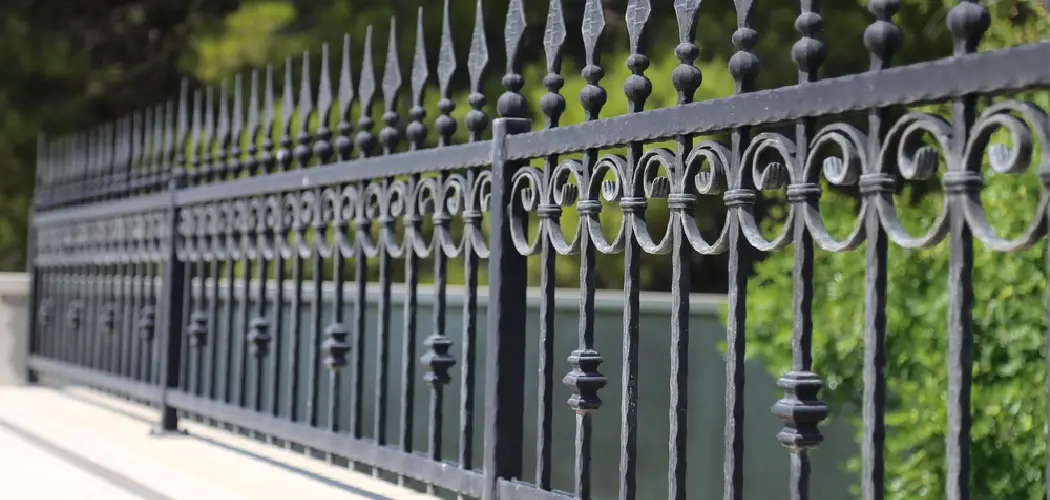
Are you looking to add a touch of style and sophistication to your property? Installing a wrought iron fence can create instant charm, elegance, and privacy for any outdoor space – but it’s not without its challenges. From proper measurements to securely fixing the posts into concrete, many different things need to be taken into consideration when installing a wrought iron fence onto concrete. You don’t have to worry though!
If you’re looking to add an elegant, classic touch to your garden or backyard patio, installing a wrought iron fence in concrete could be the perfect solution.
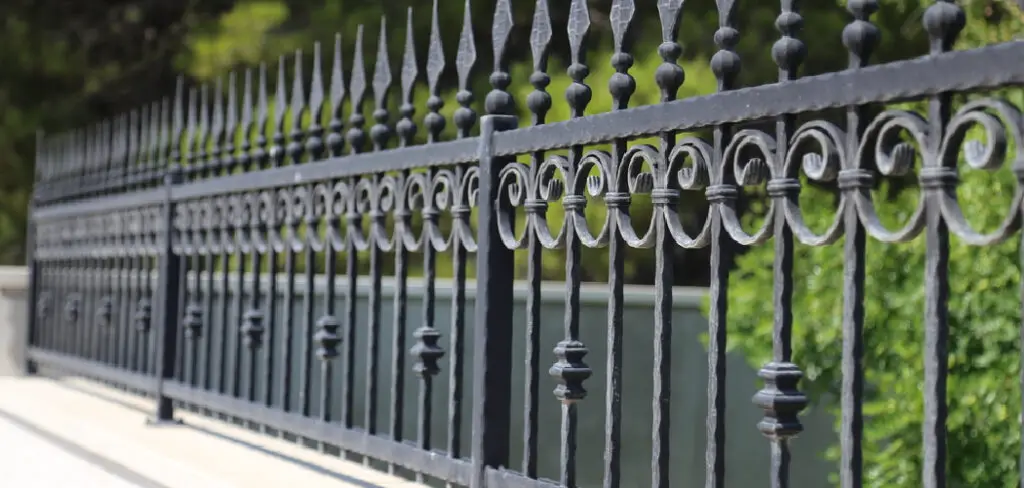
With a wide range of design options and materials available, you can make sure that your wrought iron fencing installation looks exactly as you envisioned it. In this blog post, we’ll walk through how to install wrought iron fence in concrete so that your unique outdoor space feels complete.
Why May You Want to Install Wrought Iron Fence in Concrete?
1 . To Provide Durability and Strength
Installing a wrought iron fence in concrete offers unmatched strength and durability. Concrete is considered one of the strongest materials for fencing, capable of withstanding extreme weather conditions without breaking or warping. Additionally, wrought iron itself is a durable material that can last for decades when properly installed.
2 . To Enhance Security
Wrought iron fences are known for their strength and security. By installing the fence in concrete, you are adding an extra layer of protection to your property. This is especially beneficial for commercial properties or homes located in high-crime areas.
3 . To Create a Decorative Element
Wrought iron fences are not only functional but also add aesthetic appeal to any property. With intricate designs and elegant finishes, a wrought iron fence can elevate the look of your property. By installing it in concrete, you are ensuring that the fence stays securely in place and adds to the overall visual appeal.
4 . To Increase Property Value
The combination of strength, security, and aesthetics makes a wrought iron fence installed in concrete a desirable feature for any property. This can increase the overall value of your property, making it a wise investment in the long run.
5 . To Save Space
If you have limited space on your property, installing a wrought iron fence in concrete can be beneficial. Unlike traditional fences that require additional space for posts and foundations, a wrought iron fence installed in concrete takes up minimal space while still offering the same level of security and strength.

How to Install Wrought Iron Fence in Concrete in 6 Easy Steps
Step 1: Gather All The Tools
The very first step is to gather all the required tools for installing a wrought iron fence in concrete. The list of essential tools includes:
- Wrought Iron Fence Sections
- Concrete Mix
- Gravel or Crushed Stone
- Shovel
- Wheelbarrow
- Hoe
- Level
- Measuring Tape
- Wooden Stakes
Make sure you have all these tools before starting the installation process.
Step 2: Measure and Mark The Layout
The second step is to measure and mark the layout of your fence. Use a measuring tape to determine the exact length and width of where you want your wrought iron fence installed in concrete. After measuring, use wooden stakes to mark the corners of your fence layout.
Step 3: Prepare The Concrete Mix
Once you have the layout marked, it’s time to prepare the concrete mix. Follow the instructions on the bag of concrete mix and mix it with water in a wheelbarrow or mixing tub until it reaches a thick consistency.
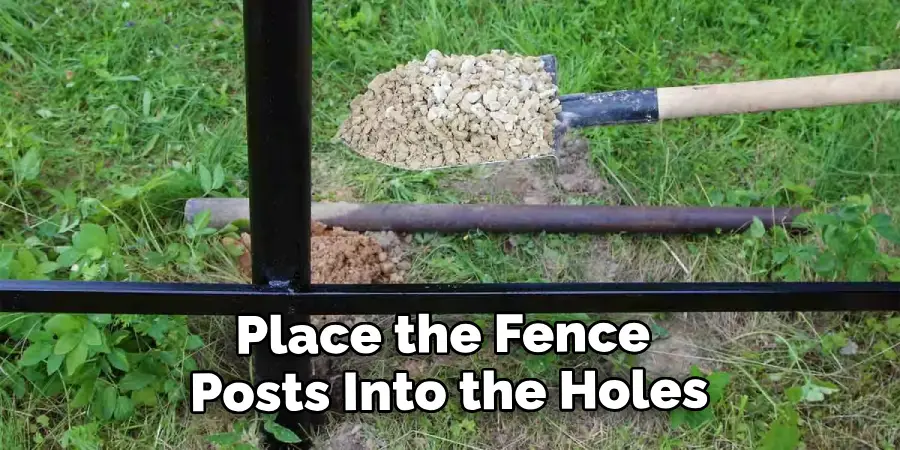
Step 4: Dig The Holes and Set The Posts
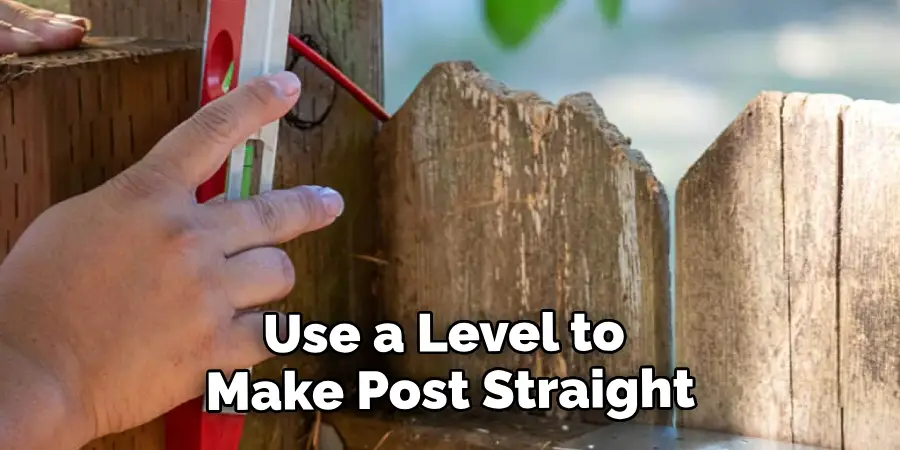
Dig holes along your fence layout using a shovel. The holes should be at least 12 inches in diameter and deep enough to accommodate one-third of the fence post’s length. Place the fence posts into the holes and use a level to ensure they are plumb.
Step 5: Pour The Concrete
After setting the posts, it’s time to pour concrete into each hole. Make sure to fill the holes with concrete mix and use a hoe to remove any air pockets.
Step 6: Attach The Fence Sections
Once the concrete has dried, usually after 24 hours, it’s time to attach the wrought iron fence sections. Use bolts and brackets to secure the fence sections onto the posts. Make sure each section is level before tightening the bolts.
Some Extra Tips to Install Wrought Iron Fence in Concrete
1 . Use a Level and Measuring Tape
Before you start installing the wrought iron fence in concrete, it is important to ensure that your posts are aligned properly. To do this, use a level to make sure that the posts are vertical. Also, use a measuring tape to ensure equal distance between each post.
2 . Consider Using Anchors or Bolts
While concrete alone can provide stability to the posts, it is recommended to use anchors or bolts for additional support. These can be drilled into the concrete and then attached to the posts, providing extra stability and preventing them from shifting over time.
3 . Use a Durable Sealant
To prevent rust and corrosion of the wrought iron fence, it is important to use a durable sealant. Apply this after the fence has been installed and the concrete has fully dried. This will help to protect your fence from harsh weather conditions and extend its lifespan.
4 . Regular Maintenance is Key
Even with a sealant, it is important to regularly maintain your wrought iron fence to ensure its longevity. This includes cleaning off any debris or dirt that may accumulate on the surface and checking for any rust spots that may need to be treated. Additionally, make sure to reapply the sealant every few years to maintain its protective barrier.

5 . Hire a Professional for Larger Projects
While installing a wrought iron fence in concrete can be done as a DIY project, it is recommended to hire a professional for larger or more complex installations. They have the experience and equipment necessary to ensure a sturdy and secure fence that will last for years to come.
By following these extra tips, you can successfully install a wrought iron fence in concrete and enjoy its benefits for years to come. Remember to always use proper safety precautions when working with concrete and consult a professional if needed.
Frequently Asked Questions
What Precautions Should I Take Before Installing a Wrought Iron Fence in Concrete?
Before starting any installation process, it is important to make sure that you have all the tools and materials needed. In addition, it is recommended to wear appropriate safety gear such as goggles and gloves. Also, be sure to locate any underground utilities and mark them before digging.
What Tools Do I Need to Install a Wrought Iron Fence in Concrete?
The tools you will need for this installation include a shovel, post-hole digger, level, tape measure, concrete mix, water, trowel, drill with a masonry bit, and fence panels. You may also need a sledgehammer or rubber mallet to secure the posts in the concrete.
How Do I Prepare the Concrete for Installation?
First, dig holes for your fence post using a shovel or post-hole digger. The holes should be at least 2 feet deep and wide enough to accommodate the size of your fence post. Then, mix the concrete according to the manufacturer’s instructions and pour it into the holes. Make sure to use a level to ensure that the posts will be straight once set in the concrete.
How Do I Set the Posts in Concrete?
After pouring the concrete, place one fence post into each hole while the concrete is still wet. Use a level to make sure that the post is straight and adjust as needed. Then, use a sledgehammer or rubber mallet to secure the post in place. Repeat this process for all remaining posts.
How Do I Attach the Fence Panels to the Posts?
Once the posts are set and the concrete has dried, you can attach the fence panels to the posts using screws and a drill with a masonry bit. Make sure to evenly space out the panels and use a level to ensure they are straight. You may also need to cut the panels to fit around any corners or angles.
How Do I Maintain a Wrought Iron Fence in Concrete?
To maintain your wrought iron fence, regularly check for any rust or damage and address it immediately. You can also apply a coat of rust-inhibiting paint every few years to help protect the fence from the elements. It is also important to regularly clean your fence with water and mild detergent to prevent dirt and debris buildup.
Conclusion
Finally, remember that when installing a wrought iron fence in concrete, you should always ensure to use top-quality materials as well as reliable support techniques. Doing so will give you a beautiful and sturdy fence that will last for a long time. You also need to make sure everything is measured accurately and installed correctly if you do not want any embarrassing mishaps with your newly installed wrought iron fence.
Now you know how to install wrought iron fence in concrete! Therefore, it is extremely important to pay attention to proper installation methods and take your time doing the job right. If in doubt, it may be best to call a professional for help so you are sure of the results you desire.
About
Outdoor Fixes is a distinguished figure in the world of Diy design, with a decade of expertise creating innovative and sustainable Diy solutions.
His professional focus lies in merging traditional craftsmanship with modern manufacturing techniques,
fostering designs that are both practical and environmentally conscious. As the author of diy,
outdoorfixes delves into the art and science of outdoorfixes-making, inspiring artisans and industry professionals alike.
Education RMIT University
(Melbourne, Australia) Associate Degree in Design (Outdoor Fixes) Focus on sustainable design, industry-driven projects,
and practical craftsmanship. Gained hands-on experience with traditional and digital manufacturing tools, such as CAD and CNC software.
Nottingham Trent University
(United Kingdom) Bachelor’s in outdoorfixes.com and Product Design (Honors) Specialized in product design with a focus on blending creativity with production
techniques. Participated in industry projects, working with companies like John Lewis and Vitsoe to gain real-world insights.
Publications and Impact
In diy, Outdoor Fixes his insights on indoor design processes, materials, and strategies for efficient production.
His writing bridges the gap between artisan knowledge and modern industry needs, making it a must-read for both budding designers and seasoned professionals.