Transforming your existing lawn with fresh sod can revitalize your outdoor space, giving it a lush, green appearance that’s both beautiful and functional. Whether your lawn has succumbed to weeds, pests, or simply seen better days, laying new sod over the old grass is an effective and time-saving solution.
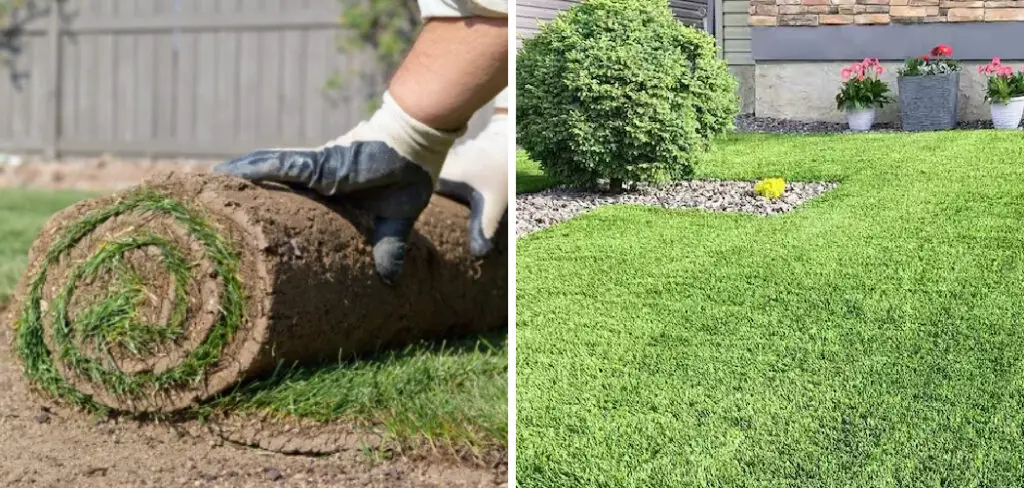
This guide on how to lay down sod over existing lawn will walk you through the necessary steps to ensure successful sod installation, covering essential preparation, installation techniques, and post-laying care. With the right approach, you can achieve a seamless, thriving lawn that enhances the curb appeal of your home.
Why Lay Down Sod Over Existing Lawn?
While it may seem counterintuitive, laying sod over an existing lawn offers several benefits over starting from scratch. Here are some reasons why you might choose to go this route:
Time and Cost Savings:
Laying down new sod is quicker and less labor-intensive than removing the old grass and preparing the soil from scratch. This can save you both time and money, especially if you have a large yard.
Reduced Risk of Soil Erosion:
By leaving the existing lawn in place, you create a protective layer that prevents soil erosion and provides a stable base for the new sod to take root.
Instant Results:
Sod is mature grass that is already established, meaning you get an instant result of a lush, green lawn without having to wait for seeds to germinate and grow.
Now that we understand the benefits of laying down sod over existing lawns, let’s dive into the steps involved in this process.
Needed Materials
Before beginning the installation process, make sure you have all the necessary materials on hand. These may include:
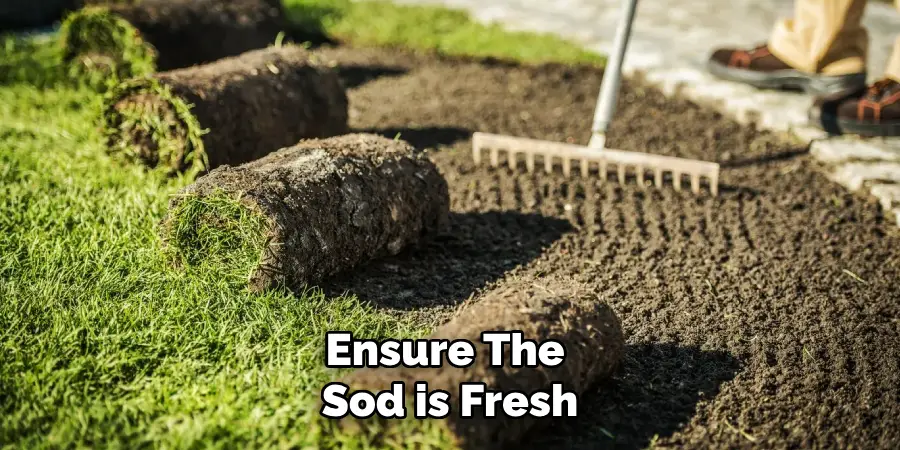
Sod:
Measure your lawn area to determine how much sod you will need. It is always a good idea to order slightly more than needed to account for any trimming and shaping required during installation.
Rake:
This will be used to clear debris and level the soil.
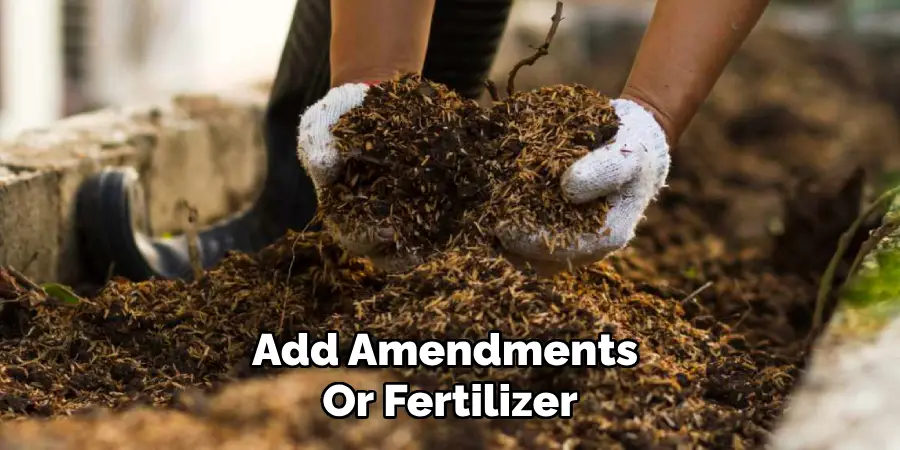
Soil Amendments and Fertilizer:
Depending on the condition of your existing lawn, you may need to add amendments or fertilizer to promote the healthy growth of the new sod.
Utility Knife:
Used for cutting the sod into smaller sections as needed.
Water Source:
Make sure you have a reliable water source nearby to keep the new sod moist during installation and in the following weeks.
7 Simple Step-by-step Guidelines on How to Lay Down Sod Over Existing Lawn
Step 1: Prepare Your Lawn
Before laying down the new sod, proper preparation of your existing lawn is crucial for the success of the project. Start by mowing the current lawn as short as possible without scalping it. This will reduce the amount of grass and debris that could interfere with the sod’s contact with the soil. Following mowing, use a dethatcher or a rake to remove any thatch or dead grass.
This step ensures the new sod has the best chance of rooting into the soil. Next, water the lawn lightly to soften the top layer of soil, making it easier to work with. Finally, apply a starter fertilizer to provide the essential nutrients that promote root growth and help the new sod establish quickly. Proper lawn preparation sets the foundation for a smooth and successful sod installation.
Step 2: Measure and Order Sod
Accurate measurements are vital to ensure you order the correct amount of sod for your lawn. Begin by measuring the length and width of your lawn area in feet, and then multiply these numbers to determine the total square footage. For irregularly shaped lawns, break the area into smaller sections, calculate the square footage of each section, and then add them all together for a final total. It’s a good practice to order an extra 5-10% of sod to account for any cutting and fitting required during the installation process.
Once you have your measurement, choose a reputable sod supplier and place your order. When ordering sod, consider the type of grass that best suits your climate, soil type, and sun exposure. Popular options include Kentucky Bluegrass, Bermuda, Zoysia, and Fescue, each offering unique benefits and aesthetic qualities. Scheduling the delivery of your sod as close to the installation date as possible is crucial to ensure the sod is fresh and healthy when you lay it down.
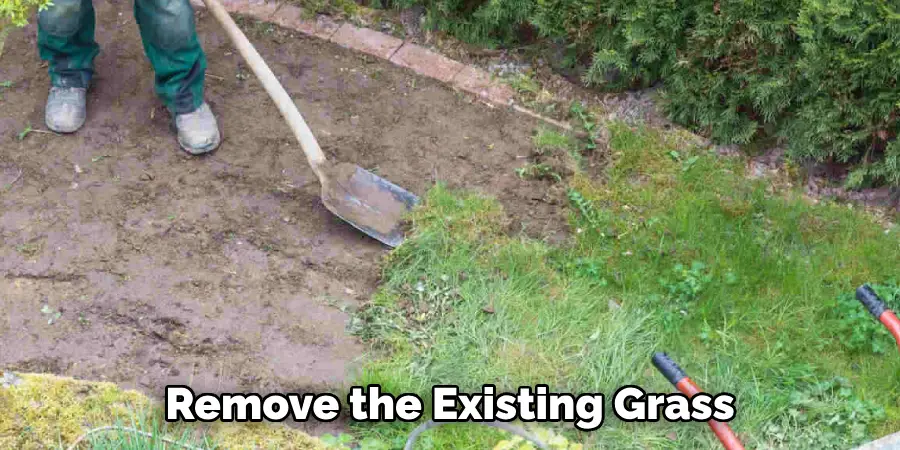
Step 3: Remove Existing Debris
With your lawn prepared and your sod order placed, the next crucial step is to clear your lawn of any debris. Begin by raking the lawn to remove leaves, sticks, and any other loose materials that might interfere with the sod’s ability to root properly. It’s important to remove larger debris that could create uneven surfaces or gaps beneath the sod.
Additionally, inspect the lawn for any rocks or stones and remove these as well, as they can impede root growth and create an uneven appearance. By ensuring your lawn is free from debris, you provide a clean slate for the new sod to establish itself effectively, leading to a healthier and more visually appealing lawn.
Step 4: Level the Soil
After removing debris, use a rake to level the soil. This step is essential for ensuring uniform thickness and root contact of the new sod. You can also use a lawn roller to compact the soil slightly, making it easier to lay down the sod evenly. Avoid overcompacting the soil as this can prevent proper water and air circulation, leading to poor root growth.
It’s also a good idea to add any necessary soil amendments or fertilizer at this stage, especially if your existing lawn shows signs of nutrient deficiency. Follow the recommended application rate on the product label and rake the amendments into the top layer of soil. This will help provide essential nutrients for your new sod to thrive.
Step 5: Lay down Sod in Straight Lines
When it’s time to lay down the sod, start at one end of your lawn and work in straight lines. Unroll the first piece of sod along an edge or a straight line, making sure it is flush with any borders or hardscaping edges. Avoid stretching out the sod as this can create gaps between pieces and hinder proper root growth.
Continue unrolling successive rows of sod, staggering the joints like brickwork. This will help prevent visible seams and create a more visually appealing result. As you lay down each piece, tamp it down lightly with your feet to ensure good contact between the soil and roots.
Step 6: Cut Sod into Smaller Pieces
For irregularly shaped areas or around edges and obstacles, you may need to cut pieces of sod to fit. To do this, use a utility knife to score the desired shape and then fold the sod along the scored line. Finally, use the knife again to cut through the folded portion. By cutting sod into smaller pieces, you can achieve a better fit for your lawn without creating gaps or uneven areas.

But remember, it’s best to avoid small, narrow pieces of sod as they can dry out quickly and struggle to establish themselves. If necessary, use two or more larger pieces of sod to cover the area instead.
Step 7: Water Immediately After Installation
Once you have all the sod in place, it’s crucial to water immediately. The new sod needs moisture to establish itself and develop strong roots. Use a hose and sprinkler to cover your lawn evenly with about an inch of water. Repeat this process every day for the first two weeks after installation, gradually reducing watering frequency as the roots become established.
Avoid overwatering as this can lead to fungal diseases and shallow root growth. Keep track of the weather and adjust your watering schedule accordingly. If there is significant rainfall, you may need to water less frequently.
Following these seven steps on how to lay down sod over existing lawn for sod installation will help you achieve a healthy, lush lawn in no time. Remember to follow proper maintenance practices, such as regular watering and mowing, to keep your new sod looking its best year-round. With the right preparation and care, your lawn will be the envy of the neighborhood!
Frequently Asked Questions
Q: How Long Does It Take for Sod to Root?
A: Sod typically roots within two weeks, but this can vary depending on the type of grass and environmental factors. To promote proper root growth, keep the sod well-watered and avoid heavy foot traffic for the first few weeks after installation.
Q: Can I Lay Sod on Top of Existing Grass?
A: While it is possible to lay sod over an existing lawn, it is not recommended. The new sod may struggle to establish itself among competing grasses and can lead to uneven growth. It’s best to remove the existing grass before laying down new sod.
Q: How Often Should I Water My New Sod?
A: For the first two weeks after installation, water your new sod daily with about an inch of water. After that, the watering frequency will gradually be reduced as the roots become established. Monitor weather conditions and adjust your watering schedule accordingly.
Conclusion
Installing sod is a relatively simple and straightforward process, but proper preparation and care are essential for its success. By following these seven steps on how to lay down sod over existing lawn, you can ensure a smooth and effective sod installation that will lead to a lush and healthy lawn for year-round enjoyment. Remember to choose the right type of grass for your climate and schedule delivery as close to installation as possible. With patience and dedication, your new sod lawn will be the envy of the neighborhood. Happy sodding!
About
Outdoor Fixes is a distinguished figure in the world of Diy design, with a decade of expertise creating innovative and sustainable Diy solutions.
His professional focus lies in merging traditional craftsmanship with modern manufacturing techniques,
fostering designs that are both practical and environmentally conscious. As the author of diy,
outdoorfixes delves into the art and science of outdoorfixes-making, inspiring artisans and industry professionals alike.
Education RMIT University
(Melbourne, Australia) Associate Degree in Design (Outdoor Fixes) Focus on sustainable design, industry-driven projects,
and practical craftsmanship. Gained hands-on experience with traditional and digital manufacturing tools, such as CAD and CNC software.
Nottingham Trent University
(United Kingdom) Bachelor’s in outdoorfixes.com and Product Design (Honors) Specialized in product design with a focus on blending creativity with production
techniques. Participated in industry projects, working with companies like John Lewis and Vitsoe to gain real-world insights.
Publications and Impact
In diy, Outdoor Fixes his insights on indoor design processes, materials, and strategies for efficient production.
His writing bridges the gap between artisan knowledge and modern industry needs, making it a must-read for both budding designers and seasoned professionals.