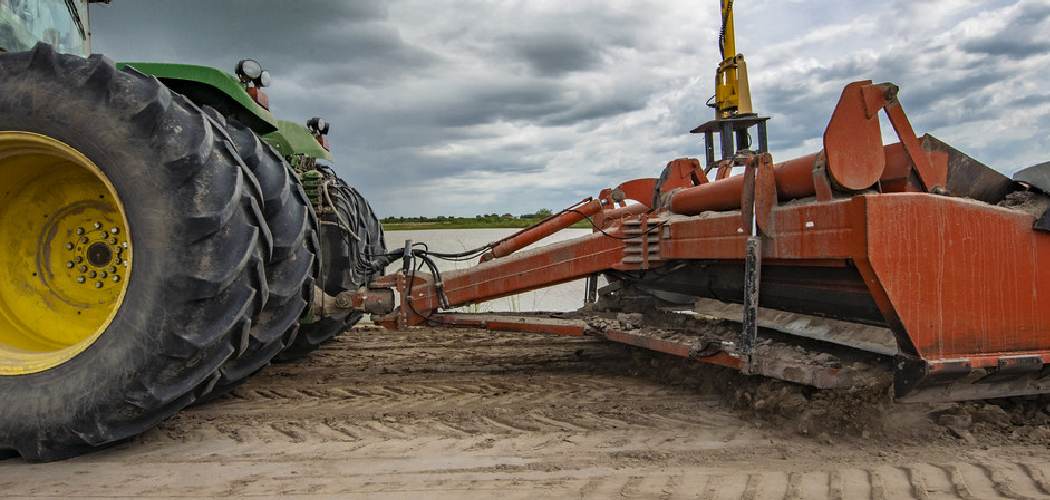
Leveling land with a tractor is essential for many agricultural, gardening, and landscaping operations. A level surface will ensure that water and nutrients are evenly distributed across the soil, resulting in more successful crop growth. Additionally, a tractor can be used to level ground for laying down turf or creating walkways and driveways. Doing this job with a tractor is much faster and more efficient than doing it manually or with other equipment.
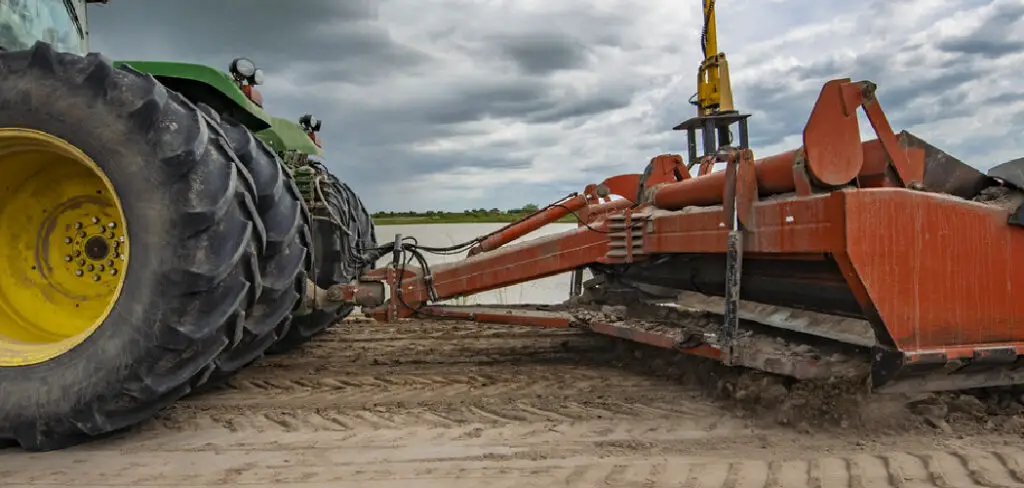
One of the primary advantages of using a tractor to level land is that it is significantly faster and more efficient than manual leveling. Using a tractor can reduce the amount of labor required and make the job much easier for those involved. Additionally, tractors are able to cover larger areas in less time, making them ideal for large-scale leveling projects. You can find step-by-step instructions on how to level land with a tractor in this blog article.
How Often Should One Use a Tractor to Level Land?
Ideally, using a tractor to level land as often as needed is best. How often this may depend on the size and type of property being leveled. Generally speaking, larger areas can go longer between leveling sessions than smaller ones. In addition, certain conditions, such as heavy rainfall or extended periods of drought, can necessitate more frequent leveling with a tractor.
In any case, it is important to conduct regular inspections of the land and check for signs that leveling may be necessary. These signs include unevenness or irregularities in the terrain, drainage issues (such as puddles of water or pooling), or problematic slopes. When deciding whether to level land with a tractor, it is also important to consider the type of soil and climate in the area. For example, clay soils may not need to be leveled as frequently as sandy or loamy soils. Similarly, areas with heavier rainfall may require more frequent leveling than those with drier climates.
Tools You Will Need
- Tractor
- Front loader bucket or box blade
- Plowing and grading laser
- Trencher
- Leveling bar
- Dirt/Dozer Blade
- Stake Driver
- Scraper blade or Ripper
- Harley rake/Power Box Rake
- Landscape rakes
How Does One Prepare the Land Before Using a Tractor to Level It?

- Clear the area of any objects, such as large rocks or stumps that may interfere with the leveling process.
- Mark off boundaries for the leveled area using stakes and string so that you can keep track of your progress.
- Measure the site and determine the amount of material needed to be moved to achieve your desired result.
- Break up any large clumps of soil using a hoe or similar tool to make it easier for the tractor’s blade to push through and level it off.
- If needed, add more soil to build up low spots or reduce high spots in order to achieve the desired grade.
- Use a rake to spread out the soil and level it off as much as possible before beginning work with the tractor.
- Attach the appropriate blade to your tractor and start leveling, pushing the dirt in the direction of any high spots or slopes, making sure not to overfill any low spots.
- When finished, check the area with a leveler or use a straight edge and measuring tape to ensure that your leveled area is even.
- Finally, compact the soil using a roller or tiller attachment to settle it down before planting anything in the space.
By following these steps, you can properly prepare the land for leveling with a tractor. Doing so will ensure that your results are even and consistent and that your leveled area is smooth and ready for whatever you plan to use it for.
Step-by-Step Processes for How to Level Land With a Tractor
Step 1: Inspect the Land You Plan
Ensure the area you plan to level is free of obstacles such as large rocks and stumps. Also, ensure no underground obstructions like utility lines or pipes exist. If you’re unsure, consult a professional before starting the task.
Step 2: Mark your Target Area
Draw a line around the outside edge of the area you need to level. This will help you track your progress and ensure your tractor is working in the right direction. Clear away any debris that could interfere with the leveling process. This includes large rocks, tree stumps, and other obstacles.
Step 3: Choose the Right Attachment
Attach a box blade or landscape rake to your tractor. These tools are designed to level land quickly and efficiently. Make sure the blade is level with the ground, then slowly move the attachment back and forth across the area you need to level.
Step 4: Fill in Any Low Spots
If you need to level low spots or depressions in the land, use a shovel or bucket to fill them in. Add gravel or sand to create an even surface. Once you’ve filled in any low spots and leveled the land, use the box blade attachment to smooth out the area. Make sure it’s as even and flat as possible before moving on to the next step.

Step 5: Add Topsoil
Topsoil is essential for helping plants and grass grow in previously leveled land. Spread a layer of topsoil across the area, then use your box blade attachment to work it into the ground. Once your topsoil is in place, spread it evenly across the terrain you’re leveling with a landscape rake. Make sure there are no large clumps or uneven patches. You can also use a leveler to ensure that everything is completely even.
Step 6: Compact the Soil
Compact the soil by using a tractor-mounted roller attachment. This will help ensure that the ground is even and level and make it easier for roots to take hold. Add fertilizer to your newly leveled land to help plants and grasses grow. Choose a fertilizer that’s best suited for your soil type and the plants you plan to grow.
Step 7: Plant Grass or Other Plants
Once everything is level and fertilized, you can begin planting grass seeds or other plants on your newly leveled land. Be sure to water regularly to help the seeds take root.
With these steps and the right attachments, you should have no trouble leveling land with a tractor.

Tips for How to Level Land With a Tractor
- When operating the tractor, wear protective gear like a hard hat, safety glasses, and work gloves.
- Ensure you are familiar with the manual or instructions before beginning the process of leveling land with a tractor.
- Know your maximum working load capabilities for your tractor and ensure not to exceed them while leveling land.
- Make sure to clear away any debris, stones, or rocks that may be in the way of the area you are working on and double-check the safe operating area for any potential hazards.
- Check all safety features on your tractor before starting work and ensure they are functioning properly.
- Follow all posted speed limits and always have the proper permits and licenses for working on the land.
- Remain vigilant and pay attention to your surroundings while operating the tractor. If you are tired, take a break to avoid potential accidents or injury.
Using caution when working with tractors on uneven terrain is also important, as it can increase the risk of tipping or rollover. Always be sure to follow all safety protocols when working with a tractor and leveling land. Doing so will help ensure your safety as well as the quality of the work you are doing.
How Much Time Does It Take to Level an Area of Land With a Tractor?
The amount of time it takes to level an area of land with a tractor depends on the size and complexity of the project. Starting from scratch can take anywhere from hours to days or even weeks, depending on how big and complex the project is. Smaller projects may require just an hour or two to complete. It is important to have a plan before beginning the project to ensure it is completed efficiently and safely.
Generally, it takes four main steps to level an area of land with a tractor: preparation, excavation, leveling, and compaction. Preparation involves clearing debris from the area and preparing the soil for excavation. Excavation involves digging up the earth in order to level it. Leveling involves filling in any low spots and removing high ones with a blade or other implement. Finally, compaction is necessary to ensure that the soil is firm and able to support whatever activities will take place on the land.
How Much Experience is Necessary in Order to Level Land With a Tractor?
Leveling land with a tractor requires some level of expertise and experience for it to be done safely and effectively. An operator should have at least a basic understanding of how a tractor works and some familiarity with the terrain being leveled. It is also helpful if the operator has experience using attachments such as blades, rakes, and graders. If an operator is inexperienced, it’s important to take the time to learn how to use the equipment properly before attempting any land-leveling tasks. Doing so will help ensure that no damage occurs and that the job is done correctly.
Additionally, if unsure of what a particular task requires or how to do it safely, don’t hesitate to ask for help from a more experienced operator. With the right knowledge and experience, leveling land with a tractor can be an efficient process that yields great results.
Conclusion
In conclusion, using a tractor to level land effectively creates a flat surface for building and development. It involves using the right equipment, safety precautions, and understanding how the tractor works. When done correctly, it can be a relatively easy process that can be completed in less time than if you were trying to do it manually. Using these tips and following the instructions, you can level land with a tractor efficiently and effectively. I hope reading this post has helped you learn how to level land with a tractor. Make sure the safety precautions are carried out in the order listed.
About
Outdoor Fixes is a distinguished figure in the world of Diy design, with a decade of expertise creating innovative and sustainable Diy solutions.
His professional focus lies in merging traditional craftsmanship with modern manufacturing techniques,
fostering designs that are both practical and environmentally conscious. As the author of diy,
outdoorfixes delves into the art and science of outdoorfixes-making, inspiring artisans and industry professionals alike.
Education RMIT University
(Melbourne, Australia) Associate Degree in Design (Outdoor Fixes) Focus on sustainable design, industry-driven projects,
and practical craftsmanship. Gained hands-on experience with traditional and digital manufacturing tools, such as CAD and CNC software.
Nottingham Trent University
(United Kingdom) Bachelor’s in outdoorfixes.com and Product Design (Honors) Specialized in product design with a focus on blending creativity with production
techniques. Participated in industry projects, working with companies like John Lewis and Vitsoe to gain real-world insights.
Publications and Impact
In diy, Outdoor Fixes his insights on indoor design processes, materials, and strategies for efficient production.
His writing bridges the gap between artisan knowledge and modern industry needs, making it a must-read for both budding designers and seasoned professionals.