
Gardening is a wonderful hobby for those who enjoy the satisfaction of growing their own produce and creating an environment that is both peaceful and inviting. One essential element in any garden setting is the gate, which provides security while also allowing you to show off your beautiful landscape design.
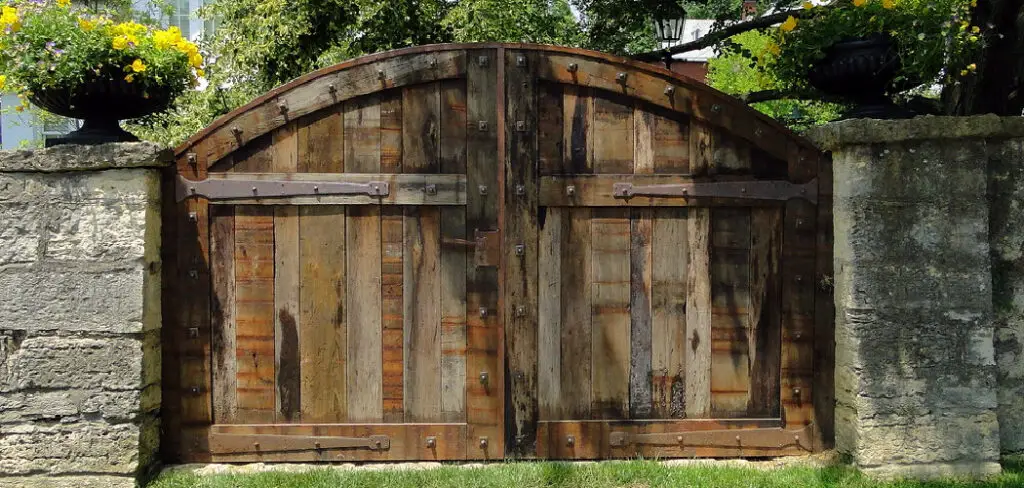
In this blog post, we’ll guide you through the process of how to make a garden gate, so you can have peace of mind knowing your precious plants are securely contained while providing an extra touch of beauty to your outdoor space. So grab some tools, find some handy materials nearby, and let’s get started!
What Is the Lifespan of Wooden Garden Gate?
The lifespan of a wooden garden gate depends on the type of wood used and how well it is maintained. Hardwoods like teak or mahogany can last up to 20 years without requiring much maintenance, while softwoods like pine or cedar may need to be replaced every ten years.
Properly sealed and stained wood will also last longer, as the sealant and stain protect the wood from moisture and rot.
Regular maintenance such as cleaning, sanding, and painting will also help to extend the life of a wooden garden gate. It is important to inspect wooden gates regularly for signs of damage or wear so that any necessary repairs can be made quickly to avoid further damage. Properly cared for, a wooden garden gate can last for many years.
Although metal gates typically require less maintenance than wooden ones, they may need to be painted every few years to keep them looking their best. Aluminum and steel gates should not rust unless exposed to degrading elements like acid rain or salt water but may corrode over time otherwise.

Rust-resistant galvanized steel gates are a great option for areas prone to moisture and will last much longer than untreated metal. Generally speaking, metal gates can last anywhere from 15-30 years when properly cared for.
Regardless of the material used, all garden gates should be checked regularly for damage or wear and tear and repaired as needed to help them last as long as possible. With proper maintenance and care, both metal and wooden gates can provide a beautiful and secure entrance to any garden or outdoor space for many years.
10 Methods on How to Make a Garden Gate
1. Get the Materials:
Start by gathering the necessary materials, such as two posts, hinges, a latch, screws, and a gate. Make sure that the post length is slightly longer than the gate’s length to ensure stability when installed. If desired, you may also use a bit of gravel or sand to help set the posts. While assembling the gate, it’s important to wear safety glasses and gloves.
However, power tools aren’t required for most types of gates.
2. Measure and Cut the Posts:
Place the posts in their desired location and measure them accurately. Then use a saw to cut both posts at an angle if desired or needed for proper installation. Make sure to wear a dust mask and safety glasses when cutting the posts.
If you have an electric saw, you may need to wear additional safety gear, such as ear protection and a hard hat. However, if you decide to use a manual saw, make sure you have a partner to help with the cutting. Although the posts may already be pre-cut, it’s still a good idea to double-check their measurements to ensure accuracy.

3. Install the Hinges:
Drill two holes on each post for the hinges and make sure they are level with each other before mounting them onto the post with screws or nails. Position the hinges, so they are slightly higher than the center of the gate. This will help keep moisture out and prevent sagging. If you plan to use a latch, make sure the hinges are aligned correctly with the latch.
Secure the other end of each hinge onto the gate by drilling and attaching it with screws or nails. If your gate is particularly heavy, you may need to use a larger hinge or two hinges per post. However, be careful not to over-tighten the screws, as this can damage the wood.
4. Attach Gate to Hinges:
Slide the gate onto hinges & then use screws or bolts to secure it in place. Be sure to check that all bolts are tight before moving on to the next step. If you have a latch, attach it to the gate & side panels now as well.
Once the gate is on its hinges, open & close the gate to make sure it swings smoothly. If needed, adjust the tension on the hinges or other hardware to ensure a secure fit. While you’re at it, take a look at the gate to make sure everything looks even. You may need to adjust the alignment or add additional screws if need be.
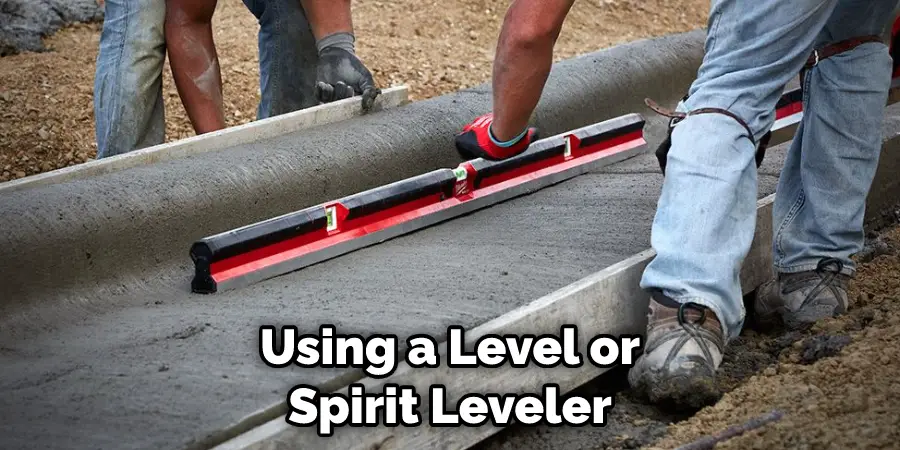
5. Check for Levelness & Security:
Test that both sides of the gate are level with each other by using a level or spirit leveler, as well as making sure everything is securely attached so that it won’t come off easily in windy weather conditions. If necessary, use extra screws and brackets to ensure a secure fit.
If you are using hinges, be sure to check that the gate opens and closes easily and without difficulty. Lastly, make sure that the latch is secure and easy to use.
6. Add Latch & Lock System:
Choose from traditional lock systems like padlocks or more modern ones like combination locks or deadbolts for extra security and convenience when securing your garden gate closed during different times of day or night time hours. Make sure your latch and locks are rust-resistant and easy to operate.
If using a padlock, you may want to consider adding a hasp for extra security. When installing the lock and latch, use heavy-duty screws and lag bolts to ensure they are secure enough to withstand a lot of weight and pressure. Be sure to check regularly for any loosening of screws or bolts so that your latch and lock system remains in good working order.
7. Paint & Sealant Usage:
To protect your newly built garden gate from weather elements like rain, sun, wind, and snow, you’ll want to apply both paint (wood stain) and sealant over it – be sure to do this in well-ventilated areas outside of direct sunlight exposure!
You should use a brush or roller to apply the paint and sealant evenly around the gate, paying close attention to small crevices and edges.
Allow the paint and sealant to dry before touching or using your gate. Although it’s not essential, you may want to apply a second coat of paint or sealant for added protection. With proper maintenance and care, your garden gate will remain beautiful and functional for many years to come!
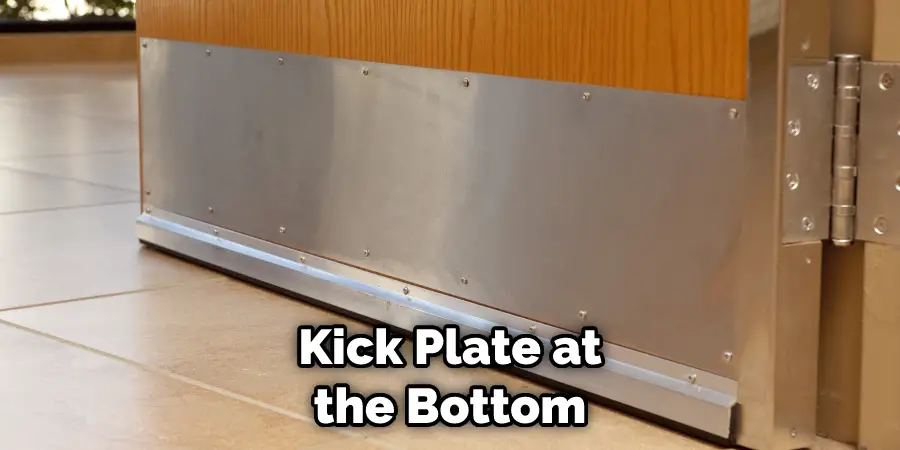
8. Additional Accessories Installation:
There are several additional accessories you may choose to install, such as a kick plate at the bottom of the gate for added protection from pets or small children pushing against it; decorative inserts like wrought iron styling; address numbers/letters for easy identification; doorbells/chimes etcetera depending on your individual needs/preferences!
Additionally, you may choose to attach various types of locks, including combination latch locks or deadbolt latches.
For added security, consider adding an automated opener and/or an intercom. Finally, consider the placement of your gate; it should be easily accessible and not intrude on any walkways or landscaping. By following these steps, you can easily construct a garden gate and add additional accessories to suit your needs!
9. Set Up Post Mounting System:
Setting up a system of two posts mounted into the concrete will help keep your garden gate stable no matter how much weight is placed upon it – simply dig two holes where you’d like posts situated and fill them up with cement mix until it hardened solid enough before placing an actual post into the hole are given!
While the exact instructions may vary according to the type of gate you are building, most post-mounting systems feature sturdy metal brackets that can be attached to the backside of each post with an anchor bolt and washer. Once the brackets are in place, they can be attached to the gate itself with two more bolts.
This will make sure your gate is firmly secured and won’t sway in the wind or shift due to pressure from heavy items being placed on it.
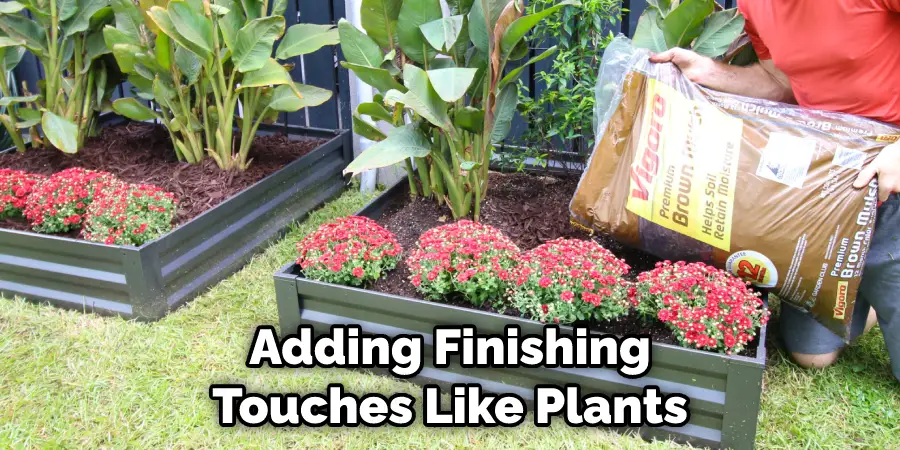
10. Finishing Touches:
Lastly, don’t forget about adding finishing touches like plants around the perimeter fence line and special touches such as bird feeders/baths hanging near the entranceway, welcome signs, decorative door knockers, etcetera which can really customize the look and feel of the space, even more than before! Don’t worry – the idea of a garden gate has unlimited possibilities and you can be as creative as you like. Have fun with it!
Things to Consider When Making Garden Gate
When making a garden gate, it’s important to take your time and consider all the options. Here are some things to keep in mind:
1. Size:
The size of your garden gate should be proportional to the area it will cover. Measure your space before you start so that you know what size you need.
2. Material:
You’ll want to choose a material for your gate that is both durable and aesthetically pleasing. Popular materials include wood, metal, plastic, and vinyl.
3. Security:
Depending on the type of garden you have, security may be an important consideration when choosing a gate. Consider whether or not you need locks, alarm systems, and other deterrents to protect your space from intruders.
4. Style:
Garden gates come in a variety of styles, from ornate to rustic. Pick a design that complements the look of your garden and suits your taste.
5. Cost:
Gates for gardens can be expensive, so it’s important to determine how much you’re willing to spend before you start shopping around. Compare prices from different suppliers to ensure you get the best deal.
By taking the time to consider these factors when making a garden gate, you’ll be able to create a beautiful and functional entryway into your outdoor space. With careful planning, you’ll have an attractive gate that lasts for many years!
What Can I Use Instead of a Baby Gate?
If you’re looking for an alternative to a baby gate, some other options include a pet gate or a garden gate. A pet gate is similar to a baby gate in that it keeps pets and small children contained safely in one area of the house. However, these gates are designed specifically for animals and may not be suitable for babies and toddlers.
A garden gate is also a great alternative to a baby gate and can be used as just an aesthetic feature if you don’t need the extra security of a pet or baby gate. Garden gates are decorative and come in many different styles to match your exterior decor.
They also provide more room for small children and pets to roam around outside. Both garden gates and pet gates can be installed in your home for extra safety, but if you have babies or toddlers to worry about, a baby gate may still be the best option.
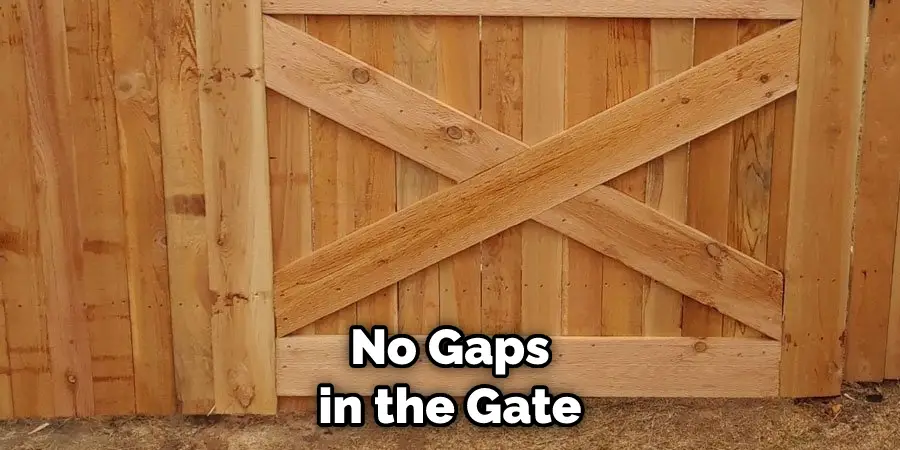
No matter what type of gate you choose to install, always make sure that it is securely mounted and that there are no gaps or openings in the gate where small fingers or paws can get through. Additionally, always follow the manufacturer’s instructions for the installation and use of your gate to ensure maximum safety.
Conclusion
Now that you know how to make a garden gate, it’s time to get started on your project! Whether you’re looking for a decorative touch or want to keep pesky critters out of your garden, this DIY project is sure to do the trick.
So gather up your supplies and get ready to put your carpentry skills to the test.
With a little bit of effort, you’ll have a beautiful new addition to your home in no time.
About
Outdoor Fixes is a distinguished figure in the world of Diy design, with a decade of expertise creating innovative and sustainable Diy solutions.
His professional focus lies in merging traditional craftsmanship with modern manufacturing techniques,
fostering designs that are both practical and environmentally conscious. As the author of diy,
outdoorfixes delves into the art and science of outdoorfixes-making, inspiring artisans and industry professionals alike.
Education RMIT University
(Melbourne, Australia) Associate Degree in Design (Outdoor Fixes) Focus on sustainable design, industry-driven projects,
and practical craftsmanship. Gained hands-on experience with traditional and digital manufacturing tools, such as CAD and CNC software.
Nottingham Trent University
(United Kingdom) Bachelor’s in outdoorfixes.com and Product Design (Honors) Specialized in product design with a focus on blending creativity with production
techniques. Participated in industry projects, working with companies like John Lewis and Vitsoe to gain real-world insights.
Publications and Impact
In diy, Outdoor Fixes his insights on indoor design processes, materials, and strategies for efficient production.
His writing bridges the gap between artisan knowledge and modern industry needs, making it a must-read for both budding designers and seasoned professionals.