
Are you looking for accurate and reliable measurements of a chain link? Well, look no further because we have you covered! You only need a ruler or measuring tape and the following steps to measure a chain link correctly.
If you want to add a chain link to your property, understanding how to measure it is an essential step in the process.
Chain link fencing offers a wealth of benefits for security and privacy that will not only enhance your living or working space but also increase its value. Knowing how much chain link you need before buying can ensure you don’t overspend on materials and enable accurate pricing for labor costs during installation.
In this blog post, we’re going to help take some of the guesswork out of how to measure chain link so that you can get the perfect fit!
What Will You Need?
Before you begin measuring, here’s a list of the items you’ll need to get started:
- Ruler or measuring tape
- Pen and paper (if you plan to note your measurements)
Only after you have all of these items ready can you begin measuring the chain link.
10 Easy Steps on How to Measure Chain Link
Step 1: Measure the Length and Width
The first step in measuring chain link is to measure the overall length and width of the area you plan to fence. Using a ruler or tape measure, record this measurement in either inches or feet (whichever works best for your project). If you need clarification on the length and width, use a tape measure to walk around the perimeter of your yard or workspace.
Step 2: Add an Extra 2 Feet
It’s important always to add an extra couple of feet when measuring chain links so that you can account for any shrinkage associated with weather conditions like rain, snow, or humidity. This will ensure a better fit once the material is installed. Additionally, adding extra feet gives you more slack when making the cuts for a clean and professional finish.
Step 3: Measure Each Section and Corner Post
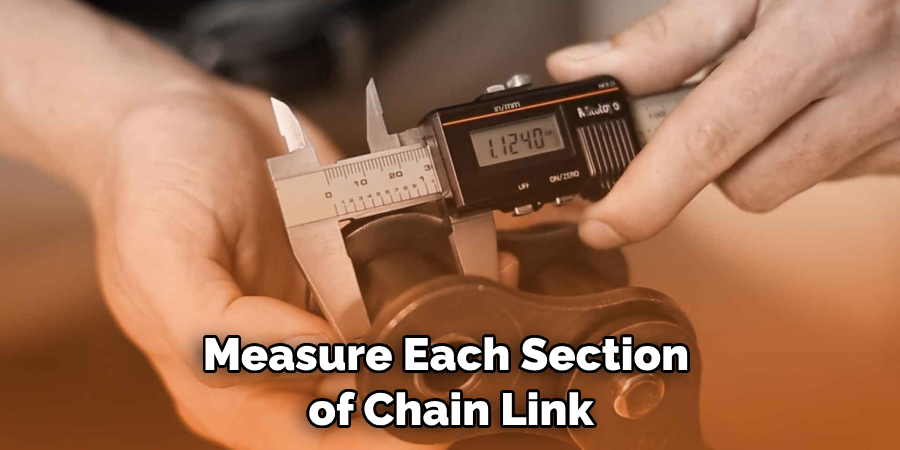
Once you have recorded the overall length and width of the entire area, it’s time to measure each section of chain link fencing and the corner posts. Note each measurement separately on the paper or in your notes app, as this will help you track how much material you’ll need to buy for installation. Remember, it’s important to measure twice and check each measurement for accuracy before cutting the chain link.
Step 4: Measure Any Gates
Gates can be tricky to measure, so when measuring any gates in the chain link fence, you consider both the height and width. Record these measurements, too, ensuring they match their respective gate openings. Be careful when measuring each gate, as this will determine how much chain link you need to buy for that section.
Step 5: Measure the Posts
Next, measure all the posts necessary for the chain link fencing installation. This includes top rails, line, corner, and end posts – if applicable. Again, take note of all posts and their dimensions to get an accurate quote for labor and materials.
Step 6: Measure the Top Rails
Next, measure the top rails of the fence. These cross pieces will be installed at either end of each post, connecting them all. Make sure to note down these measurements separately from those of the posts themselves.
Step 7: Calculate the Total Footage
Once you have measured everything accurately, it’s time to calculate your measurements into total footage for chain link material and posts. This is especially important if you buy a pre-made kit – as they generally come in specific lengths (usually full rolls). If using a kit or ordering online, make sure to double-check all of your measurements and calculations before buying.

Step 8: Double Check Your Measurements
Once you have calculated all the necessary footage, take one last look at your notes or paper to ensure that everything matches up and is accurate. This will help ensure no material amounts or cost discrepancies once you move forward with your project. Be bold and ask for a second opinion from a friend or professional if you’re unsure.
Step 9: Take a Photo
If needed, taking a photo of your notes can be helpful for future reference. This way, you won’t need to retrace any steps or start from scratch if something goes wrong during installation. Another bonus of taking a photo is that you can easily share your measurements with contractors via email if they need them.
Step 10: Order Materials & Begin Installation!
The final step is ordering the materials and beginning the installation. Once you have all your measurements and calculations, it’s time to start shopping for supplies and begin the installation process. Remember, we recommend shopping around for the best prices and always ask questions if you need clarification on something.
By following these simple steps, measuring chain links will be a breeze! Before you know it, you’ll have a beautiful new fence perfectly suited to your property’s needs.
5 Additional Tips and Tricks
1. If you don’t have a tape measure, use an alternative measuring tool such as a ruler or yardstick.
2. Start from one end of the chain link and measure to the other in one continuous length.
3. Keep track of your measurements, as you may need to refer back to them later for comparison purposes.
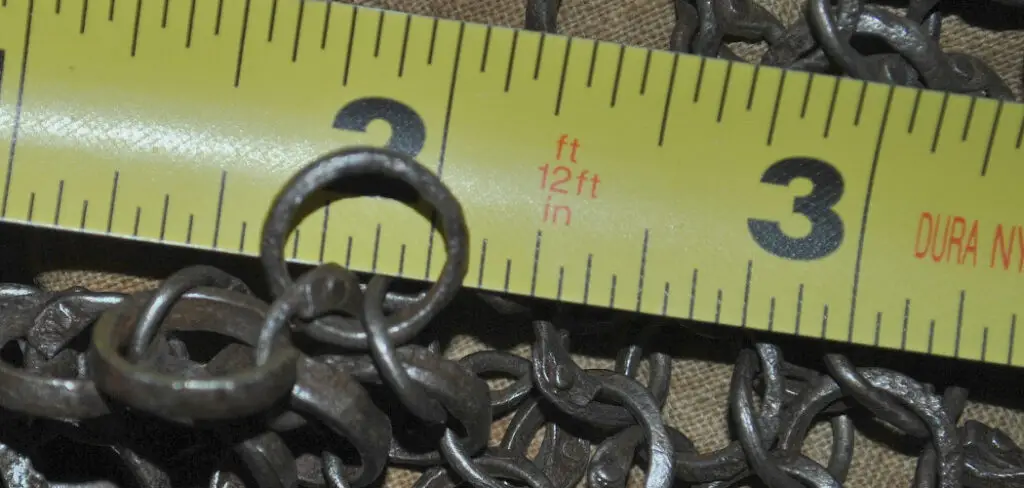
4. If measuring a round loop, measure from outside edge to outside edge rather than inside edges.
5. Consider investing in a chain-link measuring tool such as a cloth tape with markings designed specifically for this purpose. This will make your job much easier and more accurate!
With these tips, you can easily measure a chain link confidently and accurately.
5 Things You Should Avoid
- Taking measurements from multiple angles, as this may give you incorrect results.
- Trying to measure the chain link with something other than a measuring tool, such as an object of a certain size or arm’s length.
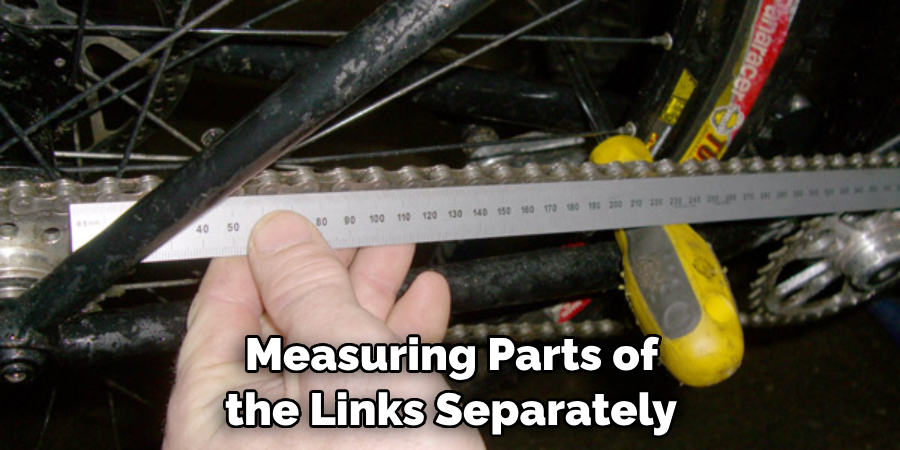
- Measuring parts of the links separately unless necessary.
- Remember to account for any bends or curves in the chain link when measuring around it.
- Not consulting an expert if you are unsure how to measure your chain link correctly and consistently accurately!
By following these steps and avoiding common mistakes, you can be sure that you’ll be able to measure your chain link accurately and efficiently every time!
How is Link Quality Measured?
The galvanization process, gauge size, and wire diameter determine the quality of a chain link. The galvanization process helps to protect the metal from corrosion while providing durability to extend the life of the chain link fence. Gauge size measures the links’ thickness, while wire diameter measures how wide they are.
Higher quality chain links will have thicker links and larger gauge sizes for increased strength and durability. As well, zinc or aluminum alloy coatings can be used on top of the galvanized coating, further improving its lifespan and maintaining a glossy finish over time.
Furthermore, higher-quality links can be made from more durable materials, such as stainless steel or aluminum, which provide even better protection against corrosion. By considering all of these factors, you can be sure that the chain link fence you install will last for many years to come. With this knowledge, you can confidently measure your chain link and purchase materials- ensuring your new fence is as secure and durable as possible!
What is a Chain Surveying?
Chain surveying is a method used to measure distances accurately. This method uses a chain marked off at intervals, called “chain surveying.” The surveyed distance and angles between points are calculated by counting the number of links and measuring the length of each link with a tape measure.
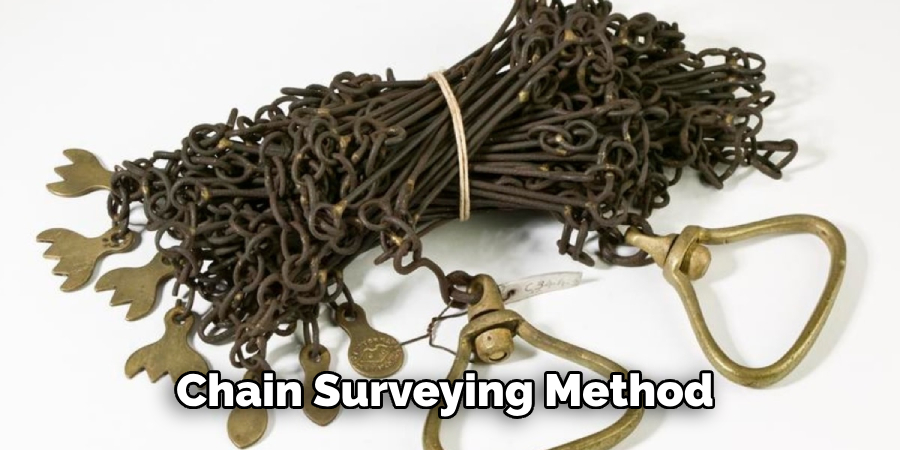
It is one of the simplest yet most accurate surveying methods and is also used to measure large distances such as those between two cities.
Chain surveying is commonly used in land surveying, engineering, and construction projects. This method is preferred over other methods because it requires fewer instruments and personnel for measurements than other survey techniques.
Additionally, chain surveying only requires a few mathematical calculations compared to some other survey techniques, making it easier to carry out and complete quickly. Ultimately, when measuring distances or angles by chain surveying, accuracy must be ensured at all times.
Conclusion
Now that you understand how to measure chain link, you are ready to tackle your project with confidence! The process may be intimidating at first, but it can become easy with a little practice and common sense.
Always take necessary safety precautions when dealing with tools and power equipment. Despite this task’s potential difficulty, knowing that you have done it right is satisfaction.
Just remember: measure twice, cut once! There’s no reason why you shouldn’t be able to accomplish your desired result. So get out there and start measuring some chain link fence – the sky’s the limit!
About
Outdoor Fixes is a distinguished figure in the world of Diy design, with a decade of expertise creating innovative and sustainable Diy solutions.
His professional focus lies in merging traditional craftsmanship with modern manufacturing techniques,
fostering designs that are both practical and environmentally conscious. As the author of diy,
outdoorfixes delves into the art and science of outdoorfixes-making, inspiring artisans and industry professionals alike.
Education RMIT University
(Melbourne, Australia) Associate Degree in Design (Outdoor Fixes) Focus on sustainable design, industry-driven projects,
and practical craftsmanship. Gained hands-on experience with traditional and digital manufacturing tools, such as CAD and CNC software.
Nottingham Trent University
(United Kingdom) Bachelor’s in outdoorfixes.com and Product Design (Honors) Specialized in product design with a focus on blending creativity with production
techniques. Participated in industry projects, working with companies like John Lewis and Vitsoe to gain real-world insights.
Publications and Impact
In diy, Outdoor Fixes his insights on indoor design processes, materials, and strategies for efficient production.
His writing bridges the gap between artisan knowledge and modern industry needs, making it a must-read for both budding designers and seasoned professionals.