
Are you planning on giving your yard a facelift by doing some landscaping? Whether you are looking to create an idyllic outdoor space or just need to tame an overgrown mess, prep work is essential for achieving the results you want.
Thankfully, preparing the ground for landscaping doesn’t have to be complicated – with some basic preparations and tips on how to prepare ground for landscaping, it can be easy and straightforward. Read this blog post for a comprehensive guide on how to prepare the land in your garden or lawn so that all of your grand plans come true.
Things to Consider Before Starting
Before you start digging and planting, there are a few things to consider. First off, think about what type of landscaping project you want to do. Do you want to create a flower bed, add some shrubs and trees, or perhaps build a patio? Knowing what you want will help determine the type of prep work needed. For example, if you plan on building a patio, you will need to ensure that the ground is level and compacted.
Another important thing to consider is the current state of your yard. Is it overrun with weeds or debris? If so, it’s essential to clear these out before beginning any preparations. This will make the process easier and give you a clean canvas to work with. Additionally, check for any underground utilities such as gas or water lines that may be affected by your landscaping plans.
11 Step-by-step Guides on How to Prepare Ground for Landscaping
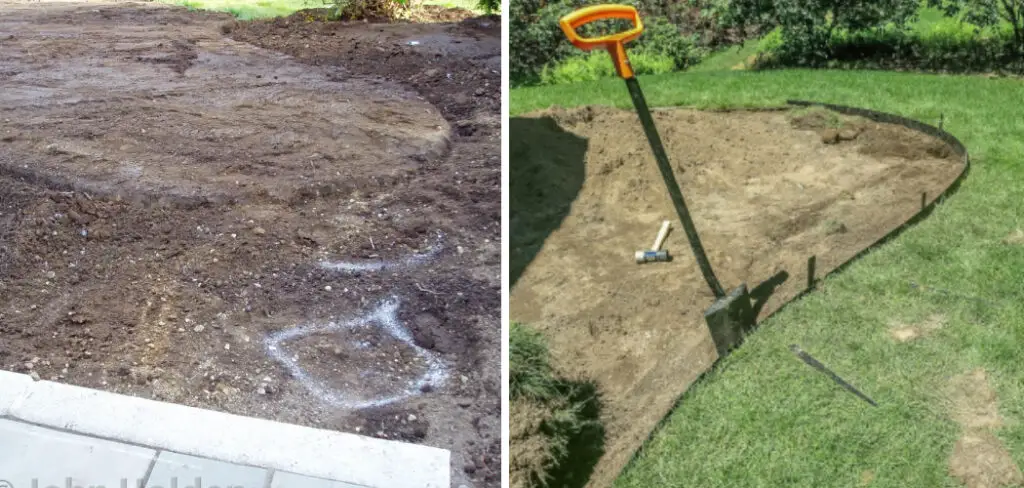
Step 1: Map Out Your Plan
The first step in preparing the ground for landscaping is to map out your plan. This will help you determine what needs to be done and in what order. Consider where you want to place different elements such as flower beds, pathways, or outdoor structures. You can do this by sketching a rough design or using landscaping software. It’s also helpful to mark out the designated areas with spray paint.
Step 2: Remove Existing Vegetation
Before you start any digging, it’s essential to remove any existing vegetation such as grass, weeds, and plants. You can use a shovel, spade, or rototiller to loosen the soil and then pull out the vegetation by hand. Make sure to remove all roots and debris.
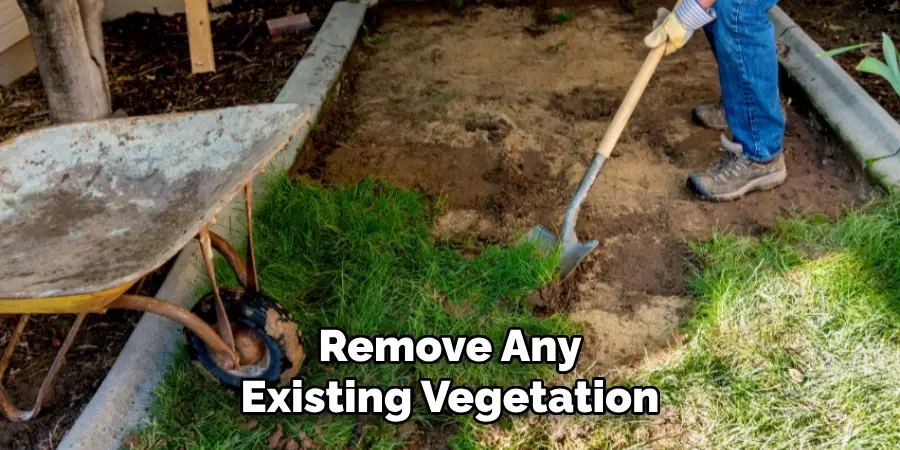
You can also use herbicides to kill any remaining vegetation, but this may not be the most environmentally friendly option. But in some cases, it may be necessary.
Step 3: Test the Soil
Testing your soil is crucial for a successful landscaping project. You can purchase a soil test kit from your local garden center or have a professional test it for you. This will help you determine the pH level of your soil, which can affect plant growth and health.
It will also tell you about the nutrient levels and any amendments you may need to add. But generally, most plants thrive in soil with a pH level of 6.0 to 7.0.
Step 4: Amend the Soil
Based on your soil test results, you may need to amend the soil by adding nutrients or adjusting the pH level. This is especially important if you plan on planting specific types of plants that require a certain type of soil.
You can do this by adding organic matter, compost, or other amendments recommended by your soil test results. It’s best to do this a few weeks before planting so that the amendments have time to work into the soil.
Step 5: Level and Compact the Ground
For a smooth and even landscape, it’s essential to level and compact the ground properly. Use a landscaping rake or shovel to level out any uneven areas and then use a tamper or roller to compact the soil. This will help prevent future settling and ensure that your plants have a stable foundation. You can also add a layer of sand or gravel for added stability.
Step 6: Install Edging
Edging is not only aesthetically pleasing, but it also serves a functional purpose in landscaping. It helps define different areas, prevents grass and weeds from encroaching, and keeps mulch or gravel in its designated area. You can use various materials such as plastic, metal, or stone for edging.
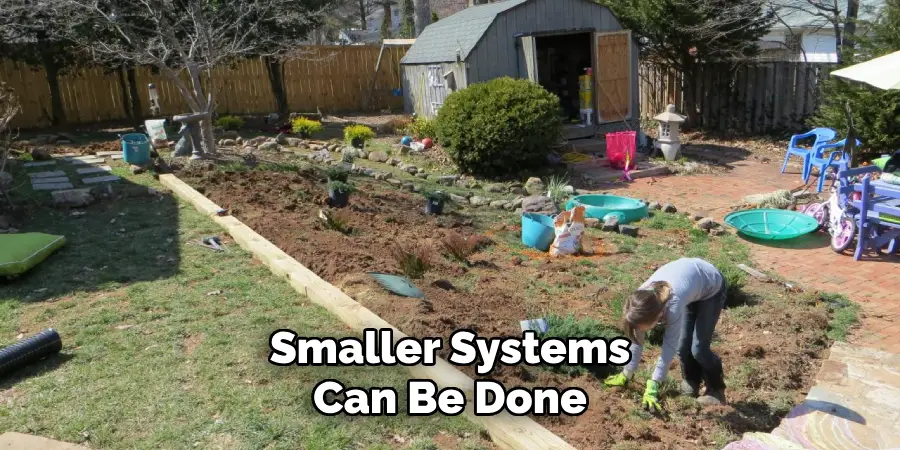
Step 7: Install Irrigation System
If you plan on having a large garden or lawn, it’s worth considering installing an irrigation system to save time and effort in watering your plants. This can be a DIY project or done by a professional. Make sure to research and choose the right system for your specific needs. Although it may require an upfront investment, it can save you money and water in the long run.

Step 8: Lay Down a Weed Barrier
To prevent weeds from growing and competing with your plants, consider laying down a weed barrier. This can be in the form of landscape fabric or cardboard placed on top of the compacted soil. Cut holes in the barrier for your plants to grow through.
You can also use mulch or gravel on top of the barrier for a more aesthetic look. It’s important to note that weed barriers are not 100% effective, but they can help reduce the number of weeds.
Step 8: Lay Down Landscape Fabric
Landscape fabric is a material that helps suppress weed growth while still allowing water and nutrients to pass through. It’s especially useful in areas that are more prone to weeds. Lay down the fabric in a single layer and cut holes for your plants.
Make sure to secure the edges of the fabric with landscape pins or stones. Otherwise, it may blow away in strong winds. You can also layer mulch or gravel on top for a more finished look.
Step 9: Add Mulch
Mulch not only helps suppress weed growth, but it also helps retain moisture in the soil and regulate soil temperature. You can use various types of mulch such as wood chips, bark, or shredded leaves. Spread a layer of 2-3 inches evenly around your plants, avoiding the base of the plant to prevent rot. You can also mix in some compost or fertilizer with the mulch for added nutrients.
Step 10: Plant Your Plants
It’s finally time to start planting! Make sure to follow any specific instructions for each plant and space them accordingly. Plant them at the same depth as they were in their containers and gently firm soil around the roots. Water thoroughly after planting. It’s also a good idea to add a layer of mulch on top to help retain moisture and prevent weeds.
Step 11: Add Finishing Touches
Once your plants are in place, you can add any finishing touches to your landscaping project such as decorative rocks or outdoor lighting. Don’t forget to regularly maintain your landscape by watering, fertilizing, and weeding as needed.
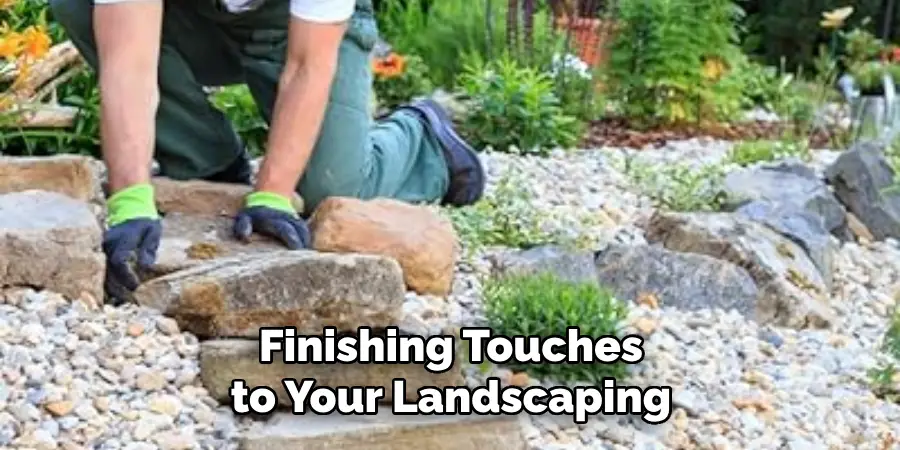
It’s also essential to periodically check for any underground utilities that may need to be marked or adjusted. Now sit back and enjoy your beautifully prepared ground for landscaping!
Following these steps on how to prepare ground for landscaping will ensure that your landscaping project has a solid foundation and is set up for success. Remember to plan, prepare, and maintain your ground for the best results. Happy gardening!
Frequently Asked Questions
Q: Do I Need to Test My Soil Before Planting?
A: It is highly recommended to test your soil before starting your landscaping project. This will help you determine any necessary amendments and ensure that your plants have the best growing conditions.
Q: What is the Best Way to Level and Compact My Ground?
A: Use a landscaping rake or shovel to level out any uneven areas, then use a tamper or roller to compact the soil. It’s also important to periodically check for any settling and adjust as needed.
Q: Can I Install an Irrigation System on My Own?
A: This depends on the size and complexity of your landscaping project. It’s recommended to consult with a professional for larger projects, but smaller systems can be done as DIY projects.
Q: Are Weed Barriers Effective?
A: While they are not 100% effective, weed barriers can help reduce the number of weeds in your landscape. They work best when combined with other weed control methods such as mulching or pulling weeds by hand.
Conclusion
By taking the time to properly prepare your ground for landscaping, you can save yourself a lot of time and hassle in the future. Now that you have the knowledge to tackle your project head-on, it’s time to put on your gardening gloves and start digging.
With just a few simple steps, you’ll be creating an amazing outdoor space in no time. So what are you waiting for? Get to work, and soon enough you’ll be on your way to turning your dream landscape into reality! Thanks for reading this article on how to prepare ground for landscaping.
About
Outdoor Fixes is a distinguished figure in the world of Diy design, with a decade of expertise creating innovative and sustainable Diy solutions.
His professional focus lies in merging traditional craftsmanship with modern manufacturing techniques,
fostering designs that are both practical and environmentally conscious. As the author of diy,
outdoorfixes delves into the art and science of outdoorfixes-making, inspiring artisans and industry professionals alike.
Education RMIT University
(Melbourne, Australia) Associate Degree in Design (Outdoor Fixes) Focus on sustainable design, industry-driven projects,
and practical craftsmanship. Gained hands-on experience with traditional and digital manufacturing tools, such as CAD and CNC software.
Nottingham Trent University
(United Kingdom) Bachelor’s in outdoorfixes.com and Product Design (Honors) Specialized in product design with a focus on blending creativity with production
techniques. Participated in industry projects, working with companies like John Lewis and Vitsoe to gain real-world insights.
Publications and Impact
In diy, Outdoor Fixes his insights on indoor design processes, materials, and strategies for efficient production.
His writing bridges the gap between artisan knowledge and modern industry needs, making it a must-read for both budding designers and seasoned professionals.