
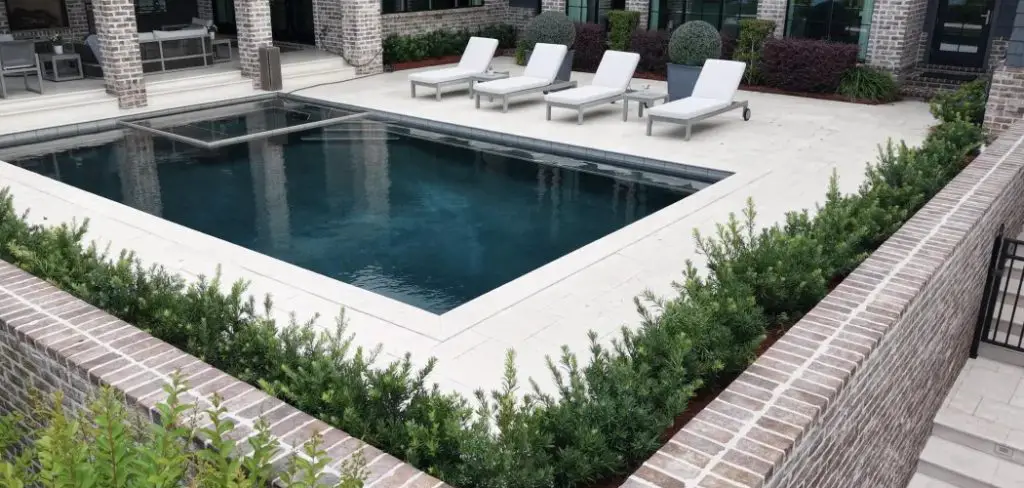
The coping is the finished edge around your swimming pool, serving as both a functional and decorative border. It protects the pool’s structure, prevents water from getting behind the shell, and provides a safe, non-slip surface for swimmers.
Over time, exposure to weather, pool chemicals, and ground movement can cause this crucial element to chip, crack, or become loose. Damaged coping is not just an eyesore; it can be a safety hazard.
While calling a professional is always an option, many common coping issues are well within the reach of a determined DIYer. This comprehensive guide will walk you through exactly how to repair pool coping, helping you restore the safety and beauty of your pool’s edge without the high cost of a service call.
Repairing pool coping might seem daunting at first, but with the right tools and guidance, it is a manageable task. Taking the time to address these issues not only improves the appearance of your pool but also ensures the safety of those using it. Before starting the repair process, it’s important to understand the materials used in your pool’s coping and the common problems that can arise. Proper preparation and a clear step-by-step approach will make the project smoother and more effective.
Why Pool Coping Repair is Necessary
Understanding why pool coping repair is necessary is crucial for maintaining the longevity and functionality of your pool. Over time, coping can crack, shift, or erode due to weather exposure, regular use, or improper installation. Damaged coping not only diminishes the pool’s aesthetic appeal but can also create safety hazards, such as sharp edges or loose pieces. Additionally, compromised coping can allow water to seep into the surrounding structure, potentially leading to more extensive damage. Repairing or maintaining the coping ensures that your pool remains a safe, durable, and visually appealing feature of your home.
How to Repair Pool Coping: A Step-by-Step Guide
Step 1: Assess the Damage and Gather Supplies
Before starting any repair, conduct a thorough inspection of the entire pool coping. Look for loose or hollow-sounding stones, cracked mortar joints, and significant chips or cracks in the coping material itself. Tap each piece gently with a rubber mallet; a hollow sound indicates a loss of adhesion underneath. Make a detailed list of all the areas that need attention. Based on your assessment, gather your materials. This will likely include a pre-mixed mortar or a specialized pool patch material, a caulk gun with flexible pool sealant, a hammer and chisel, a wire brush, a trowel, sponges, and buckets. Having everything on hand before you begin makes the process much smoother.

Step 2: Remove the Loose Coping
For any stones or sections that are loose, you must remove them completely to create a stable foundation for the repair. Start by using a utility knife or grout removal tool to cut away the old, failing caulk or mortar from the joints around the loose piece. Once the joints are clear, you can often pry the piece up by hand. If it is still stubborn, carefully insert a pry bar or flat-head screwdriver into the joint and gently lever it up. Avoid using excessive force that could crack the stone. If the piece is held down by old mortar, you may need to use a hammer and chisel to carefully break it free.
Step 3: Chip Out the Old Mortar Bed
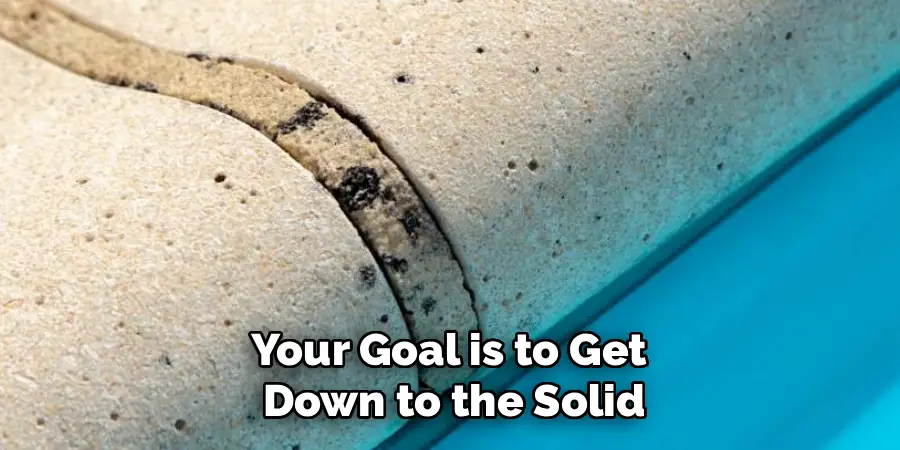
After you have removed the loose coping stone, you must prepare the underlying surface. The old mortar bed that the stone was sitting on has failed and needs to be removed. Using a hammer and a cold chisel, carefully chip away all the old, crumbly mortar from the pool’s bond beam. Your goal is to get down to the solid concrete structure underneath. Wear safety glasses and gloves during this process, as small, sharp pieces of mortar will be flying. Create a clean, relatively level surface for the new mortar to adhere to. Once all the large pieces are gone, use a wire brush to scrub the area and remove any remaining dust and debris.
Step 4: Clean and Prepare All Surfaces
A strong bond depends on clean surfaces. Thoroughly sweep or vacuum away all the dust and debris you created in the previous step from both the concrete bond beam and the underside of the coping stone you removed. If there is old mortar still stuck to the bottom of the stone, use your chisel or a grinder to remove it. Once the loose debris is gone, wash both surfaces with a sponge and clean water to remove any fine dust. Allow the areas to dry completely. This cleaning process ensures that there is nothing to interfere with the adhesion of the new mortar, which is a critical part of learning how to repair pool coping correctly.
Step 5: Mix and Apply the New Mortar
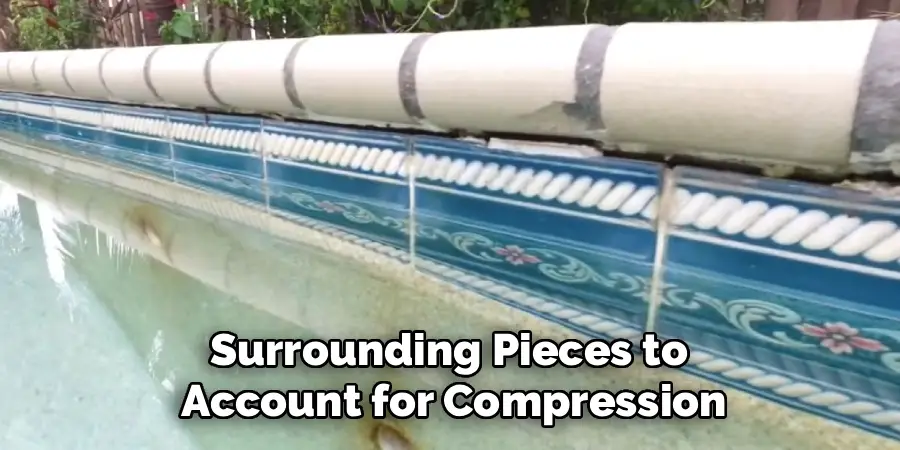
Now you are ready to mix your patching material. Following the manufacturer’s instructions, mix your polymer-modified mortar or pool patch compound with water in a bucket until it reaches a thick, peanut-butter-like consistency. Do not mix more than you can use within about 20-30 minutes, as it will begin to harden. Using a trowel, apply a generous layer of the fresh mortar onto the clean concrete bond beam. Create an even bed about half an inch thick, ensuring it is slightly higher than the surrounding pieces to account for compression when you set the stone back in place.
Step 6: Reset the Coping Stone
Before setting the coping stone into the fresh mortar, you should “back-butter” it. This involves applying a thin layer of the same mortar mix to the underside of the stone. This technique ensures 100% contact and a much stronger bond. Carefully place the stone onto the mortar bed, wiggling it slightly as you press it down firmly. Use a rubber mallet to gently tap the stone until its surface is perfectly level with the adjacent coping pieces. A torpedo level can help you ensure it is not tilted. Excess mortar will squeeze out of the joints; this is normal and expected.
Step 7: Clean the Joints and Excess Mortar
While the mortar is still wet, you must clean up the excess that squeezed out of the joints. Use the edge of your trowel or a small margin trowel to scrape away the bulk of the material. Then, use a damp sponge to carefully wipe away any remaining mortar from the face of the coping stone and the surrounding deck. Rinse your sponge frequently in a bucket of clean water. Be careful not to drag mortar out of the joint itself. A clean installation at this stage saves you from having to grind or chip away hardened mortar later, resulting in a much more professional-looking repair.
Step 8: Fill Cracks and Chips in Coping
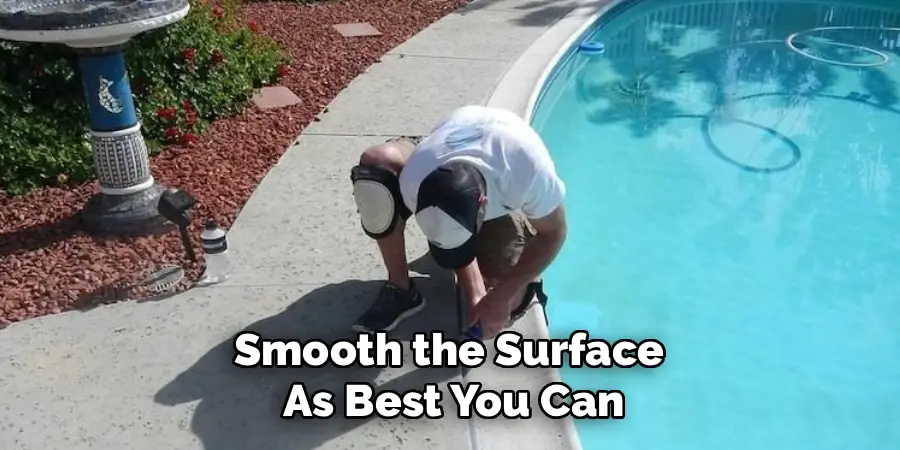
For minor damage like small cracks or chips where the stone is still solid, you do not need to remove the whole piece. For this, you will use a cementitious pool patch product. Mix the patch material according to the directions to a paste-like consistency. Clean the crack or chip thoroughly with a wire brush and water. Using a small putty knife or your finger, press the patching compound firmly into the damaged area, slightly overfilling it. Smooth the surface as best you can, and then use a damp sponge to feather the edges and blend the patch with the texture of the surrounding coping.
Step 9: Allow the Mortar to Cure Properly
Patience is a virtue in masonry work. The new mortar and patching compounds need time to cure and gain their full strength. Most products require at least 24 to 72 hours to cure, but you should always follow the specific instructions on the packaging. During this time, avoid walking on the repaired sections or splashing them with pool water. If you are working in very hot, direct sun, you may need to lightly mist the new mortar with water occasionally to prevent it from drying out too quickly, which can cause cracking and a weaker bond.
Step 10: Caulk the Expansion Joints
The final step is to seal the joint between the coping and the pool deck. This expansion joint absorbs movement and prevents cracking. Use a high-quality, flexible, UV-resistant polyurethane pool sealant. First, ensure the joint is completely clean and dry. You may want to insert a foam backer rod into the joint to set the depth of the caulk line. Apply a continuous, even bead of sealant into the joint using a caulk gun. Smooth the bead with a gloved finger dipped in soapy water to create a clean, professional finish. Allow the caulk to cure fully as directed before allowing heavy foot traffic.
Safety Precautions
When performing pool joint repairs, it is essential to follow safety precautions to protect yourself and others. Always wear appropriate personal protective equipment (PPE), such as gloves, safety goggles, and a dust mask, especially when handling sealants or tools that may emit fumes or particles. Ensure the work area is well-ventilated to avoid inhalation of harmful chemicals. Keep the pool area clear of children, pets, and unnecessary distractions to prevent accidents. When using sharp tools or power equipment, follow the manufacturer’s instructions and exercise caution. Finally, read and adhere to all safety guidelines included with the sealant and any other repair materials to ensure a safe and effective repair process.
Additional Tips and Advice for Pool Coping Repair
- Regularly inspect your pool coping for any signs of wear or damage. Catching issues early can prevent them from becoming bigger, more costly problems down the road.
- When selecting materials for repair, make sure to choose ones that are specifically designed for use with swimming pools and are resistant to water, chemicals, and UV rays.
- If you’re unsure about how to properly mix mortar or apply sealant, consult an expert or watch online tutorials before attempting the repair yourself.
- Consider hiring a professional if you have extensive damage or are not confident in your abilities. It’s better to spend a little extra money upfront than risk causing further damage to your pool.
- Regularly check for any cracks or leaks in the pool’s structure and address them promptly to prevent larger and more expensive repairs in the future.
- If you have a vinyl pool, make sure to regularly inspect and replace any worn or damaged liners to prevent water from seeping into the walls and causing damage.
- Make sure to also maintain proper chemical balance and filtration in your pool as this can help prevent damage and extend its lifespan.
Frequently Asked Questions
What Is the Best Material to Use for Coping Repair?
The best material depends on the repair. For resetting loose stones, a polymer-modified, pre-mixed mortar is ideal as it offers superior strength and flexibility. For filling small cracks and chips, a specific cementitious pool patching compound is recommended. For sealing the expansion joint between the coping and the deck, you must use a flexible, UV-stable polyurethane sealant designed for pools, not standard silicone caulk.
Can I Repair a Crack in My Coping Without Replacing the Piece?
Yes, in many cases. If the crack is hairline or the piece of coping is still structurally sound and not loose, you can repair it. You will need to use a grinder with a masonry blade to open the crack into a “V” shape, clean it thoroughly, and then fill it with a concrete patching compound. For very fine cracks, an epoxy injection kit can also be a good solution.
How Much Does It Cost to Have Pool Coping Professionally Repaired?
The cost of professional pool coping repair can vary widely depending on your location, the type of coping material, and the extent of the damage. Generally, you can expect to pay anywhere from $25 to $50 per linear foot for resetting loose stones and repairing mortar joints. For a complete coping replacement, the cost can be $50 to $100 per linear foot or more.
How Do I Match the Color of My Existing Mortar?
Matching old mortar can be challenging. You can purchase mortar dyes from a hardware or masonry supply store and add small amounts to your white or gray mortar mix until you get a close match. It is best to mix a small test batch and let it dry completely to see the final color, as mortar lightens as it cures.
What Causes Pool Coping to Fail?
Several factors contribute to coping failure. Water seeping into the joints, freezing, and expanding (freeze-thaw cycle) is a major cause. Ground movement or settling of the pool deck can also put stress on the coping. Additionally, the constant exposure to corrosive pool chemicals and UV rays from the sun can break down the mortar and sealant over many years.
Conclusion
A well-maintained pool coping is essential for the safety, longevity, and overall appearance of your swimming pool. While damaged or loose coping can seem like a daunting problem, it is often a very manageable DIY project. By following a methodical process of removing the old, failed materials, thoroughly cleaning the surfaces, using the correct mortar and sealants, and allowing for proper curing, you can achieve a professional-quality result. This not only saves you a significant amount of money but also gives you the satisfaction of having restored your backyard centerpiece yourself. With this guide on how to repair pool coping, you have the knowledge to confidently tackle the job and keep your pool looking its best for years to come.
About
Outdoor Fixes is a distinguished figure in the world of Diy design, with a decade of expertise creating innovative and sustainable Diy solutions.
His professional focus lies in merging traditional craftsmanship with modern manufacturing techniques,
fostering designs that are both practical and environmentally conscious. As the author of diy,
outdoorfixes delves into the art and science of outdoorfixes-making, inspiring artisans and industry professionals alike.
Education RMIT University
(Melbourne, Australia) Associate Degree in Design (Outdoor Fixes) Focus on sustainable design, industry-driven projects,
and practical craftsmanship. Gained hands-on experience with traditional and digital manufacturing tools, such as CAD and CNC software.
Nottingham Trent University
(United Kingdom) Bachelor’s in outdoorfixes.com and Product Design (Honors) Specialized in product design with a focus on blending creativity with production
techniques. Participated in industry projects, working with companies like John Lewis and Vitsoe to gain real-world insights.
Publications and Impact
In diy, Outdoor Fixes his insights on indoor design processes, materials, and strategies for efficient production.
His writing bridges the gap between artisan knowledge and modern industry needs, making it a must-read for both budding designers and seasoned professionals.