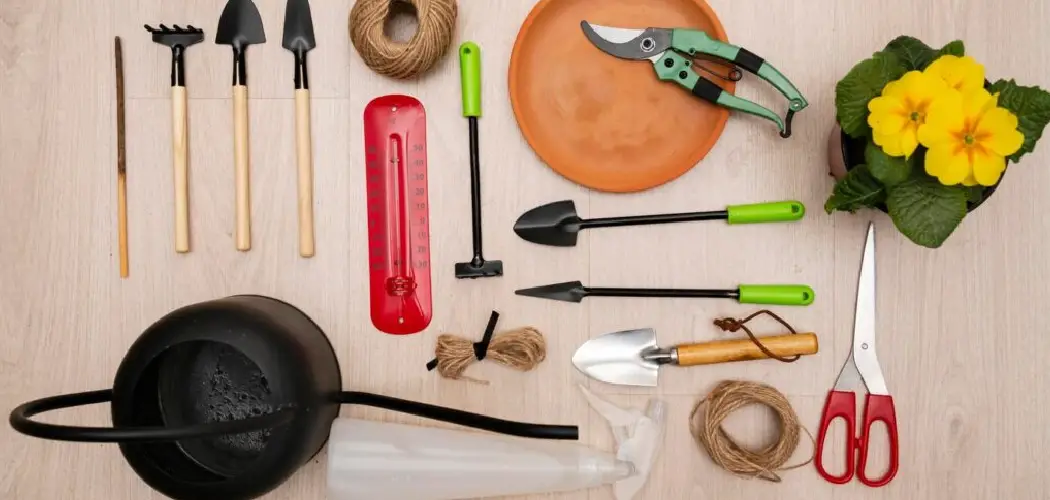
Keeping your garden tools in top condition is essential for a healthy and beautiful landscape. Among the most crucial tools for pruning are garden loppers, which allow you to tackle thicker branches that pruning shears can’t handle. However, with repeated use, the blades of even the best loppers will become dull, leading to ragged cuts that can damage your plants and make your gardening tasks more strenuous.
Learning how to sharpen your garden loppers is a valuable skill that not only prolongs the life of your tools but also promotes healthier plant growth. A sharp blade makes a clean cut, which allows the plant to heal faster and reduces the risk of disease. This guide on how to sharpen garden loppers will walk you through everything you need to know, from preparing your loppers to the final sharpening and maintenance steps, ensuring your tools are always ready for action.

Understanding Garden Loppers
Garden loppers are long-handled cutting tools designed specifically for pruning branches and stems that are too thick for hand-held pruners. Their long handles provide significant leverage, allowing you to apply much more cutting force with less effort. This design makes them ideal for reaching into dense shrubs or high up into trees to remove branches up to two inches in diameter, depending on the model.
There are two primary types of loppers: bypass and anvil. Bypass loppers feature two curved blades that move past each other in a scissor-like motion, creating a clean and precise cut that is best for living wood.
Anvil loppers, on the other hand, have a single straight cutting blade that closes onto a flat, soft metal or plastic base (the anvil), which is better suited for cutting dead or dry wood as it can crush stems. Understanding which type you have is crucial, as the sharpening process differs slightly between them.
Assessment and Preparation
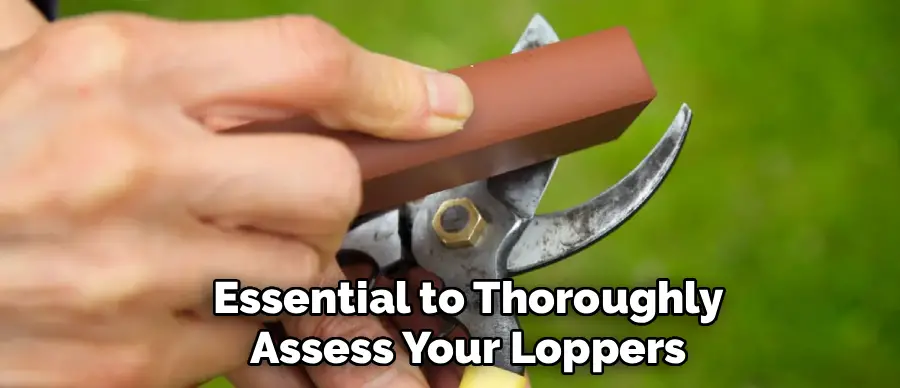
Before you begin the sharpening process, it is essential to thoroughly assess your loppers and gather all the necessary tools and materials. This preparatory phase ensures that you can work safely and efficiently, achieving the best possible results. A careful inspection will reveal the extent of the wear and tear, helping you determine the best course of action for restoration.
Skipping this step can lead to an incomplete sharpening job or even damage to the tool if underlying issues are not addressed first. Proper preparation sets the foundation for a successful and satisfying maintenance session, leaving you with a tool that performs like new.
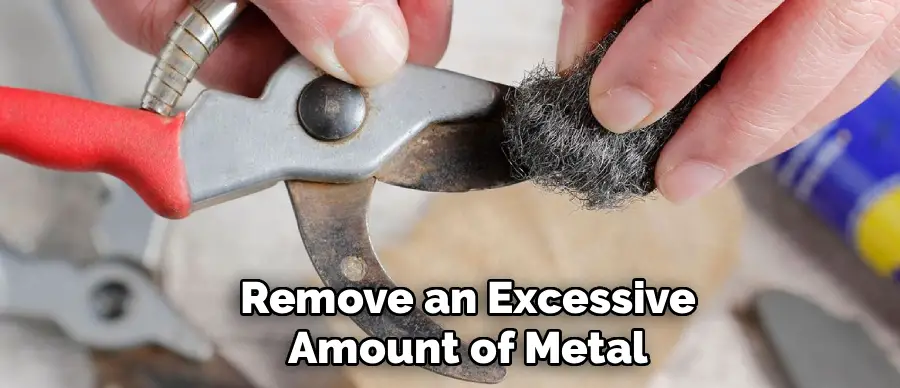
First, begin by closely examining the blades. Look for any significant nicks, chips, or areas of rust.
Heavy rust might require a wire brush or steel wool to remove, while minor surface rust can often be scrubbed away with a scouring pad. Check the pivot point of the loppers. Is the action smooth, or is it stiff and gritty? Dirt, sap, and debris often accumulate in this area, hindering the tool’s performance.
Also, inspect the handles for any cracks or splinters if they are made of wood, and ensure that any grips are secure. Once you have a clear understanding of the loppers’ condition, you can begin the cleaning process. A thorough cleaning is not just for aesthetics; it removes sap and grime that can interfere with the sharpening process and cause the blades to stick. Use warm, soapy water and a stiff brush to scrub the entire tool, paying close attention to the blades and the pivot joint.
For stubborn sap, a solvent like turpentine or a specialized resin remover might be necessary. After cleaning, rinse the loppers thoroughly and dry them completely with a clean cloth to prevent new rust from forming. This step is critical as any moisture left on the metal can quickly undo your hard work.
Once your loppers are clean and dry, you need to gather your sharpening supplies. The most common and effective tool for sharpening loppers is a flat mill bastard file, which is excellent for reshaping a damaged edge and performing general sharpening. A diamond file or a sharpening stone (also known as a whetstone) can also be used, especially for finer finishing. In addition to the sharpening tool, you will need a sturdy vise to hold the loppers securely in place while you work.
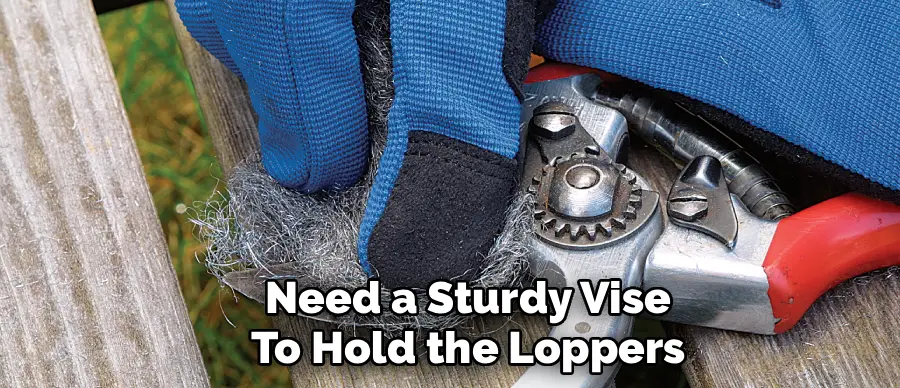
This is a non-negotiable safety measure, as it prevents the tool from slipping and causing injury. You should also have protective gear, including a pair of thick work gloves to protect your hands from accidental slips and safety glasses to shield your eyes from any metal filings that might fly off during the process. Finally, have some lubricating oil, such as a 3-in-1 oil or boiled linseed oil, and a clean rag ready for the final step of protecting the blades after sharpening. Having everything organized and within reach before you start will make the entire process smoother and more enjoyable.
6 Simple Step-By-Step Guidelines on How to Sharpen Garden Loppers
Step 1: Disassemble the Loppers (If Possible)
For the most thorough sharpening and cleaning, it is highly recommended to disassemble your loppers. Most models are held together by a central bolt or nut at the pivot point. Carefully loosening and removing this fastener will allow you to separate the two handles and blades.
Place the nut, bolt, and any washers in a small container so they don’t get lost during the process. Separating the blades gives you unobstructed access to the entire cutting edge, making it significantly easier and safer to work on each blade individually. This also provides an excellent opportunity to deep clean the pivot mechanism, removing any hidden grime or rust that contributes to a stiff or sticky action.
Working with the blades separated allows you to focus on restoring the original bevel on each cutting edge without the other blade getting in the way. You can clamp a single blade securely in a vise, giving you a stable platform to apply even, consistent strokes with your file. If your loppers cannot be taken apart, do not worry.
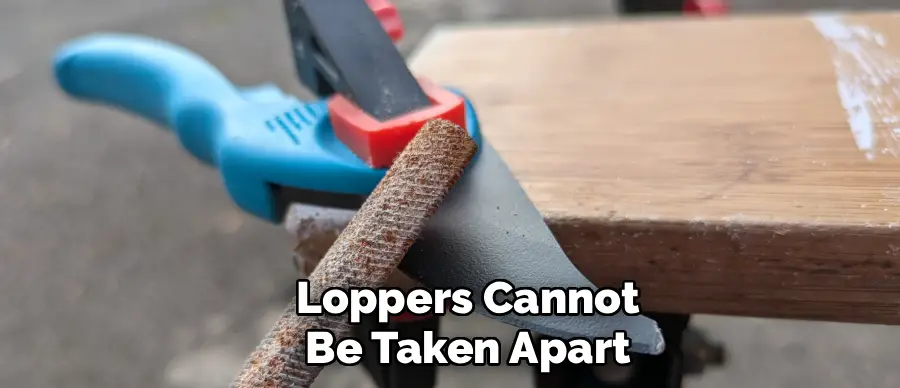
You can still sharpen them effectively by opening them as wide as possible and clamping one handle firmly in the vise. This will keep the tool steady, but you will need to be more careful to maintain the correct angle and avoid hitting the opposite blade with your sharpening tool. While disassembly is the ideal approach for a professional-grade result, a successful sharpening is still very achievable with the tool fully assembled.
Step 2: Secure the Blade for Sharpening
Safety and precision are paramount during the sharpening process, and neither is possible if the tool is not held securely. The best way to achieve this is by using a bench-mounted vise. Open the jaws of the vise and place one of the disassembled lopper blades into it, with the beveled cutting edge facing up and positioned for easy access.
Tighten the vise firmly so the blade is completely immobile. It should not wiggle, shift, or vibrate when you apply pressure. This stability is crucial, as it allows you to use both hands to guide the sharpening file, ensuring consistent pressure and a uniform angle along the entire length of the blade.
If you are working with loppers that cannot be disassembled, open them to their widest position and clamp one of the handles securely in the vise. This will hold the entire tool steady while you work on the exposed blade. You may need to reposition the loppers in the vise to gain access to the other blade.
Regardless of whether the tool is disassembled or whole, always double-check that it is firmly secured before you begin filing. A tool that slips mid-stroke is a serious safety hazard and will almost certainly result in an uneven, poorly sharpened edge. Taking a moment to ensure everything is locked down is a critical step that should never be overlooked.
Step 3: File the Beveled Edge
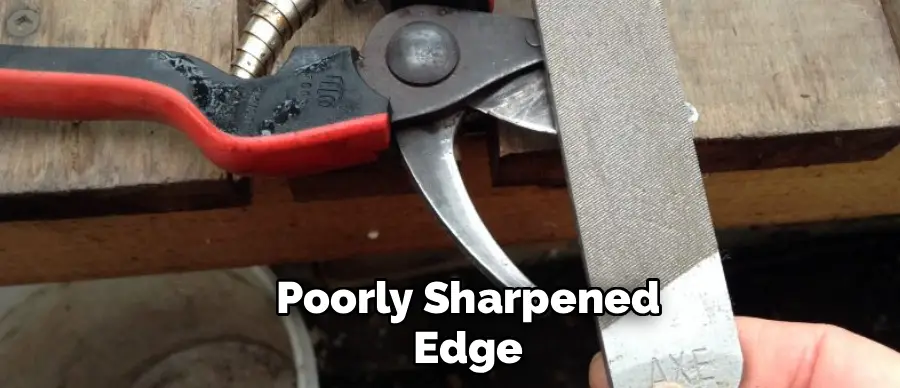
With the blade securely clamped, it is time to begin the sharpening process. Identify the beveled edge of the blade; this is the angled surface that forms the cutting edge. Bypass loppers typically have a bevel on only one side of the cutting blade, while the other blade (the hook or counter-blade) is not sharpened. Anvil loppers also have a single beveled blade. It is crucial to sharpen only the beveled side and to maintain the factory-set angle. Attempting to sharpen the flat side or change the angle will negatively affect the tool’s cutting performance. Take your mill file and place it against the bevel, matching the existing angle as closely as possible.
Holding the file with both hands for maximum control, push it in a smooth, fluid motion away from your body, moving from the base of the blade toward the tip. As you push, apply steady, even pressure. On the return stroke, lift the file off the blade completely.
Dragging the file backward across the blade will dull the file and can damage the edge you are trying to create. Repeat this process, using long, consistent strokes. You will begin to see fresh, shiny metal appear along the edge. Continue this motion until you have restored a sharp, clean edge along the entire length of the blade. The goal is to remove any nicks and restore the original angle, not to remove an excessive amount of metal.
Step 4: Remove Burrs from the Flat Side
After you have successfully sharpened the beveled side of the blade, you will notice a small ridge of metal has formed on the opposite, flat side. This is known as a burr, and it is a natural result of the filing process. This bur must be removed to achieve a truly sharp and clean cutting edge. If left in place, the burr will interfere with the lopper’s ability to make a clean slice, causing it to tear plant fibers instead. Removing the burr is a delicate finishing step that refines the edge for optimal performance. It requires a much lighter touch than the initial filing of the bevel.
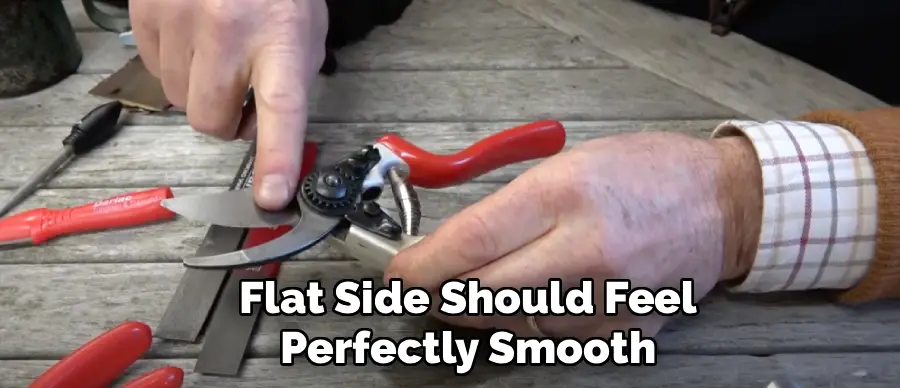
To remove the burr, carefully turn the blade over in the vise or, if you have a sharpening stone, take the blade out of the vise. Lay the flat side of the blade perfectly flat against your sharpening stone or a fine-grit diamond file. With a single, gentle pass, slide the blade across the stone. You are not trying to sharpen this side; you are simply shearing off the fine metal burr.
One or two light passes should be all that is needed. You can feel for the burr with your fingernail (very carefully) before and after to ensure it has been removed. The flat side should feel perfectly smooth. Once this is done, your blade is now properly sharpened.
Step 5: Clean and Reassemble the Loppers
Once both blades have been sharpened (or the single cutting blade, in the case of anvil loppers) and the burrs have been removed, it is time to clean all the components one last time before reassembly. Use a clean, dry cloth to wipe away all the metal filings from the blades, handles, and pivot components.
Metal filings left on the tool can accelerate rust formation and can mix with lubricant to create an abrasive paste that will wear down the pivot mechanism. Take a moment to inspect every part to ensure it is completely clean and free of debris. This is also a good time to apply a light coat of oil to the blades and pivot bolt.
Carefully reassemble the loppers in the reverse order of how you took them apart. Align the blades and insert the central pivot bolt through the designated holes. Reattach any washers and securely tighten the nut. Be careful not to overtighten the pivot nut. The action of the loppers should be smooth and fluid, but not loose or wobbly.
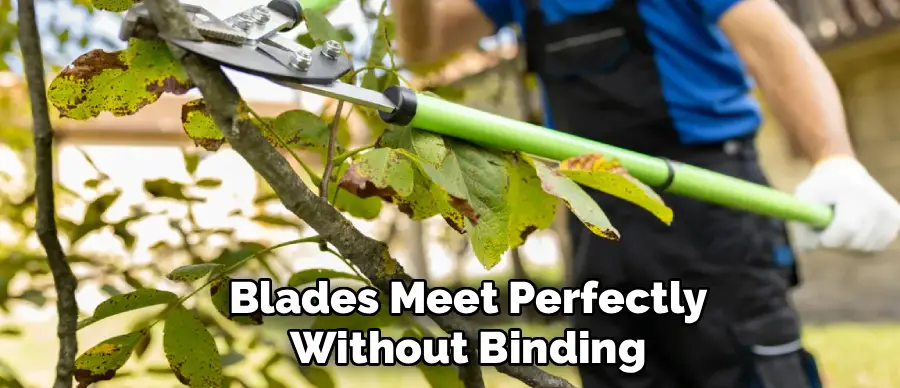
Open and close the loppers a few times to test the tension. If the movement is too stiff, loosen the nut slightly. If there is too much play between the blades, tighten it a bit. Finding this sweet spot is key to the tool’s performance, as it ensures the blades meet perfectly without binding.
Step 6: Lubricate and Protect
The final step in the maintenance process is to lubricate and protect your newly sharpened loppers. This step is vital for ensuring smooth operation and preventing rust, which can quickly dull your sharp blades and seize the pivot joint. Take a clean rag and apply a small amount of a quality lubricating oil, such as 3-in-1 oil, camellia oil, or even boiled linseed oil. Thoroughly wipe down both sides of each blade, applying a thin, even coat of oil. This protective barrier will repel moisture and inhibit the formation of rust, preserving the sharp edge you worked so hard to create.
Don’t forget to lubricate the moving parts. Apply a few drops of oil directly into the pivot joint where the two handles meet. Open and close the loppers several times to work the lubricant deep into the mechanism. You should notice that the cutting action becomes much smoother and requires less effort.
This not only makes the tool more pleasant to use but also reduces wear and tear on the pivot components, extending the overall life of your loppers. Properly storing your loppers in a dry place, like a shed or garage, will further protect them from the elements and keep them in excellent working condition for your next pruning session.
Following these steps on how to sharpen garden loppers will not only improve their performance but also ensure that they last for many years to come. Regular maintenance and care are essential for any gardening tool, and loppers are no exception. By keeping them sharp, clean, and properly stored, you can make the most out of your loppers and enjoy a smooth and efficient gardening experience.
Alternative Sharpening Methods
While a mill file is a classic and highly effective tool for sharpening loppers, several other methods can achieve excellent results, some of which may be more convenient or better suited for finer finishing. A popular alternative is a diamond file. These files are coated with industrial diamond grit and come in various shapes and coarseness levels. They cut more aggressively than steel files and can be used on very hard steel blades. A card-sized diamond sharpener is a great, portable option to carry with you in the garden for quick touch-ups on the go.
Another common tool is the sharpening stone, or whetstone. Whetstones are blocks of abrasive material that, when used with water or oil, can produce a razor-sharp edge. They are typically used for finer sharpening after the initial edge has been established with a file. For loppers, a two-sided stone with a coarse grit on one side and a fine grit on the other is ideal.
You would use the coarse side to remove nicks and establish the bevel, and the fine side to hone and polish the edge. For those who prefer power tools, a rotary tool like a Dremel with a grinding stone attachment can make quick work of sharpening. However, this method requires a very steady hand, as it is easy to remove too much metal or alter the blade’s angle if you are not careful.
Testing and Maintenance
After sharpening and reassembling your loppers, the final step is to test their performance. Find a branch of an appropriate thickness (typically under 1.5 inches) and make a test cut. A properly sharpened lopper should slice through the wood cleanly and with minimal effort, leaving a smooth surface on the plant.
If the cut is ragged or crushes the stem, you may need to refine the edge further or adjust the pivot tension. Regular maintenance, such as cleaning and oiling your loppers after each use, will significantly prolong the time between sharpenings and extend the life of your tool.
Safety Considerations
Always prioritize safety when working with sharp tools. Wear thick work gloves to protect your hands from the blade and any metal filings. Safety glasses or goggles are also essential to shield your eyes from flying debris. The most critical safety measure is to ensure the loppers are securely clamped in a vise before you begin sharpening.
A tool that slips while you are applying force with a file can cause serious injury. When filing, always push the file away from your body and keep your fingers clear of the cutting edge. Finally, handle the newly sharpened blades with extreme care, as they will be much sharper than you are used to.
Frequently Asked Questions
Q1: How Often Should I Sharpen My Garden Loppers?
The frequency with which you need to sharpen your garden loppers depends heavily on how often you use them and what you are cutting. For an average home gardener who uses loppers for seasonal pruning, a thorough sharpening once a year is usually sufficient.
However, if you use your loppers extensively or frequently cut very hard, dense, or dead wood, you may need to sharpen them two or three times per season. A good rule of thumb is to inspect the blades before each major pruning task. If you notice the tool is tearing or crushing branches instead of making clean cuts, or if you have to exert significantly more force than usual, it is time for a sharpening.
Q2: What Is the Difference Between Sharpening Bypass and Anvil Loppers?
The main difference lies in which parts of the tool you sharpen. For bypass loppers, you only sharpen the outer face of the single, thin cutting blade to maintain its factory bevel. The thicker, curved counter-blade, or hook, is not sharpened; its job is to hold the branch steady while the cutting blade slices through it. Sharpening the hook would create a gap between the blades, ruining the tool’s scissor-like action.
For anvil loppers, you also only sharpen the single cutting blade. The flat anvil base is made of a softer material and should never be filed or ground down. Sharpening the cutting blade against its existing bevel is all that’s required for both types, but understanding which blade to work on is key.
Q3: Can I Damage My Loppers by Sharpening Them Incorrectly?
Yes, it is possible to damage your loppers if you do not follow the correct procedure. The most common mistake is altering the angle of the blade’s bevel. Every cutting tool has a specific angle that is optimized for its function, and changing it will reduce cutting efficiency. Always try to match the original factory angle as closely as possible when filing.
Another error is sharpening the wrong side of the blade, such as the flat side of a bypass lopper blade, which will prevent the blades from closing flush against each other. Using an overly aggressive power tool without proper control can also remove too much metal too quickly, permanently altering the blade’s shape. By being patient and methodical, you can avoid these pitfalls.
Conclusion
Mastering the skill of sharpening your garden loppers is a worthwhile investment of your time. It transforms a frustrating chore into a satisfying task and ensures your pruning efforts contribute positively to the health and vitality of your plants. A sharp, well-maintained lopper not only makes cleaner cuts for faster plant healing but also reduces the physical strain on you, the gardener.
By following the steps outlined in this guide on how to sharpen garden loppers—from careful assessment and preparation to the final acts of lubrication and protection—you can keep your tools in prime condition for years to come. Remember that regular cleaning and proper storage are just as important as sharpening. Taking care of your tools is, in essence, taking care of your garden.
About
Outdoor Fixes is a distinguished figure in the world of Diy design, with a decade of expertise creating innovative and sustainable Diy solutions.
His professional focus lies in merging traditional craftsmanship with modern manufacturing techniques,
fostering designs that are both practical and environmentally conscious. As the author of diy,
outdoorfixes delves into the art and science of outdoorfixes-making, inspiring artisans and industry professionals alike.
Education RMIT University
(Melbourne, Australia) Associate Degree in Design (Outdoor Fixes) Focus on sustainable design, industry-driven projects,
and practical craftsmanship. Gained hands-on experience with traditional and digital manufacturing tools, such as CAD and CNC software.
Nottingham Trent University
(United Kingdom) Bachelor’s in outdoorfixes.com and Product Design (Honors) Specialized in product design with a focus on blending creativity with production
techniques. Participated in industry projects, working with companies like John Lewis and Vitsoe to gain real-world insights.
Publications and Impact
In diy, Outdoor Fixes his insights on indoor design processes, materials, and strategies for efficient production.
His writing bridges the gap between artisan knowledge and modern industry needs, making it a must-read for both budding designers and seasoned professionals.