
A weed eater, or string trimmer, is an indispensable tool for keeping lawn edges sharp and unruly weeds at bay. But like any hardworking piece of equipment, it requires maintenance. The cutting head, which spins at high speeds and endures constant impact, is the part most likely to wear out, break, or become frustratingly tangled.
Whether you need to replace a broken head, upgrade to a new style, or simply perform a deep clean, knowing how to remove it is a fundamental skill for any homeowner. The task can seem intimidating, with its hidden screws and reverse threads, but it is surprisingly straightforward once you understand the basic mechanics. This guide will demystify the process and show you exactly how to take a weed eater head off, empowering you to handle this common maintenance task with confidence and ease.
Removing a weed eater head may vary slightly depending on the brand and model, but the fundamental steps remain consistent. Before beginning, it’s important to gather the necessary tools, ensure the equipment is turned off, and take safety precautions to avoid injury. With a little patience and a clear understanding of the mechanics involved, you’ll find that the process is simpler than it first appears.
7 Step-by-Step Guide on How to Take a Weed Eater Head Off
Step 1: Ensure Safety and Disconnect Power
Before you begin any maintenance on a power tool, safety must be your absolute priority. For a gas-powered weed eater, this means unplugging the spark plug wire. This simple action completely prevents any chance of the engine accidentally starting while you are handling the cutting head. If you have a battery-powered model, remove the battery pack entirely.
For a corded electric trimmer, unplug it from the wall outlet. This crucial first step ensures that the head cannot spin unexpectedly, protecting your hands from injury. It is a non-negotiable part of the process that guarantees you can work on your equipment safely.
Step 2: Locate the Locking Mechanism
The most critical part of this job is stopping the driveshaft from spinning while you try to unscrew the head. Most weed eaters have a specific locking mechanism for this purpose. Look closely at the top of the gear head, right where the spinning trimmer head attaches to the shaft. You should find a small hole or slot.
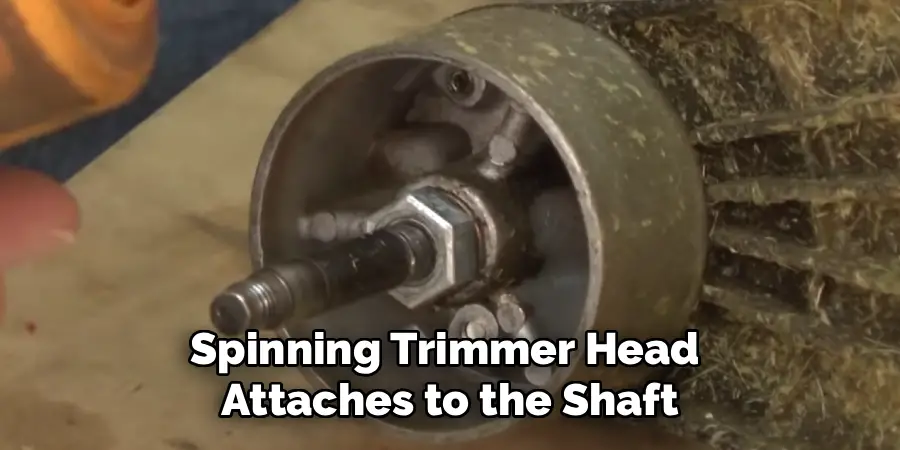
In some models, like many Stihl trimmers, this is a distinct hole. On others, like some Echo or Husqvarna models, it might be a slot. This opening is your access point for immobilizing the shaft so you can apply torque to the head without the whole assembly just spinning in circles.
Step 3: Insert a Locking Tool
Once you have found the locking hole, you need to insert a tool to hold the driveshaft in place. Some trimmers come with a specific metal pin or a small screwdriver for this purpose. If you do not have the original tool, a long, thin screwdriver, a hex key (Allen wrench), or even a sturdy nail will work perfectly.
Slowly rotate the trimmer head by hand while gently pushing the tool into the hole. You will feel a distinct “clunk” or click as the tool drops into a corresponding hole on the internal hub, locking the head securely in place. This is the secret to successfully getting the head to unscrew.
Step 4: Determine the Thread Direction
This is where many people get stuck. To prevent the head from loosening during normal operation, most weed eater heads are reverse-threaded. This means that to unscrew them, you must turn them clockwise—the opposite direction you would turn a normal screw or lid.
Remember the old saying “righty-tighty, lefty-loosey”? For a string trimmer head, it is usually “righty-loosey, lefty-tighty.” Grasp the head firmly and prepare to turn it clockwise. If clockwise rotation only seems to tighten it, your model may be one of the rare exceptions with standard threading, in which case you would turn it counter-clockwise.
Step 5: Apply Force to Unscrew
With the driveshaft locked and the correct direction determined, it is time to apply some force. Grip the outer housing of the cutting head firmly with your hands. If it is on too tight to turn by hand, you may need more leverage. A large pair of channel-lock pliers can be used to grip the head, but be careful not to crush the plastic.
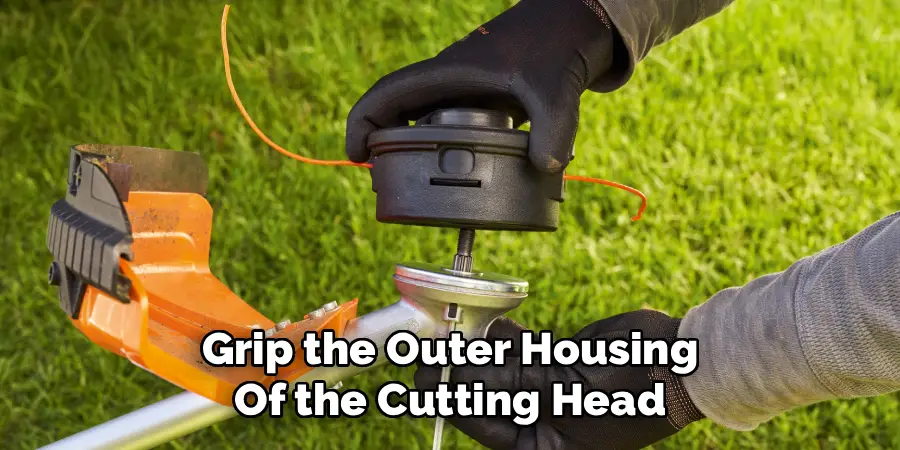
Some heads have notches or flat spots designed for a wrench. Turn the head firmly clockwise (or counter-clockwise if it has standard threads) until you feel it break loose. This part of learning how to take a weed eater head off can sometimes require a good deal of effort, especially if the head has been on for a long time.
Step 6: Remove the Head and Any Washers
Once you have broken the initial tension, the head should spin off the threaded shaft quite easily. Continue turning it until it comes completely free. As you remove it, pay close attention to the order of any washers, spacers, or adapter plates that might be between the head and the gearbox.
These components are essential for proper alignment and function of the new head. It is a good idea to lay them out on a clean surface in the exact order they came off. Taking a quick photo with your phone before you fully disassemble everything is a great way to ensure you remember how it all goes back together.
Step 7: Clean the Shaft and Prepare for Installation
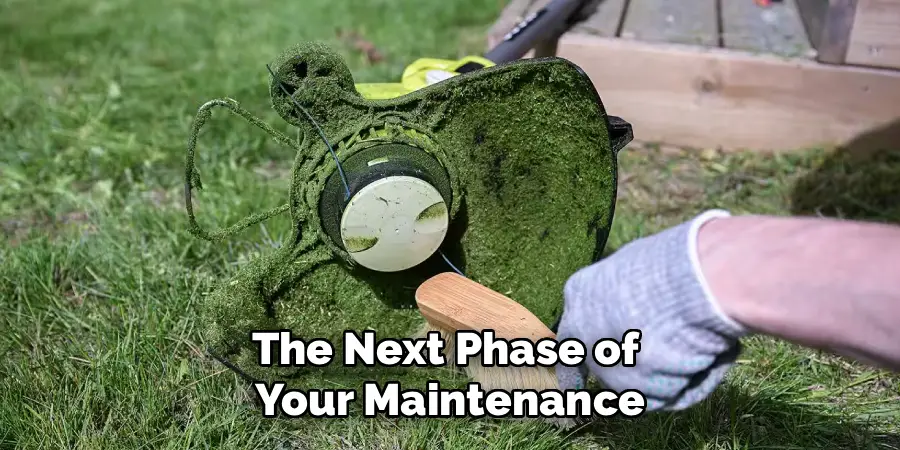
With the old head removed, you have a perfect opportunity to clean the area. Use a rag to wipe down the threaded driveshaft and the surrounding gearbox. Remove any tangled grass, dirt, or debris that has accumulated. This ensures that the new head will thread on smoothly and sit flush against the machine.
Inspect the driveshaft threads for any damage. If they are clean and intact, you are now ready to install your new replacement head or put the old one back on after cleaning or untangling it. This simple cleanup step ensures a secure and proper fit for the next phase of your maintenance.
Common Weed Eater Issues
Weed eaters, while essential for lawn and garden maintenance, can encounter several common issues that may hinder their performance. One frequent problem is difficulty starting the engine, which can be caused by a dirty air filter, old spark plugs, or stale fuel. Another issue users often face is the line not feeding correctly from the spool, which could result from improper winding or a jammed spool.
Additionally, the trimmer line can wear down quickly if it comes into frequent contact with hard surfaces like rocks or concrete. Overheating is another concern, especially if the engine components are clogged with debris or the unit is overworked. Regular inspection, cleaning, and replacing worn-out parts can help mitigate these challenges and keep your weed eater running efficiently.
Frequently Asked Questions
Which Way Do I Turn to Get My Weed Eater Head Off?
For the vast majority of string trimmers, the head is reverse-threaded to prevent it from flying off during operation. This means you will turn it clockwise to loosen and remove it. Think “righty-loosey.” If you are turning clockwise and it seems to be getting tighter, stop and try turning counter-clockwise, as your model might be a rare exception.
What If My Weed Eater Doesn’t Have a Locking Hole?
Some older or different models might not have a visible locking hole. In this case, you may need to use a strap wrench to grip the shaft just above the head. Alternatively, if you are replacing the head anyway, you can use large pliers to hold the upper part of the head stationary while turning the bottom part. For some models, removing the spark plug and feeding a piece of nylon rope into the cylinder (piston stop method) will lock the engine, but this should only be done with extreme care.
How Do I Remove a Stuck or Stubborn Weed Eater Head?
If the head is completely stuck, heat and leverage are your friends.
- Penetrating Oil: Spray a product like WD-40 or PB Blaster onto the threads and let it sit for 15-20 minutes.
- Leverage: Use large channel-lock pliers or a pipe wrench to get a better grip.
- Impact: Sometimes a sharp, quick jerk is more effective than steady pressure.
- Heat: Gently heating the head with a heat gun can cause the metal to expand, breaking the corrosion bond.
Are All Weed Eater Heads Universal?
No, they are not. While many replacement heads are designed to be “universal” and come with a kit of adapters (nuts, bolts, and spacers) to fit various brands, it is not a guarantee.

The size and threading of the driveshaft (arbor) can vary between models. It is always best to check the specifications of your trimmer and the replacement head to ensure compatibility before purchasing.
Do I Need to Remove the Head to Replace the String?
For most modern string trimmers, especially those with “bump-feed” or “easy-load” heads, you do not need to remove the entire head to add new string. These are designed to be refilled by feeding the line through the head and twisting the knob. You typically only need to remove the entire head assembly if it is broken, you are upgrading to a different type (like a bladed head), or it is so tangled that you cannot fix it otherwise.
Conclusion
Mastering basic equipment maintenance is a surefire way to make your yard work less of a chore and more of a pleasure. Removing a weed eater head is one of those tasks that seems complicated at first glance but is simple once you understand the core principles of locking the shaft and turning in the correct direction.
By following these steps, you can save yourself a trip to the repair shop and gain the satisfaction of fixing your own gear. Now that you have a clear understanding of how to take a weed eater head off, you can confidently tackle broken parts, frustrating tangles, and upgrades, ensuring your trimmer is always in top condition and ready to perform.
About
Outdoor Fixes is a distinguished figure in the world of Diy design, with a decade of expertise creating innovative and sustainable Diy solutions.
His professional focus lies in merging traditional craftsmanship with modern manufacturing techniques,
fostering designs that are both practical and environmentally conscious. As the author of diy,
outdoorfixes delves into the art and science of outdoorfixes-making, inspiring artisans and industry professionals alike.
Education RMIT University
(Melbourne, Australia) Associate Degree in Design (Outdoor Fixes) Focus on sustainable design, industry-driven projects,
and practical craftsmanship. Gained hands-on experience with traditional and digital manufacturing tools, such as CAD and CNC software.
Nottingham Trent University
(United Kingdom) Bachelor’s in outdoorfixes.com and Product Design (Honors) Specialized in product design with a focus on blending creativity with production
techniques. Participated in industry projects, working with companies like John Lewis and Vitsoe to gain real-world insights.
Publications and Impact
In diy, Outdoor Fixes his insights on indoor design processes, materials, and strategies for efficient production.
His writing bridges the gap between artisan knowledge and modern industry needs, making it a must-read for both budding designers and seasoned professionals.