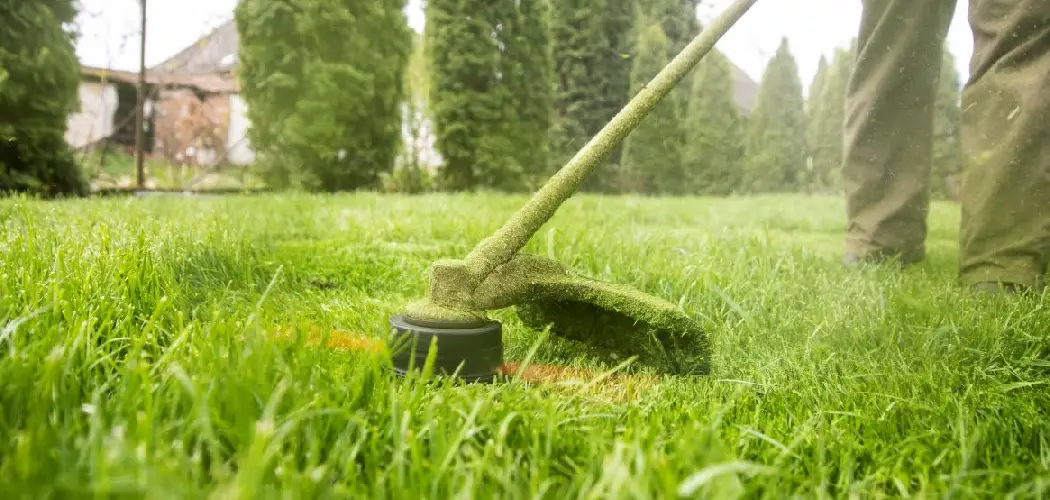
There is a immense satisfaction in looking at a freshly manicured hedge, where clean lines and healthy foliage create a living wall of green. While manual shears have their place for delicate touch-ups, tackling an entire row of overgrown bushes by hand is exhausting and time-consuming. This is where the power of modern tools changes the game. Electric hedge trimmers are lightweight, quiet, and incredibly efficient, turning a weekend-long chore into a quick afternoon project.
For beginners, however, wielding a powered blade can feel intimidating. The fear of cutting too much or creating uneven shapes is common, but with the right technique, these fears are easily conquered. Mastering this tool not only saves you money on professional landscaping but also gives you complete creative control over your garden’s aesthetic. This guide will walk you through exactly how to trim shrubs with electric trimmer models safely and artistically, empowering you to shape your landscape with confidence and precision.

Tools and Materials
Before getting started, it’s essential to gather all the necessary tools and materials to ensure a smooth trimming experience. Here’s what you’ll need:
- Electric shrub trimmer – Choose a reliable model suited for your garden’s needs, with sharp blades and safety features.
- Extension cord – If your trimmer is corded, use a heavy-duty outdoor extension cord to reach all areas of your yard.
- Protective gloves – These provide grip and protect your hands from any accidental nicks or scratches.
- Safety goggles – Shield your eyes from flying debris and ensure clear vision while trimming.
- Rake or broom – These help in clearing trimmed branches and leaves for a neat finish.
- Drop cloth or tarp – Use this to catch clippings, saving yourself from a lengthy cleanup process.
- Sharpening tool – Keep your trimmer blades sharp for the best results and avoid jagged cuts.
Having these tools and materials ready will not only save time but also make the whole process more effective and enjoyable.
Step-by-Step Guide on How to Trim Shrubs with Electric Trimmer
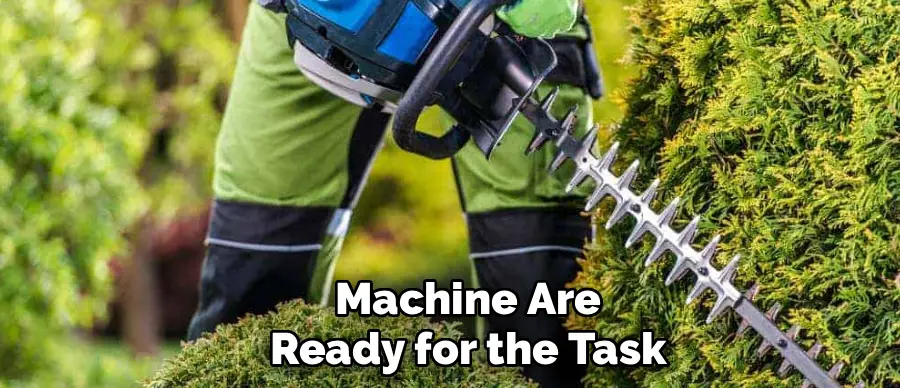
Step 1: Inspect Your Equipment and Prioritize Safety
Before you ever squeeze the trigger, your first responsibility is to ensure both you and your machine are ready for the task. Start by inspecting the blades of your electric trimmer. They should be clean, sharp, and free of rust or sap buildup from previous uses. Dull blades tear plant tissue rather than slicing it cleanly, which leads to brown tips and disease susceptibility.
Next, focus on personal protective equipment. Flying debris is a real hazard, so safety goggles are non-negotiable. Wear sturdy work gloves to protect your hands from thorns and vibration, and choose closed-toe shoes to safeguard your feet. If you are using a corded model, check the extension cord for any frays or nicks. Safety preparation is the unglamorous but vital foundation of successful hedge maintenance.
Step 2: Clear the Area and Lay a Tarp
Preparation of the workspace is often overlooked, yet it makes the entire process significantly smoother. Walk around the shrubs you intend to cut and remove any obstacles like garden hoses, lawn ornaments, or large rocks that could trip you or damage the trimmer blades. It is also wise to check inside the shrub itself for hidden objects like wire fencing, old toys, or even bird nests.
Once the perimeter is secure, lay down a large tarp or old sheet at the base of the bushes. This simple trick catches the majority of the clippings as they fall. Instead of spending an hour raking leaves out of your mulch or gravel later, you can simply gather up the corners of the tarp and dump the waste into your compost bin or yard waste bag.
Step 3: Plan Your Shape and Use Guides
One of the biggest mistakes beginners make is diving in without a plan, which often results in uneven, wavy hedges. Before you make a single cut, visualize the final shape you want. For most hedges, the ideal profile is slightly wider at the bottom than at the top. This “A-frame” or tapered shape allows sunlight to reach the lower branches, preventing them from becoming bare and woody.

To ensure a perfectly straight top line, do not rely on your eye alone. Set up a guide string by staking two tall poles at either end of the hedge and tying a string taut between them at your desired height. This simple visual reference serves as a foolproof boundary, preventing you from accidentally dipping the trimmer too low and creating a gap in your foliage.
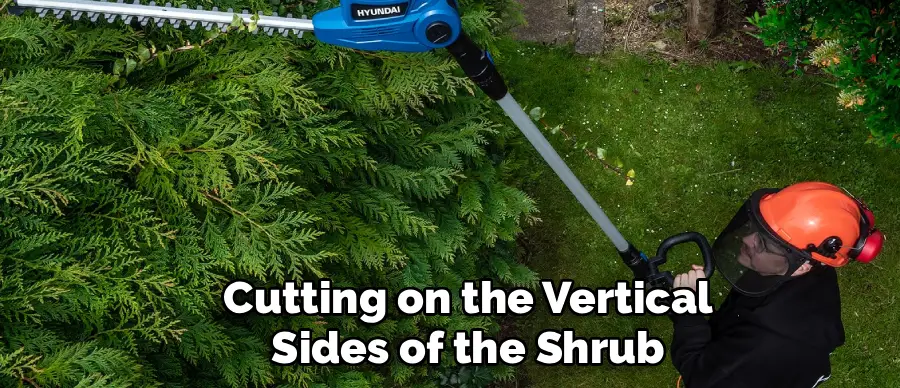
Step 4: Start with the Sides
Begin your actual cutting on the vertical sides of the shrub. Position yourself so you are stable and balanced. The most effective technique is to use long, sweeping motions. Start at the bottom of the bush and sweep the trimmer upwards toward the top. Cutting on the upstroke allows the falling debris to drop away from the cutting path, keeping your view of the work area clear.
If you cut on the downstroke, branches can get caught or matted down. Move slowly and steadily, removing only a few inches of growth at a time. It is always better to make multiple shallow passes than one deep, aggressive cut that exposes the bare inner wood. This vertical sculpting sets the width of your hedge and establishes the foundation for the rest of the trim.
Step 5: Level the Top Surface
Once the sides are vertical and tapered correctly, move on to the top surface. This is where your guide string becomes invaluable. Hold the trimmer bar completely flat and horizontal. Use a wide, sweeping motion from left to right, or vice versa, engaging the blades with the new growth. If your hedge is particularly wide, you may need to cut from one side, then walk around to the other side to complete the center.
Keep the trimmer level and avoid “dipping” the tip of the blade, which can gouge the surface. For a rounded shrub shape, use the flat of the blade to gently curve the edges where the top meets the sides. This step defines the silhouette of the plant, so take your time and step back frequently to check your progress from a distance.
Step 6: Clean Up and Detail
After the main shaping is complete, step back and critically assess your work. You will likely spot a few “stragglers”—individual branches that stick out or were missed during the initial passes. You might also notice corners that look too sharp or areas that need slight blending. Go back in for a detail pass.
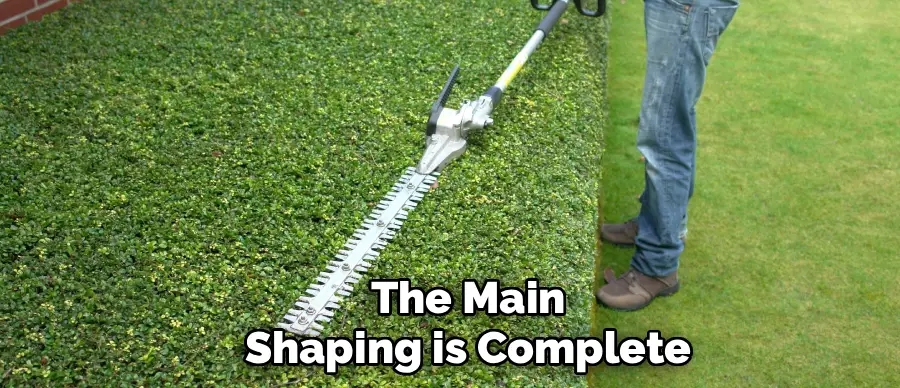
You can use the electric trimmer for this, or sometimes it is easier to use a pair of manual hand pruners for these specific snips to avoid over-cutting with the power tool. Shake the bush gently to dislodge any cut branches that are stuck inside the foliage. These dead clippings will turn brown and unsightly if left behind, so clearing them now ensures the final result looks polished and professional.
Step 7: Clean and Lubricate the Blades
The job isn’t finished until the tool is put away properly. Unplug the unit or remove the battery to ensure it cannot start accidentally. Use a stiff brush or a rag to wipe away all plant residue, sap, and dirt from the cutting bar. Sap is acidic and can corrode the metal if left to sit. Once clean, apply a light coat of machine oil or a specialized resin solvent spray to the blades.
This lubrication prevents rust and ensures the moving parts glide smoothly next time you use them. Proper maintenance extends the life of your equipment and guarantees that your next trimming session will be just as successful as this one. Store the trimmer in a dry place, preferably with the protective sheath over the blades to prevent accidents.
Frequently Asked Questions
When Is the Best Time to Trim Shrubs?
Timing depends on when your shrubs flower.
- Non-flowering hedges: Trim them in late spring after the new growth has emerged, and do maintenance trims through late summer.
- Spring-flowering shrubs: Prune these immediately after they finish blooming (e.g., lilacs, forsythia) to avoid cutting off next year’s buds.
- Summer-flowering shrubs: Prune these in late winter or early spring before new growth starts, as they bloom on new wood.
- Avoid Fall: Do not trim heavily in late fall, as new growth may not harden off before the first frost.
Can I Use an Electric Trimmer on Thick Branches?
Electric hedge trimmers are designed for thin, green growth, typically branches under 3/4 of an inch in diameter.
- Check the Gap: Look at the spacing between the teeth on your trimmer blade; do not try to cut anything wider than that gap.
- Use Loppers: For thick, woody stems (older growth), put the electric trimmer down and use manual loppers or a pruning saw.
- Risk of Damage: Forcing the trimmer through thick wood can jam the blades, burn out the motor, or cause the tool to kick back, creating a safety hazard.
Why Are My Hedges Turning Brown After Trimming?
Brown tips or patches usually indicate dull blades or improper technique.
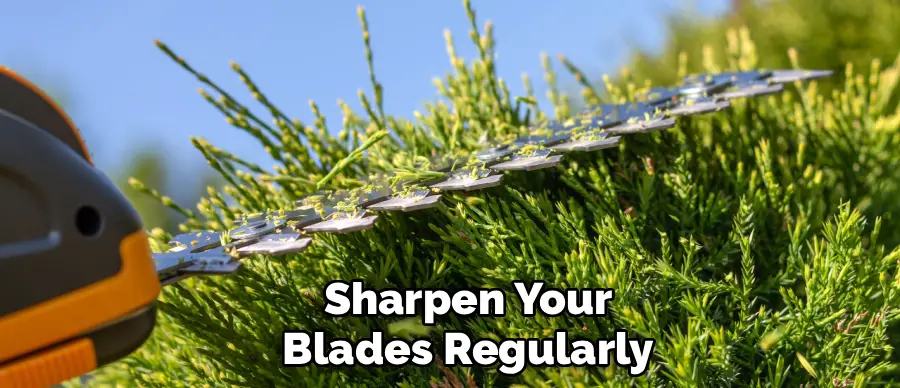
- Ragged Cuts: Dull blades shred the stem rather than slicing it, causing the damaged tissue to die back and turn brown. Sharpen your blades regularly.
- Sunscald: If you cut too deeply and expose inner leaves that have lived in shade, they can get sunburned. Stick to trimming only the outer layer of new growth.
- Heat: Trimming on a very hot, sunny day can stress the plant. Try to trim on overcast days or in the cooler evening hours.
Is a Cordless Trimmer Better Than a Corded One?
It depends on the size of your garden and your needs.
- Cordless (Battery): Offers unlimited mobility and is generally lighter. Perfect for large yards where cords won’t reach. However, runtime is limited by battery life.
- Corded (Electric): Provides unlimited power and runtime, often at a lower price point. Great for small yards near a power outlet. The downside is managing the extension cord, which can be a tripping hazard or get cut accidentally.
How Much Growth Should I Remove at Once?
A general rule of thumb for plant health is the “one-third rule.”
- The Limit: Never remove more than one-third of the shrub’s total volume in a single season. Taking too much can send the plant into shock.
- Rejuvenation: If a hedge is severely overgrown, prune it back gradually over three years rather than chopping it all at once.
- Maintenance: For regular shaping, you are usually just removing the most recent flush of growth (the light green tips), which is perfectly safe to do multiple times a year.
Conclusion
Taking control of your garden’s appearance is a rewarding experience that pays dividends in curb appeal and plant health. While electric tools can seem powerful and daunting at first, they are ultimately designed to make your life easier. By following a structured approach—prioritizing safety, planning your shape, and executing careful, sweeping cuts—you can achieve professional-level results without the professional price tag.
Remember that plants are forgiving; they grow back, giving you endless opportunities to refine your technique. Regular maintenance is the secret to dense, lush hedges, so don’t let the growth get ahead of you. Now that you have mastered the fundamentals of how to trim shrubs with electric trimmer tools, you are ready to step outside, power up, and sculpt the beautiful landscape you have always envisioned.
About
Outdoor Fixes is a distinguished figure in the world of Diy design, with a decade of expertise creating innovative and sustainable Diy solutions.
His professional focus lies in merging traditional craftsmanship with modern manufacturing techniques,
fostering designs that are both practical and environmentally conscious. As the author of diy,
outdoorfixes delves into the art and science of outdoorfixes-making, inspiring artisans and industry professionals alike.
Education RMIT University
(Melbourne, Australia) Associate Degree in Design (Outdoor Fixes) Focus on sustainable design, industry-driven projects,
and practical craftsmanship. Gained hands-on experience with traditional and digital manufacturing tools, such as CAD and CNC software.
Nottingham Trent University
(United Kingdom) Bachelor’s in outdoorfixes.com and Product Design (Honors) Specialized in product design with a focus on blending creativity with production
techniques. Participated in industry projects, working with companies like John Lewis and Vitsoe to gain real-world insights.
Publications and Impact
In diy, Outdoor Fixes his insights on indoor design processes, materials, and strategies for efficient production.
His writing bridges the gap between artisan knowledge and modern industry needs, making it a must-read for both budding designers and seasoned professionals.