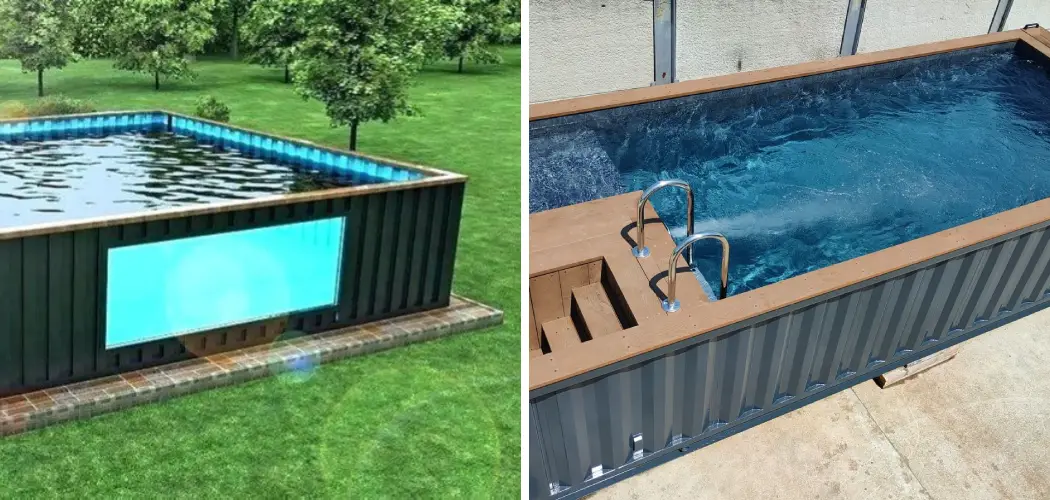
Looking for an aesthetically unique way to make a splash in the summertime? If you’ve ever contemplated your own private pool, you know how expensive and complicated they can be.
But did you know that with a bit of creativity, it’s possible to turn a shipping container into an amazing swimming oasis? Building your own stylish swimming pool using recycled materials is not only eco-friendly but also much less costly than traditional construction!
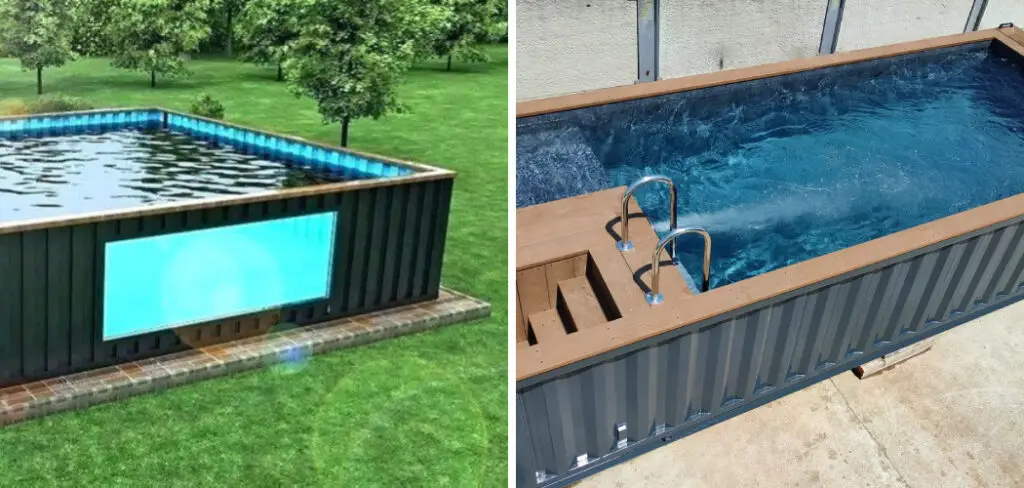
In this blog post, we’ll show you exactly how to turn a shipping container into a pool and the steps necessary for creating your own ultimate backyard retreat. So take off those shoes, roll up those sleeves, and get ready to dive right into the cool project of turning an ordinary cargo box into something extraordinary – your very own personalized hydro pool!
Tools and Materials You Will Need to Turn a Shipping Container Into a Pool
- A Shipping Container (20 ft or 40 ft)
- Waterproof coating
- A pool liner
- Drainage pump and hoses
- Insulation foam
- Cladding material (wood, tiles, etc.)
- Pool equipment (pump, filter, chlorine dispenser)
- Tools: Saw, Drill, Screwdriver, Measuring Tape
Step-by-step Guidelines on How to Turn a Shipping Container Into a Pool
Step 1: Choose Your Container
The first step is to choose the right container for your pool. You can either opt for a new or used shipping container, with sizes ranging from 20 ft to 40ft. Keep in mind that the larger the container, the more space you’ll have for swimming and lounging. Choosing a used container is also more cost-effective, and you can easily find them for sale on websites like eBay or Craigslist.
Step 2: Prepare the Container
Once you have your shipping container, it’s time to prepare it for its transformation. The first step is to clean the interior thoroughly with soap and water to remove any dirt or debris. Next, apply a waterproof coating to the entire interior of the container. This will prevent any leaks and protect the metal from rusting due to constant exposure to water.
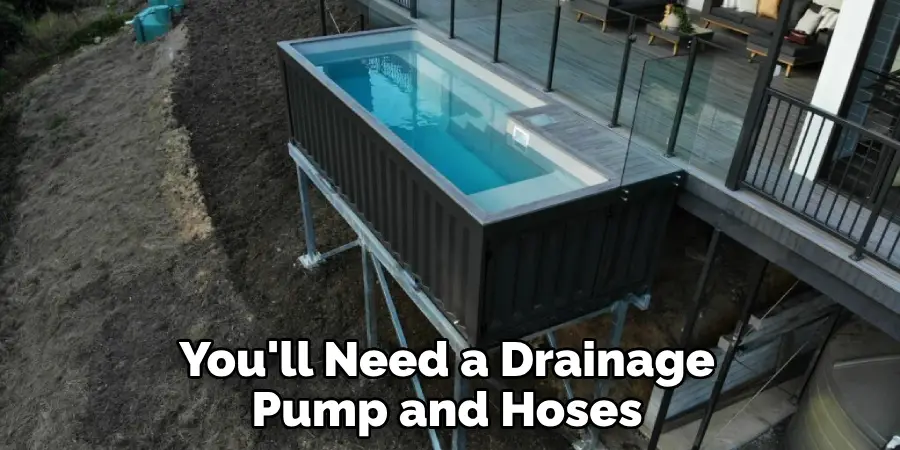
Step 3: Add Drainage Pump
To ensure that your pool stays clean, you’ll need a drainage pump and hoses. Cut a hole in one of the corners of the container and install the pump according to manufacturer instructions. The hose should run from the pump and out of the container, allowing you to drain and replace the water when needed. Make sure that the pump is powerful enough to handle the size of your pool.
Step 4: Add Insulation
Since shipping containers are made of metal, they can get quite hot in direct sunlight. To prevent your pool from turning into a sauna, add insulation foam to the interior walls after the waterproof coating has dried. This will also help to maintain the water temperature and prevent it from getting too cold in colder climates.
Step 5: Install Pool Liner
Lay the pool liner over the insulation foam, making sure to smooth out any wrinkles or creases. A pool liner is essential for maintaining the structural integrity of your pool and preventing leaks. You can find pool liners at most pool supply stores or online. While a traditional blue pool liner is an option, you can also choose from different colors and patterns to add a personalized touch to your pool.
Step 6: Add Cladding
To give your container pool a more polished look, add cladding material such as wood or tiles to the exterior of the container. This will also help to insulate the container and make it more aesthetically pleasing. You can use screws to attach the cladding, making sure to seal any gaps or cracks with waterproof caulk. Adding a deck around the pool is also an excellent way to enhance its appearance and provide a space for lounging.
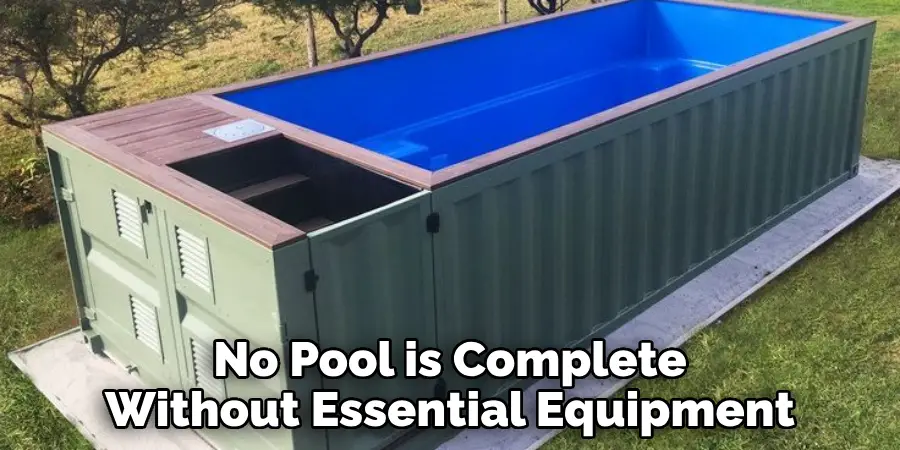
Step 7: Install Pool Equipment
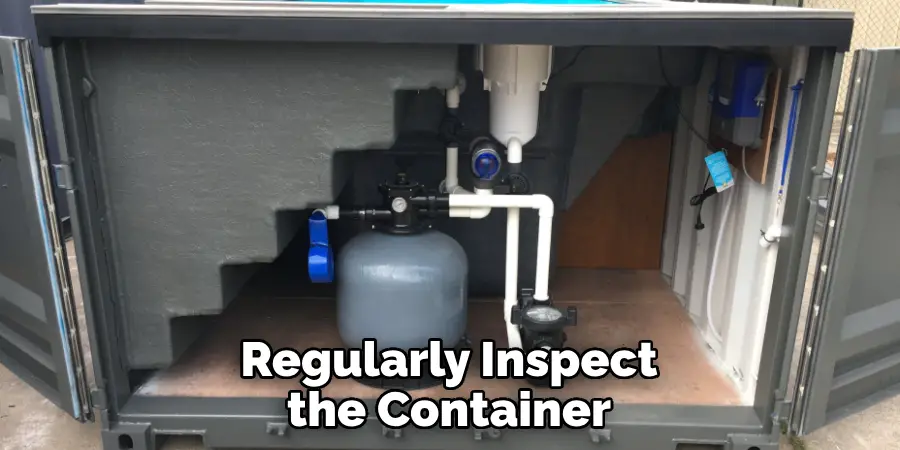
No pool is complete without essential equipment such as a pump, filter, and chlorine dispenser. These can be installed either inside or outside the shipping container pool. If installing them outside, make sure to hide any visible pipes or hoses using the same cladding material as the exterior. Make sure to also connect the pool equipment to your drainage pump for easy maintenance.
Following these simple steps, you can now turn a shipping container into your very own pool that is not only unique but also cost-effective and eco-friendly. So next time you’re dreaming of a backyard oasis, consider thinking outside the box – or in this case, the container – for an innovative and stylish solution! Happy swimming!
Additional Tips and Tricks to Turn a Shipping Container Into a Pool
- Consider adding a deck or patio around the shipping container pool to create a more cohesive and attractive outdoor space. This can also serve as an additional seating and lounging area.
- If you are using a standard shipping container, consider cutting out windows on one side to allow for natural light and airflow. You can also install glass sliding doors if you want to create an indoor-outdoor feel.
- For added safety, consider installing a pool cover or fence around the shipping container pool. This will prevent any accidents and ensure that children or pets cannot access the pool area without supervision.
- Utilize the space under and around the shipping container for storage of pool equipment, such as floats, cleaning supplies, and loungers. You can also install shelves or hooks inside the container to maximize storage space.
- Consider adding lighting around the pool area for night-time swimming or entertaining. You can use string lights, solar-powered lanterns, or even install underwater LED lights in the pool itself.
- If you are using a saltwater filtration system, make sure to regularly check and maintain the pH levels of the water to ensure it is safe for swimming.
- Decorate the shipping container pool with plants, tiles, or artwork to make it a unique and visually appealing feature in your backyard.
- If you live in a colder climate, consider adding a heater to the shipping container pool to extend its use throughout the year.
- Take advantage of the height of the shipping container by installing a diving board or slide for added fun and excitement.
- Don’t forget to regularly clean and maintain your shipping container pool, just like a traditional in-ground pool. This will ensure it stays in good condition and provides a safe swimming experience for you and your family.
Following these tips and tricks will not only help you turn a shipping container into a pool, but also create a beautiful, functional, and unique addition to your outdoor space. Get creative and have fun with the process! So why wait? Start planning and building your very own shipping container pool today. Your family and friends will thank you for it. Happy swimming!
Things You Should Consider to Turn a Shipping Container Into a Pool
1. Size and Shape of the Shipping Container:
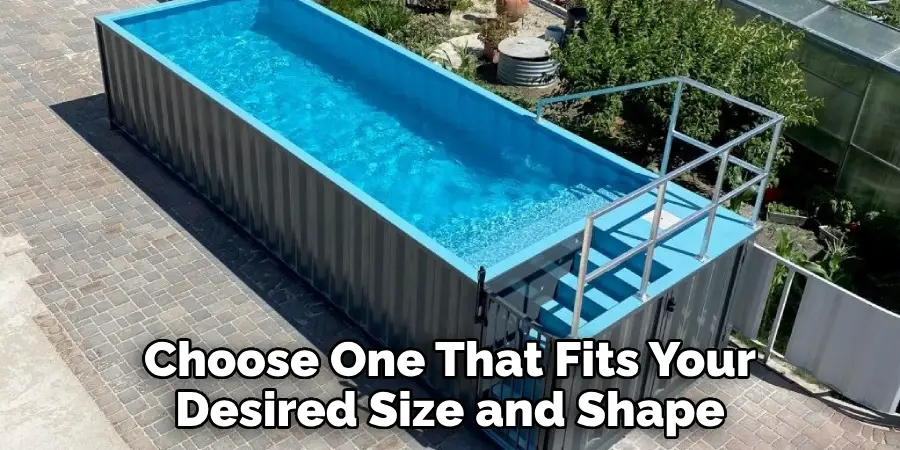
The first thing to consider when turning a shipping container into a pool is its size and shape. Typically, shipping containers come in standard sizes of 20 feet or 40 feet long and 8 feet wide. However, there are also high cube containers that are 9 feet tall instead of the standard 8 feet.
When selecting a shipping container for your pool, it is important to choose one that fits your desired size and shape. Additionally, you should also consider the space where you plan to install the pool as well as any local regulations or restrictions on pool sizes.
2. Condition of the Container:
Another important factor to consider is the condition of the shipping container. A used container that has been in service for a long time may have rust, dents, or other structural issues that can affect the integrity of your pool. It is best to choose a container in good condition to ensure your pool will last for a long time and avoid any potential safety hazards.
3. Location and Foundation:
Before installing your shipping container pool, you should carefully consider the location and foundation. The ground should be level and stable to support the weight of the pool, which can hold thousands of gallons of water.
You may also need to lay a concrete slab or reinforce the existing surface to provide a sturdy base for your pool. Additionally, you should choose a spot that receives adequate sunlight and is free from any potential hazards such as overhanging trees or power lines.
4. Pool Design and Features:
One of the most exciting aspects of turning a shipping container into a pool is designing and customizing it to fit your preferences. You can choose from a variety of pool designs, including lap pools, plunge pools, or even adding a hot tub section.

Additionally, you can also add features such as a swim jet, waterfall, or LED lighting to enhance your pool experience. Make sure to plan and budget accordingly for any additional features you want to include.
5. Installation and Maintenance Costs:
Converting a shipping container into a pool can be a cost-effective alternative to traditional pools, but it is important to consider the installation and maintenance costs.
You may need to hire professionals for some aspects of the installation, such as cutting openings for entry and filtration systems. Additionally, you should also budget for ongoing maintenance and cleaning to keep your pool in top condition.
6. Permits and Regulations:
Before starting any construction on your shipping container pool, it is crucial to check with your local authorities for any necessary permits or regulations to follow. Some cities may have specific guidelines for installing pools, including fencing requirements and safety regulations. It is important to adhere to these regulations to ensure the safety of your pool and avoid any potential legal issues.
Following these important considerations can help you turn a shipping container into a functional and unique swimming pool. With proper planning and execution, you can transform an ordinary shipping container into a backyard oasis that will provide endless hours of enjoyment for years to come.

Get creative and have fun with the design process, but always prioritize safety and adhere to any local regulations. Now go make your dream of having a shipping container pool a reality! So, if you’re looking for a budget-friendly and environmentally-friendly option for a swimming pool, turning a shipping container into one may be the perfect solution for you. Happy swimming!
Frequently Asked Questions
What Are Some Benefits of Turning a Shipping Container Into a Pool?
Converting a shipping container into a pool can offer several benefits. Firstly, it can be more cost-effective than traditional pool construction, as the container already provides a sturdy structure. It can also be a sustainable option, as it repurposes an existing item that may otherwise go to waste.
Additionally, shipping containers are designed to withstand harsh environments, making them durable and long-lasting pools. They can also be easily transported and installed, making it a great option for those who move frequently or have limited space.
Can You Heat a Shipping Container Pool?
Yes, it is possible to heat a shipping container pool. The type of heating system used will depend on the size and design of the pool, as well as personal preferences. Options for heating a shipping container pool include traditional heaters, heat pumps, and solar panels.
What Maintenance is Required for a Shipping Container Pool?
Like any pool, regular maintenance is necessary to keep your shipping container pool clean and safe to use. This includes regularly checking and adjusting chemical levels, cleaning the walls and floor of the pool, and maintaining the filtration system. It’s also important to regularly inspect the container for any signs of wear and tear, such as rust or leaks, and address them promptly.
Conclusion
Now you know how to turn a shipping container into a pool and the benefits it can offer. With a little creativity, this innovative solution can provide a unique and efficient way to have your own pool. Remember to always consult with professionals and follow safety guidelines when building and using your shipping container pool. Happy swimming!
About
Outdoor Fixes is a distinguished figure in the world of Diy design, with a decade of expertise creating innovative and sustainable Diy solutions.
His professional focus lies in merging traditional craftsmanship with modern manufacturing techniques,
fostering designs that are both practical and environmentally conscious. As the author of diy,
outdoorfixes delves into the art and science of outdoorfixes-making, inspiring artisans and industry professionals alike.
Education RMIT University
(Melbourne, Australia) Associate Degree in Design (Outdoor Fixes) Focus on sustainable design, industry-driven projects,
and practical craftsmanship. Gained hands-on experience with traditional and digital manufacturing tools, such as CAD and CNC software.
Nottingham Trent University
(United Kingdom) Bachelor’s in outdoorfixes.com and Product Design (Honors) Specialized in product design with a focus on blending creativity with production
techniques. Participated in industry projects, working with companies like John Lewis and Vitsoe to gain real-world insights.
Publications and Impact
In diy, Outdoor Fixes his insights on indoor design processes, materials, and strategies for efficient production.
His writing bridges the gap between artisan knowledge and modern industry needs, making it a must-read for both budding designers and seasoned professionals.

