
For many modern pool owners, the autofill system is a silent hero. It sits quietly in the background, ensuring your water level remains perfect regardless of evaporation or heavy splashing. It eliminates the chore of dragging a garden hose across the deck every few days to top off the pool, offering a true “set it and forget it” convenience.

However, like any automated system, there are times when you need to intervene. Whether you are winterizing your pool to protect it from freezing temperatures, performing a leak detection test, or managing water levels during a week of torrential rain, knowing how to disable this feature is crucial.
Despite its simplicity, many homeowners are unsure of where to find the controls for their autofill or how to shut it down properly. Leaving it running at the wrong time can lead to expensive water bills, diluted chemicals, or even damage to your pool deck and equipment. This guide is designed to demystify the process, providing you with a clear, step-by-step walkthrough on how to turn off pool autofill systems safely and effectively, ensuring you have total control over your pool’s water level when it matters most.
Understanding Your Pool’s Autofill System
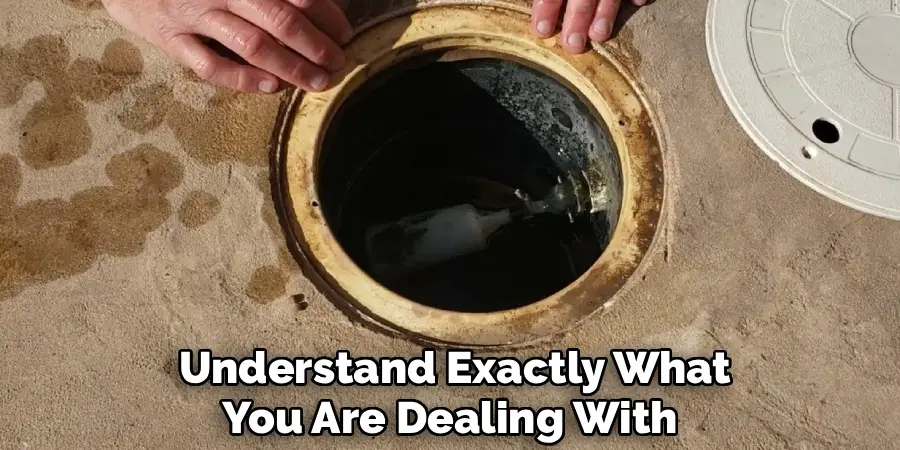
Before you can turn a system off, it helps to understand exactly what you are dealing with. An automatic water leveler, or autofill, is essentially a toilet tank mechanism for your pool. It relies on a simple float valve to regulate water flow. The device is housed in a dedicated canister—usually a round plastic bucket set into the pool deck—connected to the pool by an equalizer line. As the water level in the pool drops due to evaporation, the water level in the canister drops with it.
How Does an Autofill Work?
When the water level in the canister lowers, the plastic float drops. This movement opens a mechanical valve connected to a fresh water supply line, allowing water to flow into the canister and then into the pool. As the pool fills up, the float rises. Once it reaches the preset level, the float pushes the valve shut, stopping the water flow.
It is a purely mechanical process that requires no electricity, which makes it reliable but also means it doesn’t have an “off” switch on your automation panel. You have to physically stop the water supply.
Common Types of Autofill Systems
While the concept is universal, the installation can vary. The most common type is the deck-mounted canister described above. You will typically see a small, round lid, about 8 to 10 inches in diameter, sitting in the concrete deck near your skimmer. Other systems are integrated directly into the skimmer itself, often found in older pools or specific brands.
Key Reasons to Turn Off Your Autofill
You might wonder why you would ever want to turn off such a convenient feature. While it is great for daily maintenance, an active autofill can be a liability in specific scenarios.
Preparing for Winter and Freezing Weather
If you live in a region where temperatures drop below freezing, winterizing your pool is non-negotiable. Leaving your autofill on during winter is a recipe for disaster. The supply line that feeds the autofill is often shallow and prone to freezing. If the water inside expands and cracks the pipe, you could face a massive underground leak.
Detecting a Pool Leak
One of the most common reasons to disable the autofill is to perform a leak detection test. If you suspect your pool is losing water, you might perform a “bucket test” to compare evaporation rates. However, if your autofill is running, it will constantly replace the lost water, masking the leak entirely. You will never know if the water level is dropping because the system keeps topping it off. You must learn how to turn off pool autofill to get an accurate reading on your water loss.
Preventing Overflow During Rainy Seasons
During periods of heavy, sustained rainfall, your pool can naturally fill to the brim. If your autofill float gets stuck or malfunctions during a storm, it might continue adding water even when the pool is overflowing. This excess water dilutes your carefully balanced chemicals, specifically your salt and stabilizer levels, forcing you to spend money re-balancing the water. In extreme cases, a continuously running autofill combined with heavy rain can flood your yard or patio area.
Essential Tools and Preparation
Turning off the autofill is usually a tool-free job, but being prepared helps. The most difficult part of the process is often just finding the right valve.
Tools You Might Need
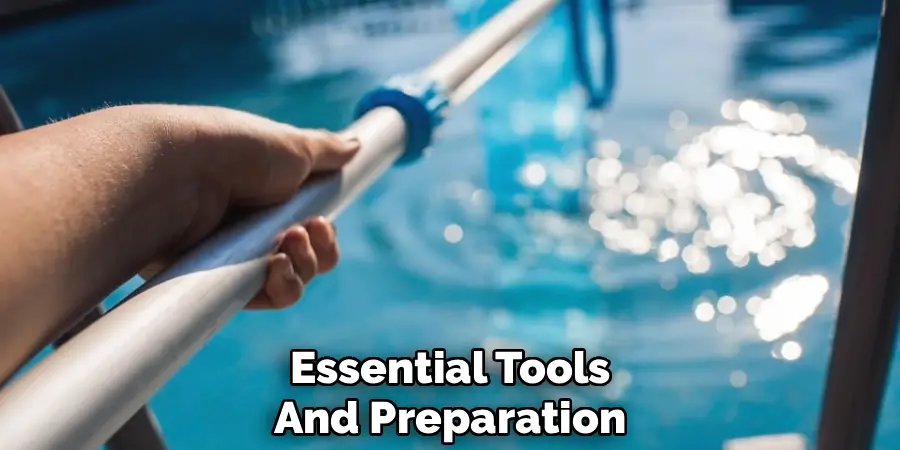
Most modern installations use a ball valve with a lever handle that you can turn by hand. However, older gate valves (the ones with a round, wheel-like handle) can become stiff or corroded over time. Having a pair of slip-joint pliers or a wrench on hand can give you the leverage needed to turn a stubborn valve. If your valve is located underground in a narrow box, a specialized valve key or a long screwdriver might be necessary to reach it.
5 Step-by-Step Guide on How to Turn Off Pool Autofill
Once you have located the components, the actual process takes only a few minutes. Follow these steps to ensure you shut the system down completely.
Step 1: Locate the Autofill Mechanism
Walk around your pool deck and look for the lid that covers the autofill canister. It is usually located right next to the skimmer but will have a separate lid. It may be labeled “Autofill” or “Water Leveler.” If you don’t see a separate canister, check inside your skimmer to see if the float mechanism is built in. Lift the lid to confirm you are looking at a float valve assembly. You should see water inside the canister level as the pool water.
Step 2: Find the Dedicated Water Supply Line
Now, look for the pipe that supplies fresh water to this canister. Unlike the large pool plumbing pipes, this will be a much smaller diameter pipe, usually ¾ inch or ½ inch PVC or copper.

Try to trace this line visually from the canister back toward the house or the equipment pad. It often runs parallel to the pool deck before turning toward the water source.
Step 3: Identify the Shut-Off Valve
Follow that small pipe until you find a valve. This is your target. As mentioned, it might be a PVC ball valve with a colored handle (often red or blue) or a brass gate valve. If you find a manifold with multiple valves (common near irrigation systems), look for the one connected to the pipe heading toward the pool. Sometimes installers will label the pipe “Pool Fill” or “Leveler,” but often you will have to deduce which one it is by process of elimination.
Step 4: Turn the Valve to the “Off” Position
Once you have identified the correct valve, it is time to close it.
- For a Ball Valve: These valves have a lever handle. When the handle is parallel to the pipe, it is open. To close it, turn the handle 90 degrees so that it is perpendicular to the pipe. It should form a “T” shape with the pipe.
- For a Gate Valve: These have a round handle. Turn the handle clockwise (“righty-tighty”) until it stops. Be firm but gentle; old gate valves can snap if forced too hard. If it resists, wiggle it back and forth slightly to break any mineral deposits before turning it fully closed.
Step 5: Verify That the Water Has Stopped
Do not just assume the valve worked. Go back to the autofill canister on the pool deck. Lift the lid. Push the float down gently with your hand. Normally, this would trigger the water to hiss and spray into the canister.

What to Do If You Can’t Find a Dedicated Valve
In some frustrating cases, builders hide the valves or bury them without leaving a map. If you cannot find a dedicated shut-off valve for the pool fill line, you still have options, though they are less convenient.
Checking Near the Main Water Spigot
Often, the pool fill line is tapped into the water supply right before an outdoor hose bib. Check the spigots around the perimeter of your house. Look for a “T” fitting where a pipe branches off and goes into the ground. There may be a small valve located right at that junction.
The Main Water Shut-Off as a Last Resort
If you have an emergency—like a broken autofill pipe spewing water—and cannot find the specific isolation valve, you can turn off the main water supply to your entire house. This is typically located where the water line enters your home or at the street meter. While this stops the leak, it also leaves your home without water, so it is strictly a temporary measure while you wait for a plumber to install a proper shut-off valve for the pool line.
Winterizing the Autofill System After Turning It Off
If you are turning the system off for the winter, simply closing the valve is not enough. Water trapped in the line and canister can still freeze and cause damage.
Draining the Canister
Once the water supply is cut, you need to empty the water sitting in the autofill canister. Because it is connected to the pool via an equalizer line, water will naturally try to flow back in. You can use a wet/dry shop vac to suck the water out. If you are lowering the pool water level for winter, the canister level will drop naturally, but you should still vacuum out the remaining water and debris at the bottom to prevent the plastic canister from cracking if it freezes.
Plugging the Fill Line
To be completely safe, you should plug the lines. The hole at the bottom of the canister connects to the pool; use a rubber expansion plug to seal this off so pool water cannot re-enter the canister. Additionally, disconnect the float valve assembly if possible (it usually unscrews) and store it indoors.

Turning the Autofill System Back On
When spring arrives, and you are ready to open the pool, reversing the process is straightforward, but proceed with caution.
Reversing the Process
First, remove any winterizing plugs you installed in the canister. Reinstall the float valve assembly if you removed it. Then, go back to your shut-off valve. Turn it slowly back to the “Open” position (handle parallel to the pipe). Opening it too fast can send a “water hammer” shockwave through the pipes, potentially damaging fittings. Once the water is on, go back to the canister and verify that water is flowing when the float is down and stopping when the float is up.
Adjusting the Float Level
Spring is the perfect time to calibrate the water level. The float usually sits on an adjustable arm or screw. If your pool water level was consistently too high or too low last season, adjust the float now. Generally, you want the water level to be halfway up the skimmer opening. If the water is too low, adjust the float to shut off higher; if too high, adjust it to shut off lower.
Conclusion
The autofill system is a wonderful convenience, but it should never be a mystery. Taking the time to locate your shut-off valve and understanding how the mechanism works gives you control over your pool’s environment. Whether you are troubleshooting a leak, protecting your plumbing from a hard freeze, or simply doing routine maintenance, knowing how to turn off pool autofill is a fundamental skill for any responsible pool owner.
Don’t wait for an emergency to go hunting for that valve. Locate it today, tag it if necessary, and rest easy knowing that you can stop the flow of water instantly whenever the need arises. Your pool—and your water bill—will thank you.
About
Outdoor Fixes is a distinguished figure in the world of Diy design, with a decade of expertise creating innovative and sustainable Diy solutions.
His professional focus lies in merging traditional craftsmanship with modern manufacturing techniques,
fostering designs that are both practical and environmentally conscious. As the author of diy,
outdoorfixes delves into the art and science of outdoorfixes-making, inspiring artisans and industry professionals alike.
Education RMIT University
(Melbourne, Australia) Associate Degree in Design (Outdoor Fixes) Focus on sustainable design, industry-driven projects,
and practical craftsmanship. Gained hands-on experience with traditional and digital manufacturing tools, such as CAD and CNC software.
Nottingham Trent University
(United Kingdom) Bachelor’s in outdoorfixes.com and Product Design (Honors) Specialized in product design with a focus on blending creativity with production
techniques. Participated in industry projects, working with companies like John Lewis and Vitsoe to gain real-world insights.
Publications and Impact
In diy, Outdoor Fixes his insights on indoor design processes, materials, and strategies for efficient production.
His writing bridges the gap between artisan knowledge and modern industry needs, making it a must-read for both budding designers and seasoned professionals.