
Raised bed gardening offers incredible benefits, from better soil control to easier access, but it comes with one unique challenge: water management. Because raised beds drain better and warm up faster than in-ground gardens, they can dry out surprisingly quickly, putting stress on your vegetable crops. Hand watering is time-consuming and often inefficient, leading to evaporation or wet foliage that invites disease. The solution lies in a simple, porous tube known as a soaker hose.

This irrigation method delivers moisture directly to the root zone where it is needed most, minimizing waste and keeping leaves dry. By implementing a dedicated drip system, you can automate your watering chores and ensure your plants receive steady hydration even during the hottest summer days. This guide will demystify the setup process, teaching you exactly how to use soaker hose in raised beds to create a low-maintenance, high-yield garden oasis that practically waters itself.
7 Step-by-Step Guide on How to Use Soaker Hose in Raised Beds
Step 1: Measure Your Beds and Select the Right Hose
Before you head to the garden center, you need a solid plan based on the specific dimensions of your growing space. Take a tape measure and record the length and width of each raised bed you intend to irrigate. This is critical because soaker hoses come in various set lengths, typically 25, 50, or 75 feet. You want to choose a length that allows you to loop back and forth through the bed without having excessive hose left over.
Ideally, the spacing between lines should be about 12 to 18 inches to ensure full soil saturation. If you have multiple beds, consider buying a bulk roll of soaker tubing and cutting it to custom lengths using connectors. Taking accurate measurements now prevents the frustration of having too little hose to cover your plants or a tangled mess of extra tubing that gets in your way.
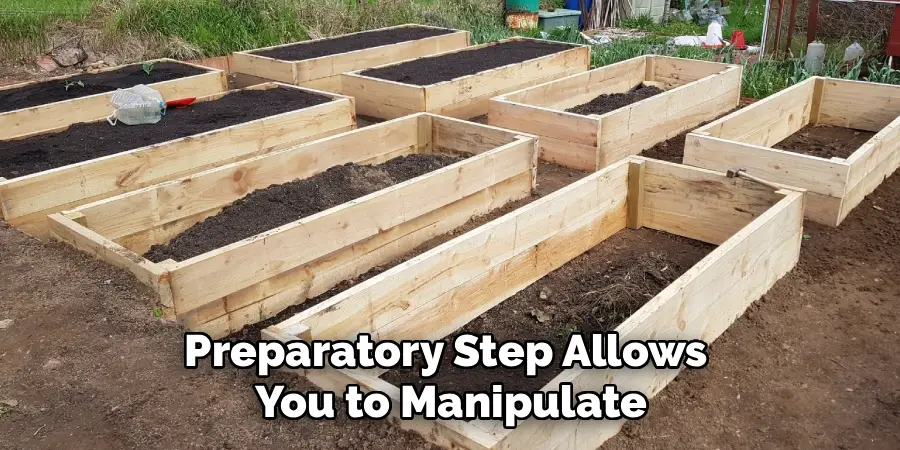
Step 2: Uncoil and Relax the Hose in the Sun
When you first purchase a new hose, it will likely be tightly wound in its packaging, retaining a stubborn coil shape that makes it difficult to lay flat. Wrestling with a stiff, curling rubber tube inside a confined raised bed is a recipe for damaging delicate seedlings.
To solve this, unpackage the hose and lay it out straight on a driveway or lawn in direct sunlight for at least an hour or two. The heat will soften the rubber or recycled material, making it flexible and pliable. This simple preparatory step allows you to manipulate the hose easily into the desired pattern, ensuring it stays where you place it without springing back up and crushing your young vegetables.
Step 3: Lay Out the Pattern
Now that your hose is flexible, place it into the raised bed. The goal is to snake the hose through the bed in a pattern that provides even water distribution. A serpentine or “S” shape is the most effective layout for rectangular beds. Start at one end near the water source and weave the hose back and forth along the length of the bed.
Ensure the lines are spaced roughly 12 to 18 inches apart. This spacing ensures that the moisture spreads laterally through the soil, meeting in the middle to create a uniform zone of hydration. Be careful not to make the turns too sharp, as kinking the hose will block water flow and leave parts of your garden thirsty.
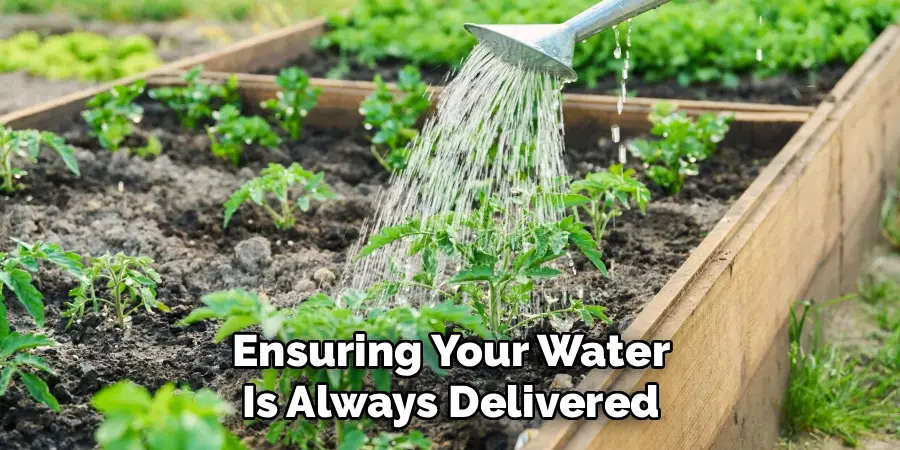
Step 4: Secure the Hose with Garden Staples
Once you are satisfied with the layout, you must anchor the hose in place to prevent it from shifting over time. As the hose fills with water and pressurizes, it can move slightly, and seasonal temperature changes can cause it to expand and contract. Use metal garden staples, also known as landscape pins, to pin the hose to the soil.
Place a staple every 2 to 3 feet along the straight sections and use extra staples at the curves of your “S” pattern to hold the shape firmly. Press the staples flush with the ground so they don’t become a tripping hazard. Securing the system properly is a vital part of how to use soaker hose in raised beds, ensuring your water is always delivered exactly where you planned.
Step 5: Connect to the Water Source
Soaker hoses are designed to operate at low pressure. Standard household water pressure is often too high and can cause the porous material to burst or spray fine mist rather than weeping gently. To prevent this, attach a pressure regulator to your faucet or the start of the hose line. This inexpensive device reduces the water flow to a safe level, usually around 10 to 20 PSI.
Additionally, installing a filter washer at the connection point is highly recommended. Raised bed irrigation systems can easily become clogged with sediment or mineral deposits. A simple mesh filter catches debris before it enters the narrow pores of the hose, extending the lifespan of your equipment significantly.
Step 6: Test the System and Adjust for Leaks
Before you cover anything up or walk away, you need to verify that the system is working correctly. Turn on the water spigot, but only open it about a quarter to half a turn. You do not need full pressure. Watch the hose as it fills. You should see beads of water forming along the entire length of the tube, dripping steadily into the soil.
If you see water spraying out in jets, the pressure is too high; turn the faucet down. Check the end cap to ensure it is tight and not leaking. Walk along the bed and check for any major kinks you might have missed. This test run confirms that every inch of your planting area will receive hydration.
Step 7: Cover with Mulch to Retain Moisture
The final step is to cover the exposed soaker hose with a layer of organic mulch. Spread about two to three inches of straw, wood chips, or shredded leaves over the entire bed, burying the hose completely. This serves two crucial functions. First, it protects the rubber hose from degradation caused by UV sunlight, helping it last for many seasons.
Second, and most importantly, the mulch acts as an insulator that prevents the water seeping from the hose from evaporating into the air. By keeping the moisture locked in the soil, you maximize efficiency. This combination of deep watering and mulching creates the perfect environment for roots to thrive while dramatically reducing your overall water usage.

Frequently Asked Questions
How Long Should I Run My Soaker Hose?
There is no single answer, as it depends on your soil type and weather, but a general rule is 30 to 60 minutes per session.
- The Finger Test: After watering, stick your finger into the soil. It should be moist at least 2 inches down.
- Flow Rate: Soaker hoses deliver water slowly. If it feels dry, run it longer next time.
- Frequency: During hot summers, you may need to run it every 2-3 days.
Can I Connect Multiple Soaker Hoses Together?
Yes, but there is a limit. If you chain too many hoses together, the water pressure will drop significantly by the time it reaches the end, leaving the last bed dry.
- Maximum Length: generally, try to keep total runs under 100 feet.
- Zone Splitter: Ideally, use a multi-way splitter at the faucet and run separate leader hoses to each bed rather than connecting them in one long series.
Do Soaker Hoses Clog Easily?
They can clog over time due to mineral deposits in hard water or sediment.
- Filter is Key: Always use a 200-mesh filter washer at the source.
- Flushing: Once or twice a season, unscrew the end cap and turn the water on high for a minute to flush out any internal debris.
- Vinegar Soak: If a section stops weeping, you can soak that part of the hose in vinegar to dissolve calcium buildup.
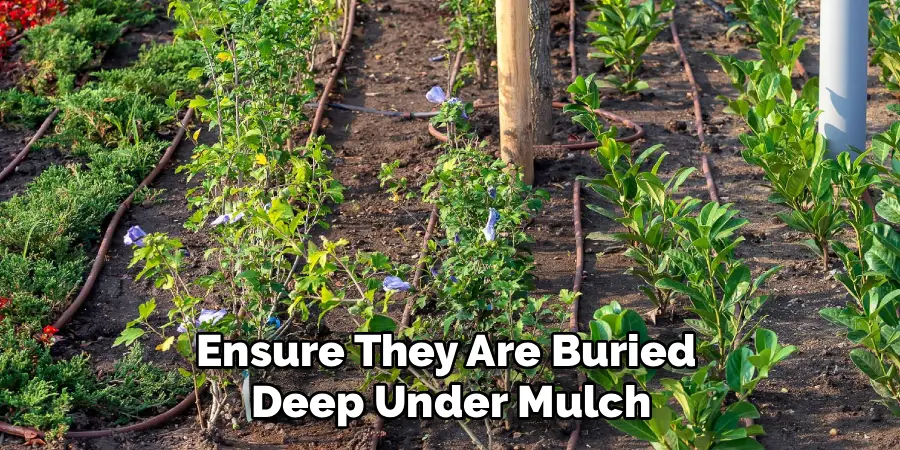
Is It Better to Put the Soaker Hose Under or Over Mulch?
It is always better to place the soaker hose under the mulch.
- Evaporation: Placing it under mulch protects the water from the sun and wind, reducing evaporation rates by up to 70%.
- Protection: The mulch shields the rubber or fabric hose from damaging UV rays, preventing it from becoming brittle and cracking prematurely.
Can I Leave Soaker Hoses Out in Winter?
In freezing climates, it is risky to leave them out. Water trapped inside the porous material can freeze, expand, and crack the hose.
- Drain and Store: The best practice is to remove them, drain the water, and store them in a shed.
- Lay Flat: If you must leave them, uncap the ends to drain completely and ensure they are buried deep under mulch, but removal is safer.
Conclusion
Switching to a soaker hose system is one of the smartest upgrades you can make for your raised bed garden. It shifts your role from a water carrier to a garden manager, giving you back hours of free time while simultaneously improving the health of your plants. By delivering moisture slowly and deeply to the roots, you encourage stronger growth and reduce the risk of fungal diseases that plague wet foliage.
The initial setup requires a bit of measuring and planning, but the long-term payoff is a lush, resilient vegetable patch that thrives even in the heat. Now that you understand how to use soaker hose in raised beds, you can confidently install your own system and enjoy a more efficient, productive, and stress-free gardening season.
About
Outdoor Fixes is a distinguished figure in the world of Diy design, with a decade of expertise creating innovative and sustainable Diy solutions.
His professional focus lies in merging traditional craftsmanship with modern manufacturing techniques,
fostering designs that are both practical and environmentally conscious. As the author of diy,
outdoorfixes delves into the art and science of outdoorfixes-making, inspiring artisans and industry professionals alike.
Education RMIT University
(Melbourne, Australia) Associate Degree in Design (Outdoor Fixes) Focus on sustainable design, industry-driven projects,
and practical craftsmanship. Gained hands-on experience with traditional and digital manufacturing tools, such as CAD and CNC software.
Nottingham Trent University
(United Kingdom) Bachelor’s in outdoorfixes.com and Product Design (Honors) Specialized in product design with a focus on blending creativity with production
techniques. Participated in industry projects, working with companies like John Lewis and Vitsoe to gain real-world insights.
Publications and Impact
In diy, Outdoor Fixes his insights on indoor design processes, materials, and strategies for efficient production.
His writing bridges the gap between artisan knowledge and modern industry needs, making it a must-read for both budding designers and seasoned professionals.