
A stubborn lawnmower that refuses to start can derail your yard work plans. This is a common frustration, especially at the beginning of the mowing season or when the weather is cold.
One of the quickest and most effective solutions for a reluctant engine is using starter fluid. This aerosol product contains highly flammable solvents that ignite easily, helping to kick-start an engine that’s having trouble firing up on its own. When used correctly, starter fluid can be a valuable tool in your lawn care arsenal, helping your mower start up so you can get back to work.
Let’s dive into how to use starter fluid on lawn mower.

What are the Benefits?
Using starter fluid offers several key advantages for anyone dealing with a non-starting mower. The most significant benefit is the ease of starting a difficult engine. It provides the initial combustion needed to get the engine cycle going, which is especially helpful for mowers that have been in storage for a long time or are operating in cold temperatures.
This can save you considerable time and effort. Instead of repeatedly pulling the recoil cord and potentially flooding the engine, a quick spray of starter fluid can often get it running in just one or two pulls. It also serves as a diagnostic tool. If the engine fires up with starter fluid but then dies, it often points to a fuel delivery problem, helping you narrow down the potential issue.
What Will You Need?
Before you begin, it’s important to gather the necessary tools and materials. This ensures you can perform the task safely and efficiently without interruption.
- Starter Fluid: A can of high-quality engine starter fluid.
- Safety Glasses: To protect your eyes from any spray or debris.
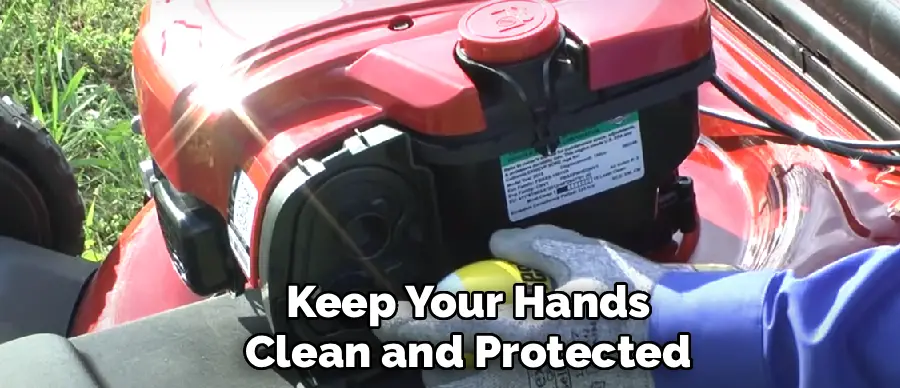
- Gloves: To keep your hands clean and protected.
- Screwdriver or Wrench: Depending on how your mower’s air filter cover is secured.
- Clean Rag: For wiping away any spills or cleaning surfaces.
10 Easy Steps on How to Use Starter Fluid on Lawn Mower
Using starter fluid is a straightforward process, but following these steps carefully is crucial for safety and effectiveness.
Step 1: Move the Mower to a Safe, Ventilated Area
Safety should always be your top priority. Before you even touch the can of starter fluid, move your lawnmower to an open, well-ventilated space. An ideal location is a driveway or a clear spot on the lawn, far away from any enclosed areas like a garage or shed. Vapors from gasoline and starter fluid can build up quickly in confined spaces, creating a fire hazard. Working outdoors ensures these flammable fumes dissipate safely. Also, make sure there are no open flames, sparks, or sources of ignition nearby. This includes cigarettes, pilot lights on water heaters, or any running electrical equipment.
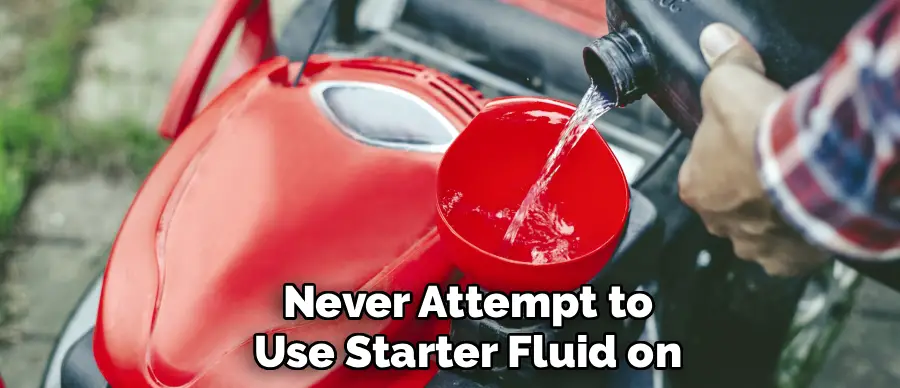
Step 2: Ensure the Mower Engine is Cool
Never attempt to use starter fluid on a hot or recently running engine. Starter fluid is extremely flammable, and spraying it onto hot engine components could cause it to ignite instantly, leading to a dangerous fire. If you have been trying to start the mower, give the engine at least 15-20 minutes to cool down completely. You should be able to comfortably touch the engine casing without it feeling hot. This simple precaution dramatically reduces the risk of an accident and is one of the most important rules when handling these types of products.
Step 3: Locate and Access the Air Filter
The air filter is the gateway to the engine’s air intake system, which is where you will apply the starter fluid. On most push mowers and riding mowers, the air filter is housed in a plastic or metal box located on the side or top of the engine. This housing is typically held in place by one or two screws, clips, or a simple knob that you can turn by hand. If you are unsure where to find it, consult your lawn mower’s owner’s manual. The manual will provide a diagram showing the location of all key components, including the air filter assembly.
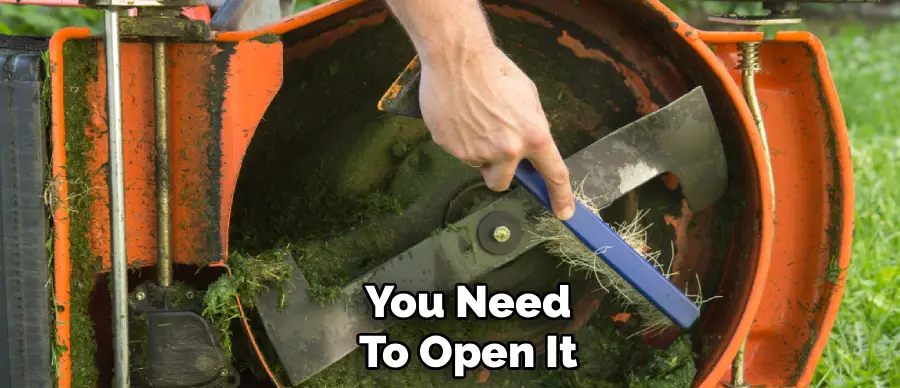
Step 4: Remove the Air Filter Cover and Filter
Once you have located the air filter housing, you need to open it. Use a screwdriver or wrench if necessary to remove the screws, or simply unlatch the clips holding the cover in place. Set the cover and any fasteners aside in a safe place where they won’t get lost. After removing the cover, you will see the air filter itself. It is usually a paper, foam, or fabric element. Carefully lift the air filter out of its housing. This will expose the carburetor’s air intake, which is the opening leading directly into the engine.
Step 5: Prepare the Starter Fluid Can
Before spraying, take a moment to prepare the can of starter fluid. Shake it vigorously for about 10-15 seconds. This action mixes the active ingredients inside, ensuring that you get a consistent and effective spray. Most cans come with a thin plastic straw that can be attached to the nozzle. Using this straw allows you to direct the spray more accurately into the carburetor intake, preventing you from spraying the fluid all over the engine. If a straw is provided, insert it firmly into the nozzle before proceeding.
Step 6: Apply a Short Burst of Starter Fluid
This is the most critical step. Hold the can several inches away from the carburetor’s air intake opening. You are going to apply a very small amount of fluid. Press the nozzle for just one to two seconds—a short, quick burst is all you need. The goal is to introduce a small amount of flammable vapor into the engine, not to drench the carburetor in liquid. Using too much starter fluid can be counterproductive and even harmful. It can wash away the lubricating oil from the cylinder walls and piston rings, causing premature wear and potential engine damage. Moderation is key.
Step 7: Quickly Reinstall the Air Filter
Immediately after spraying the starter fluid, place the air filter back into its housing. You do not need to put the cover back on just yet. The purpose of replacing the filter is to prevent any potential backfire from shooting flames out of the carburetor intake. The filter acts as a flame arrestor, a crucial safety barrier. This step needs to be done quickly because the starter fluid begins to evaporate almost instantly. You want to attempt to start the engine while the vapors are still concentrated in the intake.
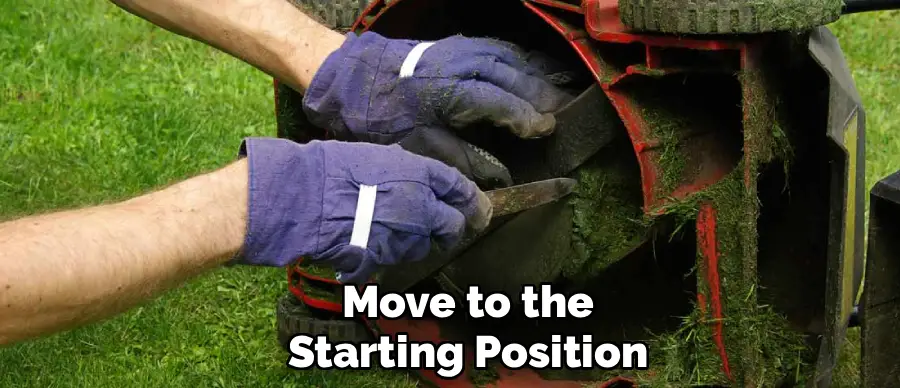
Step 8: Attempt to Start the Engine
With the air filter in place, move to the starting position. Make sure the mower’s safety features are engaged, such as the blade brake clutch or safety bar on the handle. Set the choke to the “off” or “run” position, as the starter fluid effectively replaces the function of the choke. Now, pull the recoil cord firmly or turn the ignition key. The engine should fire up almost immediately, possibly running roughly for a few seconds as it burns off the starter fluid before transitioning to pulling fuel from the tank.
Step 9: Let the Engine Run
If the engine starts successfully, let it run for at least 30 seconds to a minute. This allows it to warm up and stabilize. The engine may sputter or run unevenly at first, but this should smooth out as the regular fuel system takes over. If the engine starts but then dies after a few seconds, it is a strong indicator that you have a fuel delivery issue. This could be a clogged fuel filter, a blocked fuel line, or a problem with the carburetor. In this case, the starter fluid has done its job by helping you diagnose the problem.
Step 10: Secure the Air Filter Cover
Once the engine is running smoothly, you can shut it off. Now, take the time to properly secure the air filter cover. Place the cover back over the air filter and fasten it with the screws or clips you removed earlier. Ensure it is snug and secure to prevent dirt and debris from entering the engine while you mow. Do not operate the mower for an extended period without the air filter cover in place.
5 Things You Should Avoid
- Do Not Overuse It: Never spray more than a one- to two-second burst. Excessive use can damage internal engine components by stripping away necessary lubrication.
- Avoid Using on a Hot Engine: This is a serious fire hazard. Always let the engine cool down completely before application.
- Don’t Spray Without the Air Filter: After spraying, quickly replace the air filter before starting. It acts as a flame arrestor in case of a backfire.
- Never Use Near an Open Flame: Starter fluid is extremely flammable. Ensure you are in a well-ventilated area away from any sources of ignition.
- Don’t Use as a Long-Term Solution: Starter fluid is a starting aid, not a fix for an underlying problem. If your mower consistently requires it to start, it’s time to investigate and repair the root cause.
Conclusion
How to use starter fluid on lawn mower can be a quick and effective way to get a reluctant lawn mower running. By following the proper steps and prioritizing safety, you can save yourself the time and frustration of a non-starting engine.
Remember to move your mower to a safe area, work on a cool engine, and use only a small amount of fluid. If you find yourself relying on starter fluid every time you mow, take it as a sign that your mower needs a tune-up to address the underlying issue.
With a little care, you can keep your mower starting easily and your lawn looking great.
About
Outdoor Fixes is a distinguished figure in the world of Diy design, with a decade of expertise creating innovative and sustainable Diy solutions.
His professional focus lies in merging traditional craftsmanship with modern manufacturing techniques,
fostering designs that are both practical and environmentally conscious. As the author of diy,
outdoorfixes delves into the art and science of outdoorfixes-making, inspiring artisans and industry professionals alike.
Education RMIT University
(Melbourne, Australia) Associate Degree in Design (Outdoor Fixes) Focus on sustainable design, industry-driven projects,
and practical craftsmanship. Gained hands-on experience with traditional and digital manufacturing tools, such as CAD and CNC software.
Nottingham Trent University
(United Kingdom) Bachelor’s in outdoorfixes.com and Product Design (Honors) Specialized in product design with a focus on blending creativity with production
techniques. Participated in industry projects, working with companies like John Lewis and Vitsoe to gain real-world insights.
Publications and Impact
In diy, Outdoor Fixes his insights on indoor design processes, materials, and strategies for efficient production.
His writing bridges the gap between artisan knowledge and modern industry needs, making it a must-read for both budding designers and seasoned professionals.