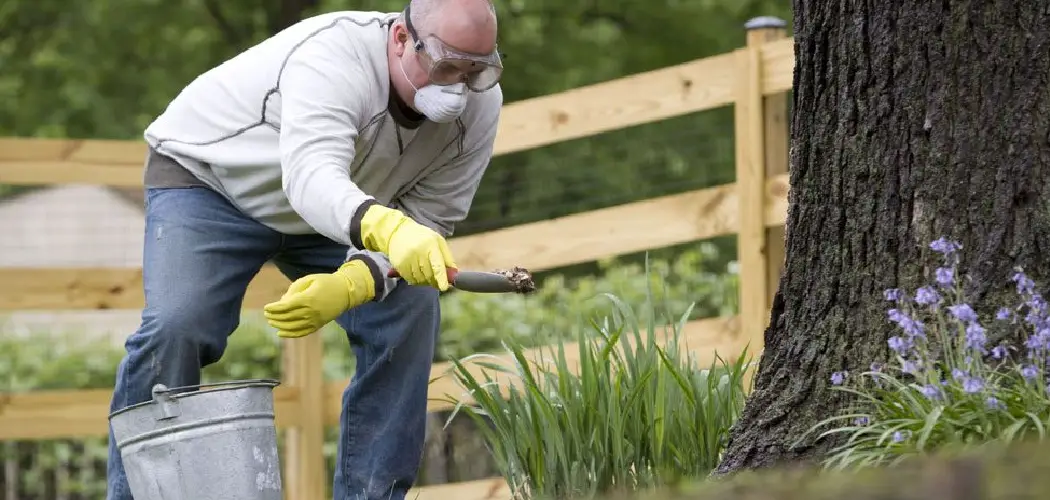
Planting a new tree is an investment in the future of your landscape, but the first two years are critical for survival. The number one reason young saplings fail to establish themselves is improper watering. Shallow sprinkling encourages weak surface roots, while neglecting them during dry spells leads to transplant shock.

This is where slow-release irrigation tools become a game-changer for homeowners. These clever devices deliver water deep into the root zone over several hours, ensuring that every drop is absorbed efficiently without runoff or evaporation. They take the guesswork and the daily labor out of tree care.
Whether you have just planted a single maple in your front yard or an entire orchard of fruit trees, learning how to use tree watering bags properly can mean the difference between a struggling stick and a flourishing canopy. This guide will walk you through the simple process of selecting, installing, and maintaining these bags to give your trees the strong start they deserve.
Alternative Watering Methods
While tree watering bags are highly effective, there are several alternative methods to keep your trees hydrated. One common approach is the use of soaker hoses, which can be laid around the base of the tree to provide a slow and steady supply of water.
These hoses are particularly useful for larger trees or gardens with multiple plants, as they allow for even distribution without over-saturating the soil. Another option is deep root watering, which involves using a specialized wand or spike to deliver water directly to the roots, encouraging deeper growth and reducing surface runoff.
Lastly, traditional hand watering can also be effective if done consistently, ensuring the soil absorbs water deeply rather than creating shallow moisture that quickly evaporates. Each method has its own advantages depending on the specific needs of your trees and the environment they’re growing in.
Step-by-Step Guide on How to Use Tree Watering Bags
Step 1: Select the Correct Size and Style
Before you head to the garden center, you need to assess the specific needs of your trees. Tree watering bags generally come in two main styles: the upright bag that zips around the trunk and the donut-shaped ring that sits flat on the ground.
The upright style is ideal for deciduous trees with a clear trunk and branches that start higher up, while the donut style is perfect for low-branching evergreens or shrubs where a tall bag won’t fit. You should also consider the caliper, or diameter, of the tree trunk.
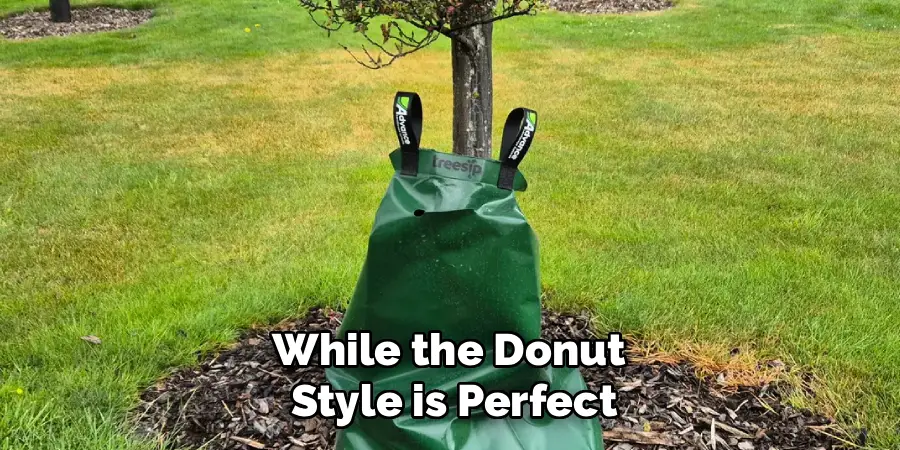
Most standard bags are designed for trunks up to three or four inches in diameter. If you have a larger tree, you may need to purchase two bags and zip them together to increase the capacity and circumference. Choosing the right style ensures the water is delivered exactly where the root ball needs it most.
Step 2: Prepare the Area Around the Trunk
Proper preparation of the ground is essential for the bag to function correctly and drain efficiently. Clear away any tall grass, weeds, or sharp debris from the base of the tree. If the ground is uneven or covered in heavy mulch, level it out slightly so the bag can sit flat and stable.
While mulch is beneficial for retaining moisture, you want the bag to have a relatively direct path to the soil. If you are using a donut-style ring, ensure the ground is level enough that the water won’t just run off to one side.
Taking a moment to clear a clean, flat surface prevents the bag from tipping over as it empties and ensures that the water penetrates vertically down into the root system rather than pooling on the surface.
Step 3: Wrap and Secure the Bag Properly
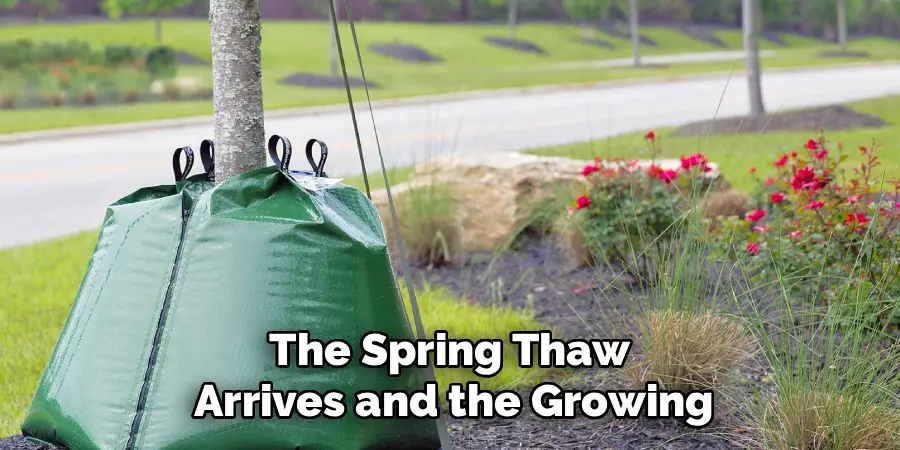
For the upright style bag, wrap the bag around the tree trunk with the zippers facing outward. Bring the two sides together and engage the zipper at the bottom, pulling it upwards to lock the bag around the tree. It is crucial that the bag stands tall and does not slouch excessively. Most models have robust nylon loops at the top.
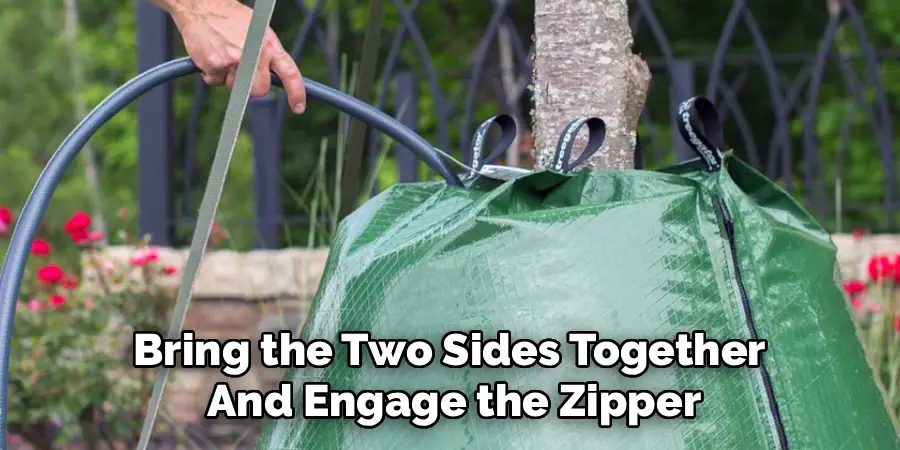
This is a vital feature for proper setup. You must not skip this part because if the bag slumps, it won’t hold the full capacity of water. If you are learning how to use tree watering bags for larger trees, this is the moment where you would zip two separate bags together to create a larger double-bag cylinder around the wider trunk.
Step 4: Fill to Quarter Capacity
Do not fill the bag to the brim immediately. Instead, insert your garden hose into the fill opening at the top of the bag and turn the water on. Fill the bag only about one-fourth of the way full. Now, stop the water and gently lift up on the two black straps or nylon loops at the top of the bag.
This action adjusts the bag’s position, ensuring the bottom expands fully and the bag stands upright and centered around the trunk. If you skip this adjustment, the bag may lean to one side, causing uneven watering or putting unnecessary pressure on the young bark.
This quick “lift and settle” move is the professional trick to ensuring stability during the slow release process.
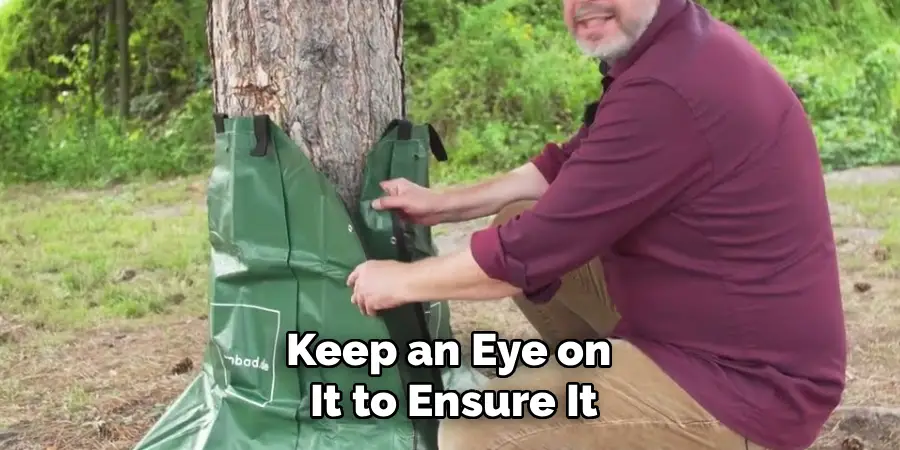
Step 5: Fill to the Top and Secure the Lid
Once the bag is seated correctly and stable, continue filling it with water until it reaches the fill line or the top of the bag. As it fills, the bag will become heavy and rigid. Keep an eye on it to ensure it remains balanced. Once full, remove the hose.
Some models come with a small fill cap or flap that you can close to prevent debris or mosquitoes from entering the reservoir, though many are designed to remain open.
At this point, double-check that the zippers are secure and that the weight of the water is resting on the ground, not hanging from the tree branches or leaning heavily against a sapling that might not be strong enough to support it without staking.
Step 6: Establish a Refill Schedule
The beauty of these bags is that they are designed to empty slowly over a period of five to nine hours. However, they are not a “set it and forget it for the whole summer” solution. You generally need to refill the bag once or twice a week, depending on your local weather conditions and soil type. In extreme heat or drought, you may need to increase the frequency. Check the soil moisture under the bag periodically by sticking your finger into the dirt. If it is soggy, wait a few days before refilling. If it is dry, it is time to water again. This consistent deep watering promotes deep root growth, which is far superior to daily shallow watering.

Step 7: Remove and Store During Winter
Tree watering bags are designed for the growing season, not for year-round permanence. Leaving them on the tree during the winter can be detrimental. The wet environment between the plastic and the bark can encourage rot or harbor pests and fungi that damage the tree. Furthermore, water freezing inside the bag can damage the release emitters and rip the plastic seams. Once the ground freezes or the trees go dormant in late autumn, remove the bags. Clean them out to remove any algae or sediment build-up, let them dry completely, and fold them for storage. Proper storage ensures your equipment lasts for years, ready to be deployed again when the spring thaw arrives and the growing season begins anew.
Frequently Asked Questions
Can I Add Fertilizer to the Watering Bag?
Yes, you can add water-soluble fertilizer to the bag. This is actually a very efficient way to feed your tree.
- Dissolve First: Premix the fertilizer in a bucket of water before pouring it into the bag to prevent clogging the drip holes.
- Follow Rates: Use the recommended dosage for the size of your tree to avoid “burning” the roots.
- Timing: Only fertilize during the active growing season, usually spring and early summer.
Why Is My Bag Not Emptying?
If the bag remains full after 24 hours, the small drip holes at the bottom may be clogged.
- Check Debris: Dirt or algae can block the emitters.
- Clean It: Remove the bag and wash the interior with warm soapy water. You can gently poke a small pin through the emitter holes to clear blockages.
- Soil Type: Sometimes, heavy clay soil drains so slowly that it prevents the bag from releasing water. In this case, move the bag slightly or aerate the soil.
Do I Need to Remove the Bag Between Waterings?
It is highly recommended to remove the bag or at least unzip it periodically to let the trunk breathe.
- Bark Health: Constant moisture against the trunk can cause the bark to rot.
- Pest Prevention: Earwigs and slugs love the cool, dark space behind the bag.
- Airflow: Moving the bag slightly allows the trunk to dry out and harden off properly.
How Many Gallons Does a Tree Watering Bag Hold?
Most standard upright tree watering bags hold between 15 and 20 gallons of water.
- Drip Time: This volume typically releases over 5 to 9 hours.
- Double Bags: Zipping two bags together doubles the capacity to roughly 30-40 gallons, which is excellent for larger trees (4-8 inch caliper).
- Donut Bags: Low-profile donut bags usually hold slightly less, around 15 gallons.
Can Using Watering Bags Cause Root Rot?
Watering bags actually help prevent root rot compared to improper manual watering, provided you let the soil dry out between fills. Root rot occurs when roots sit in stagnant water without oxygen.
- Deep Watering: The slow drip encourages water to go deep, not sit on top.
- Frequency: The danger comes from refilling the bag every single day. Stick to a weekly or bi-weekly schedule to allow the soil to breathe.
Conclusion
Caring for young trees doesn’t have to be a daily chore filled with hauling buckets or standing around with a hose. By utilizing slow-release watering bags, you ensure that your saplings receive the deep, consistent hydration they need to establish strong root systems capable of weathering future droughts. The process is simple: fit the bag correctly, fill it carefully, and maintain a consistent schedule. Remember that these tools are aids for the active growing season and should be removed in winter to protect the tree’s long-term health. Now that you understand how to use tree watering bags effectively, you can look forward to watching your new plantings grow into majestic, shade-providing fixtures of your landscape with minimal stress and effort.
About
Outdoor Fixes is a distinguished figure in the world of Diy design, with a decade of expertise creating innovative and sustainable Diy solutions.
His professional focus lies in merging traditional craftsmanship with modern manufacturing techniques,
fostering designs that are both practical and environmentally conscious. As the author of diy,
outdoorfixes delves into the art and science of outdoorfixes-making, inspiring artisans and industry professionals alike.
Education RMIT University
(Melbourne, Australia) Associate Degree in Design (Outdoor Fixes) Focus on sustainable design, industry-driven projects,
and practical craftsmanship. Gained hands-on experience with traditional and digital manufacturing tools, such as CAD and CNC software.
Nottingham Trent University
(United Kingdom) Bachelor’s in outdoorfixes.com and Product Design (Honors) Specialized in product design with a focus on blending creativity with production
techniques. Participated in industry projects, working with companies like John Lewis and Vitsoe to gain real-world insights.
Publications and Impact
In diy, Outdoor Fixes his insights on indoor design processes, materials, and strategies for efficient production.
His writing bridges the gap between artisan knowledge and modern industry needs, making it a must-read for both budding designers and seasoned professionals.