Are you tired of the same old look of your wrought iron fence? Adding some wood to it can give a new and unique touch, making it stand out from other fences in your neighborhood.
Adding a touch of natural beauty to your outdoor space can be achieved in many different ways, and adding wood to a wrought iron fence is one of them. It will lend an elegant look to the fence itself and a visually pleasing way to add some plant life and texture into the mix.

This DIY project is surprisingly straightforward when you break down each step, so if you want to change up your fencing with this unique style, then keep on reading about how to add wood to wrought iron fence!
What Will You Need
- Wood boards of your choice (cedar, pine, redwood)
- Drill and screws
- Measuring tape
- Saw (hand saw or electric)
- A helper (optional but recommended)
Once you have all your materials, it’s time to start the fun part – the installation process!
10 Easy Steps on How to Add Wood to Wrought Iron Fence
Step 1: Measure and Cut the Wood
The first step is to measure and cut the wood boards to fit in between each wrought iron panel. The width of these boards will depend on the distance between each panel, so be sure to measure carefully. Use a saw (hand or electric) to cut the boards according to your measurements.
Step 2: Pre-drill the Holes
After cutting the wood boards to the required size, the next step is pre-drilling the holes. This process is essential to prevent the wood from splitting when you insert the screws.
Carefully align the wood so it fits neatly between the wrought iron panels. Using your drill, make holes at appropriate intervals where you will later insert the screws. Ensure the holes align with the wrought iron to ensure secure fitting.
Step 3: Attach the Wood to the Fence
Now that your boards are measured, cut, and pre-drilled, the next step is to attach them to the wrought iron fence. With the help of a helper, hold the wood boards in place between the wrought iron panels. Remember to align the pre-drilled holes with the wrought iron bars.

Using your drill again, insert screws through the holes and into the iron fence. Be sure to tighten the screws securely, ensuring the wood boards are firmly attached to the fence. Repeat this process until all the wood boards are installed. Voila! You’ve successfully added wood to your wrought iron fence.
Step 4: Seal the Wood
The next step is to seal the wood to ensure your wooden additions last and withstand the elements. Apply a coat of wood sealant evenly across the surface of the wood using a brush. Make sure you cover all sides of the wood to protect it from moisture and insects fully.
Allow the sealant to dry completely for the time specified on the product’s container. This crucial step will help maintain your fence’s aesthetic appeal, prolong the wood’s lifespan, and reduce maintenance needs.
Step 5: Maintain Your Fence
Regular maintenance is key to keep your newly upgraded fence looking its best and lasting as long as possible. Over time, the wood may require a fresh coat of sealant or paint to ensure it stays protected from the elements.
Keep a close eye on the screws as well, tightening any that become loose due to weather conditions or daily wear and tear. With the right care and attention, your wooden additions to the wrought iron fence can stay stylish and sturdy for years to come.
Step 6: Enjoy Your Fence
Finally, after all the hard work, care, and attention, it’s time to enjoy your fence! The addition of wood to your wrought iron fence not only enhances its aesthetic appeal but also adds a touch of personal flair to your outdoor space.
Whether you paint the wood for an extra pop of color or leave it natural to blend with the surrounding landscape, your new fence will surely be the envy of the neighborhood. Remember, the key to a long-lasting and beautiful fence is regular maintenance and care, so don’t forget to periodically check the condition of the wood and the tightness of the screws.
Step 7: Personalize Your Fence
Once your wooden additions to the wrought iron fence are securely in place, you can consider personalizing it further. This could be by painting creative designs, adding hanging planters, or installing outdoor lighting fixtures.
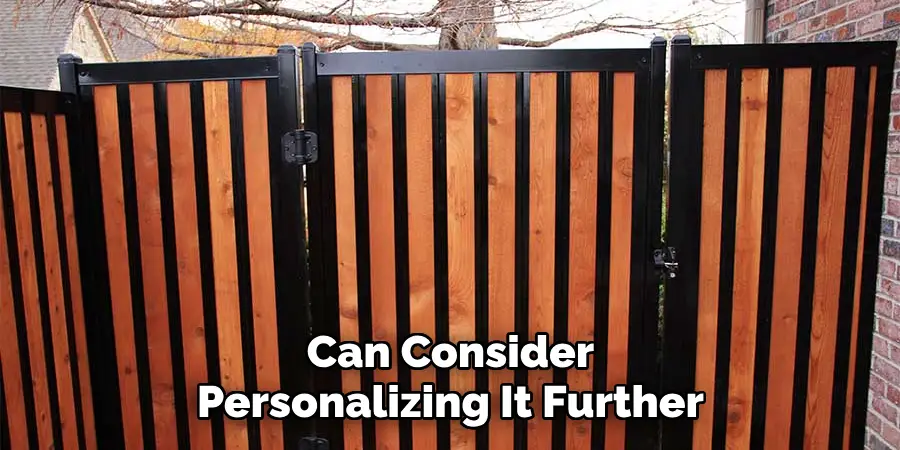
The choices are endless and can be customized to reflect your style and preference. This personal touch not only enhances the look of your fence but also adds to the overall appeal of your outdoor space. Remember, the key is to use weather-resistant materials for any additional decorations to ensure they last as long as your fence does.
Step 8: Regular Inspections
Remember, prevention is better than cure, so implement a regular inspection schedule for your fence. Check the wood boards for any signs of rot or insect damage, as these can compromise the integrity of your fence over time. Also, monitor the screws and wrought iron condition for any signs of rust or loose fittings. If any issues are spotted, it’s best to address them immediately to prevent further damage.
Step 9: Routine Cleaning
Maintaining cleanliness is another important aspect of fence maintenance. Regularly clean the wood boards with a soft, damp cloth to remove any dust or dirt that may have accumulated. Use a mild soap solution for harder-to-remove substances, such as bird droppings or stubborn stains. Rinse thoroughly after cleaning to prevent soap residue from damaging the wood’s surface. For the wrought iron parts, consider using a rust remover and a small brush to clean off any spots of rust that may occur over time.
Step 10: Celebrate Your Success
Congratulations! You’ve successfully added wood to your wrought iron fence. Take a moment to step back and admire your handiwork. Not only have you upgraded the aesthetic appeal of your fence, but you’ve also added a personal touch that reflects your style. It’s more than just a fence now; it’s a testament to your creativity and handy skills.
But remember, the journey doesn’t end here. Commit to the regular upkeep of your fence to ensure it continues to stand strong and beautiful for many years to come.

By following these steps, you now have the knowledge and ability to add wood to your wrought iron fence.
5 Additional Tips and Tricks
- Choose the Right Wood: Opt for a type of wood that is resistant to rot and pests and that complements the color and style of your wrought iron fence. Popular choices include cedar, redwood, and teak.
- Preparation is Key: Ensure your wrought iron fence is clean and rust-free before attaching the wood. This will help to improve the longevity and appearance of the combined fence.
- Secure Attachments: Use sturdy brackets, clamps, or ties to attach the wood to the iron fence securely. Ensuring that the wood panels are firmly held in place is crucial.
- Regular Maintenance: Regularly check the condition of the wood, looking for signs of rot or damage. Replace any damaged sections promptly to maintain the fence’s integrity.
- Seal for Protection: Apply a sealant to the wood to protect it against weather damage. This step will significantly lengthen the lifespan of the wood, keeping it looking fresh and new for years to come.
With these additional tips and tricks, you can confidently add wood to your wrought iron fence.
5 Things You Should Avoid
- Avoid Using Non-Durable Wood: Non-durable wood types may be cheaper, but they’ll quickly degrade and compromise your fence’s overall aesthetic and structural integrity.
- Neglecting Regular Maintenance: Pay attention to regular examinations and maintenance of your fence. Ignorance may lead to severe damage over time.
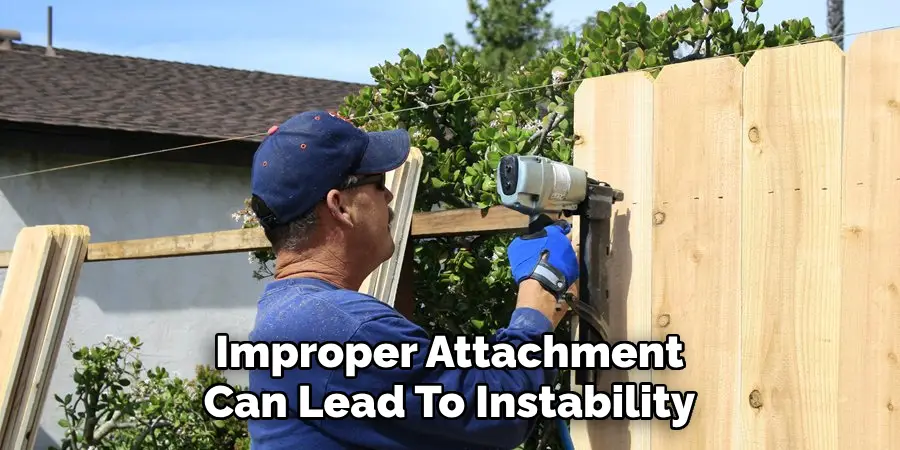
- Improper Attachment: Avoid attaching the wood panels to the iron fence without the proper tools and equipment. Improper attachment can lead to instability and potential injury.
- Ignoring Weather Conditions: Remember to consider the weather conditions in your area. In areas with harsh weather, applying a weather-resistant finish to the wood is necessary.
- Skipping the Sealant: Be sure to apply a sealant to your wood. This step is crucial to protect the wood from moisture, sunlight, and pests, ensuring its longevity.
By taking care to avoid these common mistakes, you’ll ensure your mixed-material fence remains strong, attractive, and durable for many years.
Conclusion
In conclusion, how to add wood to wrought iron fence is a great way to enhance the beauty and character of your home. The installation process is quite straightforward to do. Remember that the wood you choose must be protected from weathering, or it will degrade over time. You should also ensure that all support screws are sufficiently tight so the wood does not slip out of place.
Furthermore, make sure that the wood paneling lines up properly with the design of the iron fence for a seamless transition. You can design a beautiful wooden and iron fence with creativity to suit your unique style!
Hopefully, the article has provided you with valuable information and tips on successfully combining these two materials. Remember to choose quality materials, perform proper maintenance, and avoid common mistakes for a long-lasting, visually appealing fence. Happy fencing!
About
Outdoor Fixes is a distinguished figure in the world of Diy design, with a decade of expertise creating innovative and sustainable Diy solutions.
His professional focus lies in merging traditional craftsmanship with modern manufacturing techniques,
fostering designs that are both practical and environmentally conscious. As the author of diy,
outdoorfixes delves into the art and science of outdoorfixes-making, inspiring artisans and industry professionals alike.
Education RMIT University
(Melbourne, Australia) Associate Degree in Design (Outdoor Fixes) Focus on sustainable design, industry-driven projects,
and practical craftsmanship. Gained hands-on experience with traditional and digital manufacturing tools, such as CAD and CNC software.
Nottingham Trent University
(United Kingdom) Bachelor’s in outdoorfixes.com and Product Design (Honors) Specialized in product design with a focus on blending creativity with production
techniques. Participated in industry projects, working with companies like John Lewis and Vitsoe to gain real-world insights.
Publications and Impact
In diy, Outdoor Fixes his insights on indoor design processes, materials, and strategies for efficient production.
His writing bridges the gap between artisan knowledge and modern industry needs, making it a must-read for both budding designers and seasoned professionals.