Do you own a fence that has seen better days? Are there gaps in between the boards that give your fence an unkempt look? Well, don’t worry – all hope is not lost. With just a few simple supplies and tools, you can take matters into your own hands to repair and restore your beloved fence!
Gaps can happen in between fence boards for many reasons. Extreme weather conditions, wood shrinkage, or even vandalism can cause gaps to occur. But no matter the cause, we’ve got you covered with this comprehensive guide on how to fill gaps between fence boards.

Don’t worry; this process is relatively easy and can be done in no time.
Read on to learn more about how you can easily fill those pesky gaps for good so your fence looks as good as new.
What Will You Need
Before we start, let’s look at what you’ll need for this project.
- A screwdriver or drill
- Screws
- Sandpaper
- Paintbrushes
- Exterior paint or wood stain (optional)
- Wood putty or caulk
Once you have all these supplies ready, let’s dive into the process of filling those pesky
gaps!
10 Easy Steps on How to Fill Gaps Between Fence Boards
Step 1: Remove Loose Boards
The first step is removing loose or damaged boards from your fence. This will allow you to work more easily and effectively when filling in the gaps later on. Use a screwdriver or drill to remove any screws or nails holding the damaged boards in place.
Step 2: Clean the Space Between the Boards
After removing any damaged or loose boards, the next step involves cleaning the space between the boards. Use a putty knife or a similar tool to scrape away any accumulated dirt or debris.
This ensures the filler material adheres properly to the wood. If there’s stubborn dirt, a brush or hose can be used to thoroughly clean the area. Let the fence dry completely before moving on to the next step.
Step 3: Apply Wood Filler
Once the fence is dry, it’s time to fill in the gaps. Choose a wood putty or filler that matches the color of your fence for the best results. Using a putty knife, apply the wood filler into the gaps. Be sure to press it in firmly, filling the entire gap. Smooth out the excess with the blade of your knife so it’s flush with the surface of the wood. Allow it to dry as per the instructions on the packaging.

Step 4: Sand the Filled Areas
After the wood filler has dried completely, the next step is to sand the filled areas. Take a piece of sandpaper and gently smooth over the areas where the wood filler has been applied.
This helps to create a smooth, flush surface that blends seamlessly with the rest of the fence. Be careful not to over-sand, as this could remove too much filler and reopen the gap. Wipe away any dust or debris with a clean cloth.
Step 5: Paint or Stain the Fence
Once you have smoothed out the filled areas, it’s time to paint or stain the fence for a fresh, revitalized look. If the rest of your fence is already stained or painted, match the color as closely as possible for a seamless look.
Use a paintbrush to apply the paint or stain over the entire fence, including the filled gaps. This enhances the aesthetic appeal of your fence and adds an extra layer of protection against the elements. Allow the paint or stain to dry as per the instructions on the can.
Step 6: Check Your Work
Once the paint or stain is completely dry, step back and inspect your work. Check if the filled gaps blend seamlessly with the rest of the fence and whether the color of the filler matches that of the fence.
If there are still noticeable gaps or the filler doesn’t match the fence color, you may need to reapply the filler or add another coat of paint or stain. Remember, the goal is not only to fill the gaps but also to enhance the overall appearance of the fence.
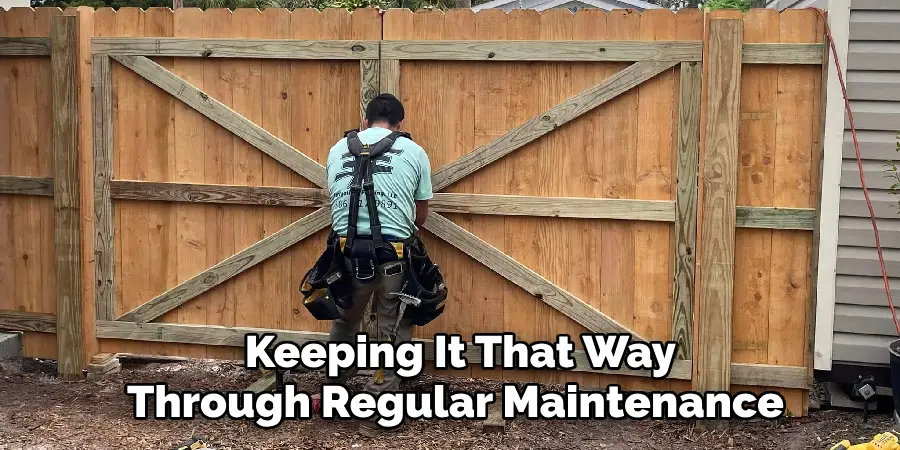
Step 7: Regular Maintenance
Now that your fence is as good as new, keeping it that way through regular maintenance is crucial. Check your fence periodically for signs of damage or new gaps. Address any issues as they arise to prevent them from becoming bigger problems.
Regularly cleaning your fence and applying a fresh coat of paint or stain once a year can also help to keep it in the best possible condition and prolong its lifespan. Remember, maintaining a fence is much easier and less time-consuming than repairing one!
Step 8: Seasonal Precautions
As each season brings about different weather conditions, taking certain precautions to protect your fence is important. In the rainy season, ensure that your fence is properly sealed to prevent water damage. During the summer, consider installing a sun-protective finish to guard against the harmful effects of the sun’s rays.
In winter, clear off heavy snow accumulation to prevent the fence from sagging or breaking due to the weight. Staying proactive with seasonal precautions will help maintain the longevity of your fence.
Step 9: Dealing With Future Gaps
Despite best efforts, fence boards can still develop gaps over time due to factors beyond control, like weather conditions or pests. It is essential to address these gaps promptly to prevent them from becoming larger and more difficult to fix.
Ensure a fence repair kit is handy with essential supplies like wood filler, paint or stain, and sandpaper. Regular inspection of your fence, particularly after extreme weather events, will allow you to swiftly identify and rectify any new gaps, maintaining the aesthetics and integrity of your fence.
Step 10: Seek Professional Help if Required
If gaps continue to appear on your fence despite your best efforts or the damage is too extensive to handle, don’t hesitate to call professional help. A skilled carpenter or handyman will have the knowledge and tools to restore your fence to its original condition. Remember, it’s okay to seek assistance when needed; preserving the quality and durability of your fence is worth the investment.
By following these ten easy steps, you can easily fill gaps between fence boards and maintain the beauty and integrity of your fence for years to come. Whether it’s a small or a larger gap, regularly inspecting and addressing any issues promptly will save you time, effort, and money in the long run.

5 Additional Tips and Tricks
- Choose the Right Materials: When filling gaps between fence boards; it is crucial to select materials that match your fence’s life expectancy and weather resistance. This can range from using a similar wood type to opting for an outdoor-friendly filler.
- Proper Measurement: To fill the fence gaps efficiently, measure them accurately. The gap’s width, depth, and height will determine the amount of filler or replacement board you need.
- Preparation is Key: Clean and dry the area around the gap before applying the filler. This will ensure a clean adhesion and prevent moisture from causing further damage.
- Aesthetic Consideration: If you’re using filler, try to match it to the color of your fence. This will help maintain a uniform appearance and make the repair less noticeable.
- Regular Maintenance: Periodically check your fence for gaps. Regular maintenance can prevent small gaps from becoming larger issues. Making minor repairs as soon as gaps are noticed will prolong the life of your fence.
With these additional tips and tricks, you can effectively fill gaps between fence boards and keep your fence looking its best.
5 Things You Should Avoid
- Avoid Ignoring Small Gaps: Small gaps can grow into larger issues if ignored. Pay attention to them; instead, make prompt repairs to maintain the integrity of your fence.
- Avoid Using Incompatible Materials: Ensure that the filler or replacement board you’re using is compatible with your existing fence material. Using incompatible materials can shorten the life of your fence and lead to further damage.
- Avoid Quick Fixes: Temporary solutions may seem appealing due to their ease and speed, but they could exacerbate the problem in the long run. Always opt for a permanent solution when repairing fence gaps.
- Avoid Neglecting Weather Considerations: Be mindful of weather conditions when planning your repairs. Applying filler during damp or wet conditions can lead to better adhesion and effective repairs.
- Avoid Inadequate Preparation: Failing to clean and dry the area before applying filler can result in ineffective adhesion and possible damage from trapped moisture. Always take the time to prepare the area for repair properly.
Avoiding these common pitfalls will help ensure the longevity and aesthetics of your fence. Proper materials, measurement, preparation, and maintenance allow you to easily fill gaps between fence boards and keep your fence in top condition.

Conclusion
With a few simple tools and creativity, you can quickly fill gaps between fence boards to add beauty and security to your outdoor space. Just be sure to consider the material of your fence, the maintenance each solution requires, and how you want your backyard to look.
No matter what option you choose, there’s guaranteed to be something that fits well with your home’s aesthetic and meets all of your requirements (ease of maintenance, weatherproofing, budget). Consider all aspects mentioned here before deciding which solution to use, and you’ll surely have a beautiful fence for years!
Plus, all options come with the satisfaction of being able to DIY – what could be better than that? Now that you know the different ways on how to fill gaps between fence boards, go out and give your fence the TLC it deserves.
About
Outdoor Fixes is a distinguished figure in the world of Diy design, with a decade of expertise creating innovative and sustainable Diy solutions.
His professional focus lies in merging traditional craftsmanship with modern manufacturing techniques,
fostering designs that are both practical and environmentally conscious. As the author of diy,
outdoorfixes delves into the art and science of outdoorfixes-making, inspiring artisans and industry professionals alike.
Education RMIT University
(Melbourne, Australia) Associate Degree in Design (Outdoor Fixes) Focus on sustainable design, industry-driven projects,
and practical craftsmanship. Gained hands-on experience with traditional and digital manufacturing tools, such as CAD and CNC software.
Nottingham Trent University
(United Kingdom) Bachelor’s in outdoorfixes.com and Product Design (Honors) Specialized in product design with a focus on blending creativity with production
techniques. Participated in industry projects, working with companies like John Lewis and Vitsoe to gain real-world insights.
Publications and Impact
In diy, Outdoor Fixes his insights on indoor design processes, materials, and strategies for efficient production.
His writing bridges the gap between artisan knowledge and modern industry needs, making it a must-read for both budding designers and seasoned professionals.