
Having a patio windbreak is the perfect way to create an outdoor space that’s both comfortable and inviting. It can provide coverage from gusts of cool air, creating a pleasant spot for barbecues and gatherings with family and friends. Whether you want to DIY your own or use pre-made panels and materials, there are plenty of options available for creating the perfect patio windbreak.
In this post, we’ll discuss all the basics when it comes to building effective patio windbreaks: from choosing materials and understanding local planning regulations and installation instructions to some creative ideas for designs you can consider implementing in your own backyard. Get ready – let’s get started on how to build a patio windbreak.
Things to Remember Before Starting
Before you start, it’s important to remember a few things.
- First, always check the local planning regulations in your area before starting any building project. In some places, windbreaks may require specific construction techniques or additional permits.
- Second, know the exact measurements of your patio area so you can build an effective windbreak that fits perfectly with the space.
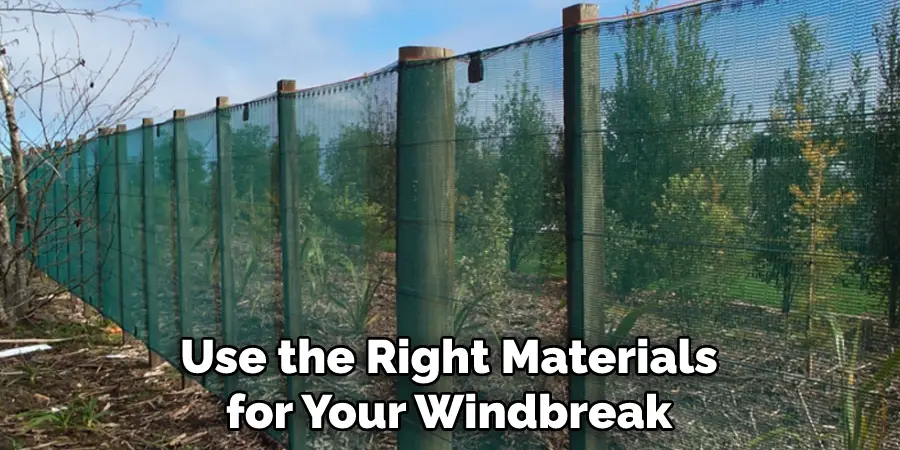
- Finally, be sure to use the right materials for your windbreak project. A combination of strong boards and posts will provide the most protection from strong winds and also ensure your patio is aesthetically pleasing.
Now that you’ve got these key points in mind let’s move on to building a patio windbreak.
Needed Tools and Supplies
Before you start building your patio windbreak, be sure to gather the necessary tools and supplies. These includes:
- Hammer
- Nails
- Circular saw
- Protective goggles
- Drill with compatible drill bits
- Posts (wooden or metal)
- Boards (wooden or metal)
- Cement or concrete mix
5 Tips for Choosing the Right Materials for your Patio Windbreak
1. Choose materials that are strong and durable enough to withstand wind, rain, and extreme weather conditions. It is important to select materials that will last for a long time and provide adequate protection.
2. Consider the aesthetic of the windbreak, especially if it is visible to your neighbors or passersby. Choose materials that complement your patio and home’s design.
3. Select materials that are easy to work with and require minimal maintenance over time. It will help you save time and money in the long run.
4. Consider the cost of materials, as some may be more expensive than others. Determine your budget beforehand so that you can make an informed decision.
5. Make sure to follow local regulations when selecting materials for your windbreak, as they may require specific types or sizes of materials. Following these tips will help you find the right materials for your patio windbreak and ensure that it is both beautiful and protective.
10 Steps on How to Build a Patio Windbreak
Step 1: Decide
Decide on the type of windbreak you want to build. How will it look? How high do you want it to be? How wide should it be? All these questions need to be answered before you start building. These will help you determine the type of materials you should buy and how many supplies you’ll need to complete your project.
Step 2: Measure
Measure the dimensions of your patio area so that you can get the proper measurements for your windbreak. Make sure to account for any posts or boards that will be set in cement, as these will also affect the overall size of the windbreak.
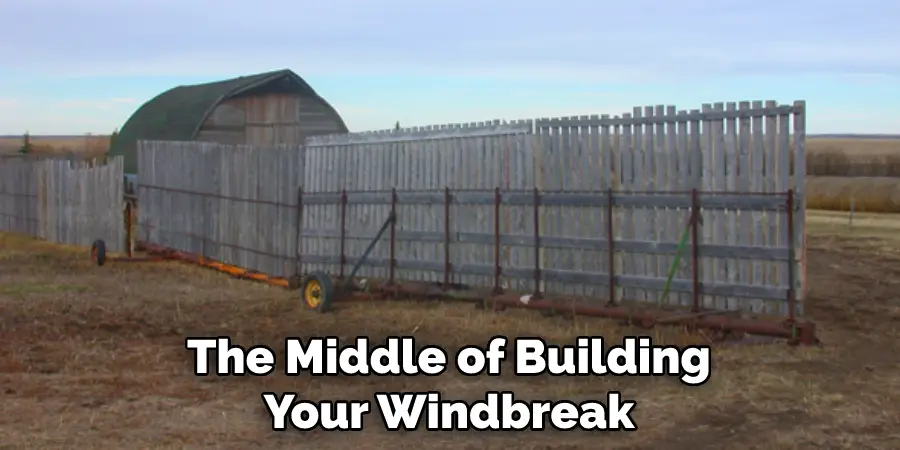
Step 3: Buy Materials
Once you have determined the measurements and materials needed, head to your local hardware store or online store to make your purchases. Be sure to buy enough supplies so that you don’t run out in the middle of building your windbreak.
Step 4: Prepare Posts
The posts will form the foundation of your windbreak. If you’re using wooden posts, use a saw to cut them into shapes and sizes. Then use nails to attach them securely together. If you’re using metal posts, drill holes in them and secure them with bolts. Securing the bolts will ensure a strong foundation for your windbreak.
Step 5: Place Posts
Once the posts have been cut and secured, it’s time to place them in the ground. Make sure to dig deep enough so that they are firmly planted in the soil. You can also use cement or concrete mix, depending on the type of material you’re using.
Step 6: Attach Boards
Use nails or bolts to attach the boards to the posts. Make sure that each board is secured firmly and won’t move when subjected to strong winds. Attaching the boards at an angle is a good way to create additional stability for your windbreak.
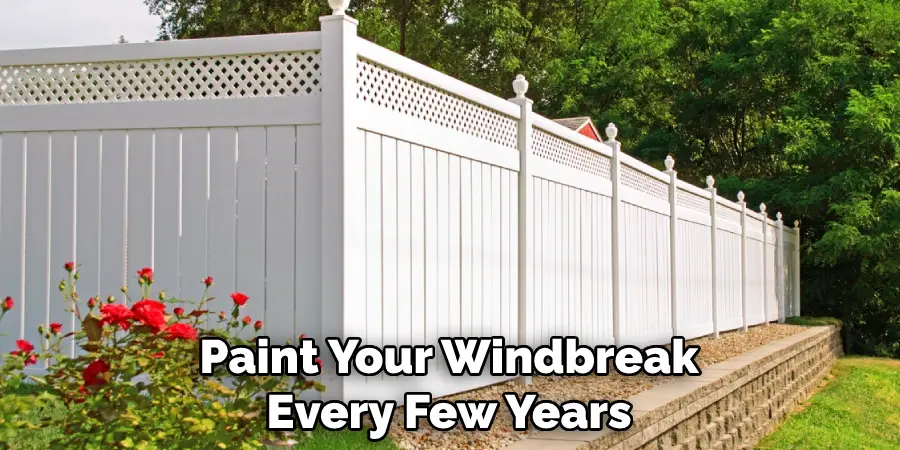
Step 7: Add Finishing Touches
Once the windbreak has been securely attached, it’s time to add the finishing touches. You can use stain or paint to give your windbreak a unique look and also protect it from the elements. You can also add decorations or other embellishments to make it stand out.
Step 8: Test It Out
Once you have constructed your windbreak, give it a test run to ensure that it is secure and stable. Check for any gaps between the boards and posts, as these can allow strong winds to penetrate your patio area. That’s why it’s important to ensure that all the boards and posts are firmly secured.
Step 9: Enjoy Your Patio
Now your patio windbreak is complete and ready for use! Enjoy your newly constructed patio windbreak and take comfort in knowing that you have created a strong barrier against winds, dust, and other elements.
Step 10: Maintain Your Patio Windbreak
Don’t forget to maintain your patio windbreak periodically. This includes checking for damages and making repairs when necessary. It’s also a good idea to stain or paint your windbreak every few years to ensure it stays looking great and remains in top condition.
8 Safety Precautions to Take
1. Read, understand, and follow all safety instructions included with the tools and supplies you are using. Reading the instruction will help ensure that you are using the tools and supplies correctly and safely.
2. Wear protective clothing, such as gloves, goggles, and a dust mask, when working on your windbreak to protect yourself from any debris or sharp objects.
3. Make sure you have a clear area to work in with plenty of room for moving around without tripping over anything.
4. Make sure that all power tools and machinery are unplugged before starting work to avoid any electric shock or other hazards.
5. Avoid using ladders as they can be dangerous if not used properly. If you need to use a ladder, make sure you have someone else with you at all times in case of an accident.
6. Ensure that all tools are in good working order and if you notice any damage or wear, replace them immediately to avoid potential hazards. Using any damaged tools could cause injuries.
7. Do not use any tools or supplies that are beyond your skill level, as this could result in serious accidents and injuries. You need to know how to use the tools and supplies correctly before starting work.
8. Most importantly, take regular breaks while working on your windbreak, as this can help reduce fatigue and improve concentration when you return to work. Taking these safety precautions will ensure that you build a safe patio windbreak that will last for many years.
5 Maintenance Tips for a Patio Windbreak
1. Regularly check the windbreak for any signs of damage or wear and tear, such as cracking, splintering, or loosened boards. Repair or replace any damaged components to ensure that your windbreak remains in good condition.
2. Check the joints and fixings regularly to make sure they are secure and tight. If necessary, re-tighten or replace any loose fixings.
3. Clean the windbreak regularly to remove dirt and debris from the boards, and apply a fresh coat of paint or stain as necessary to protect it from the elements.
4. Trim back any overhanging branches or plants from around the windbreak to prevent them from causing damage to it. It may cause the windbreak to become unstable.
5. Inspect the area around the windbreak for any signs of damage or wear, such as cracks in the patio or foundation. Repair any issues immediately to ensure that your windbreak remains stable and secure.
By following these simple tips, you can keep your patio windbreak in good condition and enjoy its benefits for many years to come.

Conclusion
If you’re looking for an affordable and easy way to add privacy and protection from the wind to your outdoor patio, a patio windbreak is the perfect solution. Building your own patio windbreak doesn’t have to be difficult; with the right materials, tools, and techniques, it’s easy to do it yourself.
Once you have all of the necessary components in place, constructing a sturdy and effective windbreak is relatively simple.
The additional benefits, such as increased comfort and an aesthetic edge, are just some of the reasons why installing a patio windbreak can be so worthwhile.
All in all, with these tips on how to build a patio windbreak, you’ll be able to enjoy spending time outdoors well into the cooler months. More importantly, with a protective barrier against powerful gusts of winds that can happen throughout the year, you can rest assured knowing your family and furniture will remain safe without having to spend too much time or energy doing so.
About
Outdoor Fixes is a distinguished figure in the world of Diy design, with a decade of expertise creating innovative and sustainable Diy solutions.
His professional focus lies in merging traditional craftsmanship with modern manufacturing techniques,
fostering designs that are both practical and environmentally conscious. As the author of diy,
outdoorfixes delves into the art and science of outdoorfixes-making, inspiring artisans and industry professionals alike.
Education RMIT University
(Melbourne, Australia) Associate Degree in Design (Outdoor Fixes) Focus on sustainable design, industry-driven projects,
and practical craftsmanship. Gained hands-on experience with traditional and digital manufacturing tools, such as CAD and CNC software.
Nottingham Trent University
(United Kingdom) Bachelor’s in outdoorfixes.com and Product Design (Honors) Specialized in product design with a focus on blending creativity with production
techniques. Participated in industry projects, working with companies like John Lewis and Vitsoe to gain real-world insights.
Publications and Impact
In diy, Outdoor Fixes his insights on indoor design processes, materials, and strategies for efficient production.
His writing bridges the gap between artisan knowledge and modern industry needs, making it a must-read for both budding designers and seasoned professionals.