
Are you looking for a unique way to bring comfort and relaxation to your outdoor space? Then consider making your own swing bed for the porch! With some basic building materials, a few tools, and the right steps on how to build a swing bed for porch, you can create an oasis in your backyard or on your patio.

Taking the time to make this piece of furniture yourself is incredibly rewarding too—there’s nothing quite like finishing up a project knowing that you did it all by yourself. If you’re ready to get started with building a beautiful swing bed of your very own, read on!
Needed Materials
Given Below Are the Materials You Will Need to Build a Swing Bed for the Porch:
- 2 X 4s (Amount Varies Depending on the Size of Your Project)
- Plywood Sheets (Same Amount as 2 X 4s, Plus Any Additional Needed for Seat Cushions, Etc.)
- Lumber Screws and Nails
- Paint or Stain (Depending on Your Preference)
- Upholstery Fabric and Foam (if Cushions Are Desired)
Needed Tools
Before you can begin building your swing bed, you will need to make sure that you have the proper tools. Here is a list of items that you should have on hand for this project:
- Hammer
- Drill and drill bits
- Circular saw
- Screwdriver
- Measuring tape
- Level
- Sandpaper
11 Step-by-step Guidelines on How to Build a Swing Bed for Porch
Step 1: Gather Your Materials
Check that you have all of the necessary materials and tools on hand before you start building your swing bed. It’s always better to be prepared in advance! This will save you time and help ensure that your project is a success. You may also need additional items, such as upholstery fabric and foam for seat cushions, depending on your project.
Step 2: Measure the Windows
Measure each window in your porch that will need to have a swing bed built around it. You’ll want to ensure that your swing bed is the perfect size and shape for the space. This step is especially important if you are working with an odd-shaped window.
If you are working with a standard rectangular-shaped window, then this step can be skipped. Although it is always a good idea to double-check your measurements. This is one of the most important steps when learning how to build a swing bed for a porch.

Step 3: Cut the 2 X 4s
Next, begin cutting each of your 2 X 4s according to the measurements that you took in Step 2. Be sure that all of your cuts are precise, as this will be essential when constructing the frame of your swing bed later on. This step requires a circular saw, so make sure that you have this tool ready to go beforehand. It is also important that you wear safety gear when using any power tools. This is one of the most crucial steps when learning how to build a swing bed for a porch.
Step 4: Assemble the Frame
Take all of your cut 2 X 4s and assemble them into a rectangular frame using screws and nails. Make sure that you double check each connection for stability, as this is key to making sure that your swing bed can support the weight of anyone who sits in it. But be careful not to over-tighten the screws, as this can cause the wood to split. It is also important to use a level while constructing the frame, as this will help ensure that your swing bed is even and not lopsided.
Step 5: Attach Plywood Sheets
Now take your plywood sheets and begin attaching them to the frame of the swing bed. Use screws for extra security, but make sure you avoid over-tightening them—this could cause the wood to split. This is a great time to use the level again, as this will help you make sure that everything is even and not lopsided. If your project requires seat cushions, this is the time to add them.

Step 6: Sand Down Any Rough Edges
Once all of the plywood has been attached to the frame, use sandpaper to smooth out any rough edges. This will help ensure that anyone sitting in your swing bed won’t get splinters! This also helps make the swing bed look more finished and polished. It is important to wear safety gear while sanding and be sure that you have proper ventilation.
Step 7: Paint or Stain Your Swing Bed Frame
Once you have finished sanding, it’s time to paint or stain your swing bed frame. Choose a color that fits with the rest of your outdoor décor, and be sure to take the proper safety precautions when using any chemicals.
This includes using gloves and a face mask, as well as having proper ventilation. But if you don’t want to paint or stain your swing bed, that is fine too—it will still look great in its natural wood state.
Step 8: Measure for Cushions
If you want to add cushions to your swing bed, now is the time to measure them out! Measure both the length and width of each cushion and subtract an inch from both dimensions before cutting the fabric. This will ensure that they fit snugly in place when attached. If you don’t need cushions, skip this step and move on to Step 9.
Step 9: Cut and Sew Upholstery Fabric
Cut out each piece of upholstery fabric according to your measurements in Step 8. Then, use a sewing machine or needle and thread to stitch the pieces into cushions with an inner foam insert. If you don’t need cushions, skip this step and move on to Step 10. This step requires a sewing machine, so make sure you have one ready to go beforehand.
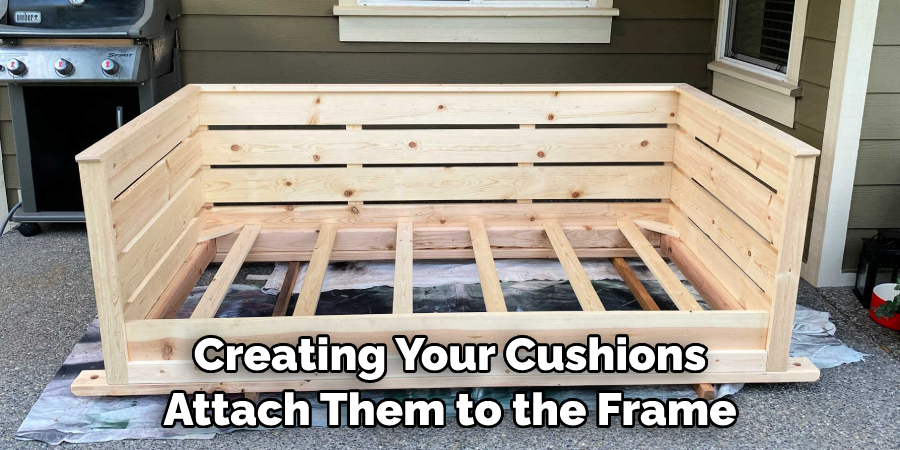
Step 10: Attach Cushions to Frame
Once you have finished creating your cushions, attach them to the frame of your swing bed using screws or nails. Make sure that they are securely in place and evenly spaced apart. It’s a good idea to double check your work with the level again, just to make sure that everything is even and not lopsided. But be careful not to over-tighten the screws, as this can cause the wood to split.
Step 11: Enjoy Your Swing Bed!
Congratulations! Your swing bed is now complete and ready for you to enjoy. Add some throw pillows and blankets for extra comfort, then sit back and relax in your new outdoor oasis. Now wasn’t this worth all of the hard work? We think so! Always remember to practice proper safety when using any tools or chemicals.
Now that you know how to build a swing bed for porch, you can be confident in creating your own cozy outdoor nook. Good luck with your project and have fun!
Extra Tips
- If You Are Going to Place the Swing Bed Outdoors, It Is Recommended That You Use Weather-resistant Materials Such as Treated Wood or Metal. This Will Help Prevent Any Wear and Tear From the Elements.
- Always Remember to Measure Twice and Cut Once—this Will Save You Time and Energy When Building Your Swing Bed.
- Upholster Your Cushions With Outdoor Fabric if Possible, as This Will Help Them Last Longer in an Exposed Environment.
- Add Some Cozy Blankets or Pillows for Extra Comfort, as Well as Some String Lights for a Festive Atmosphere.
- Have Fun With the Design of Your Swing Bed and Customize It to Fit Your Own Style! With Some Creativity, You Can Make Something Truly Unique and Beautiful.
Frequently Asked Questions
Q: What Type of Material Should I Use for My Swing Bed?
A: The best materials to use for a swing bed are treated lumber or metal, as these are more resistant to the elements and will last longer.
Q: How Can I Make Sure That My Swing Bed Is Secure?
A: When constructing the frame of your swing bed, be sure to use screws or nails for extra stability. Also, make sure that all connections are properly secured before adding any cushions or blankets.
Q: What Types of Fabrics Are Best For Cushions?
A: If you plan on keeping your swing bed outdoors, it is best to use outdoor fabric for the upholstery as this is more resistant to stains and fading from sunlight exposure. Alternatively, indoor fabrics can also work if necessary. Just remember that they may need more frequent maintenance in the long run.
Q: Is It Necessary To Stain Or Paint My Swing Bed?
A: While staining or painting your swing bed is not a requirement, it can help protect the wood and make it look more aesthetically pleasing. Be sure to choose a color that fits with the rest of your outdoor décor!

Conclusion
Building your own swing bed can be incredibly rewarding and the perfect addition to any outdoor porch. Not only is it a great project for homeowners with or without DIY experience, but it’s also beneficial financially and environmentally.
It’s clear that you can save money by purchasing a pre-made swing bed while doing something positive for the planet by using reclaimed lumber and secondhand hardware from local stores.
With patience and determination, you should have no problem crafting a comfortable swing bed of your own in no time at all. Now that you know how to build a swing bed for porch, why not take things next level and install a subfloor on concrete?
Installing subfloors can help create stable floorings even when installing carpets or hardwoods. If you are looking for your next weekend project, tackling this one sounds like fun!
About
Outdoor Fixes is a distinguished figure in the world of Diy design, with a decade of expertise creating innovative and sustainable Diy solutions.
His professional focus lies in merging traditional craftsmanship with modern manufacturing techniques,
fostering designs that are both practical and environmentally conscious. As the author of diy,
outdoorfixes delves into the art and science of outdoorfixes-making, inspiring artisans and industry professionals alike.
Education RMIT University
(Melbourne, Australia) Associate Degree in Design (Outdoor Fixes) Focus on sustainable design, industry-driven projects,
and practical craftsmanship. Gained hands-on experience with traditional and digital manufacturing tools, such as CAD and CNC software.
Nottingham Trent University
(United Kingdom) Bachelor’s in outdoorfixes.com and Product Design (Honors) Specialized in product design with a focus on blending creativity with production
techniques. Participated in industry projects, working with companies like John Lewis and Vitsoe to gain real-world insights.
Publications and Impact
In diy, Outdoor Fixes his insights on indoor design processes, materials, and strategies for efficient production.
His writing bridges the gap between artisan knowledge and modern industry needs, making it a must-read for both budding designers and seasoned professionals.