
Adding a sliding gate to your fence is not only a practical solution for gaining access to your property but also a stylish addition that can enhance the overall appeal of your home.
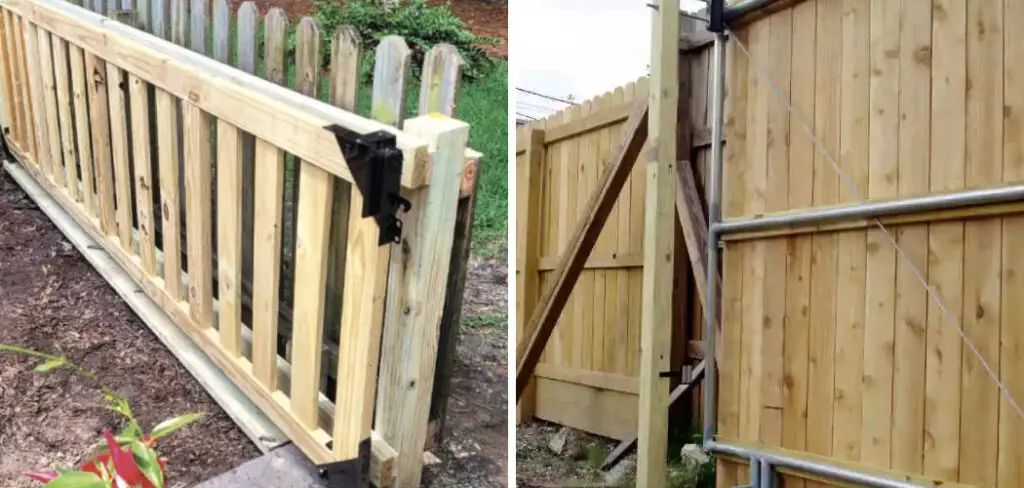
Whether you’re dealing with limited space that doesn’t accommodate a traditional swinging gate or simply prefer the convenience and modern look of a sliding mechanism, installing a sliding gate can provide security, privacy, and ease of access.
This guide on how to build sliding gate on a fence aims to walk you through the steps involved in building a sliding gate, from selecting materials to the final installation, ensuring that even beginners feel equipped to take on this project. So, let’s get started!
What is a Sliding Gate?
A sliding gate, also known as a rolling gate or gliding gate, is a type of gate that moves along a track horizontally to open and close. It operates on wheels that are attached to the bottom of the gate, allowing it to slide smoothly back and forth.
This mechanism makes it ideal for spaces where there is limited room for a traditional swinging gate to swing open.
You can choose from various types of sliding gates, including manual or automatic sliding gates. Manual sliding gates require you to physically push the gate open and close, while automatic sliding gates use a motorized mechanism for opening and closing, making it more convenient, especially for larger and heavier gates.
Why Build a Sliding Gate on a Fence?
There are several reasons why you might want to build a sliding gate on your fence. Here are some of the most common ones:
Space-saving:
As mentioned, a sliding gate is an ideal solution for areas where there is limited space for a traditional swinging gate to operate.
Enhanced Security:

Sliding gates can provide better security to your property as they are more difficult to breach compared to swinging gates that can be pushed or kicked open.
Convenience:
With automatic sliding gates, you no longer have to get out of your car to manually open and close the gate, making it a more convenient option for everyday use.
Aesthetics:
Sliding gates can add a modern and stylish touch to your home’s exterior. With various materials and designs to choose from, you can customize your sliding gate to complement your fence and enhance the overall appearance of your property.
Materials and Tools
Before you start building a sliding gate, it’s essential to gather all the necessary materials and tools. Here’s a list of what you’ll need:
2×4 Lumber for Frame Construction:
The size and number of lumber pieces will depend on the measurements of your gate. However, it’s recommended to use pressure-treated wood for durability.
Metal Brackets:
These brackets will be used to connect the various lumber pieces together to form the frame.
Gate Wheels:
These are essential for the sliding mechanism. Choose heavy-duty wheels that can support the weight of your gate.
Gate Track:
The track is used to guide the wheels and ensure smooth movement of the gate. Galvanized steel tracks are recommended for durability.
Screws, Nails, and Bolts:
These are necessary for assembling the frame and attaching the brackets, wheels, and track.
Concrete Mix:
If you’re installing a sliding gate on a concrete surface, you’ll need to secure the track using a concrete mix.
Measuring Tape, Level, and Drill:
These tools will help you accurately measure and install the gate components.

8 Simple Step-by-step Guidelines on How to Build Sliding Gate on a Fence
Step 1: Measure the Opening
The first step in building a sliding gate is to accurately measure the opening where the gate will be installed. Use a measuring tape to determine the width and height of the space. It’s important to add a few inches to the width measurement to accommodate the gate’s operating mechanism and ensure smooth movement along the track.
Note these measurements carefully, as they will guide you in selecting the materials of the right size for your gate. This step is crucial for the success of your project, as precise measurements will prevent any operational issues or the need for adjustments later on.
Step 2: Cut the Lumber
Once you have your measurements, the next step is to cut the lumber to the required sizes for your gate’s frame. Using the measurements you obtained in Step 1, mark the lengths on your 2×4 lumber pieces with a pencil. Ensure that your marks are accurate and clear for precise cuts.
A saw, whether manual or powered, will be your tool of choice for this task.
For the frame, you’ll need four pieces to create the sides and top and bottom of the gate. Remember to account for any additional support beams you plan to include within the gate’s structure.
Cutting the lumber accurately according to your measurements is vital, as this will form the basic structure of your sliding gate and affect its functionality and durability. Safety gloves and goggles should be worn during this process to protect against splinters and sawdust.
Step 3: Assemble the Frame
After cutting the lumber to the correct sizes, the next step is to assemble the frame of your sliding gate. Begin by laying out the pieces on a flat surface, arranging them to form the rectangular shape of the gate. Use metal brackets to join the corners securely, ensuring that the frame is square.

A level can be utilized to verify that the frame is perfectly flat and even, as any imbalance could hinder the smooth operation of the gate.
For additional strength, you might want to install diagonal support beams within the frame. These supports will prevent the gate from sagging over time and maintain its structural integrity.
Secure all the connections with screws or bolts, making sure that every joint is tight and solid. This step requires precision and attention to detail, as the frame serves as the backbone of your sliding gate and will bear the weight and movement once installed.
Step 4: Attach the Wheels
Next, it’s time to attach the gate wheels to your frame. These wheels will be responsible for supporting and guiding the gate along the track. Place one wheel on each bottom corner of the frame, ensuring that they are aligned with each other and perpendicular to the ground.
To secure the wheels, use screws or bolts and drill them into place. It’s essential to make sure that the wheels are firmly attached and can support the weight of your gate. Test the wheels by pushing the frame back and forth, making sure they rotate smoothly on their axles. Adjust if necessary.
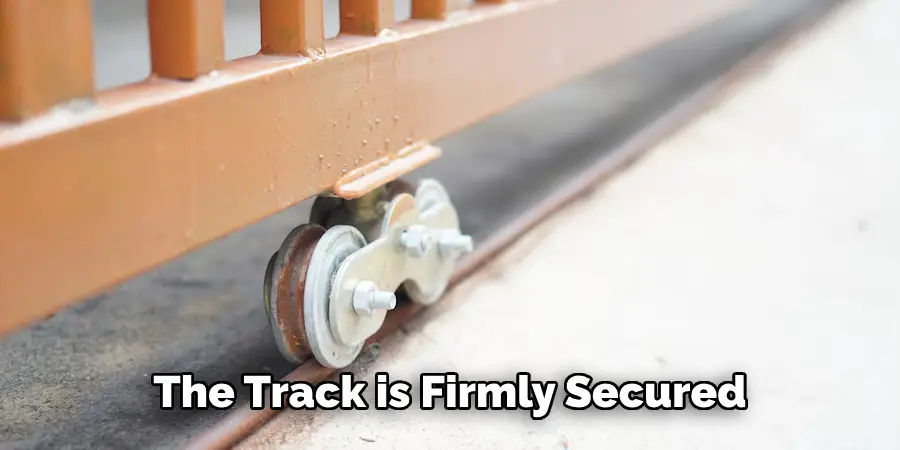
Step 5: Install the Track
With the wheels attached to your gate frame, the next crucial step is installing the track that will guide the gate’s movement. First, position the track on the ground, ensuring it is parallel to the fence line and directly under the path the gate will take. Use a measuring tape and level to align the track precisely, as any deviation from straightness could result in the gate not sliding correctly.
Once the track is positioned correctly, mark the locations where the securing bolts will go into the ground or concrete base. If installing on a concrete surface, you will need to drill holes using a masonry bit before placing the bolts. For installations directly into the soil, you may need to set the track on a concrete footing for stability and durability. Once the track is firmly secured, test it by sliding the frame back and forth to ensure smooth movement.
Step 6: Concrete Mix (If Required)
If you’re installing your sliding gate on a concrete surface, you’ll need to secure the track with a concrete mix. This will provide additional stability and prevent any shifting of the track over time. Follow the instructions on the concrete mix packaging, and be sure to let it dry completely before testing the track’s movement.
It’s also important to note that the concrete should be slightly below ground level to avoid any potential tripping hazards.
Step 7: Install the Gate
After completing all the necessary preparations and assembling the gate components, it’s time to install your sliding gate onto the track. Begin by lifting the frame and carefully placing it on top of the wheels, ensuring that they fit securely into the track.
Use screws or bolts to attach the frame to the track, making sure it is level and centered within the opening.
Test the gate’s movement by sliding it back and forth along the track, adjusting any wheels or connections if necessary. Once you’re satisfied with its operation, secure all the joints and connections tightly to prevent any future issues.
Step 8: Add Finishing Touches
With your sliding gate now installed, you can add any final touches to make it aesthetically pleasing and functional. You may want to stain or paint the wood frame to match your fence or landscape. Additionally, you can install a latch or lock mechanism for added security. It’s also important to regularly maintain and lubricate the wheels and track to ensure smooth operation over time.
Congratulations, you have successfully completed your DIY sliding gate installation! With proper maintenance and care, it will serve as a functional and attractive addition to your property for years to come. Remember always to follow safety precautions when working with power tools or heavy materials and seek professional help if needed.
Following these steps on how to build sliding gate on a fence and using quality materials will result in a reliable and long-lasting sliding gate that adds convenience and value to your home. We hope this guide has been helpful in achieving your DIY project goals.

Finishing Touches and Maintenance
After your sliding gate is installed, ensuring its longevity and optimal performance involves regular maintenance and care. To start, applying the right finish to your gate, such as weather-resistant paint or stain, will not only enhance its appearance but also protect the wood from the elements. Choose a finish that complements your property’s overall aesthetic and apply it according to the manufacturer’s instructions for the best protection.
Routine inspections of the gate, track, and wheels are crucial. Check for any loose bolts or screws and tighten them as necessary to prevent any structural weaknesses. Look for signs of wear or damage to the wheels and track, as these are critical components for smooth operation. Replacing any worn parts promptly will prevent further damage and maintain the gate’s functionality.
Lubrication of moving parts, including wheels and tracks, ensures smooth and efficient operation. Use a suitable lubricant, applied sparingly, to avoid attracting dirt and debris that can cause wear over time. This simple step, performed regularly, can significantly reduce the need for more extensive repairs down the line.
Cleaning your gate and track regularly can also extend your life. Remove debris, such as leaves and dirt, from the track to prevent obstruction of the gate’s path. Cleaning the wood components of the gate with a suitable cleaner will not only keep it looking good but also give you the opportunity to inspect for signs of weathering or pest damage.
Finally, if your gate includes an automated opener, following the manufacturer’s recommended maintenance schedule is vital. This often includes checking the power supply, sensors, and remote control function to ensure everything operates smoothly.

By adhering to these maintenance tips, you can enjoy the convenience and security of your sliding gate for many years to come. Your diligence will ensure that it remains a durable and attractive feature of your property.
Additional Tips for Building a Sliding Gate
- Before beginning any DIY project, always research a variety of sources to gain a comprehensive understanding of the task at hand.
- Measure twice and cut once to ensure accuracy and avoid wasting materials.
- Seek assistance from a friend or family member when handling heavy lumber or installing large components to prevent accidents.
- If you’re not comfortable working with power tools, consider hiring a professional for some or all aspects of the gate installation.
- Regularly inspect and maintain your sliding gate to ensure its longevity and proper functioning.
- Consider adding a backup power source or manual override mechanism in case of a power outage, ensuring that you can still access your property.
- If your driveway has an incline or slope, make sure to account for it when installing the track and testing the gate’s movement.
- Consider adding a sensor or keypad for added convenience and security when operating the gate.
- Take into consideration any potential obstructions, such as trees or landscaping, before installing the track to ensure proper clearance for the gate’s movement. Overall, approach your DIY sliding gate project with patience, precision, and attention to detail to achieve a successful outcome.
Remember to have fun and enjoy the process of creating a functional and beautiful addition to your property. Happy building!
Frequently Asked Questions
Q: Is It Difficult to Install a Sliding Gate on My Own?
A: With proper planning, materials, and tools, installing a sliding gate can be achievable for those with intermediate DIY skills. However, it’s essential to be comfortable handling power tools and working with heavy materials.
Q: How Long Will It Take to Install a Sliding Gate?
A: The time required for installation may vary depending on the size and complexity of your project, but typically it can take anywhere from 1-3 days.
Q: Do I Need Any Special Tools or Equipment to Install a Sliding Gate?
A: The necessary tools and equipment may vary based on your project’s specifics, but some common items include a drill, saw, level, measuring tape, and wrenches. It’s important to have the appropriate safety gear as well, such as protective eyewear and gloves.
Q: Can I Customize My Sliding Gate Design?
A: Yes, there are many ways to personalize your sliding gate design, such as different types of wood, decorative accents, and automation options. Be sure to research and plan accordingly before beginning your project.

Conclusion
Building and maintaining a sliding gate can be a rewarding DIY project that not only improves the accessibility and security of your property but also enhances its appearance. By carefully planning your design, selecting the right materials, and following the step-by-step guide outlined in this document, you can achieve a professional-quality result.
Regular maintenance and care will ensure your sliding gate remains an attractive and functional feature for many years.
Remember, the key to success lies in meticulous preparation, patience, and attention to detail throughout the building and maintenance process. Whether you’re a seasoned DIY enthusiast or a novice ready to tackle a new challenge, we hope this guide on how to build sliding gate on a fence empowers you to confidently build and care for your sliding gate.
Happy building, and enjoy the added beauty and convenience your new gate brings to your home.
About
Outdoor Fixes is a distinguished figure in the world of Diy design, with a decade of expertise creating innovative and sustainable Diy solutions.
His professional focus lies in merging traditional craftsmanship with modern manufacturing techniques,
fostering designs that are both practical and environmentally conscious. As the author of diy,
outdoorfixes delves into the art and science of outdoorfixes-making, inspiring artisans and industry professionals alike.
Education RMIT University
(Melbourne, Australia) Associate Degree in Design (Outdoor Fixes) Focus on sustainable design, industry-driven projects,
and practical craftsmanship. Gained hands-on experience with traditional and digital manufacturing tools, such as CAD and CNC software.
Nottingham Trent University
(United Kingdom) Bachelor’s in outdoorfixes.com and Product Design (Honors) Specialized in product design with a focus on blending creativity with production
techniques. Participated in industry projects, working with companies like John Lewis and Vitsoe to gain real-world insights.
Publications and Impact
In diy, Outdoor Fixes his insights on indoor design processes, materials, and strategies for efficient production.
His writing bridges the gap between artisan knowledge and modern industry needs, making it a must-read for both budding designers and seasoned professionals.