
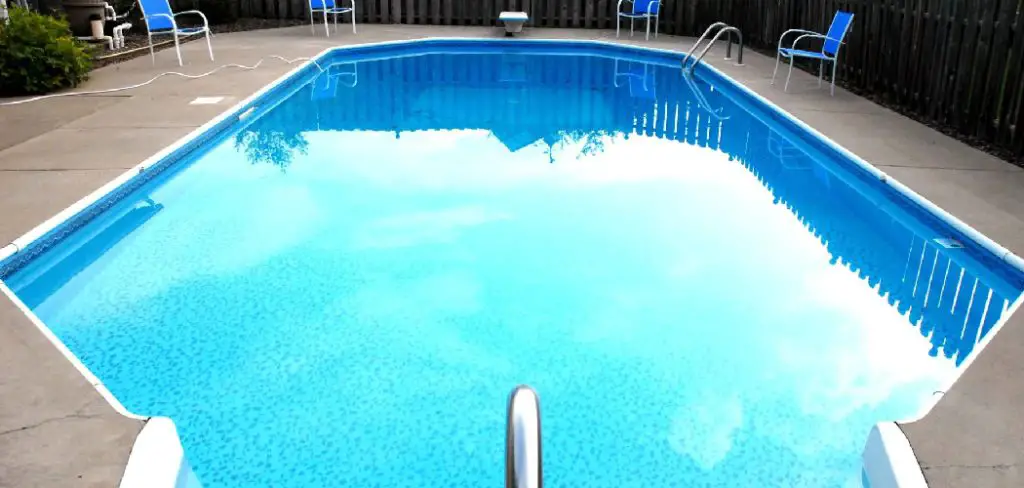
Every pool owner eventually faces a situation where the water needs to come out. Maybe you are staring down a major repair, battling a stain that won’t budge, or simply dealing with water that has become chemically unmanageable. While draining a concrete pool is a relatively straightforward affair, fiberglass pools are a different beast entirely. They require a delicate touch, specific knowledge, and a healthy dose of caution.
The most critical thing to understand before you begin is that draining a fiberglass pool carries significant risks. If done incorrectly, the consequences can be catastrophic—literally lifting your pool out of the ground or cracking the shell. This isn’t meant to scare you, but to prepare you. Knowing how to drain a fiberglass pool safely is about understanding the forces at play and taking the necessary precautions to neutralize them. This guide will walk you through the process step-by-step, ensuring you can tackle this project without compromising the structural integrity of your backyard oasis.
Understanding the Risks: Why Fiberglass is Different
To drain a fiberglass pool safely, you first need to understand why it behaves differently from its concrete or vinyl-liner counterparts. It all comes down to weight and structural support.
The Floating Bathtub Effect
Imagine a plastic bathtub floating in a lake. If you push it down into the water, the water pushes back. If you fill that tub with water, it sinks and stays stable. A fiberglass pool works on the same principle. It is essentially a large, lightweight vessel sitting on the ground. When it is full of water, the immense weight (thousands of pounds) holds it firmly in place against the surrounding earth.
However, the ground around your pool also contains water—groundwater. This water exerts hydrostatic pressure, pushing upward and inward against the pool shell. As long as the water level inside the pool is higher than the groundwater level outside, everything stays balanced. But if you remove the water from the inside while the ground is saturated, that external pressure has nowhere to go but up. This can cause the entire pool shell to “pop” or float out of the ground, ripping plumbing lines and destroying the deck in the process.

Wall Buckling and Cracking
The risks aren’t just about the pool floating; they are also about the walls collapsing. The water inside your pool acts as a structural support system, pushing outward to counteract the pressure of the dirt pushing inward. When you drain the water, you remove that internal support.
Without the weight of the water, the inward pressure from the surrounding soil can cause the long, straight walls of a fiberglass pool to bow inward. In severe cases, this bowing can lead to spider cracks in the gel coat or structural fractures in the fiberglass shell itself. This is why simply pumping out the water isn’t enough; you must actively support the structure as the water level drops.
Essential Pre-Drain Safety Checks
Before you even touch a pump, you need to verify that the conditions are safe for draining. Skipping these checks is the most common reason for pool failure during maintenance.
Inspecting the Hydrostatic Relief Valve
Your pool’s first line of defense against groundwater pressure is the hydrostatic relief valve. This is typically located at the bottom of the deep end, often integrated into the main drain pot. Its function is simple but vital: it is a one-way valve that allows groundwater to flow into the pool if the pressure beneath the shell becomes too high. By allowing water in, it equalizes the pressure and prevents the pool from lifting.
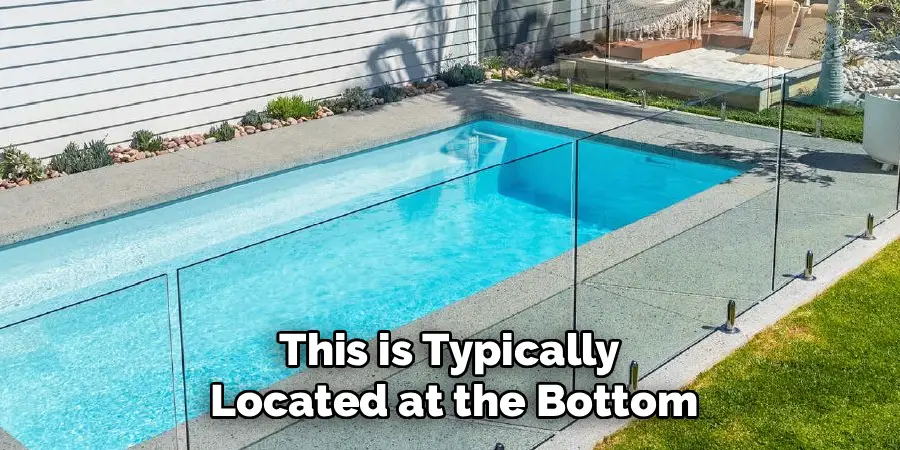
Before starting, try to locate this valve visually. You won’t be able to access it until the water is low, but knowing it is there is important. Once you drain the pool, checking and opening this valve is a critical step in the process, which we will cover later.
Checking the Groundwater Table
This is the “go/no-go” moment for your project. You must determine the water table level in your yard. If the ground around your pool is saturated, you absolutely cannot drain the pool safely on your own.
To check this, locate the sump pipe (sometimes called a “standpipe” or “dewatering pipe”) if your builder installed one. This is usually an open PVC pipe sticking out of the ground near the filter equipment or the deep end. Look down this pipe with a flashlight. If you see water standing high in the pipe, stop immediately.
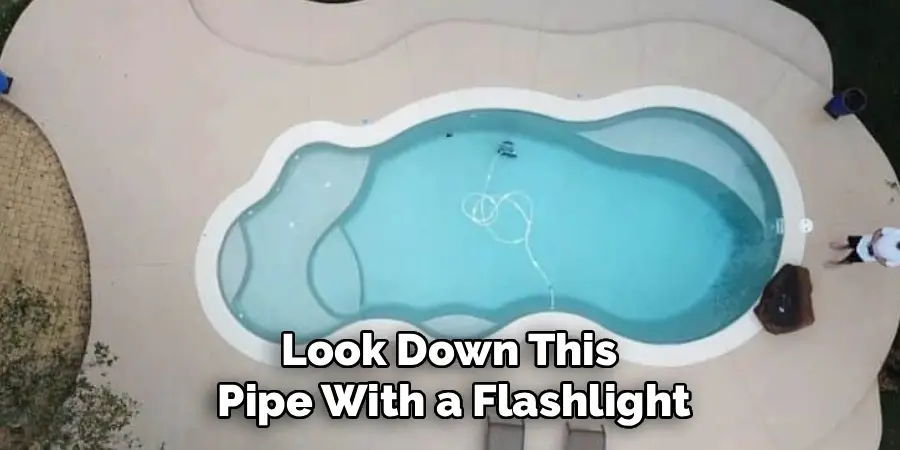
If you don’t have a sump pipe, you will need to dig a test pit about two to three feet deep near the pool (but not close enough to disturb the plumbing). If the hole fills with water, the ground is too wet. You must wait for a drier season or hire a professional with dewatering equipment to lower the water table before proceeding.
Critical Risks and Do it Safely
Safety extends beyond just the mechanical checks; it also involves strategic planning regarding timing and weather.
Timing and Weather Conditions
Check the extended weather forecast before you plan your drain day. You need a window of dry weather. Never attempt to drain a fiberglass pool if heavy rains have occurred recently or are predicted within the next few days. Rain not only raises the groundwater table but can also wash soil into your empty pool or erode the supporting backfill while the pool is vulnerable. A week of dry weather prior to the drain is ideal to ensure the surrounding soil is as stable as possible.
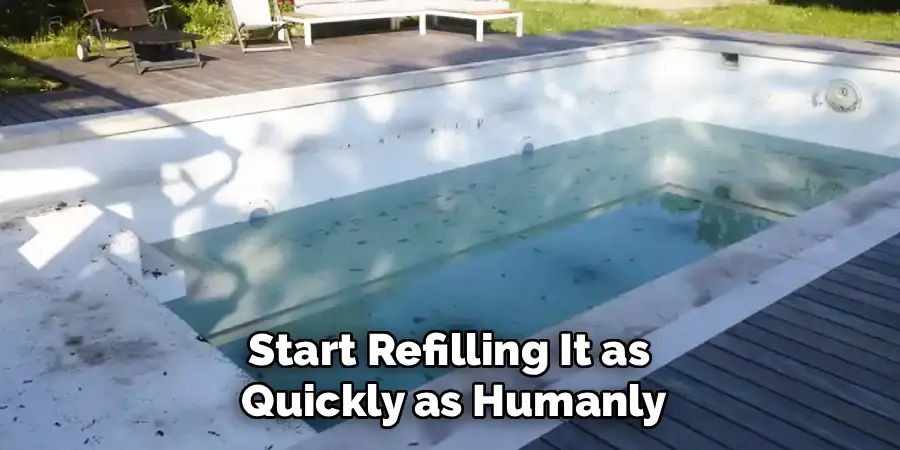
The Importance of Speed
A fiberglass pool is not meant to sit empty. It is designed to be full of water. Therefore, time is of the essence. You should not drain the pool “just in case” or leave it empty for weeks while you decide on a renovation plan. Have all your materials ready, your contractors scheduled, and your cleaning supplies on hand before you pull the plug. The goal is to drain it, perform the necessary work, and start refilling it as quickly as humanly possible to minimize the risk of structural movement.
Tools and Materials Required
Attempting this job with inadequate tools will only lead to frustration and delay. Gather everything you need beforehand.
Pumping Equipment
Do not try to use your pool’s main circulation pump to drain the pool. It is not designed to lift water from the very bottom, and running it dry can ruin the motor. Instead, rent or buy a high-quality submersible sump pump. You want a pump with a high flow rate (measured in gallons per hour) to get the job done efficiently. Along with the pump, you will need a long discharge hose—long enough to direct the water to a storm drain or a downhill area well away from the pool. Dumping thousands of gallons of water right next to the pool will only saturate the soil and increase the hydrostatic pressure you are trying to avoid.
Bracing Materials
To prevent the walls from bowing, you will need to construct a bracing system. This typically involves purchasing standard 2×4 lumber. Measure the width of your pool at its widest points and cut the lumber to fit snugly across the span. You will likely need several braces depending on the length of the pool. Having some carpet scraps or heavy towels to place between the wood and the pool wall is also essential to prevent scratching the gel coat.
Step-by-Step Guide on How to Drain a Fiberglass Pool
Once you have confirmed the groundwater is low, the weather is clear, and your tools are ready, you can begin the draining process. Proceed with caution and keep a close eye on the pool structure at all times.
Step 1: Confirm Groundwater Levels
It bears repeating: check the groundwater one last time. Even if it was dry yesterday, a localized issue like a neighbor’s irrigation system leak could have changed the situation. Ensure the test pit or sump pipe is dry. If everything looks good, disconnect your pool equipment power at the breaker to ensure the automatic timers don’t turn on the pumps while the pool is empty.
Step 2: Set Up the Submersible Pump
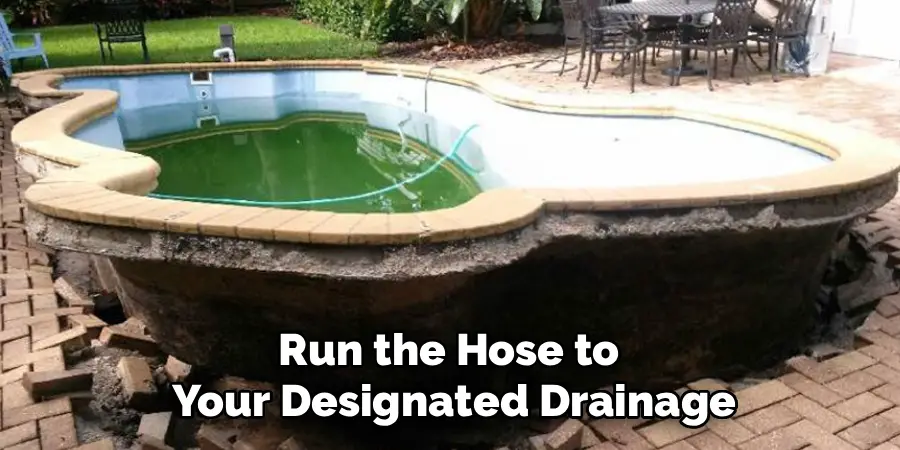
Attach your discharge hose to the submersible pump and lower it carefully into the deep end of the pool. Position it at the lowest point, usually near the main drain. Run the hose to your designated drainage area, ensuring it isn’t kinked. Securing the hose on the deck with a heavy object is a good idea, as the force of the water starting can sometimes cause the hose to whip around.
Step 3: Begin Draining and Monitor Walls
Plug in the pump and watch the water start to flow. As the water level drops, do not walk away. You need to become a vigilant observer. Continuously inspect the long, straight walls of the pool. Look for any signs that they are starting to bow inward. If you see movement, stop the pump immediately. It is better to have a half-full pool than a cracked one.
Step 4: Install Cross-Bracing
This is the proactive step that protects your pool’s shape. As the water level drops below the midpoint of the pool, you should begin installing your cross-braces. Place the padded ends of your 2x4s against the opposite walls, wedging them in place to hold the walls apart. You don’t need to drive them in with a sledgehammer; they just need to be snug enough to resist the inward pressure of the soil. Ideally, place a brace every 6 to 8 feet along the length of the pool. Adjust them downward or add more as the water gets lower and exposes more of the wall surface.
Step 5: Open the Hydrostatic Relief Valve
This step is often overlooked but is crucial for safety. Once the water is drained down to just a few inches remaining in the deep end, you will have access to the main drain pot. Safely enter the pool (wearing soft-soled shoes or socks to protect the floor). Remove the main drain cover. Inside, you should see a plug or a valve mechanism. Open or remove this hydrostatic relief valve.
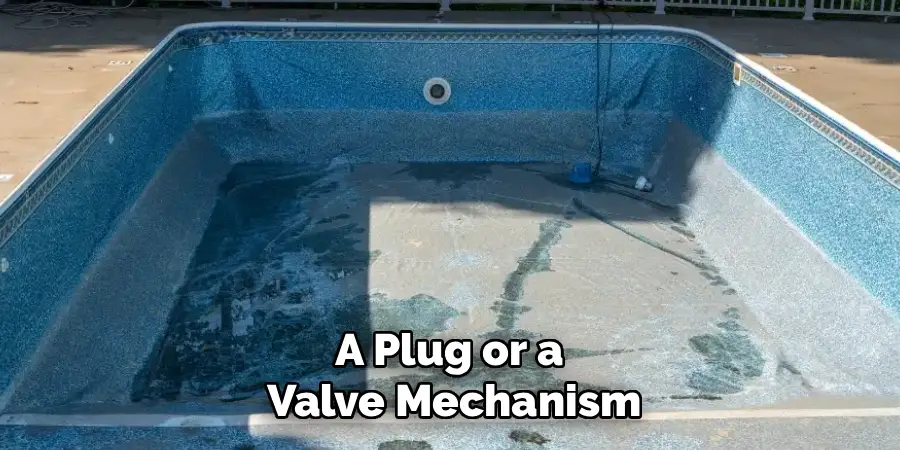
By opening this valve, you are creating a fail-safe. If groundwater pressure suddenly rises, water will flow up through this hole into the pool rather than lifting the pool out of the ground. It is messy, but it saves the shell. If your valve is old, this is also the perfect time to replace it with a new one.
Step 6: Complete the Drain and Work Quickly
With the relief valve open and the braces in place, use the sump pump to remove the remaining bulk water. A wet/dry shop vacuum can help suck up the last puddles and sludge from the floor. Now, the clock is ticking. Execute your cleaning, repair, or maintenance tasks immediately. Do not leave the pool empty overnight if it can be avoided. If you must leave it empty, ensure the hydrostatic valve remains open.
Maintenance and Repairs While Empty
Since draining is such a major undertaking, you want to maximize the opportunity while the shell is exposed.
Cleaning the Surface
An empty pool is the easiest to clean, but you must be gentle. Fiberglass pools have a gel coat finish that is durable but susceptible to scratching. Avoid using steel wool or harsh abrasive pads. For calcium scale or stubborn stains, use products specifically designed for fiberglass. Often, a sponge and a mild acidic cleaner (or even vinegar for light scaling) are sufficient. Rinse thoroughly as you go, pumping out the dirty rinse water so it doesn’t settle and stain the bottom again.
Addressing Blisters or Cracks
With the water gone, inspect the surface closely for osmotic blisters—small bumps in the gel coat ranging from the size of a dime to a quarter. These occur when water molecules penetrate the gel coat and react with the resin underneath. While the pool is dry, these can be sanded down, dried out, and patched with a fiberglass repair kit. Similarly, check for hairline stress cracks in corners or steps. Repairing these now prevents them from spreading later.
Refilling the Pool Properly
Refilling the pool is just as methodical as draining it. You cannot simply turn on the hose and walk away, especially if you have bracing in place.
Removing Bracing Gradually
Start filling the pool using a garden hose (or multiple hoses to speed up the process). As the water level rises, it begins to take over the job of supporting the walls. When the water level reaches just below a wooden brace, the pressure from the water should be sufficient to hold the wall. At that point, you can carefully remove that specific brace. Continue this process, removing braces one by one as the water rises past them. Do not pull all the braces out at once while the pool is still mostly empty.
Balancing Chemicals Immediately
As soon as the pool is full and the filtration system is running, test your water chemistry. New fill water is rarely balanced correctly for a pool. It may have high metals, incorrect pH, or zero calcium hardness. Adjust the pH and alkalinity first, then bring up the calcium hardness to protect the gel coat. Finally, introduce your sanitizer (chlorine or salt system) to prevent an immediate algae bloom. Balanced water is the key to preventing future stains and scaling.
When to Hire a Professional
We are big proponents of DIY, but we are also proponents of knowing your limits. Draining a fiberglass pool sits right on the edge of what an average homeowner should attempt.
High Water Tables
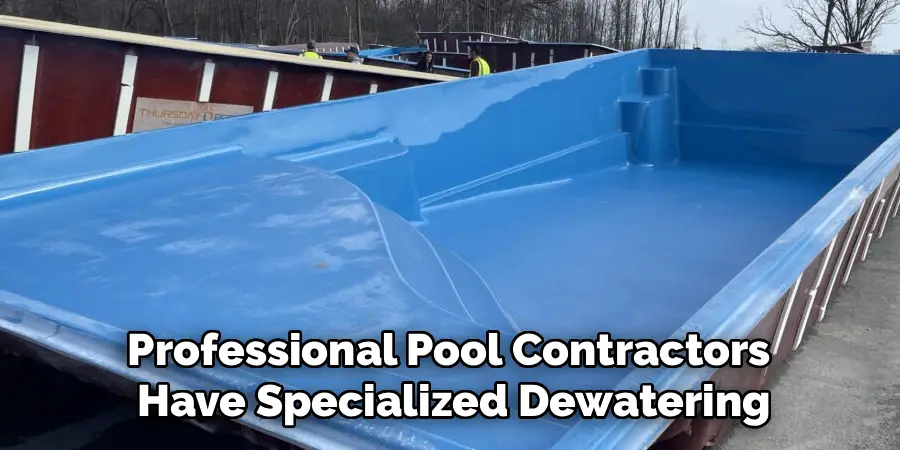
If you live in a low-lying area, near a body of water, or in a region with a consistently high water table, do not attempt this yourself. The risk of the pool floating is simply too high. Professional pool contractors have specialized dewatering systems—basically large well-point pumps—that can lower the groundwater table around the entire pool shell temporarily, making it safe to drain.
Lack of Experience
If the concept of bracing walls or checking hydrostatic valves feels overwhelming, hire a pro. The cost of hiring a service to drain and clean your pool is a fraction of the cost of replacing a cracked fiberglass shell or re-leveling a pool that has popped out of the ground. Sometimes, paying for peace of mind is the smartest investment you can make.
Conclusion
Draining a fiberglass pool is a high-stakes maintenance task that demands respect for the laws of physics. It is not something to be done on a whim or without preparation. However, by understanding the risks of hydrostatic pressure and wall stability, you can navigate the process safely.
Remember the golden rules: check the groundwater, brace the walls, work fast, and never drain after rain. Knowing how to drain a fiberglass pool correctly allows you to perform deep cleaning and vital repairs that extend the life of your pool. Proceed with caution, plan, and when in doubt, call in the experts to protect your backyard investment.
About
Outdoor Fixes is a distinguished figure in the world of Diy design, with a decade of expertise creating innovative and sustainable Diy solutions.
His professional focus lies in merging traditional craftsmanship with modern manufacturing techniques,
fostering designs that are both practical and environmentally conscious. As the author of diy,
outdoorfixes delves into the art and science of outdoorfixes-making, inspiring artisans and industry professionals alike.
Education RMIT University
(Melbourne, Australia) Associate Degree in Design (Outdoor Fixes) Focus on sustainable design, industry-driven projects,
and practical craftsmanship. Gained hands-on experience with traditional and digital manufacturing tools, such as CAD and CNC software.
Nottingham Trent University
(United Kingdom) Bachelor’s in outdoorfixes.com and Product Design (Honors) Specialized in product design with a focus on blending creativity with production
techniques. Participated in industry projects, working with companies like John Lewis and Vitsoe to gain real-world insights.
Publications and Impact
In diy, Outdoor Fixes his insights on indoor design processes, materials, and strategies for efficient production.
His writing bridges the gap between artisan knowledge and modern industry needs, making it a must-read for both budding designers and seasoned professionals.