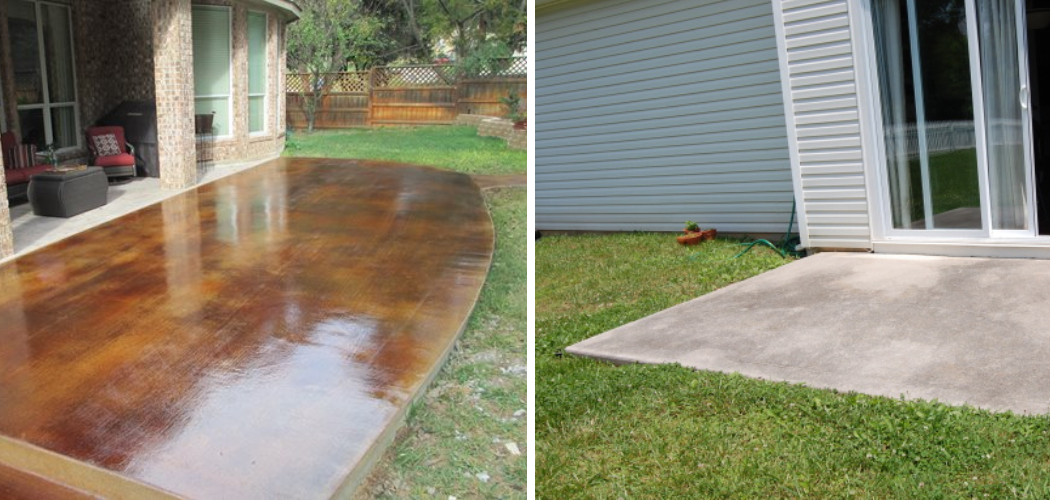
Are you looking for ways to extend your patio and create a more inviting outdoor space? Whether you want to host summer BBQs or just spend some extra time outdoors, integrating patio slabs can be an easy and visually pleasing way to increase the square footage of your backyard.
Patio slabs are sturdy stones used in building patios that come in various colors and finishes, allowing them to easily blend into whatever lifestyle best suits you.

Whatever project it is you’re trying to accomplish, using patio slabs as cover or accents can add value not only aesthetically but also functionally as they provide protection from rain, sun, and wear-and-tear common with high traffic areas.
With this guide on how to extend patio slabs, you can be sure that your investment will pay off in spades!
What are the Use Cases?
Before we dive into extending patio slabs, let’s first discuss their common use cases. Patio slabs can be used as a base for building a new patio, providing protection from the weather and dirt and debris buildup during the hot or rainy seasons. They are also ideal for covering an existing patio or a smaller area, like a walkway, that may need to be expanded.
Additionally, patio slabs can also be used in place of more traditional materials such as concrete or brick for constructing walls in your garden, creating planters, and other features around the house.
What Will You Need?
To extend your patio slabs, the following items will be necessary:
1. Patio slabs
2. Masonry sand
3. Cement
4. Rubber mallet or hammer
5. Chisel
6. Tape measure
7. Leveler
8. Trowel
Once you have all the necessary items, you can begin the project.
10 Easy Steps on How to Extend Patio Slabs
Step 1. Measure the Area:
Begin by measuring the area you need to cover with patio slabs. Make sure to account for any corners or curves in your design. Once this is done, divide the total square footage by how many slabs you have purchased, and that will give you an approximate idea of how many slabs will be required.
Step 2. Plan Your Layout:
Before installing the patio slabs, it’s important to plan out how they should be laid down. This can help prevent any gaps or uneven surfaces once the installation is complete and ensure all measurements are correct when cutting the stones if necessary. Be careful to measure any curves, corners, and slopes in the area to ensure accuracy.
Step 3. Prepare the Base:
Once you’ve planned the layout of your patio slabs, it’s time to prepare the base. Clear out any existing vegetation and ensure the area is free from roots, stones, or other debris that could disrupt the installation. If necessary, use a leveling tool to flatten out any uneven areas for better results.
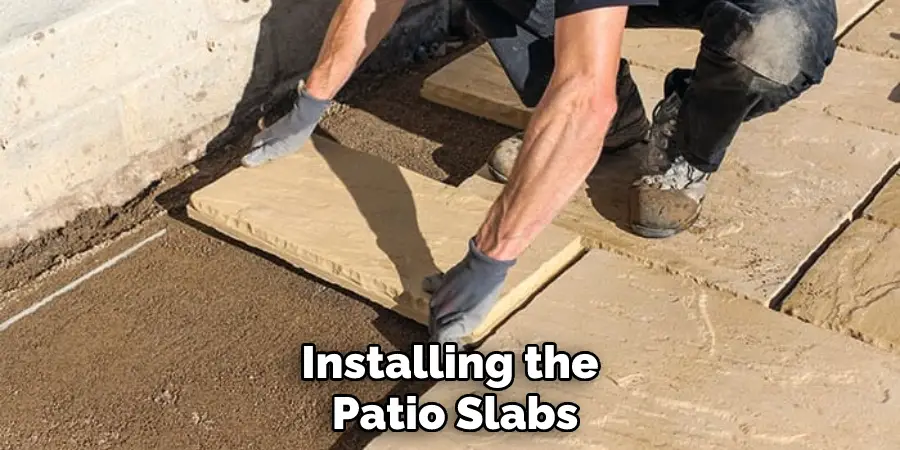
Step 4. Place the Patio Slabs:
Once the base is ready, you can start placing down the patio slabs in their designated spots. Make sure to align them correctly based on how you had planned it out beforehand and if needed, use a rubber mallet or hammer to level them off properly in each spot. Don’t forget to check how to level each slab with a leveler as you work.
Step 5. Cut the Patio Slabs:
If necessary, use a chisel and hammer to cut the patio slabs so they will fit in their designated spots. Be sure to measure twice before making any cuts, and take extra care when cutting curved or sloped areas. It will take some practice, but you can get the job done with patience.
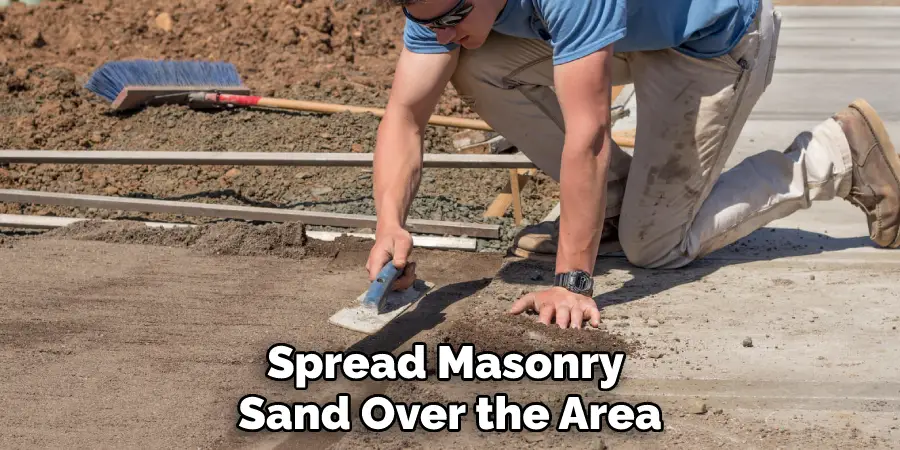
Step 6. Spread the Sand:
Once all the patio slabs are in place, it’s time to spread masonry sand over the area. This helps fill in any gaps between the stones and add stability and protection from moisture during rain or snow. You can use a trowel to spread the sand evenly and make sure to fill up any depressions or holes in the area.
Step 7. Add the Cement:
Now it’s time to add the cement. Use a trowel to spread a thin layer of cement over the area, making sure to cover all the patio slabs and sand completely. If necessary, you can use a brush or broom for more even coverage. This step helps give added stability and protection from any weather conditions.
Step 8. Let It Set:
Once you have finished applying the cement, allow the area to set overnight before adding any additional steps or decorations. This will help ensure that everything is properly set in place and ready to be used once the installation is complete. Ensure that the area is undisturbed for at least 12 hours.
Step 9. Affix Decorative Pieces:
At this point, you can add any additional decorative pieces such as stones, plants, or whatever else you might want for a more attractive look. Make sure to place these pieces carefully, so they don’t disrupt the stability of the patio slabs and cement underneath. Depending on how you want your patio to look, there are many creative ways to go about this.
Step 10. Enjoy Your New Patio!
Once all the steps are completed, and everything is properly set in place, it’s time to enjoy your new patio! With some patience and effort, you can now have an extended patio that looks great and adds value to your garden or home. So go ahead – invite over some.
By following these steps, you can easily extend your patio slabs and create a beautiful outdoor space to enjoy with friends and family. With some creativity and hard work, you’ll be able to take pride in how great it looks.
5 Additional Tips and Tricks
- Make sure to measure how much extra space you need when extending patio slabs. This will help ensure that the new slab fits well and looks great.
- When purchasing new patio slabs, buy them in the same size as the existing ones. This will ensure they match and fit together properly.
- Consider using a level to ensure your extended patio is even and flat before you lay the new slabs.
- Work with a partner or two when laying out extended patio slabs to help keep everything in place while you work on it.
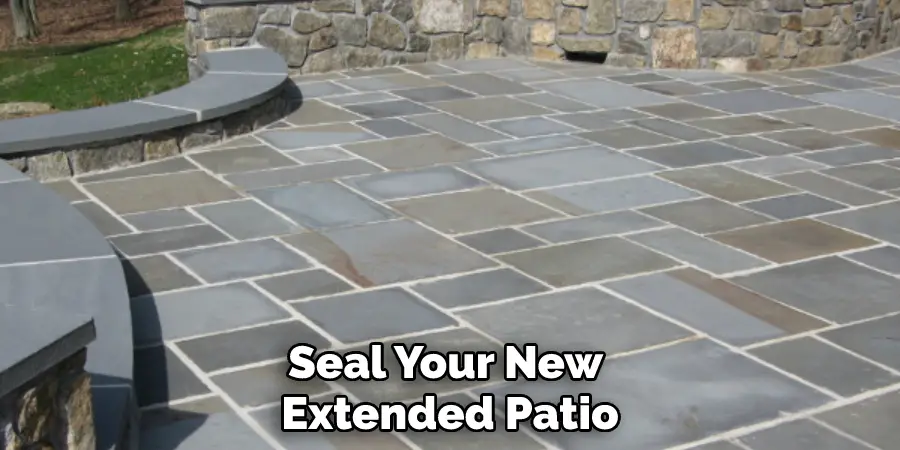
- Seal your new extended patio after installation to protect it from weather damage, dirt, and other debris that may accumulate over time.
These tips and tricks will help you extend your patio slabs! Have fun with the project and enjoy the added outdoor living space.
5 Things You Should Avoid
1. Avoid Making the Slabs Too Thin:
While thinner slabs may seem like a cost-effective way to extend your patio, they can be fragile and prone to cracking. When laying down the new extension, ensure that you use thicker slabs that are better equipped to handle wear and tear and weight without buckling over time.
2. Avoid Installing Over Uneven Ground:
The unlevel ground can cause extended patio slabs to shift if not corrected beforehand. To avoid this issue, make sure to level out any uneven sections of land before beginning installation. Additionally, consider using sand as a base for stability or adding gravel under each slab for extra support.
3. Avoid Placing Slabs Too Close Together:
The slabs should always be spaced apart from one another, so they have room to expand and contract as the temperature changes. Generally, a gap of 1-2 cm is recommended between each slab, depending on the size of your patio extension.
4. Avoid Not Accounting for Drainage:
Poor drainage can cause water damage to your patio slabs over time. To protect against this issue, make sure to install drains or add small slopes in your extended patio area so that any water runoff can quickly escape without causing damage to the underlying surface or nearby structures.
5. Avoid Skipping Maintenance:
Even if you’ve taken all precautions when laying down your extended patio slabs, proper maintenance is still necessary to keep them looking great and lasting for years to come. Regularly sweep away any dirt and debris, seal off the slabs if needed, and watch out for weeds that may be sprouting up between them. These steps will help you enjoy your extended patio for many seasons.
Follow these tips, and you’ll surely have a beautiful, durable patio extension that lasts for years!
Conclusion
In conclusion, extending patio slabs can be a great way to increase the size of your outdoor space and is surprisingly easy to do. You can complete this project quickly, easily, and cheaply with the right tools and materials. Don’t forget to clean and prepare the existing slabs and ensure there are no drainage issues.
Once all that is taken care of, mixing up a batch of cement and laying down your new slabs should take no more than a few hours. After curing for a few days, you will have extended the area without major upheaval.
Whether it’s a full renovation or just some simple patio extensions, adding some extra living space will make life much better in your backyard. Now that you know how to extend patio slabs safely and efficiently, what are you waiting for? Get started today!
About
Outdoor Fixes is a distinguished figure in the world of Diy design, with a decade of expertise creating innovative and sustainable Diy solutions.
His professional focus lies in merging traditional craftsmanship with modern manufacturing techniques,
fostering designs that are both practical and environmentally conscious. As the author of diy,
outdoorfixes delves into the art and science of outdoorfixes-making, inspiring artisans and industry professionals alike.
Education RMIT University
(Melbourne, Australia) Associate Degree in Design (Outdoor Fixes) Focus on sustainable design, industry-driven projects,
and practical craftsmanship. Gained hands-on experience with traditional and digital manufacturing tools, such as CAD and CNC software.
Nottingham Trent University
(United Kingdom) Bachelor’s in outdoorfixes.com and Product Design (Honors) Specialized in product design with a focus on blending creativity with production
techniques. Participated in industry projects, working with companies like John Lewis and Vitsoe to gain real-world insights.
Publications and Impact
In diy, Outdoor Fixes his insights on indoor design processes, materials, and strategies for efficient production.
His writing bridges the gap between artisan knowledge and modern industry needs, making it a must-read for both budding designers and seasoned professionals.