
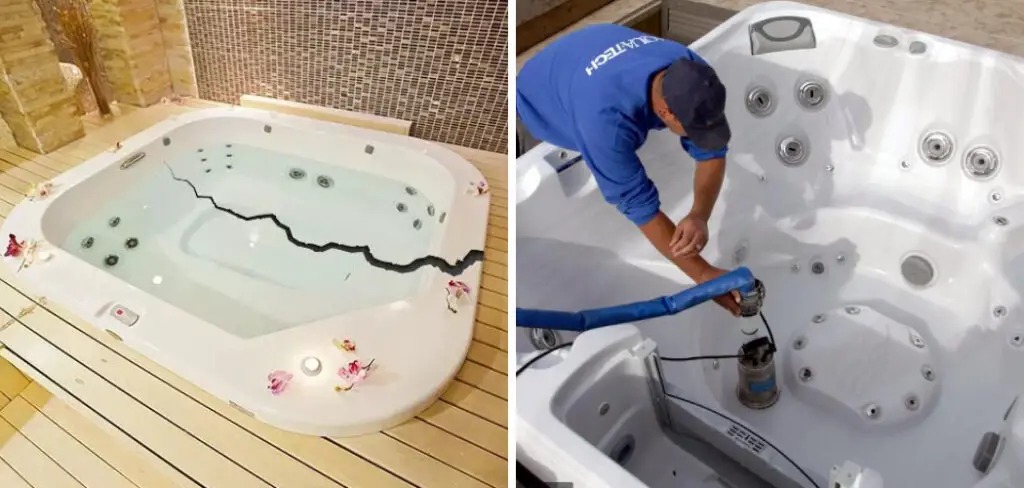
Are you lucky enough to have a hot tub in your backyard? Having one can be a great way to relax after long days and enjoy some time with family or friends. But if you suddenly notice a crack in the surface of your hot tub, it can put a damper on things—not to mention it’s dangerous!
Fortunately, tackling this issue is easier than you might think. In this blog post, we’ll discuss why cracks occur and tell you how to fix them so that your beloved hot tub remains safe for use again soon. This post will help answer the question, ‘how to fix crack in hot tub?’
Can You Fix a Hairline Crack on Tub?
Yes, you can fix a hairline crack on your hot tub. Depending on the severity of the crack, you may be able to repair it yourself with some minor repairs and supplies.
If the crack is small and just starting to form, then you can use a basic epoxy or polyester resin combined with a hardener to fill in the crack and help prevent it from spreading. You can find these supplies at most hardware stores or online.
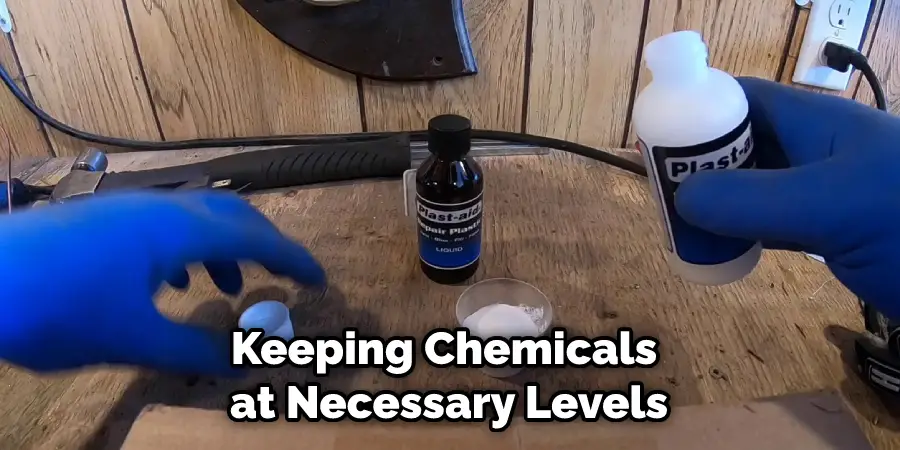
Begin by cleaning the area around the crack thoroughly, removing any dirt and debris that may be present. Once you have done this, make sure to dry off the area with a cloth before beginning your repair work.
Allow the mixture to dry for 24 hours before using your hot tub again. With these simple steps, you should be able to fix that hairline crack on your hot tub and get back to enjoying your spa time.
If the crack becomes more severe or you are unable to fix it yourself, then you may need to contact a professional for help. They will be able to assess the damage and make any repairs or replacements necessary for a secure seal on your hot tub. Remember that if the crack is too serious, it may be best to replace the entire hot tub instead of attempting a repair.
10 Methods on How to Fix Crack in Hot Tub
1. Polyester Resin Repair Kit –
Polyester resin repair kits can be used to fix small cracks in your hot tub. To use the kit, start by thoroughly cleaning the area around the crack with soap and water and then dry it with a towel. Next, mix the polyester resin according to the instructions on the packaging, then spread it onto the crack using a putty knife.
Give it at least 24 hours to dry and harden before you add water to your hot tub.
2. Acrylic Repair Cement –
If you have a cracked wall or bottom panel of your hot tub, you can use acrylic repair cement to fix it. Start by sanding down the surface of the crack and wiping away any dust with a damp cloth.
Then apply an even layer of acrylic repair cement to each side of the crack and hold them together for at least two minutes until they bond together securely. Wait for at least 24 hours before adding water to your hot tub again.
3. Vinyl Repair Kit –
To fix a small vinyl tear or crack in your hot tub, you can buy a vinyl repair kit from most hardware stores or online retailers. These kits come with everything you need, including patches, adhesive, solvent, and instructions for application.
To begin, cut out a patch that is slightly larger than the tear or crack in your hot tub liner using scissors or a utility knife. Then apply solvent to both sides of the patch before pressing it firmly into place over the affected area and holding it there until it bonds securely with no air bubbles present.
4. Fiberglass Repair Kit –
If you have more serious cracking in your hot tub’s body, you might need to use a fiberglass repair kit instead of other methods mentioned above, as this is better suited for large repairs where structural integrity needs restoring rather than just aesthetic improvements such as patching holes or sealing up minor cracks in walls or liners, etc.
Follow all safety precautions included in any fiberglass repair kit before beginning work on repairing your hot tub’s internal structure, as this involves working near electrical components, which must be done carefully if not handled by an experienced professional electrician.
5. Professional Hot Tub Repair Service –
If all else fails, don’t hesitate to call up an experienced professional who specializes in hot tub repairs and maintenance, as they should be able to quickly assess any damage caused by cracking and make appropriate repairs so that your spa is back up and running like new!
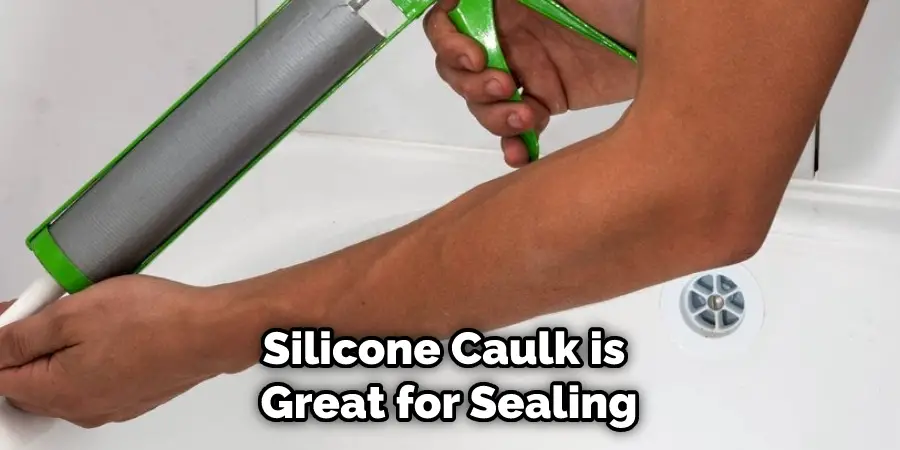
They may also recommend ways of protecting against further damage through proper maintenance, such as emptying out old stagnant water on a regular basis and keeping chemicals at necessary levels for optimal performance.
6. Clear Epoxy Sealant –
For minor cracks that are barely noticeable but still pose potential leak risks, clear epoxy sealant can help provide an extra line of protection against unwanted moisture coming into contact with electrical components inside your hot tub when filling up or topping off water levels regularly.
Begin by cleaning off any dirt around the affected area before applying clear epoxy sealant directly onto each side of the crack while avoiding getting any on surrounding areas like walls, liners, or other components. Allow 48-72 hours for drying time before refilling the spa once again.
7. Silicone Caulk –
Similar to clear epoxy sealant but less permanent, silicone caulk is great for sealing both small hairline cracks, which may not require extensive repairs otherwise but still need some additional protection against moisture, especially when running certain features such as waterfall jets, etc.
Start off by cleaning off dirt from the affected area using warm soapy water, followed by drying completely before applying silicone caulk directly onto each side of the crack while avoiding getting any on surrounding areas like walls, liners, etc. Allow 72-96 hours of drying time before refilling the spa once again.
8. Automotive Body Putty –
When dealing with larger-scale repairs requiring more structural reinforcement than just patching over existing cracks, automotive body putty is often used due to its strength when curing properly upon application, followed by additional layers depending on the severity/size of a particular issue being addressed.
Always wear protective gear such as gloves & eye protection when working with body putty, as fumes produced during the curing process may be caustic if breathed in consistently over time without adequate ventilation present nearby!
After removing the damaged section & prepping the area accordingly, apply multiple layers ( thickness will vary depending on size & depth ) across the problematic spot, allowing the suggested time frame between each coat specified within the product’s instruction manual until desired shape & fortitude are achieved prior to filling up spas ( usually 48-72 hrs )!
9. High Bond Adhesives
When dealing with smaller scale/surface level problems such as minor tears/rips occurring near seams & edges throughout interior/exterior areas within spas & Jacuzzi, high bond adhesives provides quick & easy solution without having to remove the entire portion where certain issues are located!

Easily applied directly onto surfaces needing patch/repair via syringe, roller, or paint brush, followed by allowing plenty of time ( usually 24-48 hrs ) for adhesive to dry completely before filling up spas with necessary amounts of water & begin enjoying a refreshing experience once again!
10. Keep an Eye Out
Whether your hot tub is brand new or has been used frequently over the years, it is important to keep a keen eye out for any potential issues that may arise, such as cracking, tearing, or other structural damage.
If you spot anything out of the ordinary, contact your local service provider immediately in order to get it properly looked at & fixed before further problems occur!
By following these steps and with regular upkeep of your hot tub, you will be able to ensure it remains in good condition for years to come & enjoy endless hours of relaxation as reward !
Conclusion
If your hot tub has sprung a leak, don’t despair. With a little time and effort, you can fix the crack yourself and avoid the high cost of replacing the entire hot tub. By following these simple steps, you’ll have your hot tub back up and running in no time.
If you have any other questions about fixing cracks in a hot tub, or if you want to learn more about how to fix crack in hot tub, be sure to check out our other blog posts. Thanks for reading!
About
Outdoor Fixes is a distinguished figure in the world of Diy design, with a decade of expertise creating innovative and sustainable Diy solutions.
His professional focus lies in merging traditional craftsmanship with modern manufacturing techniques,
fostering designs that are both practical and environmentally conscious. As the author of diy,
outdoorfixes delves into the art and science of outdoorfixes-making, inspiring artisans and industry professionals alike.
Education RMIT University
(Melbourne, Australia) Associate Degree in Design (Outdoor Fixes) Focus on sustainable design, industry-driven projects,
and practical craftsmanship. Gained hands-on experience with traditional and digital manufacturing tools, such as CAD and CNC software.
Nottingham Trent University
(United Kingdom) Bachelor’s in outdoorfixes.com and Product Design (Honors) Specialized in product design with a focus on blending creativity with production
techniques. Participated in industry projects, working with companies like John Lewis and Vitsoe to gain real-world insights.
Publications and Impact
In diy, Outdoor Fixes his insights on indoor design processes, materials, and strategies for efficient production.
His writing bridges the gap between artisan knowledge and modern industry needs, making it a must-read for both budding designers and seasoned professionals.