
Installing a driveway gate is an excellent way to secure your property while still maintaining easy access. A properly installed driveway gate can provide additional security and enhance the aesthetic of your home or business. It can also help keep unwanted visitors away from your premises, protect against vandalism and theft, and make it difficult for intruders to enter your property.

One of the main advantages of installing a driveway gate is that it can provide security and privacy for your home. A driveway gate offers an effective barrier between your property and the outside world so that unwelcome visitors cannot enter without permission. The gate also prevents animals from entering your yard, which helps to keep your grass and plants safe. You can find step-by-step instructions on how to install a driveway gate in this blog article.
Step-by-step Instructions for How to Install a Driveway Gate
Step 1: Inspect the Area
It’s important to start by inspecting the area where you plan on installing a driveway gate. Take note of the layout and size of your property, as well as any nearby obstacles or objects that may interfere with the installation process. Additionally, if you need to run power to your gate, be sure to check for existing electrical outlets in the area.
Step 2: Research & Purchase the Gate
Once you’ve determined the size and shape of your fencing, it’s time to select a driveway gate. Consider the style and type of material that best suit your needs and budget. Be sure to measure your property and get exact measurements for your gate, as this will ensure a proper fit and prevent any costly mistakes.
Step 3: Prepare the Area
Before installing the gate, you’ll need to prepare the area by measuring and marking where it will be installed. Using stakes or markers, indicate exactly where the gate should be placed, along with posts that will secure it in place. Additionally, you may need to clear away any existing obstructions, such as soil or vegetation.
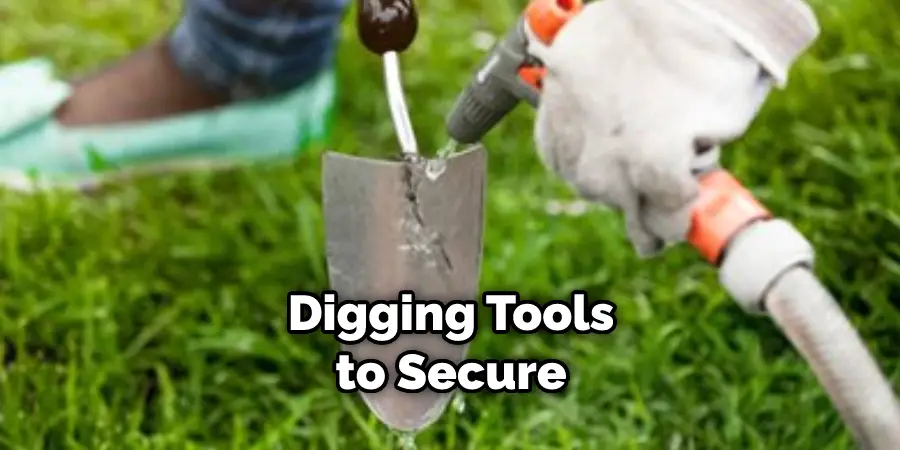
Step 4: Install the Gate
Now it’s time for the actual installation process. Depending on your gate type, you may need to use concrete, metal posts, and digging tools to secure the gate in place. Be sure to take your time and follow the instructions carefully to avoid any errors or damage during this step.
Step 5: Test & Secure the Gate
Once you’ve installed the gate, it’s essential to test its functionality and make any necessary adjustments. Ensure all locks, hinges, and other components are working properly. Additionally, be sure to secure the gate with a latch or padlock so that it stays in place and is not a danger to anyone entering or exiting your property.
Step 6: Maintain the Gate
To ensure the longevity of your driveway gate, it’s important to maintain it regularly. This includes checking for any signs of rust or corrosion and keeping the hinges and locks lubricated. Additionally, you may want to inspect the gate every now and then for any wear and tear. Following these steps should help keep your driveway gate in optimal condition for years to come.
By following these steps, you can easily install a driveway gate that is both safe and secure. Be sure to carefully research the materials and features of your gate before purchase, as this will ensure that it meets all your needs.
Safety Tips for How to Install a Driveway Gate

- Wear protective clothing and safety glasses when installing a driveway gate to protect yourself from dust, debris, or other potential hazards.
- Check the area where you plan to install your driveway gate ahead of time to ensure that it is clear of any obstructions, such as trees, power lines, or fencing.
- Ensure all tools and equipment you will use to install your driveway gate are in good working condition.
- Follow the manufacturer’s instructions carefully when installing a driveway gate, making any necessary modifications as instructed.
- Double-check that the gate is securely attached to its hinges and that all bolts, screws, and other attachments are firmly in place.
- Ensure the driveway gate is operating properly and securely before leaving it unattended for an extended period.
- Inspect your driveway gate regularly to ensure that it is still in good condition and remains secure at all times.
Following these safety tips will help ensure you correctly install your driveway gate and keep you safe.
How Do You Maintain Your Driveway Gate Over Time?
Once you have successfully installed a driveway gate, it is important to maintain it to keep it functioning properly. Regular maintenance will help extend the life of your gate and ensure that it remains secure. Here are some tips on how to maintain your driveway gate:
- Check for Wear and Tear: Inspect your gate regularly to look for signs of damage such as rust, bent tracks, or loose bolts. If any issues are found, repair them quickly before they worsen and cause further damage.
- Clean the Gate: Dirt and debris can accumulate on your driveway gate over time, so it is important to wipe it down with a mild detergent every few months to keep it looking its best.
- Lubricate the Moving Parts: You should lubricate all the moving parts on your gate, including hinges and tracks, to ensure they remain in good condition. This will help prevent wear and tear and reduce friction, making it easier to open and close your gate.
- Test the Gate: It is important to test your driveway gate on a regular basis to make sure it is functioning properly. Open and close the gate a few times to ensure that the motion is smooth and there are no issues.
Following these tips can help you maintain your driveway gate over time and keep it in top condition for many years.
How Do You Keep Your Driveway Gate Safe From Weather Damage?
Installing a driveway gate is an excellent way to add extra security to your home. Unfortunately, the gate can be exposed to rust and deterioration if you don’t take the necessary steps to protect it from weather damage. If you’re installing a metal gate, make sure that it’s galvanized or powder coated for added protection. This will help to prevent rusting and rot caused by exposure to moisture. Additionally, you should always apply a coat of paint or sealant after it has been installed.

If your driveway gate is made from wood, ensure the material is pressure treated. This will help protect it from warping and cracking from rain and snow exposure. Additionally, you should apply a coat of sealant or paint to protect the wood from moisture damage. Lastly, ensure your driveway gate is installed on a durable footing or posts. This will help ensure that it remains securely in place during severe weather conditions and prevents shifting due to high winds or ice buildup.
How Can You Prevent Unauthorized Access to the Driveway Gate?
Once you have installed your driveway gate, you want to prevent unauthorized access to the gate. You can set up a security system or use a keypad entry system to do this. Security systems are designed with several components and sensors that detect movement or other disturbances near or around the gate. When any movement is detected, an alarm will sound, alerting you and others of the disturbance.
Keypad entry systems are a great way to control access to the driveway gate without relying on security systems. With a keypad system, visitors must enter a code to open the gate. You can create your own code that is unique to your gate so that only those who know the code can gain access to the gate. By installing a security system or keypad entry system, you can have peace of mind knowing that unauthorized access to the driveway gate is prevented. This will help keep your property safe and secure from unwanted visitors or intruders.
How Often Should You Inspect Your Driveway Gate for Potential Damage or Wear and Tear?
Once you have installed a driveway gate, it is important to inspect the gate regularly for potential wear and tear. How often you should inspect your driveway gate depends on the type of material used for construction, as well as the local climate conditions. In general, wood gates should be inspected every few months to check for signs of rotting or warping, while metal gates should be inspected at least once a year. Additionally, if your driveway gate is located in an area of the country that experiences extreme weather conditions (such as high winds or heavy snowfall), it is important to inspect the gate more frequently for damage caused by these conditions.
When inspecting your driveway gate, look for signs of damage such as warping, rust, cracking, or splitting. If you find any of these signs of damage, it is important to repair the issue immediately to ensure that your driveway gate remains secure and functional. Additionally, make sure to check all the hardware used in the installation process periodically for signs of wear and tear. It is also a good idea to lubricate the hinges and other moving parts of your driveway gate regularly to ensure that they are not sticking or binding.

Conclusion
In conclusion, installing a driveway gate is a great way to increase the security of your home and property. It requires careful planning, preparation, and measurements to ensure it fits correctly and performs as expected. With adequate research, proper materials and tools, and some basic knowledge of construction work and safety precautions, anyone with the right attitude can install their own driveway gate. This project can be completed in a day or two, depending on the scale of the gate and its accompanying features. I hope this article has been beneficial in learning how to install a driveway gate. Make Sure the precautionary measures are followed chronologically.
You can check it out to Cover Dirt in Backyard for Party
About
Outdoor Fixes is a distinguished figure in the world of Diy design, with a decade of expertise creating innovative and sustainable Diy solutions.
His professional focus lies in merging traditional craftsmanship with modern manufacturing techniques,
fostering designs that are both practical and environmentally conscious. As the author of diy,
outdoorfixes delves into the art and science of outdoorfixes-making, inspiring artisans and industry professionals alike.
Education RMIT University
(Melbourne, Australia) Associate Degree in Design (Outdoor Fixes) Focus on sustainable design, industry-driven projects,
and practical craftsmanship. Gained hands-on experience with traditional and digital manufacturing tools, such as CAD and CNC software.
Nottingham Trent University
(United Kingdom) Bachelor’s in outdoorfixes.com and Product Design (Honors) Specialized in product design with a focus on blending creativity with production
techniques. Participated in industry projects, working with companies like John Lewis and Vitsoe to gain real-world insights.
Publications and Impact
In diy, Outdoor Fixes his insights on indoor design processes, materials, and strategies for efficient production.
His writing bridges the gap between artisan knowledge and modern industry needs, making it a must-read for both budding designers and seasoned professionals.