Are you a homeowner who is interested in expanding your outdoor living space with a patio cover? Installing a ledger board to your home’s structure can add tremendous aesthetic and utilitarian value to an area, allowing you to take advantage of shade when temperatures begin to soar.

By following this step-by-step guide on how to install a ledger board for a patio cover, you can be sure that the project will be done safely and correctly. With just some basic tools, time, and supplies—you too could enjoy the beauty of comfort right outside your door!
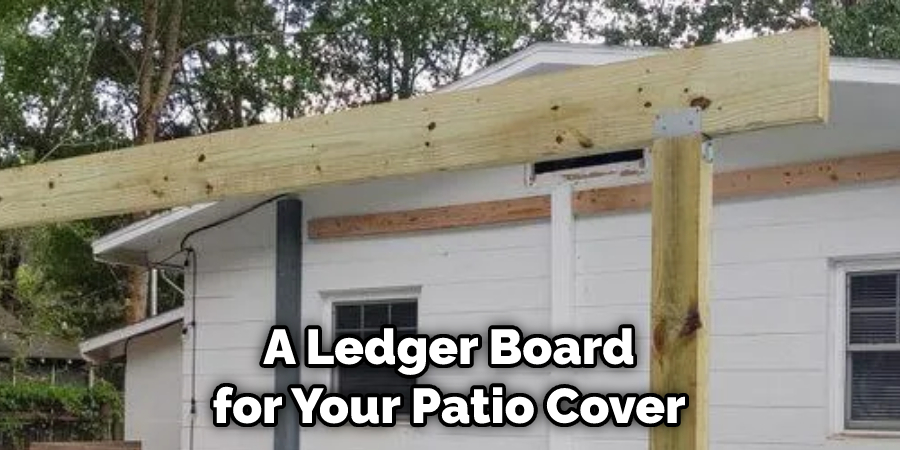
When it comes to protecting your patio from the elements and improving its overall look, installing a ledger board is one of the best ways to do so. A ledger board, also known as a fascia or header beam, helps secure the structure of your patio cover while providing an aesthetic appeal.
We’ll discuss what tools you need and answer some questions that may arise throughout the installation process. So if you are looking for a simple do-it-yourself project that can pay big dividends in terms of form and function, read on – we have all the answers you need!
Benefits of Installing a Ledger Board for a Patio Cover
There are many benefits of installing a ledger board for your patio cover. A ledger board is an essential part of any patio cover, providing the necessary support and stability to hold up the structure. Installing a ledger board can improve the look and functionality of your outdoor space while also extending its life span.
1. Increased Structural Stability
A ledger board helps to support the structure of your patio cover, distributing weight and providing a solid foundation for the entire structure. This can help prevent damage from shifting or settling over time.
2. Improved Aesthetics
Installing a ledger board creates an aesthetically pleasing frame around the edge of your patio cover. It also protects against water damage, insects, and other external elements that can cause damage.
3. Added Functionality
Ledger boards anchor things such as lighting fixtures or planters, adding functionality to your patio cover. This is a great way to customize the space and make it your own!

How to Install a Ledger Board for a Patio Cover in 6 Easy Steps
Now that you understand the benefits of installing a ledger board for your patio cover let’s go over the steps of how to do it.
Step 1: Measure and Cut Lumber
The first step is to measure and cut the lumber for the ledger board. Make sure that you measure accurately in order to create a flush fit against the house wall. You will then need to cut the wood to the appropriate size.
Step 2: Mark Location on Wall
Once you have your lumber cut, the next step is to mark the ledger board’s location on your house’s wall. Be sure to make a line that is straight and level so that your ledger board will be installed correctly.
Step 3: Attach Ledger Board
Now that you have the ledger board cut and your wall marked, you can begin attaching the ledger board to your house. You should use lag screws and masonry anchors depending on the type of wall material you are working with. Make sure to drill pilot holes first in order to prevent cracking.
Step 4: Check Levelness
Once the ledger board has been attached to the wall, you should check to make sure that it is level. If not, use a carpenter’s level to adjust as needed. It will make sure that everything fits together as it should.
Step 5: Install Joists
The next step is to install joists for the patio cover. This will provide a strong support structure and make sure that your patio cover is stable and secure. Begin installing the joists along the ledger board, making sure they are level and spaced evenly apart.
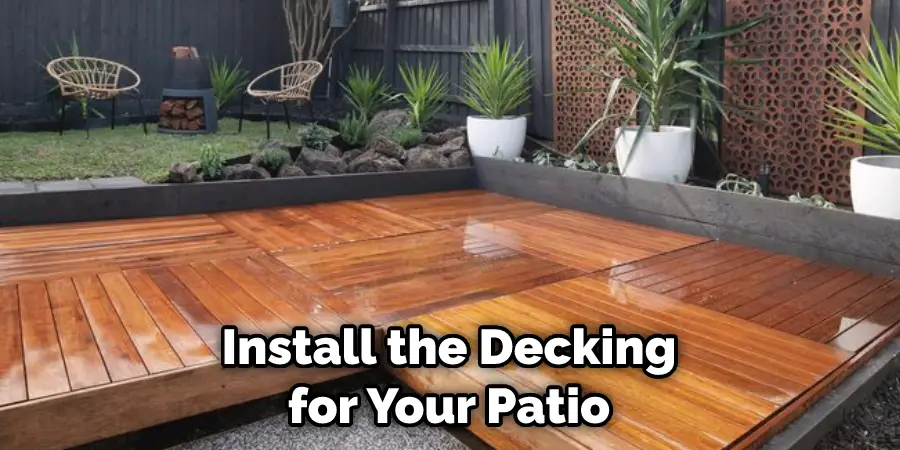
Step 6: Install Decking
The final step is to install the decking for your patio cover. Ensure you use weather-resistant materials such as composite or pressure-treated wood. Once all the deckings have been installed, you can add additional features like railings and benches.
By following these simple steps, you can easily install a ledger board for your patio cover! With the support of a ledger board, your patio cover will be stable and secure for years to come.
Some Additional Tips to Install a Ledger Board for a Patio Cover
1. Do Not Overdrive the Screws
Make sure not to over-tighten the screws when securing the ledger board. Overtightening can cause cracks in the ledger board, which could lead to the failure of the patio cover.
2. Use Strong Material for Lags and Washers
Using strong materials, such as heavy-duty galvanized lags and washers, is essential to ensure the security of the ledger board. This will help prevent any unwanted movements in the future.
3. Use Adhesive Where Necessary
To ensure that the ledger board stays secure and in place, use an appropriate adhesive or caulking to fix the ledger board onto the building. This will help prevent water damage or rot in the future.
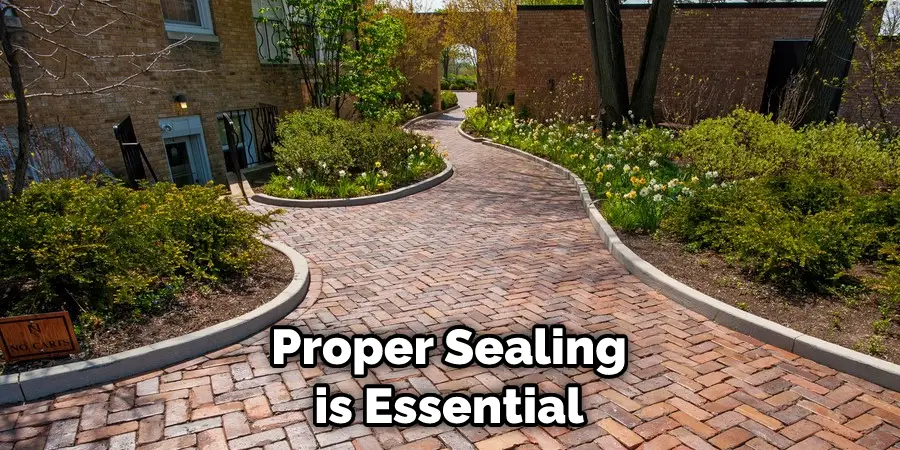
4. Seal the Joints
To further protect your ledger board, seal all the joints with a waterproof sealer after installation is complete. This will help keep moisture and debris out of any gaps between pieces of wood and will prevent potential damage.
5. Follow the Manufacturer’s Instructions
Make sure you always follow the manufacturer’s instructions when installing a ledger board for your patio cover. This will help ensure that you are doing it correctly and safely and that your ledger board is properly supported for the long term.
Following these tips will ensure your project’s success and help protect the longevity of your patio cover. Make sure to double-check all of your work before completing the installation so that you can rest assured knowing it is secure and will last many years.
Frequently Asked Questions
What Precautions Should I Take When Installing a Ledger Board?
It is important to take precautions when installing a ledger board. Always make sure the surface you are attaching your ledger board to is flat and level, as this will ensure that it is properly secured. Additionally, you should use galvanized lag screws or bolts for mounting and check that all fasteners are securely tightened.
Finally, be sure to seal the ledger board and the surrounding area with caulking or sealant to keep out moisture.
How Do I Fasten a Ledger Board?
The best way to fasten a ledger board is by using galvanized lag screws or bolts. Lag screws are better for wood surfaces, while bolts should be used when attaching the ledger board to concrete or masonry. Make sure that you predrill pilot holes for lag screws and use a masonry bit for concrete walls. Always make sure all fasteners are tightened securely before moving on to the next step.
What Materials Are Needed To Install a Ledger Board?
Before beginning your project, ensure you have all the necessary materials. You will need a ledger board, galvanized lag screws or bolts, washers, a drill and drill bits for predrilling pilot holes and masonry work (if applicable), caulking or sealant to seal the ledger board, and an appropriate level such as a 4-foot level.
Once you have all the necessary materials, you are ready to begin your project. Good luck and happy building!
How Should I Seal the Ledger Board?
Once the ledger board is mounted, it should be sealed with caulk or sealant to keep out moisture. Make sure that all gaps around the ledger board are properly sealed. You should also seal around any nails or screws used to mount the ledger board, as this will help protect them from corrosion.
Finally, be sure to check for any signs of damage or wear and tear over time. Proper sealing is essential for a successful installation.
Conclusion
Now that you know how to install a ledger board for a patio cover, you can get started on your project! This job is not as difficult as it may seem at first, and with a little bit of time and effort, you can have beautiful results. Be sure to take all necessary safety precautions and follow the instructions to ensure that your project goes smoothly.
By following the steps outlined in this blog post, you can ensure that your ledger board is properly installed and ready to support your patio cover. With a little time and effort, you can have a sturdy and attractive patio cover that will provide years of enjoyment. Thanks for reading!
About
Outdoor Fixes is a distinguished figure in the world of Diy design, with a decade of expertise creating innovative and sustainable Diy solutions.
His professional focus lies in merging traditional craftsmanship with modern manufacturing techniques,
fostering designs that are both practical and environmentally conscious. As the author of diy,
outdoorfixes delves into the art and science of outdoorfixes-making, inspiring artisans and industry professionals alike.
Education RMIT University
(Melbourne, Australia) Associate Degree in Design (Outdoor Fixes) Focus on sustainable design, industry-driven projects,
and practical craftsmanship. Gained hands-on experience with traditional and digital manufacturing tools, such as CAD and CNC software.
Nottingham Trent University
(United Kingdom) Bachelor’s in outdoorfixes.com and Product Design (Honors) Specialized in product design with a focus on blending creativity with production
techniques. Participated in industry projects, working with companies like John Lewis and Vitsoe to gain real-world insights.
Publications and Impact
In diy, Outdoor Fixes his insights on indoor design processes, materials, and strategies for efficient production.
His writing bridges the gap between artisan knowledge and modern industry needs, making it a must-read for both budding designers and seasoned professionals.