
Are you considering raising goats but don’t know how to build a safe and secure fence for them? Building a sturdy barrier is a crucial step in the process of keeping your goats contained. Not only do they need the ability to wander around to keep their muscles strong, but proper fencing can also help protect them from predators and the elements.

In this blog post, we’ll discuss some tips on how to install plastic mesh fencing that will give them enough space while still allowing you peace of mind. We’ll cover everything from choosing an appropriate type of fencing material to actually building it yourself or hiring someone else to do it for you!
Why Use Plastic Mesh Fencing
Plastic mesh fencing is a popular choice for goat pens because it’s easy to install, lightweight, and affordable. It also gives goats enough space to move around while providing adequate protection from predators. Additionally, this type of fencing is durable and resistant to weather elements, making it a long-term investment for your goat farm.
Materials Needed
Before starting your fencing project, it’s essential to have all the necessary materials ready. Some of the tools and supplies you’ll need include:
- Fence Posts (Wooden or Metal)
- Plastic Mesh Fencing
- Zip Ties or Wire for Fastening
- Hammer/drill
- Nails/screws
- Measuring Tape
- Level Tool
- Safety Gloves and Glasses
- Fence Clips or Staples
9 Simple Step-by-step Guidelines on How to Install Plastic Mesh Fencing
Step 1: Measure and Mark the Area
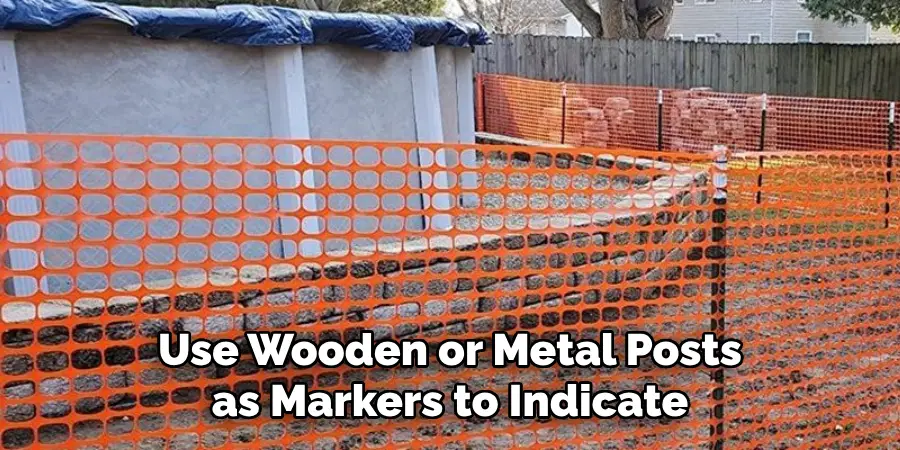
Before you begin installing the fence, measure the area where you want to build it. You can use wooden or metal posts as markers to indicate where your fence will be placed. It’s essential to have a clear idea of the perimeter to ensure you have enough fencing material for your project. It’s also a good idea to mark any obstacles or uneven areas that may need extra attention during installation. But don’t worry, we’ll cover how to navigate these challenges later on.
Step 2: Prepare the Posts
If you’re using wooden posts, make sure they are treated with preservatives to prevent rotting. For metal posts, make sure to clear any debris from the area around them before installation. It’s also a good idea to dig holes for your posts in advance, making sure they are deep enough to support your fence. You can use a post-hole digger or an auger for this task. It’s recommended to space posts at least 8-10 feet apart for proper stability.
Step 3: Dig Holes for Posts
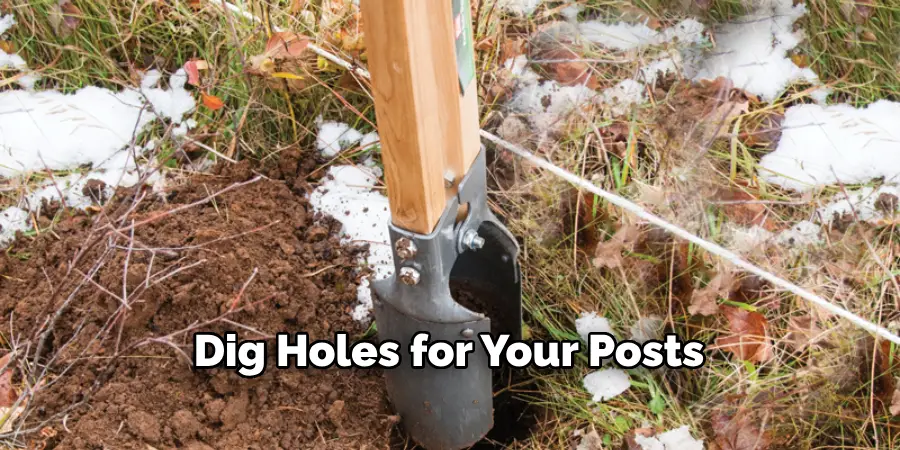
Dig holes for your posts using a post-hole digger or shovel. The depth of the holes should be at least one-third of the length of your posts. But, this also depends on the soil type and the height of your fence. For example, if you have rocky or uneven ground, you may need to dig deeper holes for stability. It’s essential to make sure the posts are evenly spaced and level before moving on to the next step. You can use a level tool to check this.
Step 4: Insert and Secure Posts
Place your posts in the dug holes, making sure they are vertical and evenly spaced. Tamp down the soil around each post to secure them in place. It’s also a good idea to use concrete for added stability, especially if you live in an area with high winds or heavy rain. Once the posts are secure, allow the concrete to dry before continuing with the installation.
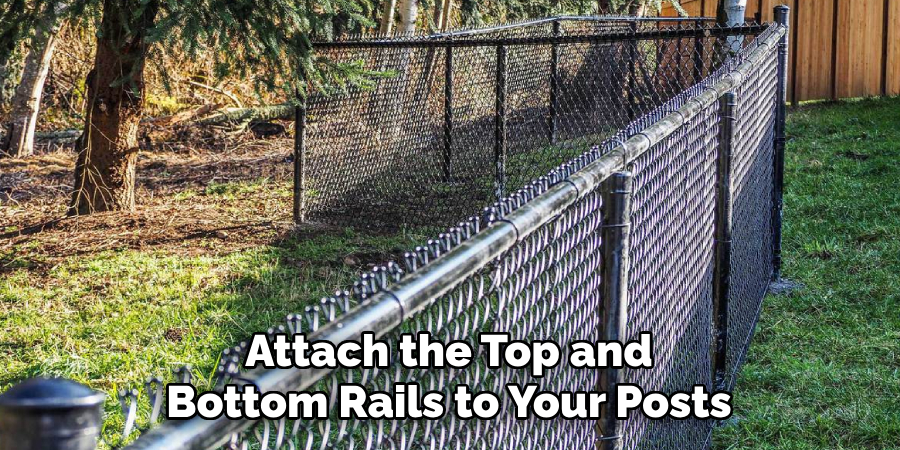
Step 5: Attach the Top and Bottom Rails
Using a hammer or drill, attach the top and bottom rails to your posts. Make sure they are level and secure. You can use nails or screws for this task, depending on your preference and the type of posts you have. It’s important to make sure the rails are evenly spaced and level to ensure proper support for your fence. This step may require some adjustments, especially if you’re working with uneven terrain. It’s also a good idea to secure the rails with fence clips or staples for added stability.
Step 6: Unroll the Mesh Fencing
Roll out your plastic mesh fencing along the length of your fence, making sure it’s straight and even. But, if your fencing is too long, you can cut it to the desired length using a wire cutter. It’s also essential to leave some extra mesh at the end of each side for overlapping and securing. If you’re working with uneven terrain, it’s a good idea to cut your fencing into smaller sections for easier installation. However, make sure to properly secure each section before moving on to the next one.
Step 7: Fasten the Fencing
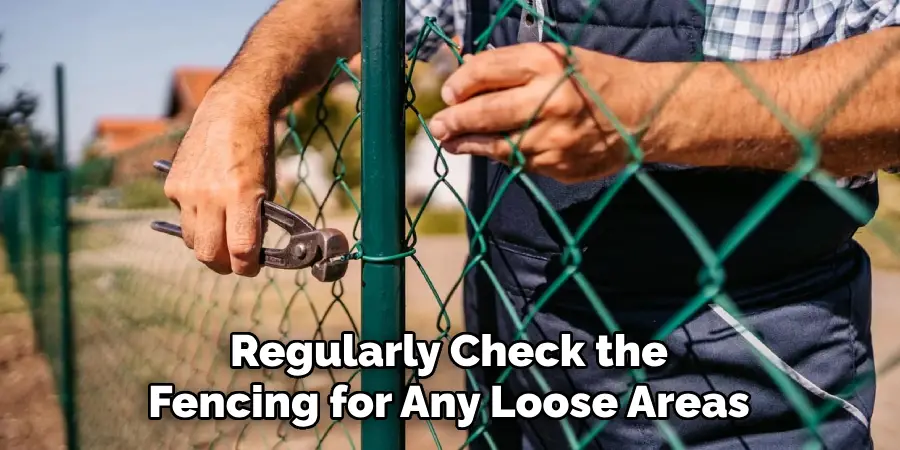
Attach the top of the fencing to the top rail, using zip ties or wire. Then, attach the bottom of the fencing to the bottom rail in a similar manner. You can also use fence clips or staples for added stability. It’s important to make sure the fencing is tightly secured to prevent any gaps that may allow goats to escape or predators to enter. You can also overlap the ends of your fencing for added reinforcement. It’s essential to regularly check your fencing for any loose areas and make necessary adjustments.
Step 8: Secure Fencing to Posts
Use fence clips or staples to secure your fencing to the posts. Make sure it’s tight and correctly attached. But, be careful not to damage the fencing material while securing it. You can also use zip ties or wire if necessary. it’s important to regularly check the fencing for any loose areas and make necessary adjustments. If you’re working with uneven terrain, it’s important to adjust the fencing accordingly to ensure proper coverage and protection. But, don’t worry, this step may require some trial and error.
Step 9: Trim Excess Fencing
Using a pair of wire cutters, trim any excess mesh fencing that is sticking out. Always use safety gloves and glasses when handling sharp tools. You can also trim any uneven or jagged edges to give your fence a cleaner look. If you’re working with rocky or uneven terrain, this step may require some extra effort. It’s important to regularly inspect your fencing for any potential issues and make necessary adjustments. But, with proper installation and maintenance, your new plastic mesh fencing should provide a secure and durable barrier for your farm.
Following these simple guidelines on how to install plastic mesh fencing will help you install your plastic mesh fencing in no time. If you’re not confident in building it yourself, don’t hesitate to hire a professional for the job. With proper installation, your goats will have a safe and secure space to roam around, giving you peace of mind. Happy goat farming!
Frequently Asked Questions
Q1: How High Should Plastic Mesh Fencing Be for Goats?
A1: The ideal height for plastic mesh fencing for goats is 4 feet. This will prevent them from jumping over and keep predators out. You can also add additional height if your goats are particularly agile.
Q2: Is Plastic Mesh Fencing Suitable for All Types of Terrain?
A2: Yes, plastic mesh fencing is adaptable to most terrains. However, it’s essential to make sure the fencing is securely attached to the ground to prevent it from being knocked over by strong winds or animals.
Q3: Can I Use Plastic Mesh Fencing for Other Types of Livestock?
A3: Yes, plastic mesh fencing can be used for a variety of livestock, including sheep, pigs, and poultry. However, make sure to choose a suitable height and material depending on the type of animals you have.
Q4: Do I Need to Replace Plastic Mesh Fencing Periodically?
A4: With proper installation and maintenance, plastic mesh fencing can last for many years. However, it’s essential to regularly inspect for any damages or wear and tear that may require the replacement of certain sections. Overall, it’s a durable and cost-effective fencing option for your goat farm.
Conclusion
Overall, installing plastic mesh fencing is a great way to maintain boundaries and protect your property. For anyone wanting to install plastic mesh fencing, it can be easily done with the right tools and materials. By following the step-by-step instructions outlined in this blog post you can ensure that the job is successfully completed. Additionally, be sure to take measurements of your intended area before getting started.
This will help make sure that once installed, your fence is even and secure. With some patience and persistence, you’ll finally have the strong barrier you were looking for — safe in the knowledge that your plastic mesh fencing was installed correctly from start to finish. So don’t wait – contact your local supplier today and get ready to install your own plastic mesh fence! Thanks for reading this article on how to install plastic mesh fencing.
About
Outdoor Fixes is a distinguished figure in the world of Diy design, with a decade of expertise creating innovative and sustainable Diy solutions.
His professional focus lies in merging traditional craftsmanship with modern manufacturing techniques,
fostering designs that are both practical and environmentally conscious. As the author of diy,
outdoorfixes delves into the art and science of outdoorfixes-making, inspiring artisans and industry professionals alike.
Education RMIT University
(Melbourne, Australia) Associate Degree in Design (Outdoor Fixes) Focus on sustainable design, industry-driven projects,
and practical craftsmanship. Gained hands-on experience with traditional and digital manufacturing tools, such as CAD and CNC software.
Nottingham Trent University
(United Kingdom) Bachelor’s in outdoorfixes.com and Product Design (Honors) Specialized in product design with a focus on blending creativity with production
techniques. Participated in industry projects, working with companies like John Lewis and Vitsoe to gain real-world insights.
Publications and Impact
In diy, Outdoor Fixes his insights on indoor design processes, materials, and strategies for efficient production.
His writing bridges the gap between artisan knowledge and modern industry needs, making it a must-read for both budding designers and seasoned professionals.