
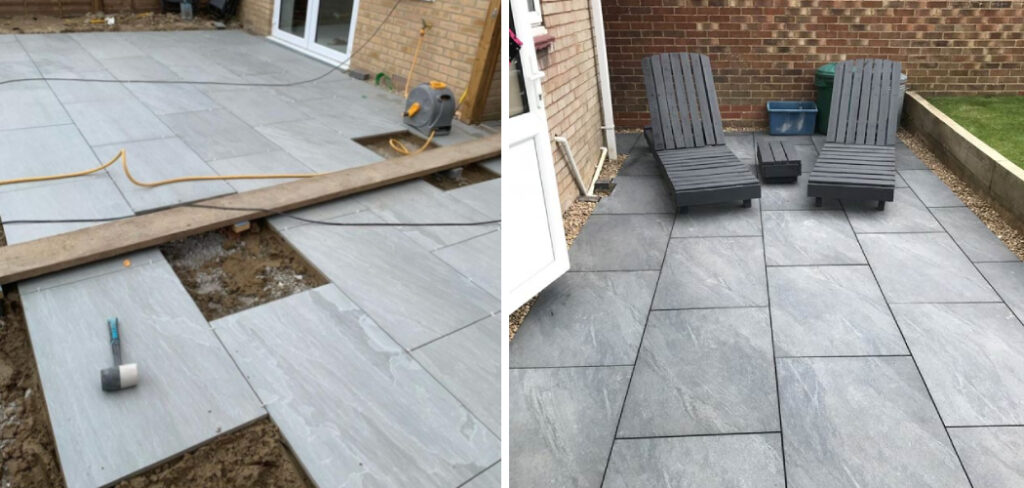
Have you ever wanted to upgrade your outdoor living space by adding the luxurious look of porcelain pavers but thought it sounded too daunting? Well, good news: laying down new porcelain pavers is easier than you may think if you follow a clear plan. Even better, this project can be done in one weekend with minimal tools and supplies; you only need a few essential materials and know-how for success.
If you’re ready to get started, here’s a complete guide on how to lay porcelain pavers. Just follow the steps below, and soon you’ll be enjoying your new upgraded outdoor living space!
In this blog post, we’ll break down the process step by step so that anyone – even beginners – can easily install these elegant pavers. So read on, and let’s start laying!
What Will You Need?
Before you begin the project, make sure to gather all of these supplies and tools:
- Porcelain pavers in the size, pattern, and color of your choosing
- Sand mix for bedding material
- Base gravel (1/8 inch or smaller)
- Polymeric sand for joints between pavers
- Paver edging or paver restraint
- Spade and tamper
- Masonry saw (optional but recommended)
Once you’ve acquired all the necessary tools and supplies, it’s time to get started!
10 Easy Steps on How to Lay Porcelain Pavers
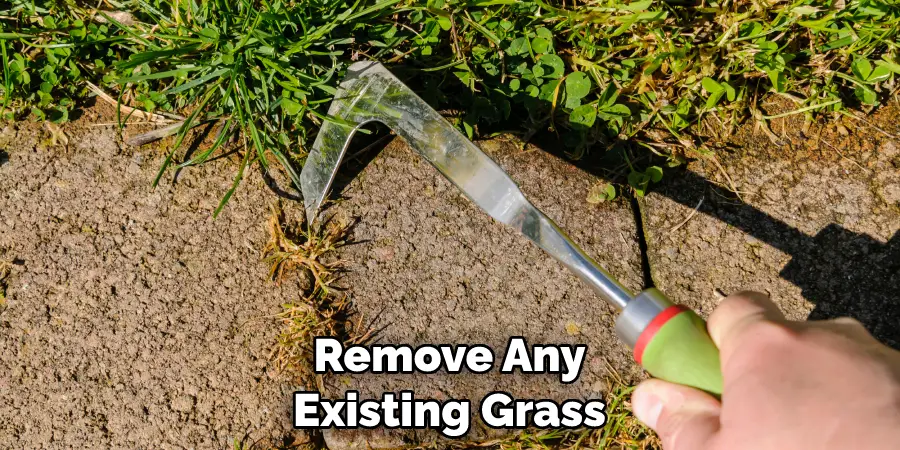
Step 1: Prepare the Area
Begin by preparing the area to give you a level surface for installing your pavers. Remove any existing grass or soil and then spread an even layer of gravel as the foundation. Compress the gravel with a plate compactor to create a solid base.
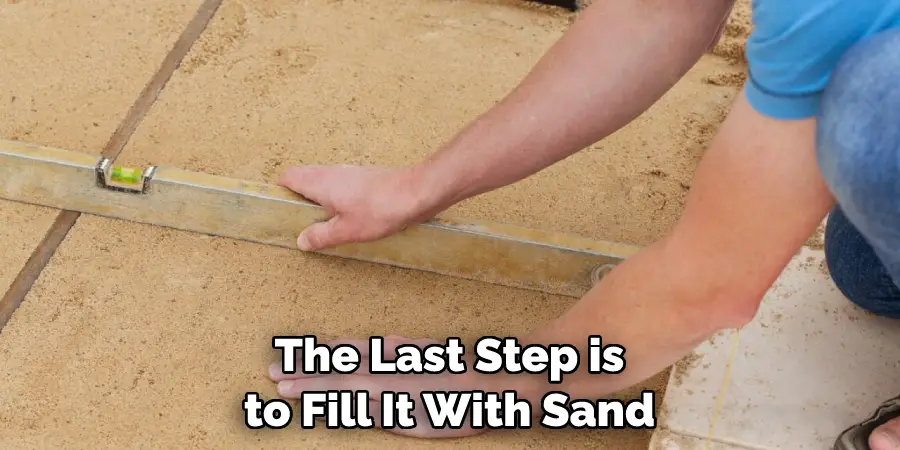
Step 2: Add Bedding Sand
The next step is to spread the sand mix over the area and then screed it out (which involves leveling it) using a 2×4 plank of wood. Ensure you leave space for your pavers, which should be about two to three inches. Skip this step if you’re installing the pavers over an existing concrete surface.
Step 3: Install Paver Edging
To keep the pavers in place and prevent them from shifting, install paver edging or paver restraints around the perimeter of your project area. This will also help contain any sand that might escape during installation. If you’re not installing an edging material, use a long screw to secure the pavers in place.
Step 4: Begin Laying Pavers
Now it’s time to start laying your porcelain pavers. Start at one corner and work outward along the longest straight line, using a masonry saw (if necessary) to cut pieces to fit. Make sure the pavers are placed tightly together, and use a leveler to ensure they’re even with one another.
Step 5: Compact Pavers
Once all of your pavers have been laid, it’s time to give them a firm foundation by using the tamper or plate compactor. This will help the pavers stay in place for years to come. You can also use a hand tamper to compact the pavers along the edges.
Step 6: Fill Joints with Sand
After tamping, you must fill the joints between your pavers with sand. To do this, sprinkle the polymeric sand onto the area and sweep it using a push broom. This will help keep your pavers locked in place and prevent weeds from growing between them.
Step 7: Add Water
Now you’ll need to add water to the sand mix to harden and bind the pavers together. Use a garden hose or a bucket of water for this step to get the sand completely wet. Be careful not to over saturate it, as this can cause the pavers to shift or crack.
Step 8: Compact Again
Once the sand is wet, use the tampers again to compact it and ensure all joints are filled properly. This will also help keep the pavers from shifting in the future. If you find any voids during this process, be sure to fill them in with more sand before continuing.
Step 9: Fill Edging With Sand
If you use paver edging or restraints around the perimeter of your project area, the last step is to fill it with sand. This will help keep it secure and prevent weeds from growing through. Ensure all the joints are filled, and then brush off any excess sand.
Step 10: Seal the Pavers
Finally, to keep your pavers looking their best for years, you’ll want to seal them with a non-slip sealant. This will help protect them from staining and other damage while providing a protective coating against moisture. Be sure to read the instructions on the sealant before applying it for best results.
And that’s it! Now you have a beautiful and durable new look in your outdoor living space, all thanks to your hard work laying porcelain pavers. We hope this guide helped show you how easy it is to get pro-level results. Enjoy your new look and the compliments that are sure to follow!
5 Additional Tips and Tricks
- Before you start, make sure your surface is level and clean. This will help ensure the pavers are laid evenly and securely.
- To ensure that each paver is secure, use a rubber mallet to tap down each piece into place gently.
- If you need to cut any pavers, use a wet saw with a diamond blade to ensure you don’t crack the paver.
- You can also use sand or mortar to fill in gaps between pavers and ensure a seamless look.
- Once you’re done laying your pavers, seal them so they stay looking great for years to come! This will help protect them from stains, dirt, and weathering.
With these tips, you should have no trouble laying your porcelain pavers. Have fun and enjoy the transformation that new pavers can bring to your home!
5 Things You Should Avoid
- Use only a little pressure when tapping on the pavers, which may cause them to crack or break.
- Avoid laying the pavers in direct sunlight or during a scorching day, as this can weaken their bond and cause shifting over time.
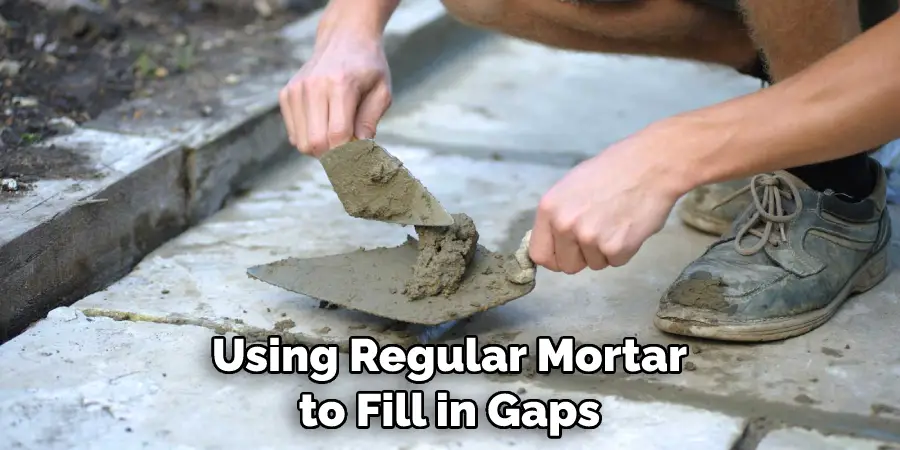
- Refrain from using regular mortar to fill in gaps between your pavers – you should use sand or a specially formulated mortar.
- Avoid mixing different types of pavers together, as it can create an uneven surface and cause the area to look disjointed.
- Remember to use a sealer on your porcelain pavers – this will help protect them from stains and dirt and keep them looking their best for longer.
Now that you know the basics of how to lay porcelain pavers, you can get started on creating your beautiful outdoor oasis! With a few simple tips and tricks, you’ll be able to have a stunning patio area in no time. Happy paving!
5 Main Benefits of Porcelain Pavers
- Porcelain pavers are incredibly durable and withstand heavy foot traffic, making them ideal for high-traffic areas like patios and pool decks.
- They come in a variety of styles and colors, so you can customize your space to fit any aesthetic.
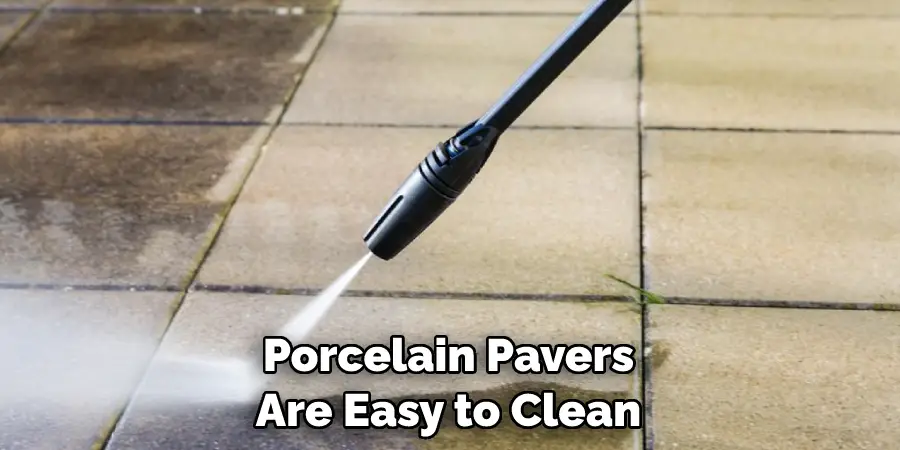
- Porcelain pavers are easy to clean and maintain, making them a great option for busy homeowners.
- They are also slip-resistant and fade-resistant, so they will look great for years to come!
- Porcelain pavers can add value to your home without investing in costly renovations or additions.
Porcelain pavers are an easy way to transform any outdoor space and make your home look more inviting. With their versatility, low maintenance needs, and long-lasting longevity, porcelain pavers are an excellent choice for anyone looking to upgrade their outdoor space.
What is the Best Base for Porcelain Pavers?
The best base for porcelain pavers is a well-prepared and level surface, such as compacted gravel or sand. This will ensure that the pavers are laid evenly and securely on top of the substrate. For an extra layer of security, you can also use mortar to fill in any gaps between the pavers.
Properly preparing your base will ensure that your porcelain pavers last for years!
Additionally, you should ensure your surface is clean before laying the pavers. This will help minimize any dirt or debris from getting stuck between the pavers, which could lead to staining and discoloration over time.
With these tips, you’ll have no trouble creating a beautiful outdoor space with porcelain pavers!
Conclusion
Porcelain pavers are a great way to add a sophisticated and luxurious design element to your outdoor space. Not only do they look amazing, but they’re also solid and durable, making them perfect for high-traffic areas. Their versatility allows you to create different patterns, textures, and designs that will give your outdoor area the perfect look you desire.
Moreover, porcelain pavers are easy to install with basic tools and materials. With patience and attention to detail, you can have perfect porcelain paver work that will last for years.
Hopefully, the article on how to lay porcelain pavers has provided you with all the information you need to get started. So feel free to start laying porcelain pavers today and enjoy the benefits of luxurious outdoor areas without breaking the budget!
About
Outdoor Fixes is a distinguished figure in the world of Diy design, with a decade of expertise creating innovative and sustainable Diy solutions.
His professional focus lies in merging traditional craftsmanship with modern manufacturing techniques,
fostering designs that are both practical and environmentally conscious. As the author of diy,
outdoorfixes delves into the art and science of outdoorfixes-making, inspiring artisans and industry professionals alike.
Education RMIT University
(Melbourne, Australia) Associate Degree in Design (Outdoor Fixes) Focus on sustainable design, industry-driven projects,
and practical craftsmanship. Gained hands-on experience with traditional and digital manufacturing tools, such as CAD and CNC software.
Nottingham Trent University
(United Kingdom) Bachelor’s in outdoorfixes.com and Product Design (Honors) Specialized in product design with a focus on blending creativity with production
techniques. Participated in industry projects, working with companies like John Lewis and Vitsoe to gain real-world insights.
Publications and Impact
In diy, Outdoor Fixes his insights on indoor design processes, materials, and strategies for efficient production.
His writing bridges the gap between artisan knowledge and modern industry needs, making it a must-read for both budding designers and seasoned professionals.