Have you ever been swimming in a pool and experienced random waves of cold or hot water coming from the surface jets? This is likely due to poor pressure testing of the pool’s lines.
Pressure testing is an important part of ensuring that your pool stays safe, efficient, and problem-free.
In this blog post, we will take a look at how to pressure test pool lines so that you can avoid any possible issues with improper flow or temperature control caused by air inside the pipe network leading into and out of the filter. We’ll outline what materials you need, provide step-by-step instructions on how to perform a proper test, as well as list some tips for troubleshooting if something doesn’t seem right during the process. Let’s get started!
Why May You Want to Pressure Test Pool Lines?
1 . Surface Leaks
Pool lines are not impervious to leaks, and surface leaks in particular can be a major headache. These types of leaks occur when there is a crack or damage to the pool’s structure that allows water to escape from the surface into the surrounding area. Pressure testing pool lines can help locate these surface leaks and allow for repairs to be made before further damage occurs.
2. Underwater Leaks
While surface leaks are visible and can be easily detected, underwater leaks are more difficult to find. These types of leaks occur when there is a crack or damage to the pool’s structure that allows water to seep out into the ground beneath the pool. Pressure testing can help locate these leaks by increasing the pressure inside the lines, making it easier to detect any water escaping.
3. Save Money on Water Bills
Undetected leaks in pool lines can result in a significant amount of water loss over time. This not only wastes water but also leads to higher water bills for pool owners. By pressure testing pool lines, any leaks can be identified and repaired, ultimately saving money on future water bills.
4. Prevent Structural Damage
When pool lines have leaks, it not only affects the water levels but can also cause damage to the pool’s structure and surrounding area. The constant leaking of water can erode the ground beneath the pool, leading to shifting and cracks in the pool’s foundation. Pressure testing can help identify these leaks early on and prevent any further structural damage.
How to Pressure Test Pool Lines in 6 Easy Steps
Step 1: Gather Necessary Equipment
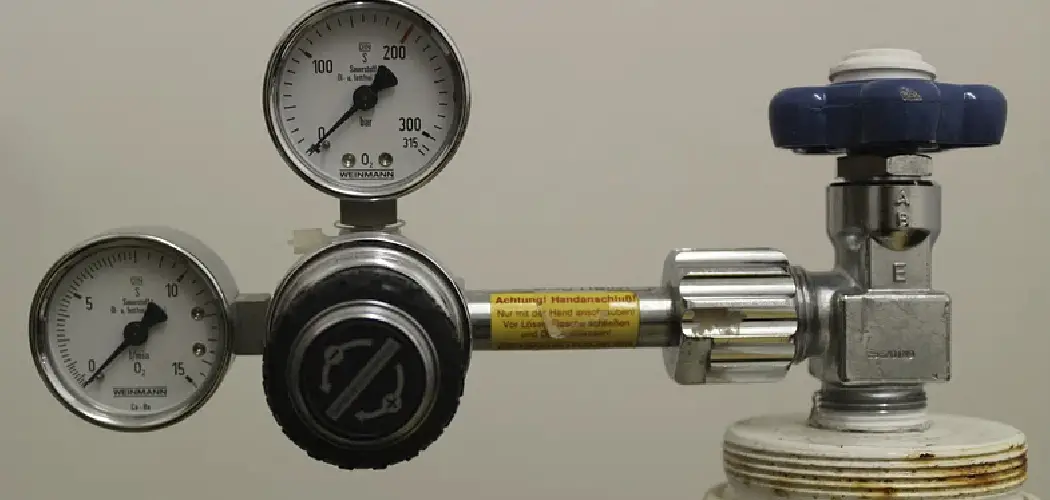
Before beginning the pressure testing process, you will need to gather the necessary equipment. This includes a plug or cap for each pool line, a pressure gauge, and a pump with enough hose length to reach all pool lines.
Step 2: Close All Pool Lines
Close off all pool lines by inserting plugs or caps into the openings where the lines connect to the pool. Make sure these are securely in place to prevent any water from escaping during the testing process.
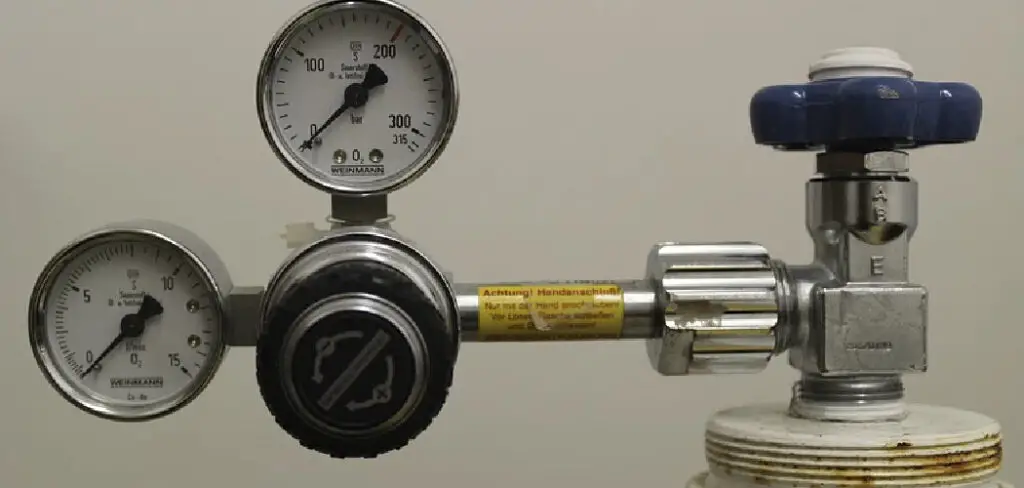
Step 3: Attach Pressure Gauge and Pump
Attach the pressure gauge to one of the closed pool lines, and connect the pump to another closed line using a hose. This will allow you to pump air into the lines and measure the pressure inside. Also, make sure all other openings in the pool, such as skimmers and returns, are closed to prevent any air from escaping.
Step 4: Pump Air into Pool Lines
Begin pumping air into the pool lines until the pressure gauge reaches the desired testing pressure. This is typically between 25-30 psi (pounds per square inch) but may vary depending on the specific pool and pump used. Be cautious not to exceed the maximum pressure capacity of your pool lines.
Step 5: Monitor Pressure Gauge
Once the desired testing pressure is reached, keep an eye on the pressure gauge for several minutes. If there are any leaks in the pool lines, you will notice a drop in pressure as air escapes. Also, listen for any hissing sounds that may indicate a leak.
Step 6: Repair Leaks
If you do discover any leaks during the pressure testing process, make note of their location and repair them as soon as possible. This may involve replacing damaged pool lines or using sealant to fix small cracks or holes. Once all repairs are completed, repeat the pressure testing process to ensure all leaks have been fixed.

Some Extra Tips to Pressure Test Pool Lines
1 . Do Not Overdo It
It is important to remember that while pressure testing pool lines are necessary, overdoing it can cause more harm than good. If the water pressure inside the pipes gets too high, it can cause them to burst or leak, leading to costly repairs. Therefore, always follow the manufacturer’s instructions and use a pressure gauge to ensure you are not exceeding the recommended PSI (pounds per square inch).
2. Test Each Line Individually
While it may be tempting to pressure test all pool lines at once, it is best to test them individually. This will give you a more accurate reading of the water pressure in each line and allow you to identify any specific line that requires attention.
3. Check for Leaks and Cracks
Pressure testing pool lines is not only a preventive measure but also a diagnostic one. While performing the test, keep an eye out for any leaks or cracks in the pipes. If you notice any, it is important to address them immediately before they worsen.
4. Use Professional Help
If you are unsure about how to pressure test pool lines or do not have the necessary equipment, it is always best to seek professional help. A licensed pool technician will have the expertise and tools to perform a thorough pressure test and identify any potential issues with your pool lines.

Frequently Asked Questions
What Precautions Should I Take When Pressure Testing Pool Lines?
Before beginning the pressure testing process, it is important to ensure that all necessary precautions are taken. These include:
- Make sure the pool is completely drained of water
- Removing any debris or obstructions from the pool lines
- Ensuring that all valves and drains are securely closed
What Tools Do I Need for Pressure Testing Pool Lines?
The following tools are typically needed for pressure testing pool lines:
- A pressure gauge
- An air compressor or pump
- Duct tape or plugs to seal off any open lines
How Do I Conduct a Pressure Test on Pool Lines?
To conduct a pressure test, follow these steps:
- Attach the pressure gauge to the pool line
- Seal off any open lines with duct tape or plugs
- Use an air compressor or pump to fill the pool line with air until it reaches the recommended pressure level (usually between 10-30 psi)
- Check for any leaks in the pool line by observing the pressure gauge for a drop in pressure
- If there are any leaks, repair them before continuing with the rest of the pool construction process
How Often Should Pool Lines Be Pressure Tested?
Pool lines should be pressure tested at least once during the construction process and again after installation to ensure they are properly sealed. It is also recommended to conduct annual pressure tests to check for any potential leaks or damages. Pool owners should also consider pressure testing if they notice a decrease in water flow or suspect any issues with the pool lines.
Are There Any Other Benefits of Pressure Testing Pool Lines?
Aside from detecting possible leaks, pressure testing pool lines can also help identify any weak spots in the pool line system that could cause future problems. It can also give pool owners peace of mind knowing that their pool is properly sealed and functioning efficiently. Regular pressure testing can help extend the lifespan of pool lines and prevent costly repairs down the line.
Overall, it is an important step in ensuring the safety and quality of a pool. So, proper pressure testing not only ensures a leak-free swimming experience but also contributes to the long-term maintenance and durability of the pool. So, it is essential to make pressure testing a routine part of pool maintenance.
In addition to that, regular pressure testing can also help identify any potential issues before they become major problems, allowing for prompt repairs and avoiding any downtime for the pool. It’s a small investment of time and effort that can save pool owners from bigger headaches in the future. So, make sure to prioritize pressure testing when it comes to maintaining a healthy and functional pool.
After all, prevention is always better than cure! So, don’t wait till there’s an issue – start pressure testing your pool lines today for a worry-free swimming experience!
Conclusion
Developing a maintenance plan for your pool lines and ensuring that you pressure test them every so often is the key to avoiding future issues. Through these efforts, pool safety can be maintained and any potential malfunctions can be avoided.
So, next time you go to start up your pool lines this season, remember to take the necessary steps to ensure they are working safely and properly. Testing your pool’s lines should not be difficult nor complicated, making this task even more important when it comes to maintaining a safe swimming environment.
Now you know how to pressure test pool lines! Feel free to consult with experts on how best to pressure test your pool lines if needed and keep in mind that taking the time out of your day now could save you from larger problems further down the line. After all, there is nothing better than having a relaxing dip in the cool water of a backyard swimming pool! So, what are you waiting for? Get testing!
About
Outdoor Fixes is a distinguished figure in the world of Diy design, with a decade of expertise creating innovative and sustainable Diy solutions.
His professional focus lies in merging traditional craftsmanship with modern manufacturing techniques,
fostering designs that are both practical and environmentally conscious. As the author of diy,
outdoorfixes delves into the art and science of outdoorfixes-making, inspiring artisans and industry professionals alike.
Education RMIT University
(Melbourne, Australia) Associate Degree in Design (Outdoor Fixes) Focus on sustainable design, industry-driven projects,
and practical craftsmanship. Gained hands-on experience with traditional and digital manufacturing tools, such as CAD and CNC software.
Nottingham Trent University
(United Kingdom) Bachelor’s in outdoorfixes.com and Product Design (Honors) Specialized in product design with a focus on blending creativity with production
techniques. Participated in industry projects, working with companies like John Lewis and Vitsoe to gain real-world insights.
Publications and Impact
In diy, Outdoor Fixes his insights on indoor design processes, materials, and strategies for efficient production.
His writing bridges the gap between artisan knowledge and modern industry needs, making it a must-read for both budding designers and seasoned professionals.