Are you tired of looking at your old, weathered split rail fence? Or maybe you’ve noticed that some of the rails have become damaged or broken and need replacement.

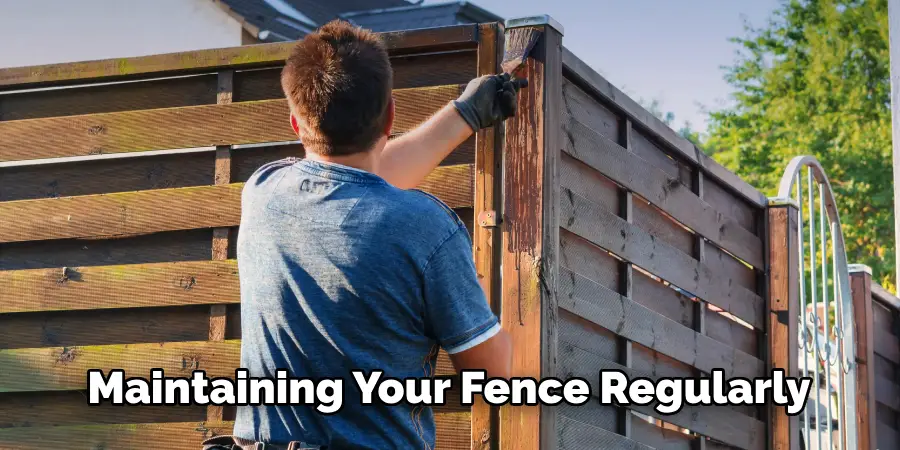
Replacing split rail fence rails is essential for homeowners and property managers seeking to maintain the aesthetic appeal and structural integrity of their fencing. Split rail fences, known for their rustic charm and simplicity, often require maintenance due to weathering, decay, or accidental damage.
The process of replacing these rails can be straightforward. With the right tools, materials, and a bit of know-how, most individuals can effectively replace damaged or old rails, restoring their fence’s functionality and appearance.
This guide will introduce you to the necessary steps and tips on how to replace split rail fence rails, ensuring your fence remains a durable and attractive boundary for years to come.
What are the Benefits of Replacing Split Rail Fence Rails?
Before we dive into the steps for replacing split rail fence rails, it’s essential to understand the benefits of this maintenance task. Here are a few reasons why regularly replacing split rail fence rails is beneficial:
- Improved Aesthetic Appeal: As mentioned earlier, split rail fences are known for their rustic charm. However, the rails can become weathered, causing the fence to look worn and unattractive. You can restore your fence’s appearance and maintain its charming appeal by replacing old or damaged rails.
- Enhanced Structural Integrity: Split rail fences serve as a boundary for properties, providing privacy and security. When the rails become damaged or broken, the fence’s structural integrity compromises, making it less effective as a barrier. Replacing these rails ensures that your fence can continue to serve its purpose effectively.
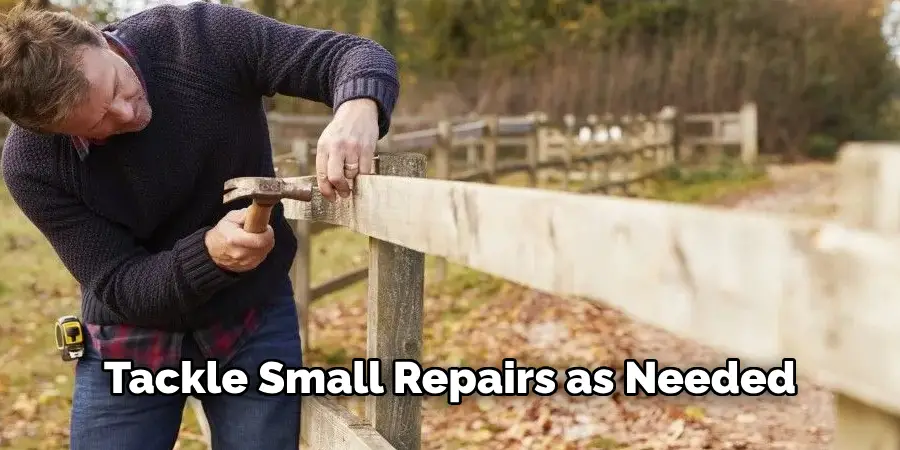
- Cost Savings: Regularly replacing split rail fence rails can save you money in the long run. Instead of waiting for multiple rails to become damaged or broken and replacing them all at once, regular maintenance allows you to tackle small repairs as needed, which can be more cost-effective in the long term.
What Kind of Wood is Used for Split Rail Fences?
Before you begin the process of replacing your split rail fence rails, it’s essential to understand the type of wood typically used for this type of fencing. The most common types of wood include cedar, pine, and spruce.
- Cedar: Cedar is a popular choice for split rail fences due to its natural resistance to decay and insects. It also has a beautiful natural color and is relatively low maintenance.
- Pine: Pine is a more affordable option for split rail fences. However, it is not as durable as cedar and may require more frequent replacements.
- Spruce: Spruce is another popular choice for split rail fences due to its affordability and rustic appearance. However, it requires regular staining or painting to maintain its durability and appearance.
These are just a few examples of wood commonly used for split rail fences. Ultimately, the type of wood you choose will depend on your budget, personal preferences, and your climate.
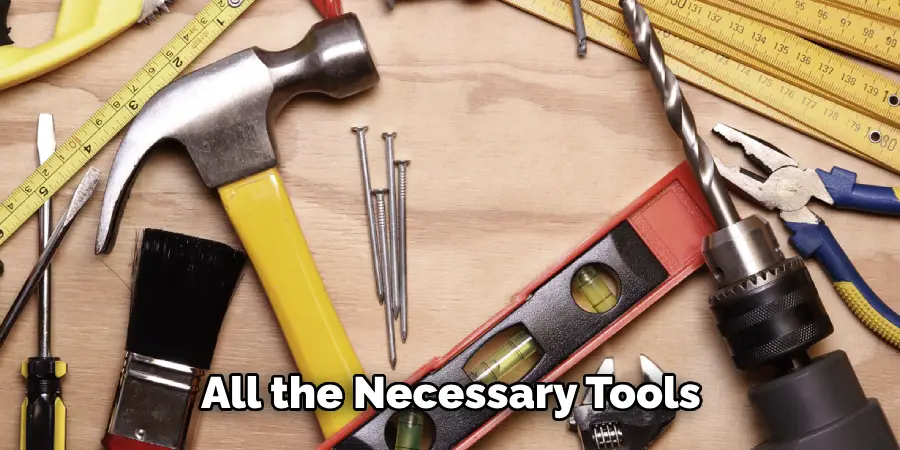
The Tools and Materials You Will Need
Before you begin replacing split rail fence rails, gathering all the necessary tools and materials is essential. Here are some items you will need:
- New Split Rail Fence Rails: Purchase enough new rails to replace the damaged or old ones. Make sure they are the same style and size as your existing rails.
- Hammer: A hammer is useful for removing old nails, especially if they are stuck in the wood.
- Crowbar: You may need a crowbar to pry off old rails or remove any stubborn nails.
- Saw: If your fence rails are too long, you need a saw to cut them to the appropriate length.
- Nails or Screws: Depending on how your fence is constructed, you may need either nails or screws to secure the new rails in place.
- Level and Measuring Tape: These tools will help ensure your new rails are installed correctly and evenly.
Now that you’ve gathered all the necessary tools and materials, let’s examine the steps for replacing split rail fence rails.
9 Easy Steps on How to Replace Split Rail Fence Rails
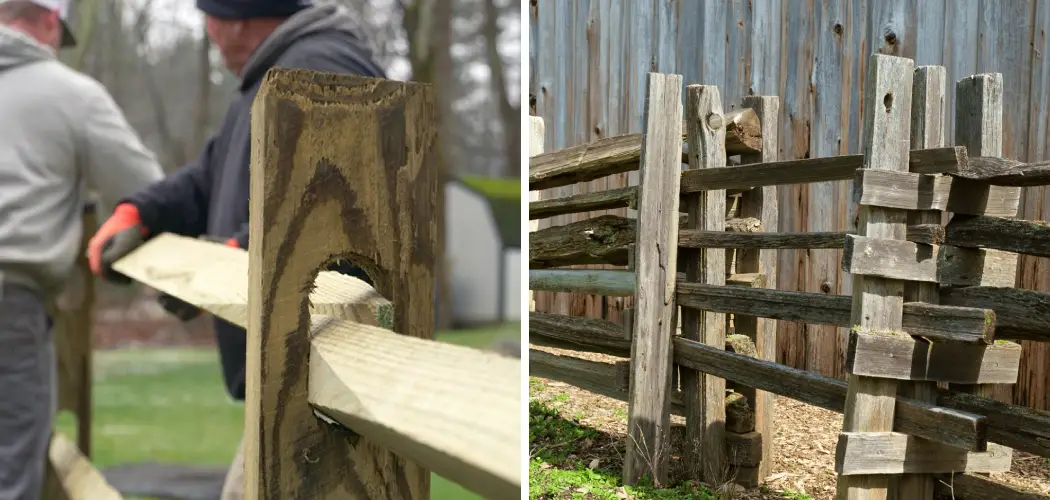
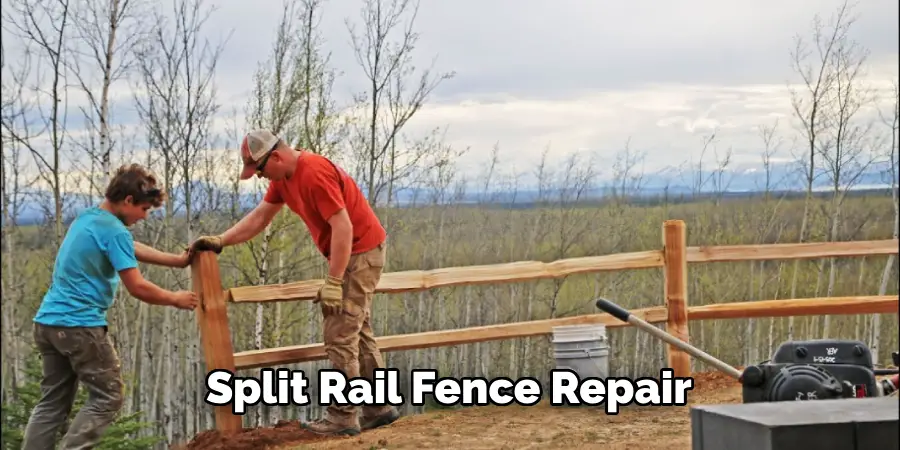
Step 1: Remove Old Rails
Start by removing the damaged or old rails from your fence. Use a hammer and crowbar to pry them out if they are nailed in place. If they are screwed in, use a screwdriver or drill to remove the screws. Once the old rails are removed, make sure to clean out any debris and nails from the post holes.
Step 2: Measure New Rails
After removing the old rails, you must measure the new ones to ensure they fit perfectly between your fence posts. Using a measuring tape, measure the distance between the posts where the new rail will be installed. If the new rail is too long, mark the correct length with a pencil and use a saw to cut it down to size.
Remember to measure twice and cut once to avoid any mistakes. Ensure the ends of your rails are cut cleanly and straight to fit snugly against the posts. This step is crucial for maintaining your fence’s structural integrity and aesthetic appeal.
Step 3: Position the New Rail
Carefully position your newly measured rail between the posts where it’s meant to be installed. It’s important to check the alignment at this stage; the rail should be level and flush with the other rails in your fence for aesthetic consistency and structural stability.
If your fence design allows, slide the rail into the notches or grooves of the posts designed to hold the rail in place. Use your level to ensure that the rail is perfectly horizontal. Adjust as necessary before securing the rail.
Step 4: Secure the Rail in Place
Once the new rail is properly positioned and level, secure it to the fence posts. If your fence uses nails, carefully hammer them through the rail into the post, ensuring not to split the wood. For those using screws, drill the screws through the rail into the post, ensuring a tight fit.
It’s essential to use at least two fasteners (nails or screws) at each end of the rail to provide sufficient support and stability. Remember to check the alignment again after securing the rail to ensure it remains level and properly positioned.

Step 5: Inspect and Repeat as Necessary
After the first rail is securely in place, step back and inspect the work to ensure it’s up to your standards. Check that the rail is straight and level and matches the surrounding fence’s aesthetic.
If you have other rails that need replacement, repeat the steps above for each one. It’s advisable to tackle one rail at a time to minimize disruption to the overall structure of the fence and to ensure each is fitted correctly. Taking your time during this process will result in a more attractive and durable fence.
Step 6: Apply Protective Finish
With your new rail(s) securely in place, it’s an opportune time to apply a protective finish or sealant. This step will extend the life of the newly installed rails and your entire fence. Choose a weather-resistant finish or sealant that matches the rest of your fence. Before application, ensure that the new wood is clean and dry.
Apply the finish according to the manufacturer’s instructions, using a brush or sprayer for even coverage. Pay special attention to the ends of the rails, as these areas are particularly susceptible to moisture ingress and can benefit from additional protection. Allow the finish to dry completely before exposing the fence to moisture.
This preventative maintenance step will guard your fence against the elements, reducing the likelihood of wood rot, UV damage, and weather-induced wear.
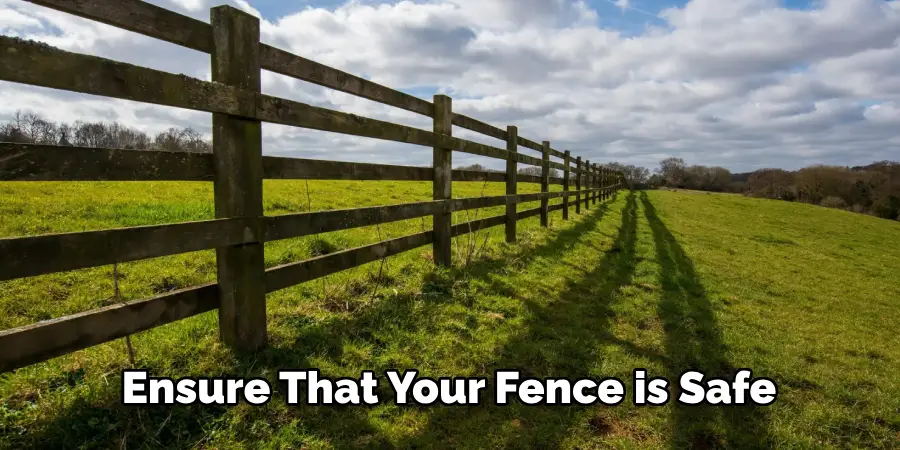
Step 7: Conduct a Final Inspection
Once the protective finish has dried completely, conduct a final inspection of your fence, focusing on the newly replaced rails. Check the solidity of the installation by gently pushing against the rails to ensure they are securely fastened. Inspect the overall condition of your fence, looking for any signs of damage or wear that may have been overlooked.
This is also a good time to ensure that all fasteners are properly tightened and that no sharp edges or splinters could cause injury. The final inspection is crucial to ensure that your fence is safe, secure, and visually appealing.
Step 8: Clean Up the Area
After successfully installing the new rails and completing the maintenance on your fence, the next important step is to clean up the work area. This includes collecting and disposing of any old wood, nails, or screws that were removed during the repair process, along with any sawdust or debris generated from cutting the new rails.
Properly disposing of these materials makes your outdoor space safe and tidy and helps prevent any potential injuries from leftover debris. Additionally, organize your tools and materials, returning everything to its rightful place. This step concludes the repair process efficiently and prepares you for any future maintenance tasks by keeping your workspace orderly and ready for use.
Step 9: Maintain Regularly
Lastly, establish a regular maintenance routine for your fence to prevent future damage and extend its lifespan. This involves inspecting your fence at least once a year for any signs of damage, wear, or loose fasteners. Check for and promptly address issues such as wood rot, pest infestations, or damage from weather conditions.
Cleaning your fence with a suitable cleaner can remove dirt and prevent mold and mildew buildup while reapplying a protective finish or sealant every few years will further protect the wood from the elements.
By following these steps and maintaining your fence regularly, you can ensure that it remains sturdy, attractive, and functional for years to come.
5 Additional Tips and Tricks
- Preparation is Key: Gather all necessary tools and materials before beginning your project. Ensure you have replacement rails of the correct size and type, in addition to tools such as a saw, hammer, and nails or screws. This preparation can save time and prevent interruptions during the repair process.
- Measure Twice, Cut Once: Always double-check your measurements before cutting new rails. This old carpenter’s adage holds true for fence repair and will help prevent waste of materials and time.
- Use a Level for Alignment: When installing the new rails, use a level to ensure they are perfectly horizontal. This enhances the aesthetic appeal of your fence and ensures it is structurally sound.
- Don’t Forget About the Posts: While repairing your fence rails, also inspect the fence posts for any damage or wear. If necessary, replace or reinforce them to prevent further issues in the future.
- Apply a Protective Finish: To extend the lifespan of your newly repaired fence rails, consider applying a protective finish such as stain or paint. This will enhance its appearance and provide an extra layer of protection against the elements.
In addition to these tips, it’s important to regularly inspect your fence for any signs of damage or wear.
5 Things You Should Avoid When Replacing Split Rail Fence Rails
- Ignoring Safety Gear: Always wear appropriate safety gear, such as gloves and eye protection, when working on your fence. Failing to do so can lead to unnecessary injuries.
- Using Mismatched Materials: Avoid using rails that don’t match the existing structure in size, type, or material. Inconsistencies can weaken the fence’s integrity and affect its appearance.
- Skipping Weather Considerations: Don’t replace rails without considering the weather conditions. Wet or extremely cold conditions can affect the fitting of the rails as well as the setting of any adhesives or finishes applied.
- Neglecting to Check Underground Utilities: Before digging post holes or making significant changes to your fence’s layout, ensure you won’t hit any utility lines. Contact your local utility companies for a check.
- Improvising Tools and Techniques: Use the right tools and follow proper techniques for cutting, fitting, and securing the rails. Improvisation can lead to poor results and may require more time and resources to correct mistakes.
Avoiding these common mistakes can ensure a successful and long-lasting split rail fence repair project.
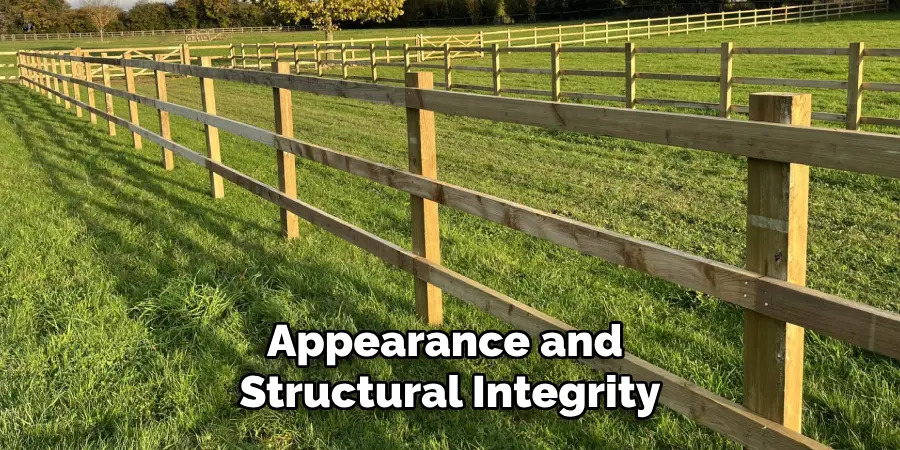
What is the Gap Between Fence Rails?
The gap between fence rails refers to the space between each individual rail. This gap is important as it allows for proper air circulation and drainage, preventing moisture buildup and potential rotting of the wood.
Furthermore, the gap size can affect the fence’s strength and stability.
If the gap is too large, the structure could weaken and make it more susceptible to damage from external forces such as strong winds.
The ideal gap between fence rails can vary depending on the type of fence and its purpose. A gap of 2-4 inches is recommended for the best balance between aesthetics and functionality for split rail fences.
However, it’s important to consider local building codes and regulations when determining the appropriate gap size for your fence rails.
Consulting with a professional or doing thorough research can help ensure you follow any necessary guidelines. So, it’s important to keep the gap between fence rails in mind when repairing or installing a new split rail fence.
What is the Difference Between Split Rail and Post and Rail Fence?
Split rail and post and rail fences are both types of rustic, traditional fencing commonly seen in rural or country settings. While they may look similar at first glance, the two have a few key differences.
One of the main differences is in their construction and design. Split rail fences consist of wooden posts with evenly spaced horizontal rails that are typically split or sawn in half.
On the other hand, post-and-rail fences have vertical posts with two or three horizontal rails attached to them.
Additionally, split rail fences are usually made from rough-hewn wood, giving them a more natural and rustic appearance. Post and rail fences, on the other hand, can be made from a variety of materials, including wood, vinyl, or metal.
How Do You Keep Your Split Rail Fence Looking New?
To keep your split rail fence looking new, regular maintenance is key. Here are a few tips to help maintain the appearance and structural integrity of your fence:
- Clean Regularly: Use a hose or power washer to remove any dirt, debris, or mildew from the surface of your fence.
- Repair any Damage Promptly: If you notice any loose or broken rails, address them immediately to prevent further damage.
- Apply a Protective Finish: As mentioned previously, applying a protective finish such as stain or paint can help prolong the lifespan of your fence.
- Trim Any Nearby Vegetation: Keep plants and shrubs trimmed back from the fence to prevent moisture buildup and potential damage to the wood.
By following these tips, you can help keep your split rail fence looking new for years to come.
Conclusion
How to replace split rail fence rails may seem daunting at first, but with the right tools and techniques, it can be a manageable and even rewarding DIY project.
By planning ahead, using quality materials that match your existing fence, employing careful techniques to ensure proper alignment and stability, and applying a protective finish, you can effectively prolong the life of your fence.
Remember to wear appropriate safety gear and avoid common pitfalls such as neglecting weather conditions or using mismatched materials. Regular maintenance and prompt attention to any damage will keep your fence looking its best.
By following these guidelines, you will ensure the structural integrity of your fence and preserve its rustic charm and appeal, enhancing the overall look of your property.
About
Outdoor Fixes is a distinguished figure in the world of Diy design, with a decade of expertise creating innovative and sustainable Diy solutions.
His professional focus lies in merging traditional craftsmanship with modern manufacturing techniques,
fostering designs that are both practical and environmentally conscious. As the author of diy,
outdoorfixes delves into the art and science of outdoorfixes-making, inspiring artisans and industry professionals alike.
Education RMIT University
(Melbourne, Australia) Associate Degree in Design (Outdoor Fixes) Focus on sustainable design, industry-driven projects,
and practical craftsmanship. Gained hands-on experience with traditional and digital manufacturing tools, such as CAD and CNC software.
Nottingham Trent University
(United Kingdom) Bachelor’s in outdoorfixes.com and Product Design (Honors) Specialized in product design with a focus on blending creativity with production
techniques. Participated in industry projects, working with companies like John Lewis and Vitsoe to gain real-world insights.
Publications and Impact
In diy, Outdoor Fixes his insights on indoor design processes, materials, and strategies for efficient production.
His writing bridges the gap between artisan knowledge and modern industry needs, making it a must-read for both budding designers and seasoned professionals.