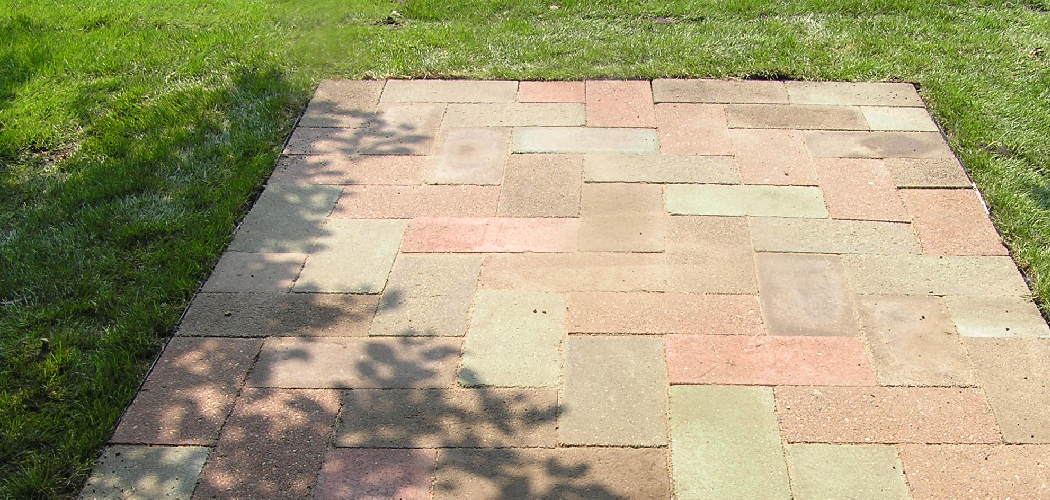
Are you looking for a way to spruce up your patio or add decorative elements to your garden? SO, we need to know how to restore patio pavers. Patio pavers are excellent for adding curb appeal, texture, and color outdoors.

While crushed stone and gravel may be the cheapest fix, nothing beats the look of high-quality brick or paving stones to make any outdoor area stand out. Not only will they enhance the aesthetic appeal of your yard, but they will also increase its durability and help protect it from harsh weather conditions.
Whether you want to bring a touch of style and elegance to your outdoor living space or just spruce up existing landscaping, restoring patio pavers is a great way to improve the look of any outdoor area. Restoring old or damaged paver can be both time consuming and expensive, but with some good tips and tricks, it’s not impossible! Here, we’ll cover how to restore patio pavers!
What Will You Need?
To restore your patio pavers, you will need the following items:
- High-pressure power washer or pressure cleaner
- Paver sealer
- Gravel or stone dust
- Polymeric sand
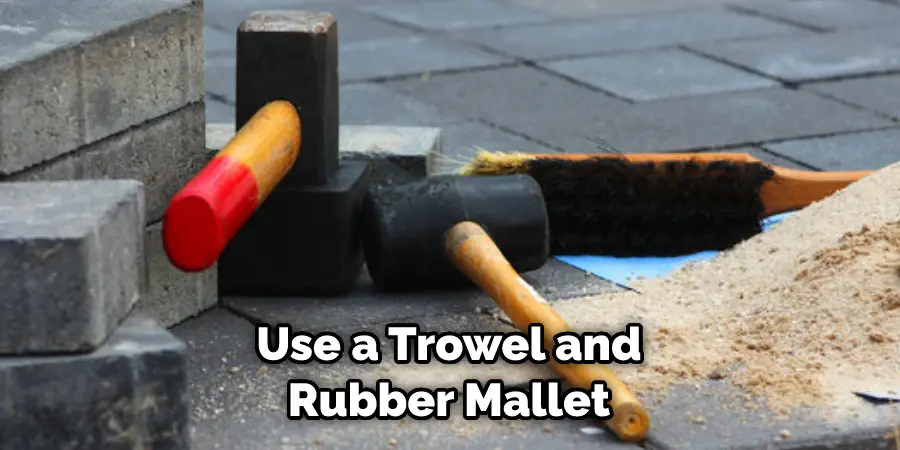
- Trowel and rubber mallet
- Broom
- Dust mask (optional)
- Gloves (optional)
Once you have all the materials, you are ready to begin!
10 Easy Steps on How to Restore Patio Pavers
Step 1: Clean the Pavers
Start by using a high-pressure power washer or pressure cleaner to remove any dirt, grime, and grease that may have built up on the pavers. You can also use this tool to remove any weeds, moss, or mildew that may be growing in between the cracks of your patio pavers. Be careful not to damage your pavers as you clean them.
Step 2: Apply Paver Sealer
Once the paver is dry, apply a paver sealer to help keep the pavers looking great and to protect them from weather damage. Make sure you follow the instructions on how to apply the sealer properly. Otherwise, you may end up with a bad job. Because sealer can be slippery, it is a good idea to wear gloves while working with this product.
Step 3: Fill any Cracks or Holes
After applying the sealer, fill any cracks or holes with gravel or stone dust. This will help keep your patio pavers looking great and protect them from further damage. If you plan to use gravel or stone dust, make sure you get it down so that it sticks to the cracks and holes. Don’t overfill them; otherwise, your pavers will look uneven.
Step 4: Apply Polymeric Sand
Once the cracks are filled, you can apply polymeric sand over the entire surface of your patio pavers. This will help to stabilize them, as well as prevent weeds from growing in between the cracks. Make sure that you spread the sand evenly to cover all the pavers completely. You can use a broom to do this.
Step 5: Use a Trowel and Rubber Mallet
Use a trowel and rubber mallet to press down firmly on each paver, ensuring that it is properly sealed. If you do not press down on the pavers properly, they may become loose over time. Don’t be afraid to use a little extra force here. Because the pavers will be used outdoors, they must be firmly secured.
Step 6: Sweep Away Excess Sand
Once all of the pavers are pressed into place, you can sweep away any excess sand that may have been left behind. Make sure to use a soft bristled broom to not scratch or damage your tiles. Ensure that you sweep in the same direction so that all of the excess sand is removed.
Step 7: Spray with Water
Spray your patio pavers with water and let them dry for at least 24 hours before walking on them. This will help ensure that the polymeric sealant has adhered correctly and won’t come off easily when walking on. Apply extra water if needed.
Step 8: Clean the Pavers Again
Once everything is dry (at least 24 hours), you can clean the pavers one last time with a high-pressure power washer or pressure cleaner. This will help remove any dirt, dust, or debris that may have stuck to the sealant while drying. Remember to be careful when cleaning the pavers, as you don’t want to damage them.

Step 9: Inspect for Damage
Once everything is clean and dry, inspect your patio pavers for any signs of damage or discoloration. If there are any areas that need repair, you should do so before adding furniture or other items on top of the pavers. This will help to make sure that they last longer.
Step 10: Enjoy Your Newly Restored Patio Pavers!
Congratulations! You have successfully restored your patio pavers. Now you can enjoy the beauty and durability of your newly restored outdoor space! Make sure to follow all of these steps regularly in order to keep your patio looking great year after year.
With these simple ten steps, you can easily restore your patio pavers and enjoy them for years to come. Cleaning, sealing, and protecting your patio pavers is essential in keeping the space looking great and lasting longer. So don’t forget to take care of your outdoor area – it will thank you later! Enjoy your newly restored patio pavers!
5 Additional Tips and Tricks
- Be sure to use a paver sealer that is specifically designed for outdoor use.
- Use a soft bristled broom to sweep away any excess sand so that you don’t scratch or damage your tiles.
- Inspect your patio pavers regularly for any signs of damage or discoloration, and repair any problem areas promptly.
- If you plan to use gravel or stone dust, make sure you get it down so that it sticks to the cracks and holes. This will help keep your patio pavers looking great and protect them from further damage.
- For extra protection and shine, consider using a paver finishing sealer after you have finished restoring your patio pavers. This will help keep them looking fresh and new for many years.
These tips and tricks should help you get the most out of your newly restored patio pavers! Now you can enjoy your outdoor space for years to come!
5 Things You Should Avoid
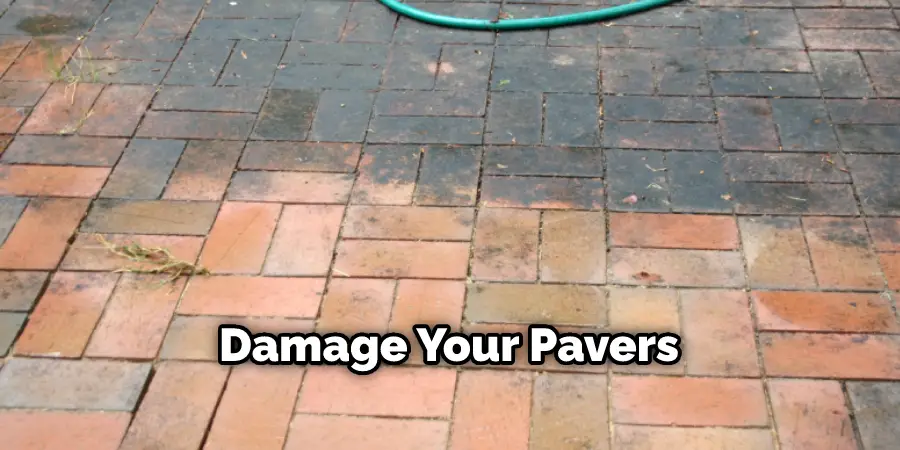
- Don’t use a power washer so that you don’t cause damage to the pavers.
- Don’t use a too strong cleaner, as it can damage the pavers.
- Don’t soak the pavers for too long, as this will cause them to deteriorate over time.
- Don’t use a wire brush to scrub away dirt and debris from the bricks as this can scratch them.
- Don’t leave any cleaning solution on the surface of the patio pavers for too long, as it can damage their surface or color over time.
- Taking the time to restore your patio pavers properly is a great way to make sure they look their best for years to come. With proper maintenance and care, you can ensure that your outdoor living space looks amazing!
Can You Color Old Pavers?
If your patio pavers are starting to show signs of fading, you might wonder if renewing their color is possible. The good news is that you can restore the original look and feel of your patio pavers with a few simple steps.
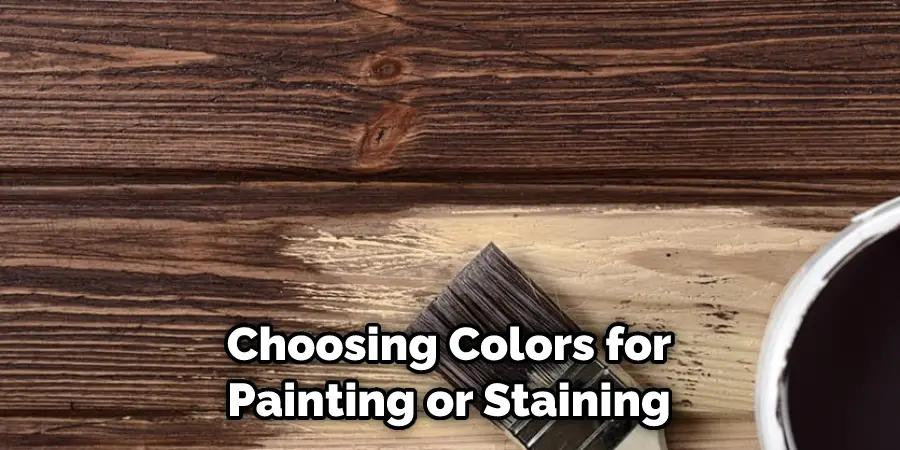
First, you will need to clean the pavers with mild detergent and water before applying a sealer or penetrating finish to help lock in the color. Once this has been done, you can then apply a stain or paint specifically designed for outdoor use.
When choosing colors for painting or staining, make sure to test them out on an inconspicuous area first, as some may not adhere properly to the surface of the pavers.
Additionally, keep in mind that changing the color of your patio pavers may require more frequent maintenance and upkeep than if you left them in their original state.
By following these steps, you can make sure that your patio pavers look as good as new for years to come!
Conclusion
Restoring patio pavers can be incredibly rewarding and cost-effective for sprucing up outdoor areas. Not only does this process improve a space visually, but it can also add decorative accents to highlight unique finds like interesting mason jars or antique decor accessories. More than that, restoring patio pavers is a great way to easily add value to any property, from newly installed sidewalks and pathways to perfectly leveled seating areas.
With the proper knowledge and simple tools, anyone can take on this task confidently and enjoy the satisfaction of turning something old into something new.
Hopefully, the article on how to restore patio pavers has been useful in getting you started on your next project. By following these simple steps, you can make sure that your outdoor space looks great! So if you’ve been looking for a DIY project that will still make a big visual impact – why not give rehabilitating pavers a try?
You Can Check It Out to Install Playground Mulch
About
Outdoor Fixes is a distinguished figure in the world of Diy design, with a decade of expertise creating innovative and sustainable Diy solutions.
His professional focus lies in merging traditional craftsmanship with modern manufacturing techniques,
fostering designs that are both practical and environmentally conscious. As the author of diy,
outdoorfixes delves into the art and science of outdoorfixes-making, inspiring artisans and industry professionals alike.
Education RMIT University
(Melbourne, Australia) Associate Degree in Design (Outdoor Fixes) Focus on sustainable design, industry-driven projects,
and practical craftsmanship. Gained hands-on experience with traditional and digital manufacturing tools, such as CAD and CNC software.
Nottingham Trent University
(United Kingdom) Bachelor’s in outdoorfixes.com and Product Design (Honors) Specialized in product design with a focus on blending creativity with production
techniques. Participated in industry projects, working with companies like John Lewis and Vitsoe to gain real-world insights.
Publications and Impact
In diy, Outdoor Fixes his insights on indoor design processes, materials, and strategies for efficient production.
His writing bridges the gap between artisan knowledge and modern industry needs, making it a must-read for both budding designers and seasoned professionals.