
Are you looking for a permanent, stylish, and weather-resistant way to upgrade your outdoor space? Sealing a stone patio can be the perfect solution if you want to boost your backyard. Not only will it protect the surface of your patio from natural elements like rain and sun, but sealing also prevents damage caused by everyday wear and tear.
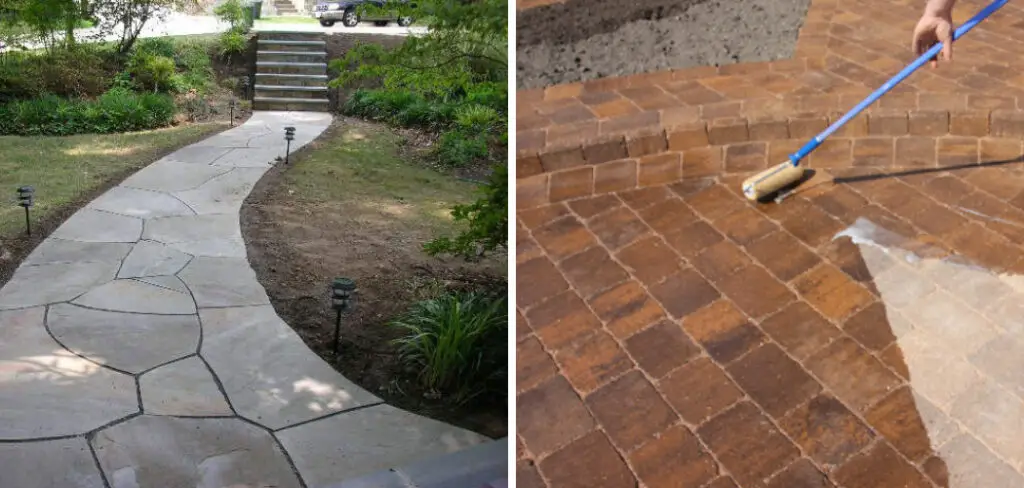
Sealing stone patios isn’t just limited to decks–it can also be used on driveways, walkways, garden pathways–basically any sort of paved or paved-looking area that could use some protection.
In this guide, we’ll cover everything you need to know about sealing stone patios so that they look great and last long into the future! So keep reading to learn valuable information about how to seal stone patio so that its beautiful shine never fades away!
What Will You Need?
Before you start, ensure you have all the necessary materials to do the job right. Here’s a list of things you should have on hand:
- A pressure washer
- Protective eye gear and gloves
- A scrub brush or stiff-bristled broom
- A silicone or latex-based sealant
- A paintbrush or roller for applying the sealant
- A trowel to spread the sealant over larger areas
- An aerosol spray bottle filled with water
- Clean rags and a bucket of warm, soapy water.
Now that you’re armed with everything you need let’s get started!
10 Easy Steps on How to Seal Stone Patio
Step 1. Clean the Surface:
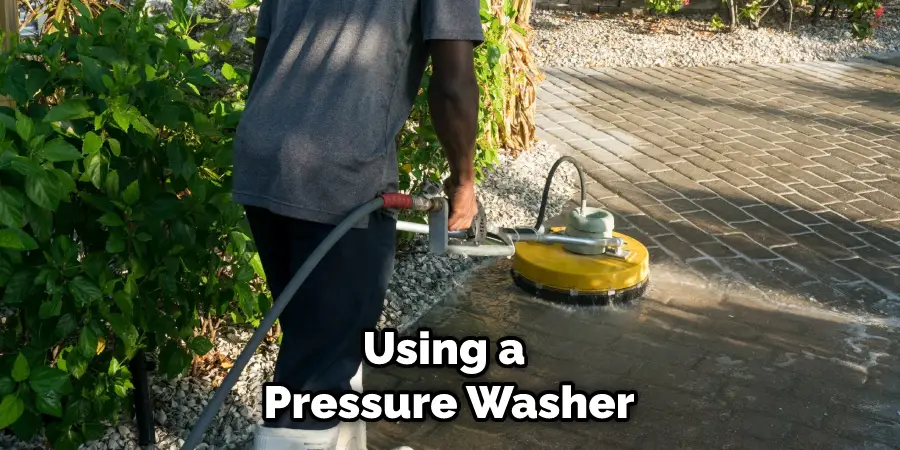
Before starting, ensure the surface is free of dirt and debris. We recommend using a pressure washer or scrub brush to clean the entire area. Be careful not to use too much pressure, as this could damage the stone.
Step 2. Let it Dry:
Once you’ve finished washing the surface, it’s important to let the stone patio dry completely. Depending on how humid your climate is, this could take anywhere from a few hours to an entire day. You can use a fan to speed up the process if necessary.
Step 3. Apply the Sealant:
Now it’s time to apply the sealant. Start by pouring some sealants into a paint tray and evenly applying a brush or roller to the stone patio. Make sure to cover each area completely, but avoid puddles or pools of sealant, as this could lead to unsightly pitting in the future.
Step 4. Let It Cure:
Once you’ve finished applying, leave it alone for 24 hours so that it can cure properly. Don’t walk on the surface during this time and avoid contact with water until it’s fully cured (typically around three days). Because stone is a porous material, it absorbs sealants slowly and often requires additional applications.
Step 5. Apply Additional Coats:
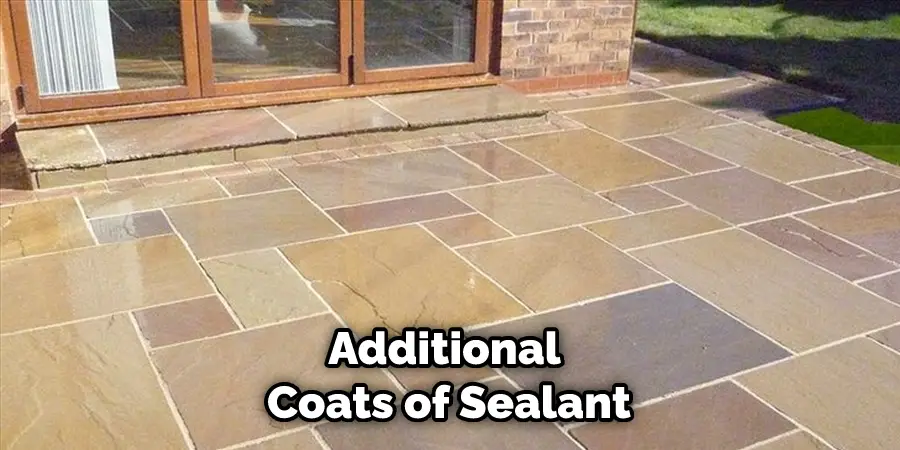
Depending on how much protection your patio needs, you might need to apply additional coats of sealant. Make sure to follow all the same steps as before and wait at least 24 hours between each coat. The more coats of sealant you add, the longer it will last without needing replacement.
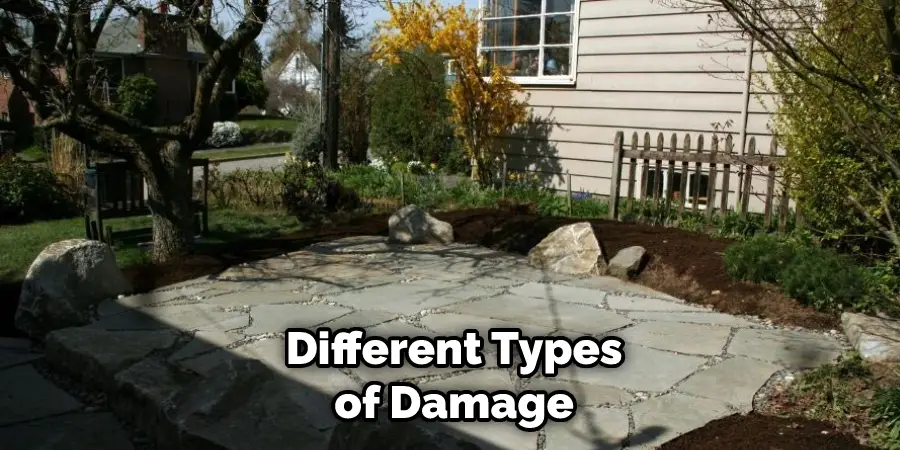
Step 6. Monitor:
It’s important to monitor regularly for signs of wear or damage. Check the surface periodically for chips or cracks, and look for discoloration from water seeping into the stone. If you notice any of these issues, it may be time to reapply the sealant!
Step 7. Maintain Regularly:
Regular maintenance is key to sealing the stone patio. Sweep away any dirt or debris that accumulates, and use a damp cloth to remove any stubborn stains. Make sure not to use harsh chemicals or abrasive cleaners, as this could damage the surface. It’s also a good idea to reseal every few years, depending on how much wear and tear the surface is exposed to.
Step 8. Avoid Abrasives:
Abrasive materials like steel wool or sandpaper should be avoided when cleaning. These can damage the sealant and cause it to break down over time, leaving your patio vulnerable to water damage. Instead, use a soft cloth dampened with warm soapy water for routine cleaning (just make sure it’s completely dry before reapplying the sealant).
Step 9. Choose the Right Sealant:
When selecting a sealant for a sealed stone patio, make sure it is formulated specifically for the material you are sealing. Many different types of sealants are available, so it’s important to read the label and check the manufacturer’s recommendations before purchasing.
Step 10. Follow Instructions:
Once you have selected a sealant, make sure to follow all instructions on how to apply it correctly. This includes wearing protective gear like ears and gloves, mixing the product properly according to package directions, and applying multiple coats if necessary. It’s also a good idea to test a small area before starting the full job.
Following these steps will ensure that how to seal the stone patio is done correctly, and your patio will stay in perfect condition for years! Don’t hesitate to ask a professional if you have any questions or concerns. With the right preparation and maintenance, you can create a beautiful outdoor living space that will stand the test of time.

5 Additional Tips and Tricks
- Use a brush or roller to apply the sealer evenly. For large surfaces, consider using a pressure washer with an attachment that allows you to target areas that need more attention accurately.
- When selecting a sealant, make sure it is designed specifically for use on stone patios and not concrete or other materials. Choose one that specifically states how many coats are needed for optimum protection.
- Apply two thin coats in opposite directions for the best coverage and wear resistance rather than one thick coat, as this will reduce the risk of bubbles forming when drying.
- Test a small area before applying the sealant to the entire patio to ensure it performs how you expect it to and that there are no unexpected issues with how it looks or how long it lasts after being applied. This can save you time, money, and hassle in the future.
- The final coat should be applied at least 24 hours after the first coat. This allows the sealer to cure fully, creating a stronger barrier against water and other materials that could potentially damage your patio.
These five tips and tricks will help you ensure that sealing your stone patio is done properly and efficiently. Care taken during each process step allows you to enjoy your patio for years to come without worry of damage or wear.
5 Different Ideas for Sealing Stone Patio
- Polyurethane Sealer: This type of sealer is designed to protect against moisture, dirt, and other common environmental contaminants. It is easy to apply using either a roller or brush and can be used both indoors and outdoors.
- Silicone Sealant: This material offers excellent protection due to its ability to remain flexible even after it has dried. It works best for stone patios located in areas with extreme temperatures, as it will not crack or degrade when exposed to the elements.
- Acrylic Sealants: These are great for helping protect against everyday wear and tear caused by foot traffic and standing water on your patio surface. They are also very easy to apply and can be used indoors and outdoors.
- Epoxy Sealer: This type of sealant provides long-lasting protection against moisture, dirt, and other elements that could damage your stone patio. It is extremely durable and best applied with a roller or brush for an even coat.
- Penetrating Sealer: This type of sealant works by getting deep into the porous material of the stone itself, creating a strong bond that will protect your patio from many different types of damage. It is often recommended when sealing natural stone surfaces as it creates a strong barrier between the surface and any environmental contaminants that could cause staining or discoloration.
These five ideas for sealing stone patios can help you protect your patio from the elements. Each option has its benefits, so it’s important to research and decide which one will work best for your specific needs. With a little bit of preparation and care, sealing the stone patio can be done correctly and easily!
Conclusion
Sealing your stone patio may be time-consuming and difficult, but it is beneficial in the long run. Not only will you have a beautiful outdoor space that is protected from spills, oils, dirt, and other damaging elements, but you will also increase its lifespan significantly.
With proper sealing and maintenance methods, your stone patio should last many years.
It’s worth investing the time and effort into protecting your patio with sealant every few years; it will certainly pay for itself when you get to enjoy its longevity for years of barbecues, family gatherings, and other outdoor fun.
Don’t wait another minute – make sure to strengthen the look and durability of your stone patio with an appropriate sealant!
Hopefully, the article on how to seal stone patio has given you the guidance and knowledge required for achieving a successful project. Good luck!
About
Outdoor Fixes is a distinguished figure in the world of Diy design, with a decade of expertise creating innovative and sustainable Diy solutions.
His professional focus lies in merging traditional craftsmanship with modern manufacturing techniques,
fostering designs that are both practical and environmentally conscious. As the author of diy,
outdoorfixes delves into the art and science of outdoorfixes-making, inspiring artisans and industry professionals alike.
Education RMIT University
(Melbourne, Australia) Associate Degree in Design (Outdoor Fixes) Focus on sustainable design, industry-driven projects,
and practical craftsmanship. Gained hands-on experience with traditional and digital manufacturing tools, such as CAD and CNC software.
Nottingham Trent University
(United Kingdom) Bachelor’s in outdoorfixes.com and Product Design (Honors) Specialized in product design with a focus on blending creativity with production
techniques. Participated in industry projects, working with companies like John Lewis and Vitsoe to gain real-world insights.
Publications and Impact
In diy, Outdoor Fixes his insights on indoor design processes, materials, and strategies for efficient production.
His writing bridges the gap between artisan knowledge and modern industry needs, making it a must-read for both budding designers and seasoned professionals.