
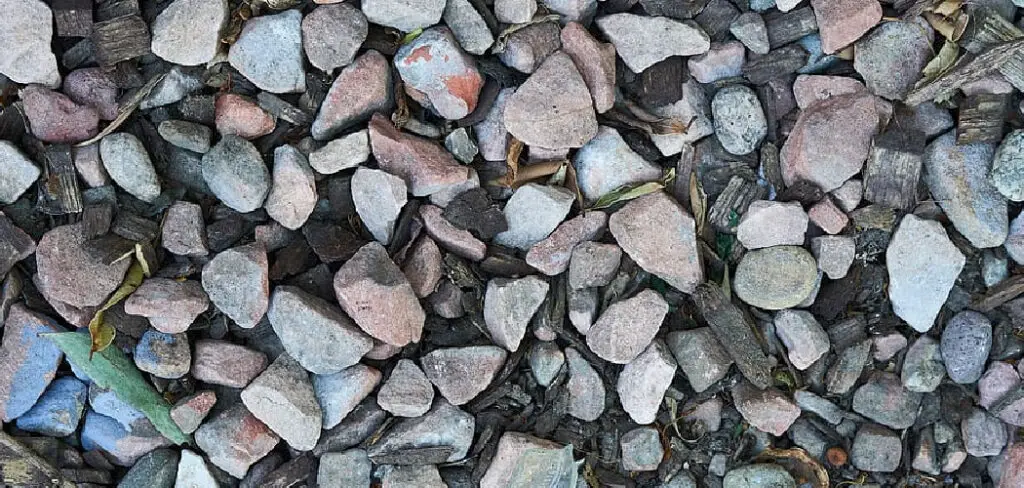
Do you ever look out onto your garden and think “How can I separate all these rocks from the dirt?” Whether it’s for landscaping purposes or just to get back some hard-earned soil, separating rocks from dirt is not as difficult as it may seem.
In this post, we will explain how to go about doing this job in a few easy steps on how to separate rocks from dirt, explain the best tools and equipment that can be used, plus cover some key tips on safety while completing the task. Read on to find out more!
Why Do You Need to Separate Rocks From Dirt?
Separating rocks from dirt is important for landscaping and gardening purposes. Rocks in the soil can inhibit plant growth, crowd out or damage roots, or add unwanted texture to flower beds. Removing them will also help aerate the soil and make it easier to work with when planting. Furthermore, many soils contain large amounts of stones which can clog drainage systems over time. Removing these stones before they become a problem is essential to keeping the soil healthy and free of water buildup.
Needed Tools
Given below are the tools and equipment you need to separate rocks from dirt.
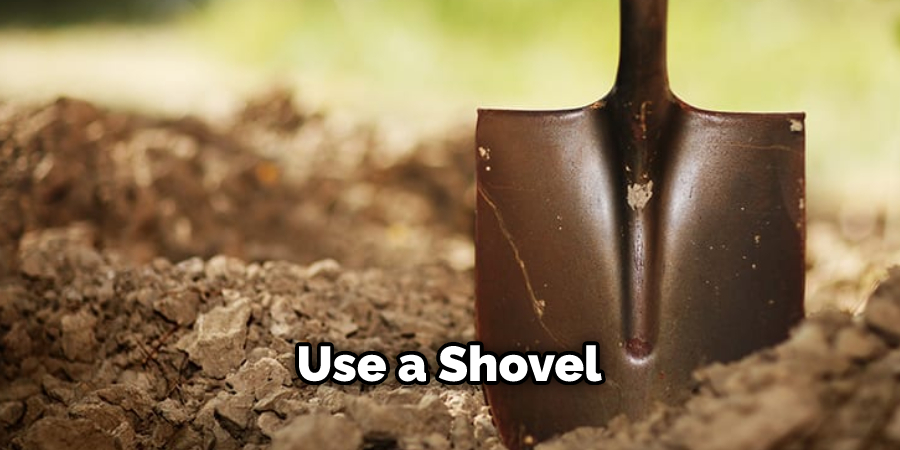
Shovels:
Shovels with a smaller head, such as trowels or spades, can be used for removing small stones from cultivated soil. Larger shovels should be used for larger stones.
Rakes:
A rake is necessary to break up clods of earth, which can then be sifted to remove stones. Be sure to choose a rake with the correct size tines for the job.
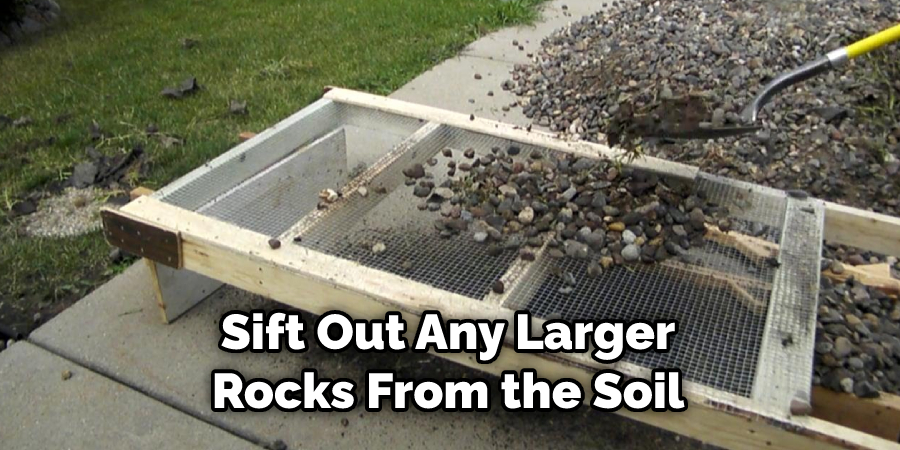
Screen:
A screen is used to sift soil and separate out larger rocks from small ones. It should have mesh of different sizes so you can filter out even smaller stones as well as larger ones.
Buckets:
You’ll need buckets for carrying away your separated stones and dirt.
Safety Measures
When separating rocks from dirt, it is important to take safety precautions such as wearing protective clothing and gloves to protect yourself from possible injuries while working on hard rough terrain. Additionally, using proper lifting techniques when picking up large or heavy objects will help prevent back injuries.
Now that you know the tools and safety measures needed, let’s get into how to actually separate rocks from dirt.
11 Step-by-step Guidelines on How to Separate Rocks From Dirt
Step 1: Remove the Top Layers of Soil With a Shovel
This will help expose any large rocks that may be buried beneath the surface. It is important to use a shovel with a small head for this task. It will be easier to dislodge and remove stones this way. But be careful not to disturb the soil too much as it may inhibit plant growth in the future. It is also important to use proper lifting techniques when removing heavy stones. But if the stones are too heavy for you to move, then it may be best to leave them in place.
Step 2: Break Up Larger Clumps of Soil Using a Rake
This will help to remove any smaller rocks that may be mixed in the soil. Be sure to use a rake with the right size tines for the job. It is also important to use proper lifting techniques when picking up and disposing of the clumps. If the soil is especially compacted, you may need to use a shovel or other tool to break it up. This will loosen the soil and make it easier to remove stones. But be careful not to overwork the soil as this can cause compaction issues.
Step 3: Place the Soil on a Screen
Using a screen will help to sift out any larger rocks from the soil. It is important to use a screen with different sized meshes so you can filter out even smaller stones as well as larger ones. If you don’t have a screen handy, you can also use a colander or sieve. It will take some time to sift all of the soil, but it will be worth it in the end. This will ensure that all of the unwanted stones are removed from the soil.
Step 4: Shake and Sift the Soil
Shake and sift the soil until all of the dirt is removed from the rocks, leaving only clean stones behind. If you have a large amount of soil to sift, it may be best to work in batches rather than trying to do it all at once. But it is also important to make sure that you don’t skip any steps in the process. That way, you can be sure that all of the rocks are completely separated from the dirt.
Step 5: Scoop Out Stones With a Shovel
Once all of the dirt has been removed, it’s time to scoop out any remaining stones with a shovel. Be sure to use one with a smaller head, such as a trowel or spade. If the stones are too large or heavy for you to lift, then it may be best to leave them in place. But if you move them, then use proper lifting techniques. It is also important to be mindful of any plant roots that may have gotten disturbed during the sifting process.
Step 6: Place Stones Into Buckets
Once all of the stones have been removed, place them in buckets to make it easier to carry them away from the area. If you have a large number of stones, it may be best to make multiple trips rather than trying to carry everything in one go. This will ensure that you don’t injure yourself in the process. It is also important to make sure that the buckets are sealed tightly so no dirt or debris gets mixed in with the cleaned stones.
Step 7: Discard Rocks and Soil
It is important to discard rocks and soil in their respective areas for proper disposal. This will help prevent any unwanted messes from occurring. But be sure to check with your local recycling center or landfill before discarding anything. That way, you can make sure that you are following the proper procedures. If you’re not sure where to take them, it is best to contact your local waste management team for more information.
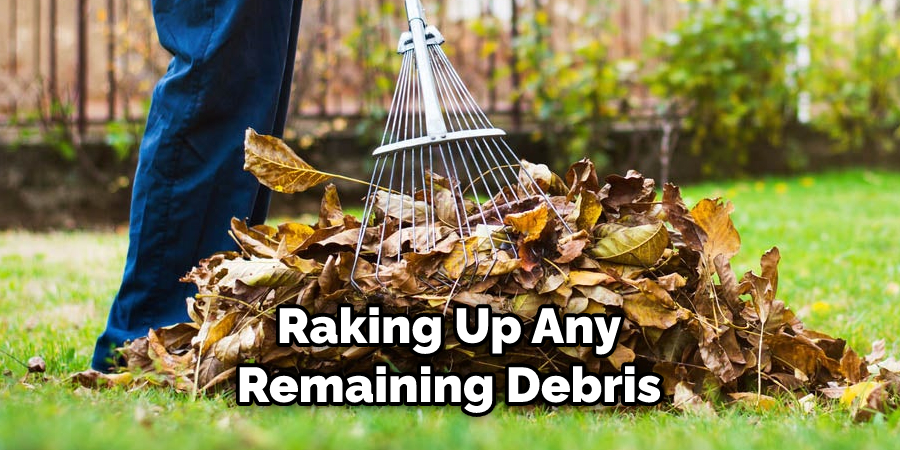
Step 8: Clean Up the Area
Once you are finished with the task of separating rocks from dirt, it’s time to clean up the area by raking up any remaining debris and disposing of it appropriately. This will make sure that the area is left in good condition. It is also important to make sure that any tools used during the process are properly cleaned and stored away. This will ensure their longevity and prevent any potential damage from occurring.
Step 9: Put Away Tools
Once the area is clean, make sure to put away any tools you may have used during the process. This will help maintain a safe and organized workspace. After all of the tools have been put away, you can sit back and enjoy the sight of your newly separated rocks from dirt. It may not be the most glamorous job, but it will certainly be worth the effort in the end.
Step 10: Take Safety Precautions
Be sure to take proper safety precautions when working with stones and soil. Wear protective clothing and gloves, and use proper lifting techniques when picking up large or heavy objects. It is also important to be aware of any possible hazards that may arise from the process. If you are ever in doubt, make sure to contact a professional for assistance.

Step 11: Repeat the Process As Needed
Repeat these steps as often as needed until all of the stones are removed from the dirt. This will ensure that your soil stays healthy, aerated, and free of debris so plants can thrive in it. But it is important to make sure that you don’t rush the process or skip any steps in order to get it done quickly. Taking your time and following the process carefully will help you get the best results in the end.
Now that you know how to separate rocks from dirt, you’ll be able to maintain a healthy and productive garden or landscaping project.
Frequently Asked Questions
Q: What Size Rake Should I Use?
A: The size of the rake depends on the type and size of rocks you are separating. Be sure to select a rake with the right size tines for the job.
Q: How Often Should I Repeat This Process?
A: It’s important to repeat this process as often as needed until all of the stones are removed from the dirt. Depending on the size and type of rocks, you may need to do this several times a year in order to maintain healthy soil.
Q: Is There Anything Else I Need To Do?
A: In addition to separating rocks from dirt, it is also important to fertilize your soil regularly and provide proper drainage so plants can thrive. Additionally, adding mulch or compost around plants can help keep weeds at bay and retain moisture in the soil.
Q: Is There Anything Else I Should Know?
A: Always make sure to discard rocks and soil in their respective areas for proper disposal. This will help prevent any unwanted messes from occurring and keep your garden or landscaping project looking neat and tidy. Additionally, you should be mindful when using tools so as not to damage plants or property nearby.
Conclusion
All in all, learning how to separate rocks from dirt can be an easy and rewarding process. Whether you’re looking to start gardening or just want to clean up your yard, taking the time to separate rocks from dirt can give you priceless results. But it’s important to pay attention so that you don’t end up damaging the rocks or the ground. The combination of patience and proper technique will be invaluable in making your project successful. With enough practice, you’ll be able to separate even tricky rocks with ease! So go ahead and give it a try – there may just be a hidden gem waiting for you underneath all that dirt!
