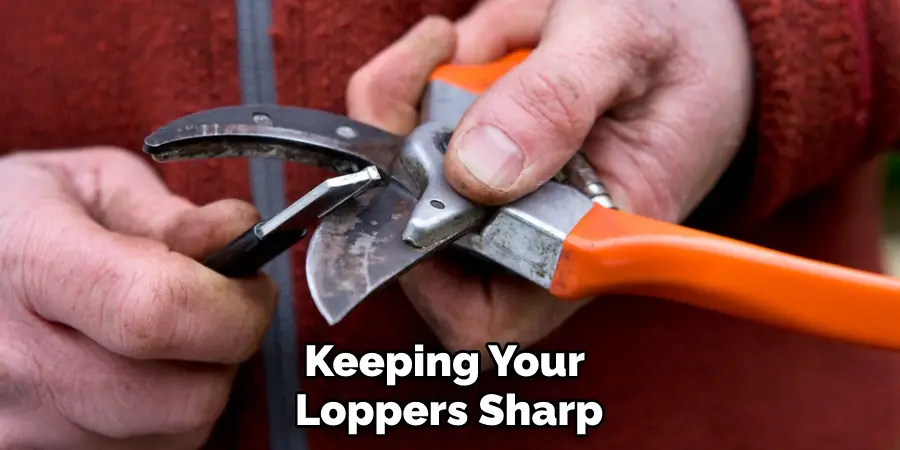
If you’ve ever needed to prune stubborn branches or thick vines, then having a good pair of loppers is essential. But even the best-quality blades will eventually become dull – which reduces their effectiveness and makes gardening tasks tedious.

Fortunately, it’s relatively easy to sharpen your loppers with just a few simple tools! In this blog post, we’ll explain how you can get back to cutting through tough branches quickly and easily by teaching you exactly how to sharpen loppers with a file in just five steps.
Tools You Will Need
- A file
- Protective gloves
- Safety glasses
- Water and a cloth for cleaning
5 Easy Steps Guide on How to Sharpen Loppers With a File
Step 1: Put On Your Protective Gear
Sharpening loppers is an essential step in keeping them in good condition and using them to their fullest capacity. Taking the time to use a file to sharpen the blades will give you more power to make precision cuts and tidily prune your potted plants with ease. This process is surprisingly simple, but always remember to consider safety first!
Put on your protective gear such as protective eyewear, face mask, heavy-duty gloves, and long-sleeved shirt before you start work—this will prevent dirt, small metal pieces, or oil from getting into your eyes & skin or clothing. With this important step taken care of you can freely enjoy sharpening your loppers!
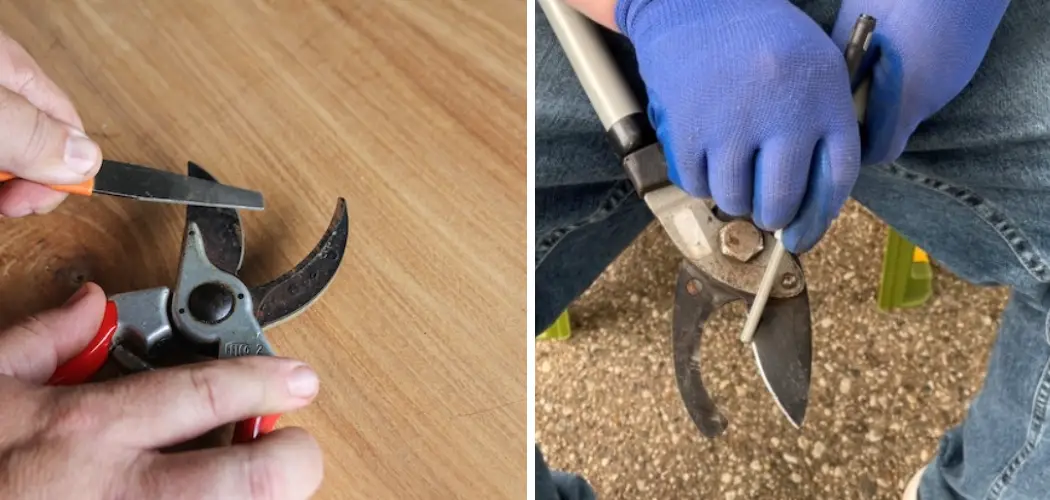
Step 2: Clean the Blades
Sharpening loppers is an important step in maintaining them for a long life span. Depending on usage, filing the blades of loppers may be necessary as often as once per season. To clean and sharpen the blades, start by wiping off any dirt or debris. You should then use a coarse-toothed mill file to remove any nicks or burrs.
Take care not to overfill your loppers, as this could damage them permanently. When filing, confirm that both sides of each blade are equally sharpened at the same angle before replacing the handles and continuing to use your tools.
With practice and regular maintenance, you’ll have nice cutting edges to make gardening tasks quicker and easier for years to come!
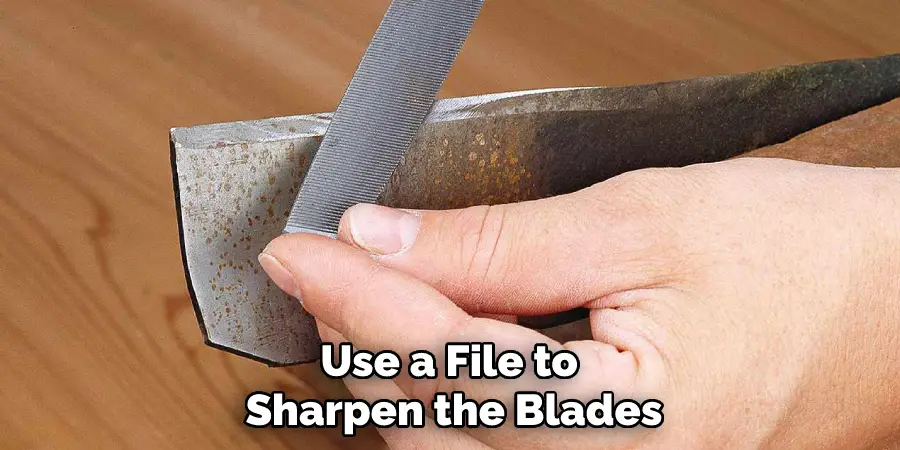
Step 3: File the Blades
Keeping your loppers sharp is essential for making clean cuts when pruning plants, removing dead branches, and harvesting fruits. Many people think that an electric file or professional sharpening service is the only way to keep their loppers in working order; however, this isn’t always necessary.
A simple and affordable option is to file the blades yourself with a file. This can be done without any special tools – all you need is a good quality metal file that fits the size of the blade, some lubricant, and an old cloth to work on.
Working carefully, use light strokes in one direction, pushing away from you and avoiding ‘sawing’ the tool which could weaken it over time. As with most gardening tasks involving power tools or hand tools, regular care and maintenance will ensure your loppers stay in peak condition for years to come.
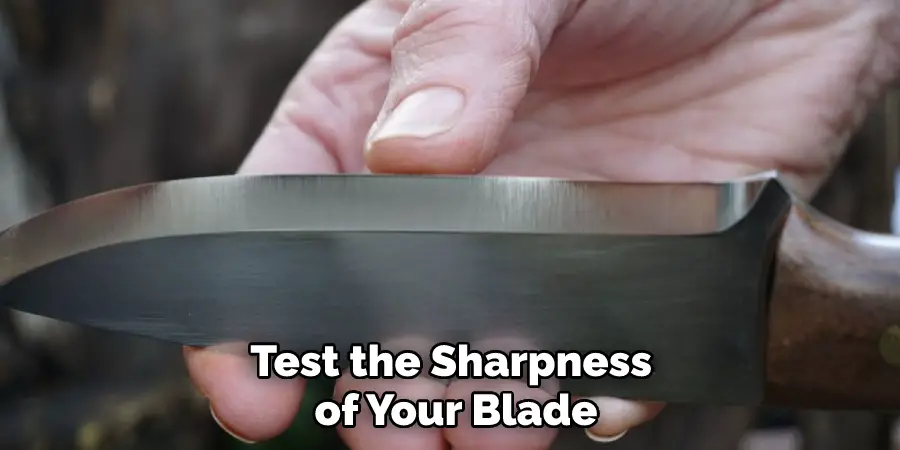
Step 4: Test for Sharpness
It’s important to regularly maintain garden loppers to ensure that they are sharp enough to easily cut through branches and other vegetation with minimal effort. A great way to test for sharpness is to remove a few whiskers from your face and place them on the blade; if the blade can remove the hairs effortlessly, it is ready for use.
To sharpen it further, use a file and move the tool back and forth against the file, just like you would sharpen a knife. Work one edge of the blade until it’s clean, then turn the loppers over and sharpen the other edge in the same manner. Ideally, you should repeat this process every 4-5 months to keep your tools in peak condition.

Step 5: Wipe Off Excess File Dust
Sharpening your loppers is an essential part of caring for them. If you want your loppers to be in top condition, you should take the time to sharpen them with a file every once in a while. After sharpening, it’s important to remove any excess metal dust from the blades by wiping them off with a damp cloth.
Doing this will protect the blades from oxidation and ensure that they stay sharp for longer. Plus, it can help reduce the possibility of transferring iron particles onto plants which could damage or discolor them. So make sure to wipe off those fine dust particles after sharpening your loppers – you’ll be glad you did!
With the right tools and safety gear, this is a relatively simple task that can be completed in just a few minutes. So next time your loppers become dull, don’t worry – just grab a file and get back to trimming those pesky branches in no time! Happy sharpening! 🙂
Tips to Sharpen Loppers With a File
- Start with a clean file. If your file is dirty, it will likely clog up quickly when you start sharpening your loppers. To clean your file, simply wipe it down with a damp cloth.
- Choose the right file. Two types of files can be used to sharpen loppers: a flat file and a round file. A flat file will work well for most general sharpening needs, while a round file is better for getting into tight spaces or for more precise sharpening.
- Place the file against the lopper blade at the correct angle. For most loppers, you’ll want to place the file at a 20-degree angle against the blade. This will ensure that you’re taking off enough metal to create a sharp edge without removing too much and making the blade too thin.
- Use short, even strokes. When sharpening your loppers, it’s important to use short, even strokes with moderate pressure. If you apply too much pressure, you risk taking off too much metal and weakening the blade. Conversely, if you don’t apply enough pressure, you won’t remove enough metal to make a difference.
- Don’t forget to sharpen both sides of the blade. It’s important to sharpen both sides of the blade evenly to create a symmetrical edge. If one side is sharper than the other, it could throw off your cutting ability and cause the blade to wear down unevenly over time.
- Wipe off the metal filings after each stroke. As you’re sharpening your loppers, metal filings will accumulate on both the file and the blade itself. Be sure to wipe these off after each stroke so that they don’t interfere with your work or cause rusting down the line.
- Test the blade before you stop filing. Every few strokes, test the sharpness of your blade by running your finger along the edge (being careful not to cut yourself!). If it feels reasonably sharp, then you can stop filing; if not, then continue until it reaches the desired level of sharpness.
- Clean and oil your loppers after sharpening. Once you’ve finished sharpening your loppers, be sure to clean them with a damp cloth and then oil them lightly (this will help to prevent rusting).
How to Get Professional Results When Sharpening Your Loppers at Home?
If you’re looking to sharpen the blades of your loppers, the key to getting a professional and consistent result is to follow a few simple steps. First, choose a high-quality sharpening stone that’s coarse enough for the type of steel in your lopper blades.
Allowing for an angle of 30°-35°, place the sharpening stone against both sides of each blade edge, evenly wearing away any burrs or buildup.
When you’ve reached the desired level of sharpness, apply to hone oil to both edges and then finely sharpen with a whetstone. For optimal performance, repeat these steps often so that your blades perform as well as new ones!
How to Master the Art of Sharpening Your Loppers?
Sharpening your loppers can be a tough job that requires patience and an eye for detail. First, you need to identify what kind of cutting-edge the loppers have: bypass or anvil. Once identified, use a sharpening stone with the appropriate grit to begin sharpening.
Depending on the condition of the blade, you may have to remove material using a bench grinder before using the sharpening stones for fine-tuning.
Additionally, it is important to focus on keeping both sides of your blade even as this will ensure that your loppers perform optimally and generate consistent results when cutting.
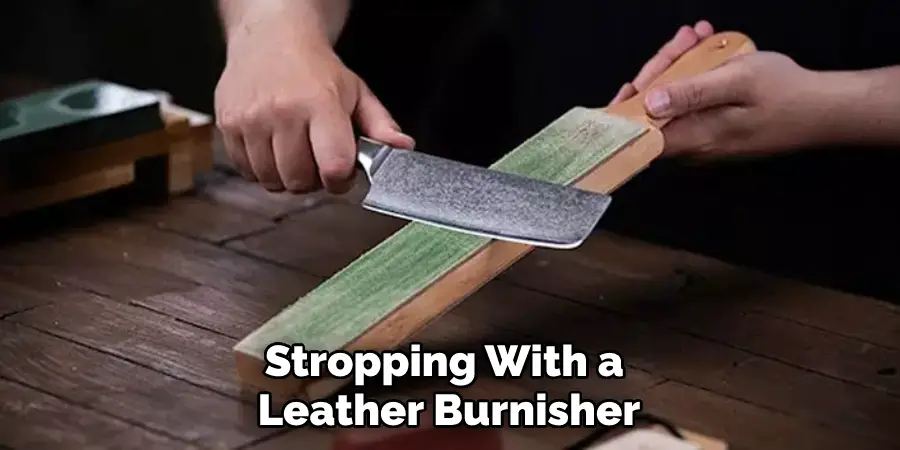
Finally, stropping with a leather burnisher will give your blades an extra edge and ultimately make them last longer between sharpenings. With practice, one can master the art of keeping their loppers performing at their peak efficiency!
How to Achieve Perfectly Sharpened Edges with Your Lopper Blades?
Sharpening your lopper blades is essential for an efficient cut, and with the proper technique, you can achieve perfectly sharpened edges every time.
First, it’s important to understand the anatomy of a lopper blade so that you get an idea of where your focus should be while sharpening.
Secondly, the type of material used in the blade will determine which kind of tool you’ll need; some surfaces require diamond stones while other materials might require something as simple as a file.
Lastly, safety should always come first; take all necessary safety precautions including wearing goggles and gloves and setting up the workspace away from any persons or animals. With the right approach, practice makes perfect when it comes to achieving perfectly sharpened edges with a lopper blade.
Conclusion
And there you have it! You now know how to sharpen loppers with a file. In conclusion, sharpening loppers with a file is an important maintenance task that can take as little as 5 minutes. By taking the time to quickly file down your loppers, you will find they work much better when cutting branches and the blades won’t wear out quite so quickly.
All that is needed is a quality, single-cut mill file and some light pressure while moving it across the blade in one direction. Additionally, try not to let the blade get too hot while filing it as this could affect its performance and strength over time.
Finally, if you’re having difficulty getting a clean edge on your loppers after sharpening them with a file let a professional handle it for you. They can sharpen your tools to help them last (and cut!) for many years to come.
About
Outdoor Fixes is a distinguished figure in the world of Diy design, with a decade of expertise creating innovative and sustainable Diy solutions.
His professional focus lies in merging traditional craftsmanship with modern manufacturing techniques,
fostering designs that are both practical and environmentally conscious. As the author of diy,
outdoorfixes delves into the art and science of outdoorfixes-making, inspiring artisans and industry professionals alike.
Education RMIT University
(Melbourne, Australia) Associate Degree in Design (Outdoor Fixes) Focus on sustainable design, industry-driven projects,
and practical craftsmanship. Gained hands-on experience with traditional and digital manufacturing tools, such as CAD and CNC software.
Nottingham Trent University
(United Kingdom) Bachelor’s in outdoorfixes.com and Product Design (Honors) Specialized in product design with a focus on blending creativity with production
techniques. Participated in industry projects, working with companies like John Lewis and Vitsoe to gain real-world insights.
Publications and Impact
In diy, Outdoor Fixes his insights on indoor design processes, materials, and strategies for efficient production.
His writing bridges the gap between artisan knowledge and modern industry needs, making it a must-read for both budding designers and seasoned professionals.