
Coco coir is a popular medium for growing plants, particularly in hydroponic systems. As with any organic material, it can sometimes harbor disease-causing organisms that may harm the plant’s health. Therefore, sterilizing coco coir before using it is highly recommended to ensure the safety of your plants. Sterilizing coco coir is a fairly simple process that takes just a few minutes and can help guarantee the health of your plants for years to come.
When it comes to organic gardening, the use of coco coir can offer some key benefits. Coco coir is a product made from the outer husks of coconut shells and is an excellent alternative to peat moss or potting soil mixes. It has a higher water-holding capacity than many other mediums and offers better drainage and aeration for plant roots. In this blog post, You will learn how to sterilize coco coir in detail.
Step-by-Step Processes for How to Sterilize Coco Coir
Step 1: Inspect the Coco Coir
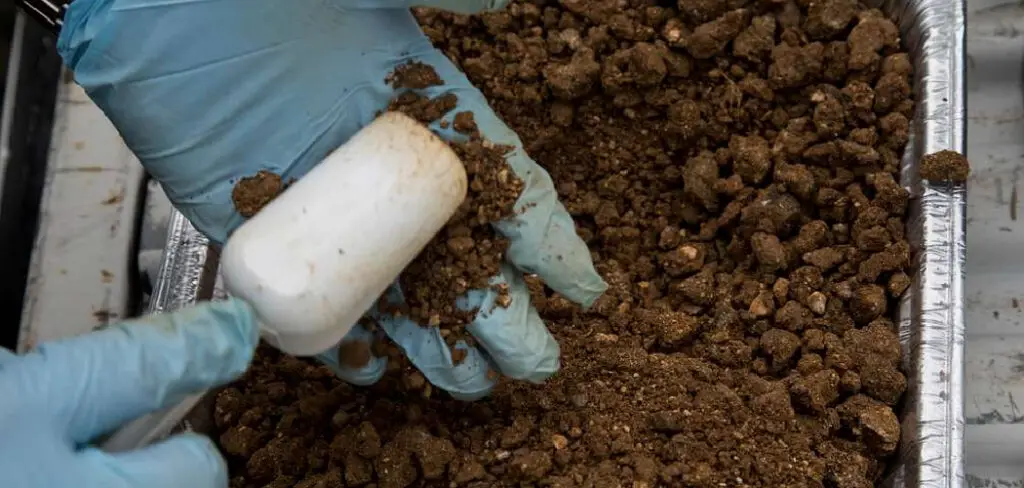
Before starting sterilizing your coco coir, inspecting it for any contaminants and removing anything that looks suspicious or out of place is important. Give the coir a thorough examination, and if you notice any large chunks or pieces of debris, use tweezers to pull them out. If there are any small bits of debris, use a strainer to remove them.
Step 2: Soak the Coco Coir in Clean Water
Next, fill a bucket with clean water and place your coco coir inside. Allow it to soak for at least 24 hours, so any contaminants will be washed away. If possible, try to stir the coir every few hours to ensure that all the debris is removed.
Once your coco coir has finished soaking, it’s time to move on to boiling. Fill a pot with enough water for your coco coir, and then bring it to a rolling boil. Add the coir to the boiling water, and allow it to boil for at least 10 minutes. This will help kill any remaining bacteria or other contaminants that might be present.
Step 3: Dry the Coco Coir
Once you’ve boiled your coco coir, it’s time to dry it out. Spread the coir out on a flat surface and allow it to air dry for several hours. Alternatively, you can place the coco coir in the oven at low heat (around 200°F) for about 10 minutes to speed up the drying process.
Once your coco coir is completely dry, you can then pasteurize it. To do this, put the coir in an oven-safe container and heat it in an oven set to 200°F for at least 30 minutes. This will help kill off any remaining bacteria or other contaminants.
Step 4: Sterilize the Coco Coir with Hydrogen Peroxide
You can also sterilize your coco coir with hydrogen peroxide. To do this, mix together 3 parts of water and 1 part of hydrogen peroxide in a bucket or container. Soak the coco coir in the solution for 30 minutes before rinsing it out with clean water. This will help get rid of any remaining bacteria or other contaminants.
Once you’ve pasteurized and sterilized your coco coir, it’s time to sun-dry it. Spread the coir out on a flat surface in direct sunlight for several hours, moving it around periodically so that all sides receive a fair amount of light and heat. This will help kill off any remaining bacteria or other contaminants.
Step 5: Store the Coco Coir
Once your coco coir has been sterilized and sun-dried, it’s time to store it away for later use. Place the coir in an airtight container or bag and store it in a cool, dark place until you’re ready to use it. Before using your coco coir, always re-check it for any contaminants that may have been missed during sterilization. If you notice anything suspicious, remove it and discard it before using the coir.
Finally, you’re ready to use your sterilized coco coir! Whether you plan to use it for gardening, hydroponics, or some other project, go ahead and start enjoying all the benefits of your freshly sterilized coco coir.
Precautions for How to Sterilize Coco Coir

- Wear protective gear such as gloves, a face mask, and safety glasses when dealing with coco coir.
- Always work in a well-ventilated area to avoid breathing in any dust or particles that could be lingering in the air.
- Prepare sterilization supplies such as bleach or hydrogen peroxide, a scrub brush and a bucket/container.
- Soak the coco coir in a container with either bleach or hydrogen peroxide for 10-15 minutes, making sure to stir it occasionally.
- After soaking, use a scrub brush to scrub all sides of the coco coir thoroughly. This will help break up any dirt, debris, or mold that may be present.
- Once scrubbed, rinse the coco coir in cold water until it is clean and free of any residue.
- Allow the coco coir to dry completely before using it again or storing it away.
- Dispose of any used bleach or hydrogen peroxide safely and according to local regulations.
By following these precautions, you can successfully sterilize coco coir for use in various applications. It’s important to remember that this process should be done carefully and with the proper protective gear to ensure your safety.
How Often Should You Perform a Sterilization Procedure on Your Coco Coir?
The frequency of sterilization depends on your purpose and the level of contamination risk. If you are using coco coir for hydroponics, it is recommended to sterilize it every 2-3 months. This will help ensure that any bacteria or fungi present in the media do not lead to problems or harm your plants. You can sterilize your coco coir for soil-based gardening every 6-12 months. This will help reduce the contamination risk and provide a cleaner medium for your plants.
It’s important to note that if you are growing food or medicinal plants, it is best to err on the side of caution and sterilize your coco coir more regularly. This will help reduce the risk of contamination and maintain safe levels of bacteria and fungi in your growing medium. When it comes to sterilizing coco coir, you have several options. You can use a bleach solution, hydrogen peroxide, or boiling water. It’s important to follow manufacturer instructions and safety guidelines when using any of these sterilization products.
How Can You Prevent the Coco Coir From Becoming Contaminated With Pathogens in the First Place?
One of the key steps in preventing coco coir from becoming contaminated with pathogens is to purchase only high-quality, professionally produced products. This includes avoiding any generic or homemade mixes which could contain unknown contaminants.
If you’re purchasing your coco coir online, it’s important to vet the retailer and ensure they have a good reputation for selling high-quality products. When it comes time to use the coco coir, you can take additional steps to ensure that it is free from contamination:
- Wear gloves when handling the coco coir. This will help prevent any potentially harmful bacteria or fungi already present on your hands from spreading to the coco coir.
- Wet the coco coir before use to help reduce dust particles.
- Use a face mask when working with the coco coir to reduce your risk of inhaling any airborne pathogens.
- Clean and disinfect all surfaces that come into contact with the coco coir, such as containers, trays, and tools.
- Separate the coco coir from other materials, and store it in a clean container or bag. This will help to prevent any cross-contamination from occurring.
- Keep the coco coir away from pets and other animals, as they could spread disease-causing microbes.
- Store the coco coir in a cool, dry place away from direct sunlight. This will help reduce any microbial growth that occurs as a result of increased heat and humidity.
By following these simple steps, you can greatly reduce your risk of introducing harmful pathogens to your coco coir and ensure it is safe to use in your garden.
How Often Should You Replace Your Coco Coir if You’re Using It for Indoor Growing?
Replacing your coco coir is highly recommended if you use it for indoor growing every two months or so. Depending on the size of the container and how much coco coir you have in use, this can vary up to four months. This is because as time passes, there begins to be an accumulation of excess salts and minerals that can harm the plants.
To ensure your coco coir is always in its best condition and free of any bacteria, it’s important to sterilize it on a regular basis by boiling or steaming it. Boiling is the most effective way to eliminate all potential contaminants, while steaming will only kill bacteria on the surface. Boiling will also help remove any excess salts and minerals that build up in the coco coir over time.

Conclusion
In conclusion, sterilizing coco coir is a simple and easy process that can be done using either chemical or physical means. Chemical sterilization requires boiling water, bleach solutions, hydrogen peroxide, or other chemicals to kill any potentially harmful microorganisms in the substrate.
Physical sterilization involves heating or microwaving the coco coir for an extended period of time to kill any living organisms. Whichever method you choose, sterilizing coco coir is an important step for ensuring your plants get off to the best start and remain healthy all the way through their growth cycle. I hope this article has been beneficial for learning how to sterilize coco coir. Make Sure the precautionary measures are followed chronologically.
You can check it out to Remove Pavers and Replace With Grass.
About
Outdoor Fixes is a distinguished figure in the world of Diy design, with a decade of expertise creating innovative and sustainable Diy solutions.
His professional focus lies in merging traditional craftsmanship with modern manufacturing techniques,
fostering designs that are both practical and environmentally conscious. As the author of diy,
outdoorfixes delves into the art and science of outdoorfixes-making, inspiring artisans and industry professionals alike.
Education RMIT University
(Melbourne, Australia) Associate Degree in Design (Outdoor Fixes) Focus on sustainable design, industry-driven projects,
and practical craftsmanship. Gained hands-on experience with traditional and digital manufacturing tools, such as CAD and CNC software.
Nottingham Trent University
(United Kingdom) Bachelor’s in outdoorfixes.com and Product Design (Honors) Specialized in product design with a focus on blending creativity with production
techniques. Participated in industry projects, working with companies like John Lewis and Vitsoe to gain real-world insights.
Publications and Impact
In diy, Outdoor Fixes his insights on indoor design processes, materials, and strategies for efficient production.
His writing bridges the gap between artisan knowledge and modern industry needs, making it a must-read for both budding designers and seasoned professionals.