There is a distinct, rhythmic “swish” that comes with using a scythe. It is a sound that connects us to thousands of years of agricultural history, a stark contrast to the aggressive roar of a gas-powered string trimmer or lawnmower. While many view the scythe as a relic of the past, it is experiencing a significant resurgence among homesteaders, gardeners, and permaculture enthusiasts.

Why return to a hand tool in an age of automation? The scythe offers precision and a connection to the land that machinery cannot match. It transforms a chore into a meditative practice. Whether you are clearing tall weeds in a ditch or managing a wildflower meadow, mastering this tool requires technique rather than brute strength.
This guide on how to use a scythe will walk you through everything you need to know to mow effectively, safely, and enjoyably.
What Will You Need?
Before you begin, you must assemble the correct kit. A scythe is a precision instrument, not just a blade on a stick.
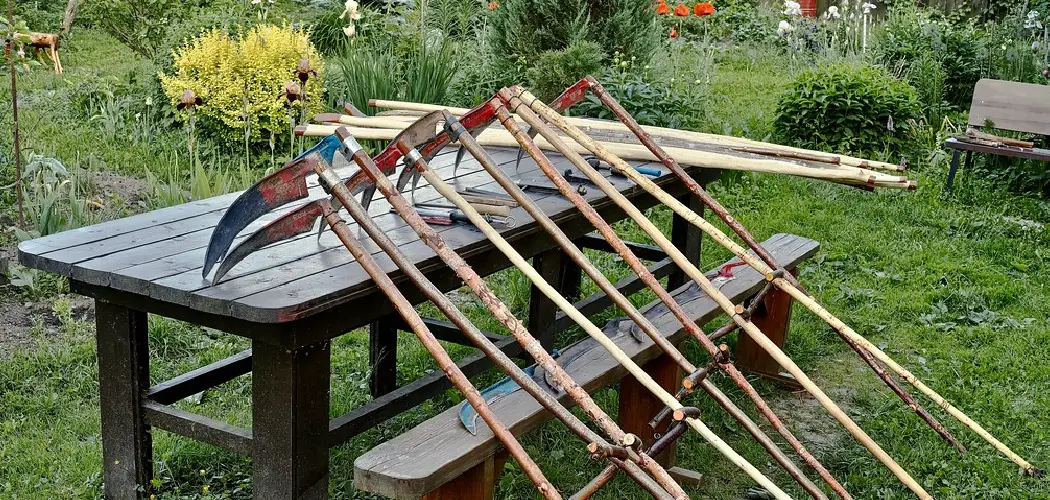
- The Snath: This is the handle of the scythe. Modern snaths are often made of lightweight aluminum or shaped wood (like ash) and are adjustable to fit your height.
- The Blade: Blades come in various shapes. A “grass blade” is thin, light, and razor-sharp, perfect for lush vegetation. A “ditch blade” or “bush blade” is shorter and thicker, designed to handle woody stems and brambles without chipping.
- The Attachment Ring and Allen Key: These secure the blade to the snath.
- A Whetstone (and Holder): A scythe must be honed frequently while working. You will need a natural or synthetic whetstone carried in a water-filled holder (often worn on a belt) to keep the stone wet and accessible.
- Peening Equipment (Optional but Recommended): Eventually, the cutting edge will thicken. Peening involves hammering the edge thin again. You will need a peening jig and hammer for long-term maintenance.
10 Easy Steps on How to Use a Scythe
Mastering the scythe is about geometry and body mechanics. If you fight the tool, you will tire quickly. If you work with the tool, you can mow all day.
Step 1: Adjusting the Snath to Your Body
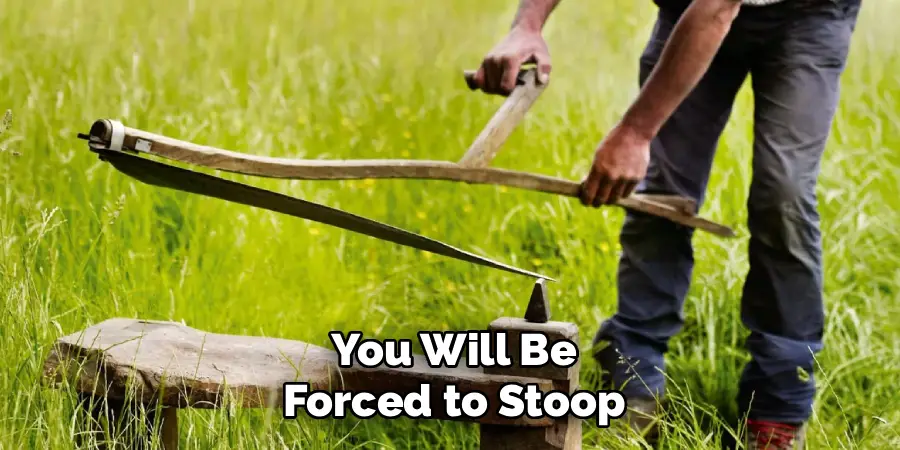
A scythe must fit its user like a tailored suit. If the handle is too long or the grips are set too low, you will be forced to stoop, leading to back pain. Start by standing upright with the scythe standing vertically next to you. The lower grip should ideally be at the level of your hip joint.
Next, check the balance. When you hold the scythe in the mowing position, the blade should naturally lie flat on the ground without you having to bend your knees excessively or hunch your shoulders. Most modern adjustable snaths allow you to slide the grips up or down. Take the time to get this right before you take a single swing. Your back should remain straight and relaxed throughout the entire mowing process.
Step 2: Attaching the Blade Correctly
The connection between the blade and the snath is critical. You are looking for the correct “hafting angle.” This refers to the angle of the blade relative to the handle. If the angle is too “open,” the blade will try to bite off more grass than you can cut, getting stuck. If it is too “closed,” it won’t cut enough.
Place the blade’s tang (the metal stem) onto the end of the snath. Most systems use a metal ring with set screws. Tighten the screws enough to hold it, but check the angle before the final torque. A good rule of thumb for beginners is a slightly closed angle. This ensures the blade slices effectively without digging in. Once you are satisfied, tighten the bolts securely using your Allen key or wrench. A loose blade is dangerous and ineffective.
Step 3: Adopting the Proper Stance
Your stance is the foundation of your movement. Stand with your feet shoulder-width apart, perhaps slightly wider for stability. Your weight should be evenly distributed. Unlike a golf swing where you address a ball, here you are addressing a wide arc of ground.
Step your right foot forward slightly (if you are using a standard right-handed scythe). This offset stance allows you to rotate your torso freely. Bend your knees slightly to lower your center of gravity. This “athletic stance” engages your thigh muscles and protects your lower back. You should feel grounded and stable, ready to move laterally if necessary. Avoid locking your knees, as this cuts off the fluid motion required for the stroke.
Step 4: Mastering the Grip
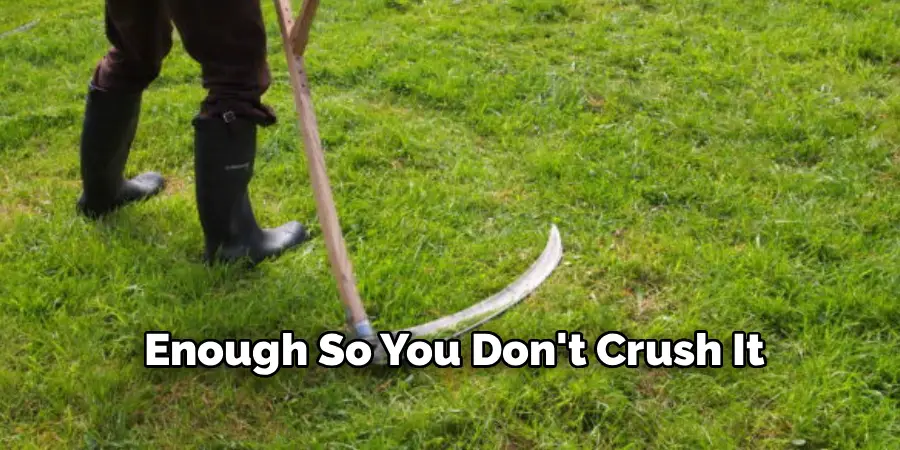
One of the most common mistakes beginners make is gripping the handles too tightly. This “death grip” creates tension in the forearms and shoulders, leading to rapid fatigue. Instead, hold the handles loosely. Your hands are merely guides; the momentum of the tool does the work.
For a standard right-handed setup, your left hand holds the top grip and your right hand holds the lower grip. Your thumbs should rest gently on top of the handles. Think of holding a bird: tight enough so it doesn’t fly away, but loose enough so you don’t crush it. This relaxed grip allows the snath to pivot slightly in your hands as you move through the arc, maintaining the correct blade angle relative to the ground.
Step 5: The Rotation Movement
Scything is not an arm movement; it is a core movement. If you try to pull the blade through the grass using only your biceps and shoulders, you will be exhausted in ten minutes. The power comes from rotating your hips and torso.
Imagine your arms are fixed connecting rods that maintain the distance between your body and the tool. Initiate the movement by twisting your torso to the right (the wind-up) and then rotating smoothly to the left (the cut). Your arms simply follow the rotation of your body. It should feel like a dance. The blade travels in a semi-circle around your feet. This rotation utilizes your large core muscles, which have far more endurance than your arms.
Step 6: Keeping the Blade Flat
As the blade sweeps across the front of you, it must remain parallel to the ground. Specifically, the back of the blade (the spine) should slide along the earth. Do not lift the blade into the air like a golf club or a hockey stick.
The unique shape of a scythe blade is designed to ride on its convex underside. This is often called “floating” the blade. When the blade stays on the ground, you don’t have to support its weight, which saves energy. Additionally, keeping it low ensures a close, even cut. If you lift the tip, you will likely drive it into the dirt on the downswing, dulling the edge instantly. Trust the shape of the tool and let it glide.
Step 7: The Slicing Stroke
The scythe is a slicing tool, not a chopping tool. This is a crucial distinction. A chop hits the target directly with force (like an axe). A slice moves across the target (like a kitchen knife cutting a tomato).
To achieve this slice, your movement creates a shearing action. As you rotate your body to the left, the blade moves sideways through the grass. The edge slides across the stems, severing them cleanly. Do not try to hack at the grass. The motion should be sweeping and continuous. You are not trying to muscle through the vegetation; you are drawing the sharp edge across it. If the blade is sharp and the stroke is correct, you should barely feel the resistance of the grass.
Step 8: The Return and Step
Mowing is a rhythmic cycle of cutting and advancing. After you complete the cutting stroke to your left, you need to return the scythe to the starting position on your right. This is the “return stroke.”
Do not lift the scythe off the ground for the return. Slide it lightly back across the stubble you just cut. As you return the blade to the right, take a small step forward. This sets you up for the next cut. The rhythm goes: Cut (rotate left), Return, and Step (rotate right/reset). The step should be small—only a few inches. Trying to take huge bites of grass with a large step will clog the blade and stall your momentum. Small, consistent bites are faster in the long run.
Step 9: Sharpening (Honing) in the Field
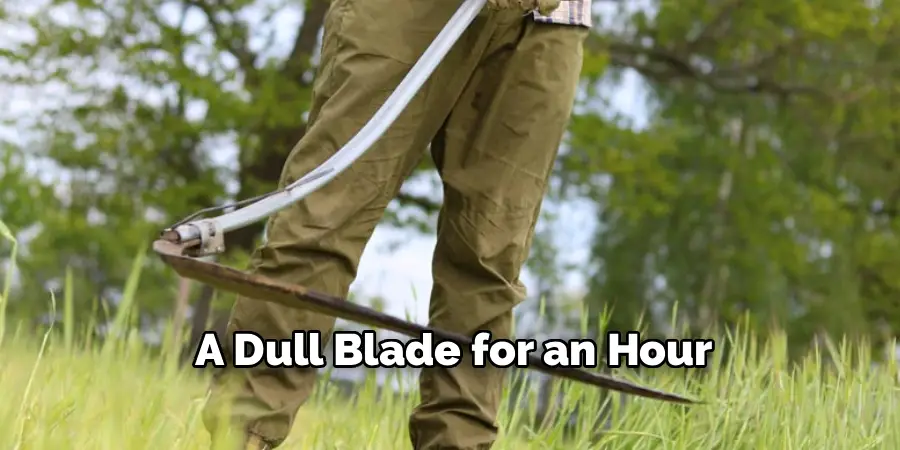
A scythe only works if it is razor-sharp. Even the best steel will dull after a few minutes of cutting fibrous grass stems. You must hone the blade frequently—roughly every 5 to 10 minutes of mowing.
Stop mowing and plant the end of the snath firmly on the ground. Wipe the blade clean with a handful of grass (carefully, from spine to edge). Take your whetstone from its water-filled holder. With a steady hand, run the stone along the edge of the blade in alternating strokes, maintaining the existing bevel angle. You are not trying to grind away metal, just realigning the microscopic edge. A quick 30-second hone is better than forcing a dull blade for an hour.
Step 10: Cleaning and Storage
Once your mowing session is complete, proper care ensures your scythe lasts a lifetime. Never put a scythe away wet and dirty. The moisture in grass sap can lead to rust very quickly.
Wipe the blade completely dry with a cloth. If you are storing it for a long period, apply a light coat of mineral oil or vegetable oil to the metal to prevent oxidation. Store the scythe in a dry place, preferably hanging up so the blade is not resting on the ground or touching concrete, which can draw moisture. Check the tightness of the ring and handle bolts periodically, as wood can expand and contract with humidity changes. Treat the wood of the snath with linseed oil occasionally to keep it supple and strong.
5 Things You Should Avoid
Even with the best intentions, beginners often fall into bad habits. Watch out for these common pitfalls.
- Hacking the Grass: Do not swing the scythe like a machete. It relies on sharpness and a slicing angle, not impact. Hacking damages the blade and exhausts the user.
- Digging the Point: If you raise your hands too high, the point of the blade dips and stabs the earth. This dulls the tip immediately and can snap the blade. Keep the spine on the ground.
- Ignoring the Whetstone: Don’t wait until the blade stops cutting to sharpen it. If you have to force the cut, you waited too long. Hone often to keep the work effortless.
- Mowing Dry, Tough Grass: Grass is easiest to cut when it is turgid (full of water). This is why traditional mowers start at dawn. Avoid mowing in the heat of the afternoon when the grass is dry and wiry; it makes the work twice as hard.
- Overreaching: Don’t try to cut a swath that is too wide. Stick to a comfortable semi-circle in front of you. Overreaching throws off your balance and ruins your posture.

Conclusion
Learning how to use a scythe is a journey of patience and rhythm. It transforms the act of mowing from a noisy chore into a quiet, rewarding interaction with nature.
By setting up your scythe correctly, maintaining a sharp edge, and focusing on body mechanics, you will find that the scythe is not just a tool of the past, but a highly effective solution for the future.
Don’t be discouraged if your first few swipes are uneven—keep honing, keep your back straight, and soon you will find the flow. Grab your snath, step into the morning dew, and enjoy the sway.
About
Outdoor Fixes is a distinguished figure in the world of Diy design, with a decade of expertise creating innovative and sustainable Diy solutions.
His professional focus lies in merging traditional craftsmanship with modern manufacturing techniques,
fostering designs that are both practical and environmentally conscious. As the author of diy,
outdoorfixes delves into the art and science of outdoorfixes-making, inspiring artisans and industry professionals alike.
Education RMIT University
(Melbourne, Australia) Associate Degree in Design (Outdoor Fixes) Focus on sustainable design, industry-driven projects,
and practical craftsmanship. Gained hands-on experience with traditional and digital manufacturing tools, such as CAD and CNC software.
Nottingham Trent University
(United Kingdom) Bachelor’s in outdoorfixes.com and Product Design (Honors) Specialized in product design with a focus on blending creativity with production
techniques. Participated in industry projects, working with companies like John Lewis and Vitsoe to gain real-world insights.
Publications and Impact
In diy, Outdoor Fixes his insights on indoor design processes, materials, and strategies for efficient production.
His writing bridges the gap between artisan knowledge and modern industry needs, making it a must-read for both budding designers and seasoned professionals.