
Are you planning to install a wire fence on your property? If yes, you’ll need to use fence staples to secure the fence to wooden posts.
Fence staples, also known as U-nails, are integral components in constructing and repairing wooden fences.
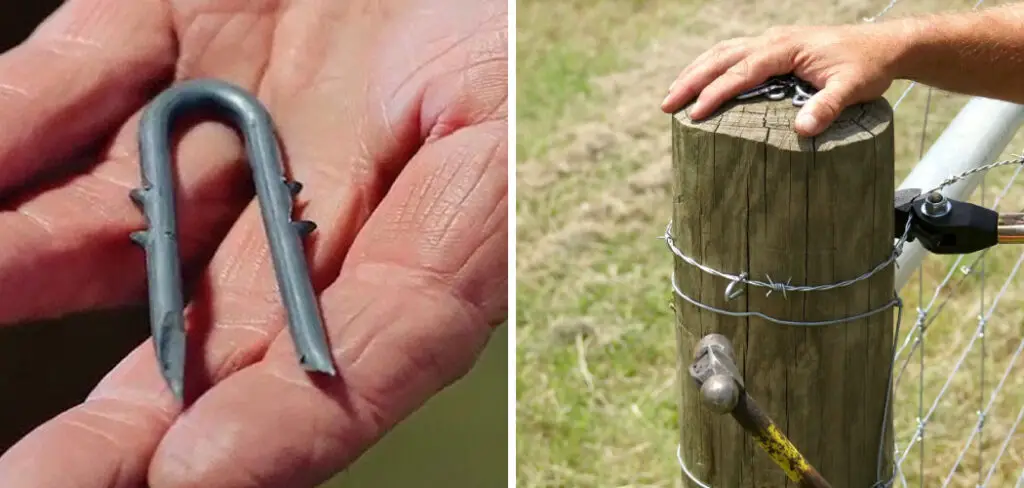
They are designed to hold the fence firmly against wooden posts, ensuring stability and durability. Their U-shaped design allows for easy insertion into wood, gripping it securely to prevent the fence material from sagging or coming loose.
This guide will provide a step-by-step introduction to how to use fence staples effectively, covering selecting the right type of staples, the tools required for the job, and practical tips to ensure a strong and lasting fence installation. Whether you’re a DIY enthusiast or a professional carpenter, understanding how to properly use fence staples will make your fencing project more efficient and robust.
What are the Benefits of Using Fence Staples?
Before diving into the steps on how to use fence staples, let’s first discuss why they are crucial in fence installation.
- Easy and Efficient Installation: One of the main advantages of using fence staples is their ease of installation. They can be inserted quickly and easily into wooden posts with minimal effort, making them ideal for small and large fencing projects.
- Strong and Durable Hold: Fence staples provide a secure grip on the fence material, preventing it from coming loose or sagging. This is especially important for fences that need to withstand heavy winds or other external forces.
- Versatility: Fence staples are highly versatile and can be used in various types of wooden fences, such as wire mesh, chicken wire, or barbed wire. They are also suitable for both temporary and permanent fences.
- Cost-effective: Compared to other fencing materials, fence staples are relatively inexpensive, making them a cost-effective option for securing your fence.
- Easy Replacement: In case of any damage or wear over time, fence staples can be easily replaced without having to replace the entire fence.
These benefits make fence staples an essential and practical tool for any fencing project.
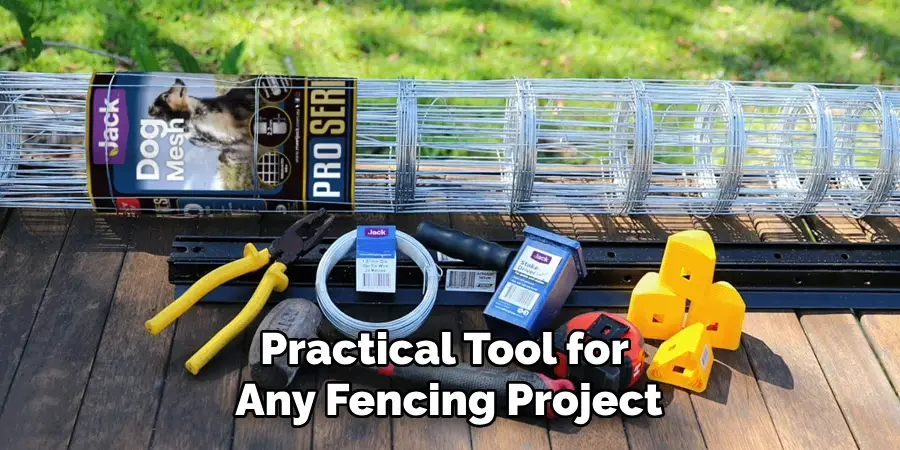
What Will You Need?
Before you start using fence staples, make sure to gather all the necessary tools and equipment. Here’s a list of what you’ll need:
- Wooden Posts: These are the main support for your fence, so make sure to use high-quality and sturdy posts.
- Fence Staples: Choose the appropriate size and type of staple for your specific fencing material and post diameter. Common types include regular, barbed, and heavy-duty staples.
- Staple Gun: This tool is used to insert the fence staples into the wooden posts. Depending on your preference and project size, you can use a manual or pneumatic staple gun.
- Hammer: A hammer can be useful for securing the staples in place in case you encounter stubborn or hard-to-reach areas when using a staple gun.
- Safety Gear: It’s always essential to prioritize safety when working with tools. Wear protective gloves and eye goggles to prevent any potential injuries.
Once you have all the necessary tools, you can start using fence staples!
Types of Fence Staples
Various types of fence staples are available, each designed for different fencing materials and post sizes. Below are the most common types:
- Regular Fence Staples: These are the standard U-shaped staples used for general fencing purposes.
- Barbed Fence Staples: As the name suggests, these staples have barbs on the legs to provide a more secure hold. They are recommended for heavy-duty fences or areas with high winds.
- Heavy-duty Fence Staples: These are thicker and stronger staples, suitable for larger posts and tougher fencing materials. They provide an extra-strong hold and are ideal for permanent fences.
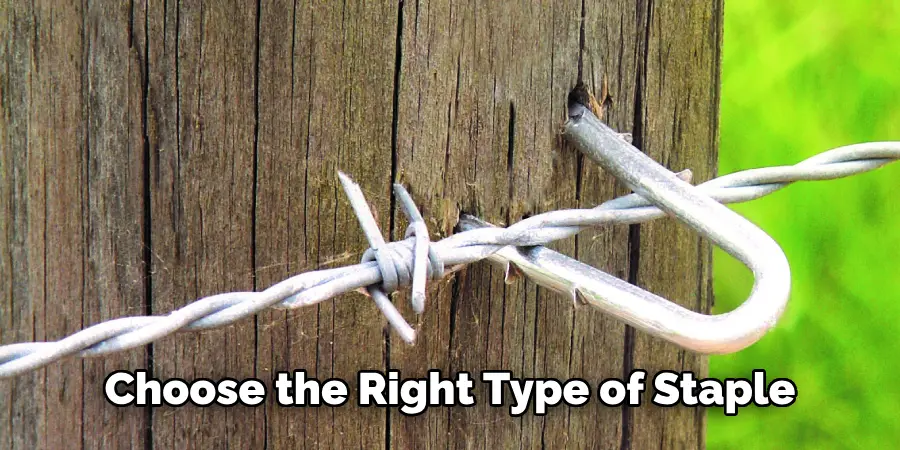
To ensure a successful fence installation, make sure to choose the right type of staple based on your specific needs.
9 Easy Steps on How to Use Fence Staples
Step 1. Prepare the Posts:
The first step in using fence staples effectively is to ensure that your wooden posts are properly prepared. Start by inspecting each post for any signs of damage or weakness. Replace damaged posts as needed to ensure your fence has a strong foundation. If the posts are new, consider treating them with a wood preservative to extend their life and protect against rot and insect damage.
Measure and mark the exact height where each wire or fence material will be attached to the posts. Consistent spacing between the wires ensures an even and aesthetically pleasing fence structure. Once the posts are prepared and marked, you’re ready to attach the fence material with the staples.
Remember, proper preparation of the posts not only makes the installation process smoother but also contributes to the overall strength and durability of the fence.
Step 2. Attach the Fence Material:
Now that your posts are prepared, the next step is to attach the fence material to the posts using the fence staples. Begin at one end of the fence line and unroll a segment of your fencing material along the posts. Ensure the material is taut and aligned with your previously marked lines on the posts to ensure a uniform height along the fence.
Holding the fence material in place against the post, use your staple gun or hammer to insert a staple in the top corner of the material where it meets the post. Be sure to angle the staple slightly downwards to ensure a secure grip. Continue to attach the fence material to the post by placing staples at the intervals you marked, stretching the material tight as you move along to prevent any sagging.
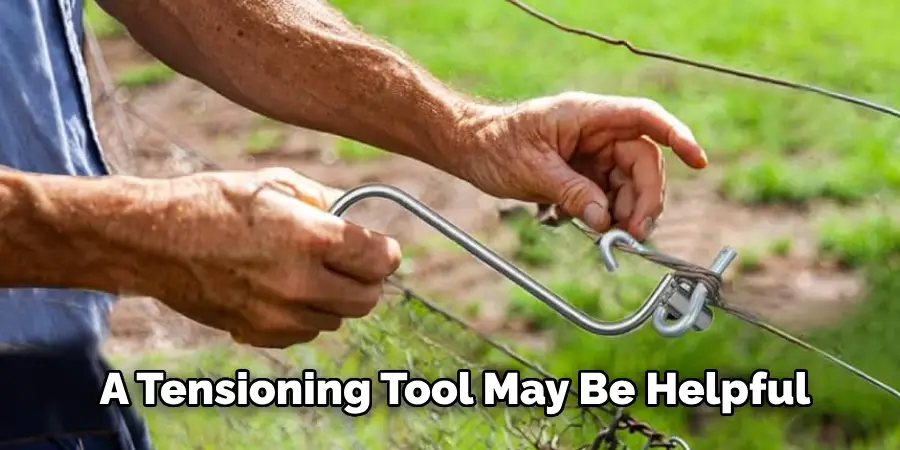
For wire or mesh fences, a tensioning tool may be helpful to keep the material taut while stapling. Ensure each staple is fully inserted into the wood for a secure hold, not damaging the fence material with excessive force.
Step 3. Check for Sagging and Adjustments:
After attaching the fence material to several posts, take a moment to step back and visually inspect the fence line. Look for any areas where the material may be sagging or not perfectly aligned. It’s much easier to make adjustments at this stage rather than after the entire fence is installed. If you find any sagging sections, gently remove the staples in those areas using a staple remover or a pair of pliers.
Pull the material taut and re-staple it to the post, ensuring it’s aligned with your original marks and there’s consistent tension across the fence. Continue this process along the fence line, attaching the material to each post and checking for uniformity in appearance and tension. This attention to detail ensures that your fence will not only look professional but will also be durable and secure.
Step 4. Secure Corners and Joints:
Corners and joints are critical points in any fence structure, as they bear significant tension and pressure. Additional staples or special corner brackets may be needed to ensure these points are fortified. Begin by examining each corner and joint to determine the level of reinforcement required. Use a heavier gauge or double up your staples for wire fences at these tension points. Where materials join, make sure the overlap is generous and well-secured.
When securing corners, insert staples in a diagonal pattern for added strength. This method distributes the tension more evenly, reducing the risk of pulling or sagging. For particularly vulnerable joints or corners, consider using metal brackets or ties that wrap around the post and fencing material, providing an extra layer of security.
Step 5. Trim Excess Material:
Once all the fence material has been securely attached and all corners and joints have been reinforced, the next step is to trim any excess material for a clean and tidy finish. Using a sharp pair of wire cutters or heavy-duty scissors, carefully trim along the top and sides of the fence, following the lines of the posts and rails.
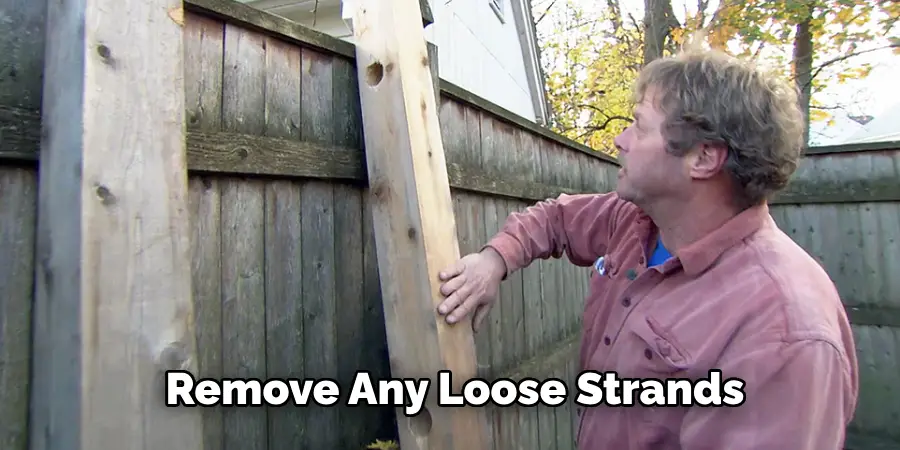
Be sure to remove any loose strands or pieces that could pose a safety hazard or detract from the fence’s appearance. If your fence material is particularly tough, such as heavy gauge wire or thick mesh, you might need specialized cutting tools to ensure a neat edge. Dispose of the trimmed material responsibly, keeping your work area clean and organized.
Step 6. Inspect and Correct Any Loose Staples:
With the fence material fully attached and trimmed, it’s important to do a thorough inspection of the entire fence line to identify any loose or improperly placed staples. During this inspection, walk along the fence and gently tug on the material at various points to test the security of the staples.
If you discover any staples that are loose or have not been driven fully into the post, use your staple gun or hammer to secure them properly. Similarly, if you find any staples that have been placed at incorrect angles or are causing the material to bunch or warp, carefully remove them and reattach the material correctly.
This step is crucial for ensuring that your fence is as strong and durable as it is visually appealing. Paying attention to these details can significantly extend the lifespan of your fence by preventing issues related to loose fencing material, such as sagging or damage from wind and weather.
Step 7. Final Walkthrough and Maintenance Plan:
After securing and inspecting the fence for any loose or improperly placed staples, the last step involves conducting a final walkthrough of the entire fence line. This ensures that everything is in place, the tension across the fence is consistent, and there are no gaps or sagging sections. Additionally, it’s crucial to establish a routine maintenance plan.
Regularly check your fence for any damage caused by weather conditions, wildlife, or wear and tear. Schedule inspections after severe weather events and at least once every season to make adjustments as needed.
This preventative maintenance will help prolong your fence’s lifespan, keeping it strong and functional year-round. Remember, a well-maintained fence not only enhances the appearance of your property but also serves its purpose effectively, whether it’s for security, privacy, or boundary definition.
Step 8. Add Finishing Touches:
The final step in installing your fence involves adding finishing touches to enhance its appearance and functionality. Consider painting or staining the fence to match your property’s aesthetic or to protect the material from weathering.
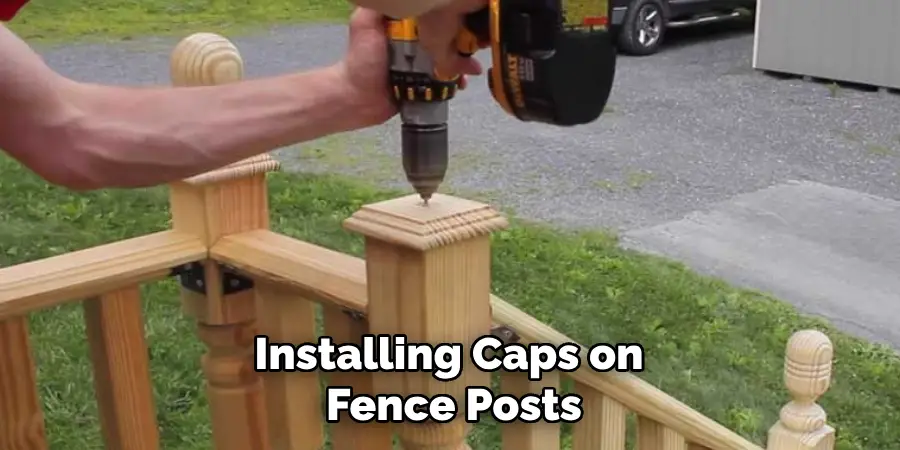
Additionally, installing caps on fence posts can prevent water from seeping into the wood, reducing the risk of rot or damage. If your fence serves a specific purpose, like keeping pets in the yard, you might add a gate with secure locks. Remember, these finishing touches not only contribute to the overall look of your fence but also its longevity and effectiveness. Take the time to review your work, ensuring that every aspect of the fence meets your standards and requirements.
Step 9. Celebrate Your Accomplishment:
After adding the finishing touches to your fence, take a moment to step back and appreciate your hard work. Installing a fence is no small task, and completing it is an accomplishment worth celebrating. Not only have you enhanced the aesthetic appeal and functionality of your property, but you’ve also added value to it.
Whether it was a solo project or a team effort, acknowledge the effort that went into planning, preparing, and executing each step. Now that your fence is in place enjoy the privacy, security, or simply the satisfaction it brings to your outdoor space.
By following these steps and taking the time to properly secure, trim, inspect, maintain, and add finishing touches to your fence, you can ensure that it will serve its purpose effectively for years to come.
5 Things You Should Avoid
- Using the Wrong Type of Staples: Using the correct type of fence staple for your project is important. Fence staples come in different sizes and materials, such as galvanized steel or aluminum. Using the wrong type of staple can cause damage to your fence or make it less secure.
- Overdriving the Staples: When using a staple gun, it can be tempting to drive the staples in too far to make them more secure. However, overdriving the staples can actually weaken the fence and cause it to come loose over time.
- Not Spacing Out the Staples: It is important to evenly space out your fence staples to ensure maximum support for your fence. Placing them too close together can cause unnecessary strain on the fence and lead to potential damage.
- Using Rusty or Damaged Staples: Before using any fence staple, it is important to check for rust or any other damage that may compromise its strength. Using rusty or damaged staples can cause your fence to deteriorate faster and become less secure.
- Not Wearing Protective Gear: When working with fence staples, it is important to wear protective gear such as gloves and safety glasses. This will protect your hands and eyes from potential injuries or accidents.
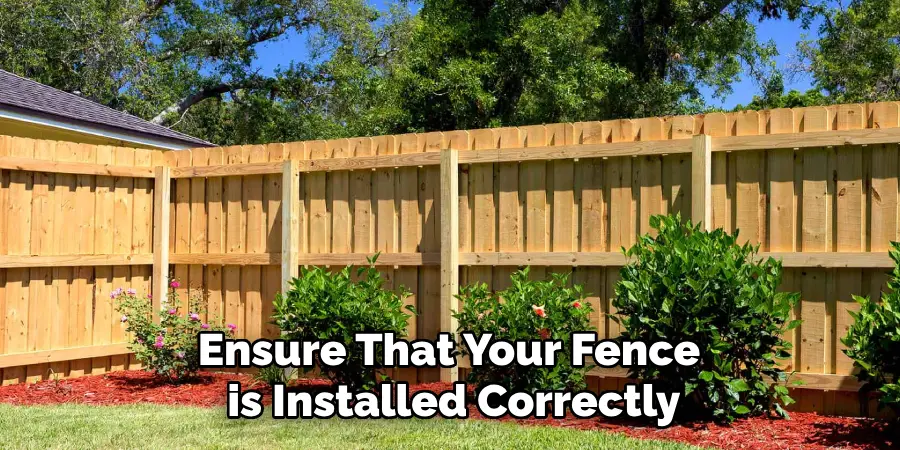
By avoiding these common mistakes, you can ensure that your fence is installed correctly and will last for a longer period of time.
What is a Basic Staple?
A basic staple is a small, U-shaped piece of metal that is used to secure items together. It is typically made from galvanized steel or aluminum and is commonly used in construction, woodworking, and fencing projects.
The two legs of the staple are inserted into the secured material, such as fence posts and wire mesh, and then bent inward to hold everything in place. Staples are a versatile and cost-effective option for securing various materials, making them an essential tool for many DIY projects.
However, it’s important to use the right type of staple for your project to ensure its effectiveness and longevity.
How to Hammer Fencing Staples?
Hammering fence staples may seem simple, but there are some helpful tips to ensure that you do it correctly and efficiently. Here are some steps to follow when hammering fencing staples:
- Choose the Right Type of Hammer: When selecting a hammer for your fencing project, make sure to choose one with a claw end. This will allow you to easily remove any misplaced staples.
- Hold the Staple in Place: Hold the staple in place with one hand while using the other to hammer it into the post or rail. This will prevent it from slipping and causing damage.
- Use a firm and Consistent Motion: When hammering, use a firm but controlled motion to drive the staple into the wood. This will ensure that the staple is secure and won’t come loose easily.
- Space Out the Staples: As mentioned earlier, it is important to evenly space out your fencing staples. This provides better support for your fence and makes hammering easier as you have more room to maneuver.
- Check for Bent or Damaged Staples: After hammering in a few staples, it is important to check for bent or damaged ones. If you find any, remove and replace them immediately.
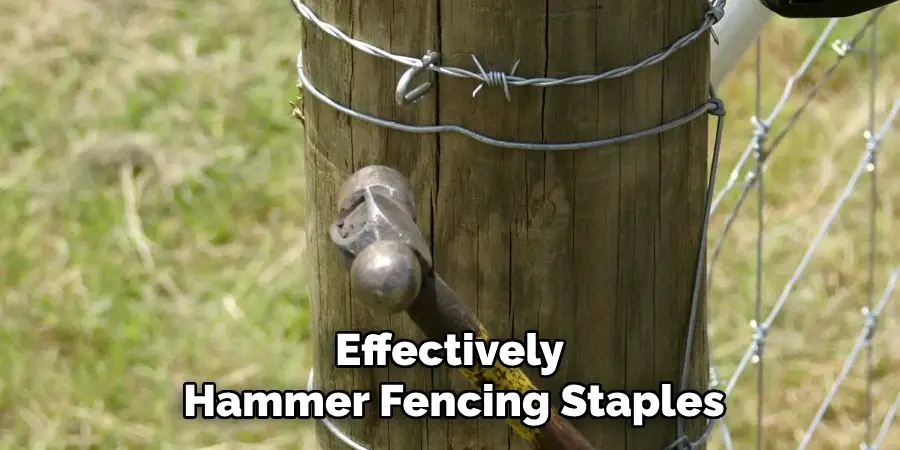
By following these tips, you can effectively hammer fencing staples and ensure that your fence is installed correctly and securely.
Conclusion
In summary, how to use fence staples is crucial for the construction and longevity of a fence.
By steering clear of common mistakes such as using the wrong type of staples, overdriving, improper spacing, employing rusty or damaged staples, and neglecting personal safety, you can ensure a sturdy and durable fence.
Adhering to best practices, such as selecting the appropriate hammer, correctly positioning and spacing the staples, and promptly addressing any damaged staples, will further solidify your fence’s integrity.
Remember, the attention to detail and adherence to these guidelines contribute to the fence’s physical structure and its lasting effectiveness in serving its purpose.
About
Outdoor Fixes is a distinguished figure in the world of Diy design, with a decade of expertise creating innovative and sustainable Diy solutions.
His professional focus lies in merging traditional craftsmanship with modern manufacturing techniques,
fostering designs that are both practical and environmentally conscious. As the author of diy,
outdoorfixes delves into the art and science of outdoorfixes-making, inspiring artisans and industry professionals alike.
Education RMIT University
(Melbourne, Australia) Associate Degree in Design (Outdoor Fixes) Focus on sustainable design, industry-driven projects,
and practical craftsmanship. Gained hands-on experience with traditional and digital manufacturing tools, such as CAD and CNC software.
Nottingham Trent University
(United Kingdom) Bachelor’s in outdoorfixes.com and Product Design (Honors) Specialized in product design with a focus on blending creativity with production
techniques. Participated in industry projects, working with companies like John Lewis and Vitsoe to gain real-world insights.
Publications and Impact
In diy, Outdoor Fixes his insights on indoor design processes, materials, and strategies for efficient production.
His writing bridges the gap between artisan knowledge and modern industry needs, making it a must-read for both budding designers and seasoned professionals.