
If you’ve always dreamed of having an outdoor living space with a functional set of steps to access it, then this guide is for you! We’ll show you how to build your own impressive set of steps on a slope using pavers.
With this comprehensive step-by-step approach on how to build steps on a slope with pavers, we’ll provide all the tips and tricks needed to get your dream project up and running quickly. Don’t let fear or lack of knowledge stand in your way when it comes to improving your landscaping – take the plunge today and learn how easy it can be to create beautiful steps out of pavers!
Needed Tools and Materials
Given below is a list of tools and materials that you’ll need in order to build steps on a slope with pavers:
- Paver Stones
- Gravel
- Sand
- Masonic Paver
- Level
- Shovel
- Wheelbarrow
- Tamper (optional)
11 Step-by-step Guides on How to Build Steps on a Slope With Pavers
Step 1: Mark Out the Area
This is the first step to building your steps on a slope with pavers. You’ll need to decide how wide and long you want the steps to be. Mark out the area with string or nails, then use a level to make sure it’s perfectly straight. It’s important to get this right, as it will be the foundation for the rest of your project. But don’t worry if things aren’t perfect – you can always go back and adjust as needed.
Step 2: Dig Out the Area
Once you’ve marked out the area, you’ll need to dig down at least 6 inches deep for the first step and 4 inches deep for the remaining steps. Make sure you dig out an extra 2 to 3 inches of space for the gravel and sand that will be used later. Otherwise, your steps may end up too shallow. It’s also important to dig out each step separately so that they are all the same height.
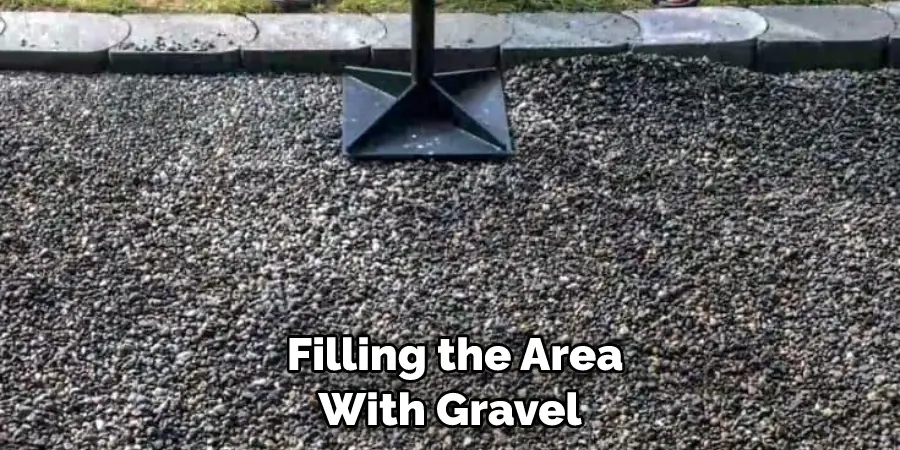
Step 3: Prepare the Base with Gravel
Now, it’s time to prepare the base by filling the area with gravel and packing it down with a tamper or a hand trowel. This will provide a stable and level foundation for the steps. But before you start to lay the pavers, make sure you’ve added enough gravel and that it is even across the entire surface. It’s also a good idea to add a few extra inches of gravel for the remaining steps.
Step 4: Place the Paver Stones
Once the base is prepared, it’s time to lay the paver stones on top of the gravel. Make sure that each stone is flat and secure before continuing with the project. You can also use masonic pavers to create a space between each step, which will help give the steps more stability.
Step 5: Fill the Gaps with Sand
Once all of the paver stones are in place, you’ll need to fill the gaps between them with sand. This will help keep your steps steady and secure. This is important if you are planning to use your steps for something more than just aesthetic purposes. You’ll also need to make sure that the sand is packed down firmly with a tamper or hand trowel to ensure a solid foundation.
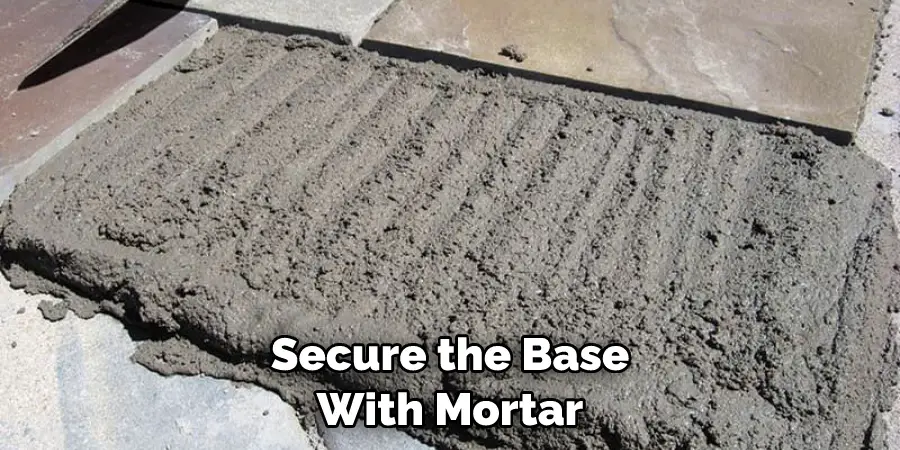
Step 6: Secure the Base with Mortar
For extra stability, you can secure the base of your steps with mortar. Simply mix the mortar according to the instructions on the package and apply it in between each paver stone. It’s important to make sure that the mortar is set and dry before you move on to the next step. But don’t worry – this won’t take long and it’s well worth the extra effort.
Step 7: Level Out the Steps with a Masonry Level
Once all of your stones are secure, you’ll need to use a masonry level to make sure that they are perfectly even. When checking the levels, be sure to check from both sides of the steps to ensure accuracy. It’s also important to make any necessary adjustments while the mortar is still wet.
Step 8: Add a Mosaic Paver Edge
Now that your steps are secure and level, it’s time to add a decorative edge with a mosaic paver. Choose a pattern that you like or create your own to make your steps look even more impressive! It’s a simple finishing touch that will really make your steps stand out and add some extra style to your outdoor living space.
Step 9: Add Sand to the Top
To help keep everything in place and provide a nice finish, it’s important to add sand to the top of your steps. Simply spread a layer of sand over the entire surface and use a hand tamper or brush to even it out. But don’t forget to brush the sand away from the edges of the steps, as it will help keep them in place and give a nice finishing touch.
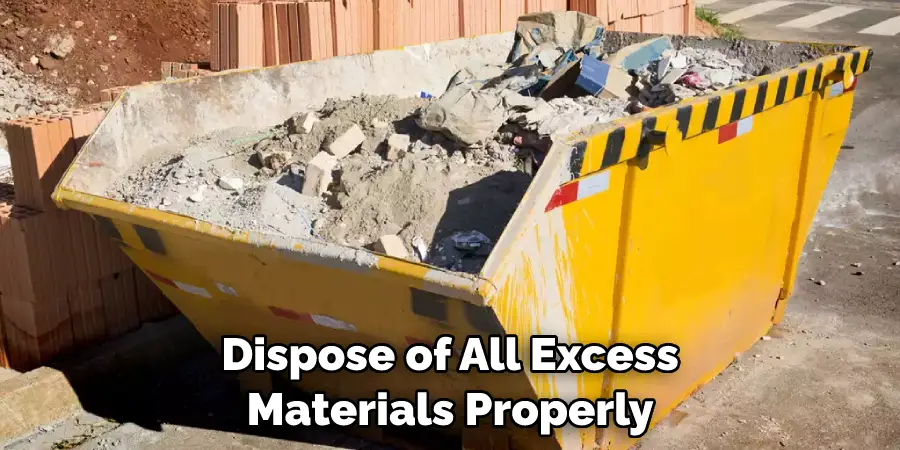
Step 10: Clean Up Your Work Area
Now that your steps are finished, it’s time to clean up the work area. Make sure you dispose of all excess materials properly and sweep away any debris. But be sure to leave some of the sand on top of the steps, as this will help keep them secure and prevent them from shifting.
Step 11: Enjoy Your New Steps!
Congratulations – You’ve just built your own impressive set of steps on a slope with pavers! Now it’s time to sit back and enjoy your hard work. Always be sure to check the steps regularly for any loose stones or shifting. This will help keep your steps looking great and ensure that they remain safe to use for years to come.
Following these 11 steps on how to build steps on a slope with pavers will ensure that you create a beautiful set of stairs that will last for many years to come. With the right tools and materials, building steps on a slope with pavers can be an enjoyable and rewarding experience. And you never know – it may even become your favorite part of the outdoor living space!
Good luck with your project, and happy building!
Do You Need to Hire a Professional?
If you’re not comfortable taking on such a project yourself, then it’s always a good idea to hire a professional to get the job done. Professional contractors can provide guidance and insight into the best way to build steps on your slope using pavers, as well as ensure that everything is installed correctly and safely.
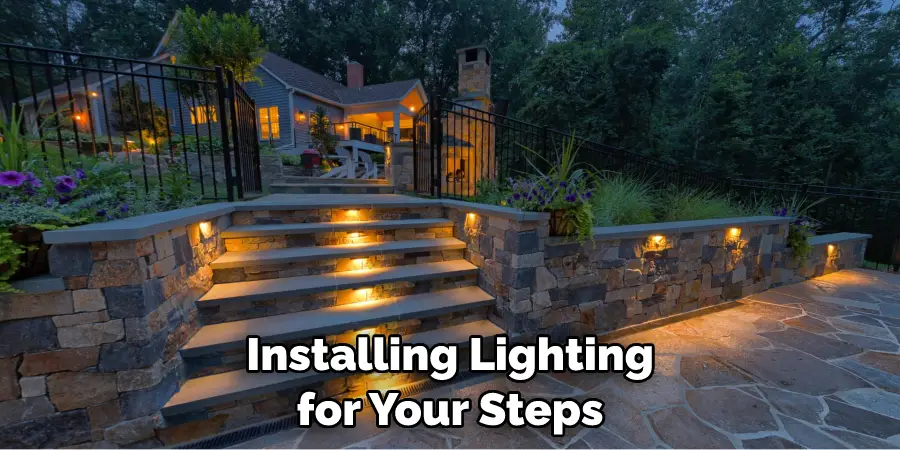
For an even more impressive look, consider hiring a professional to install lighting for your steps. This will add both safety and aesthetic appeal to your outdoor area and will ensure that you can enjoy it even after the sun goes down.
How Much Could It Cost?
The cost of building steps out of pavers on a slope can vary widely depending on the size and complexity of your project, as well as any extra features that you want to include. On average, you can expect to pay anywhere from $400 to $1,000 for professional installation of a set of steps made out of pavers. This cost will also include the cost of materials and any additional features you might want to add.
If you’re confident that you can handle the project yourself, then it may be possible to save money by sourcing the materials and tools on your own. However, keep in mind that this could take a lot of time and effort, so if you’d rather spend that time enjoying your outdoor space, then it may be best to hire a professional.
Frequently Asked Questions
Q: How Deep Should I Dig for My Steps?
A: You’ll need to dig at least 6 inches deep for the first step and 4 inches deep for the remaining steps. Make sure you dig out an extra 2 to 3 inches of space for the gravel and sand that will be used later.
Q: How Much Does it Cost to Install Paver Steps?
A: The cost of installing paver steps varies depending on the size and complexity of your project, as well as the materials and labor involved. It’s best to consult with a professional contractor to get an accurate estimate.
Q: Do I Need to Use Mortar?
A: While mortar isn’t necessary, it can provide extra stability and help keep your steps secure for many years to come. Consider using mortar if you’re looking for a more permanent solution.
Q: How Can I Make My Steps Look Even More Impressive?
A: To take your steps to the next level, consider adding a mosaic paver edge or installing lighting for your steps. Both of these options will add an extra layer of sophistication and beauty to your outdoor area.
Conclusion
After completing the task of building steps on a slope with pavers, you can sit back and enjoy your custom-made stairs. Whether you are creating a safe haven for yourself or a grand entranceway for your guests, these stairs will make any celebration or event even more special.
Pavers are an easy and affordable way to make your outdoor space look stylish. Not only does installing them provide a lot of benefits in terms of functionality, but pairing the perfect colors and textures also gives you the opportunity to have an aesthetic advantage too.
With all this said, there is no better time than now to take on the challenge of building pavers in a sloped area. With just some quick research on how to build steps on a slope with pavers, DIY skills and patience, you could have beautiful steps in no time!
About
Outdoor Fixes is a distinguished figure in the world of Diy design, with a decade of expertise creating innovative and sustainable Diy solutions.
His professional focus lies in merging traditional craftsmanship with modern manufacturing techniques,
fostering designs that are both practical and environmentally conscious. As the author of diy,
outdoorfixes delves into the art and science of outdoorfixes-making, inspiring artisans and industry professionals alike.
Education RMIT University
(Melbourne, Australia) Associate Degree in Design (Outdoor Fixes) Focus on sustainable design, industry-driven projects,
and practical craftsmanship. Gained hands-on experience with traditional and digital manufacturing tools, such as CAD and CNC software.
Nottingham Trent University
(United Kingdom) Bachelor’s in outdoorfixes.com and Product Design (Honors) Specialized in product design with a focus on blending creativity with production
techniques. Participated in industry projects, working with companies like John Lewis and Vitsoe to gain real-world insights.
Publications and Impact
In diy, Outdoor Fixes his insights on indoor design processes, materials, and strategies for efficient production.
His writing bridges the gap between artisan knowledge and modern industry needs, making it a must-read for both budding designers and seasoned professionals.