
It’s undeniable that pavers have become a popular choice of material for outdoor areas like patios, walkways, and driveways. Not only do they give a classic, sophisticated feel to your property, but they can also add value and functionality to your home.
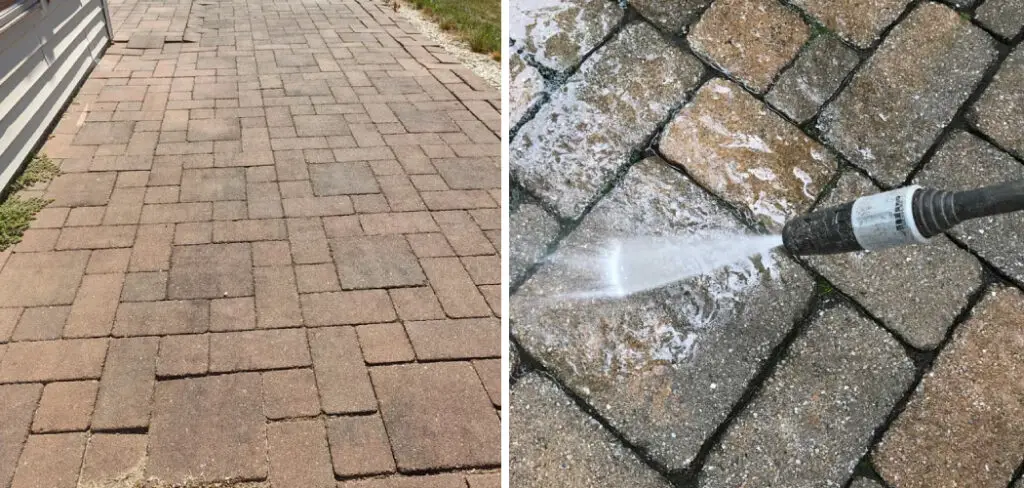
However, with time and use, they can become dirty, dusty, and prone to algae and moss growth. To keep your pavers looking new and fresh, pressure washing is essential. In this blog post, we’ll provide step-by-step guidelines on how to pressure wash pavers effectively.
11 Step-by-step Guidelines on How to Pressure Wash Pavers
Step 1: Choose the Right Pressure Washer
Before starting the process, you need to make sure you have the right tools. It’s important to use a pressure washer with a maximum output of 3000 PSI and a 3 GPM flow rate. Using a larger pressure washer can damage your pavers.
Also, consider getting a pressure washer with interchangeable nozzles to switch between more advanced and robust surfaces. It’s best to avoid using an electric pressure washer as they are not powerful enough for this job.
Step 2: Clear the Area
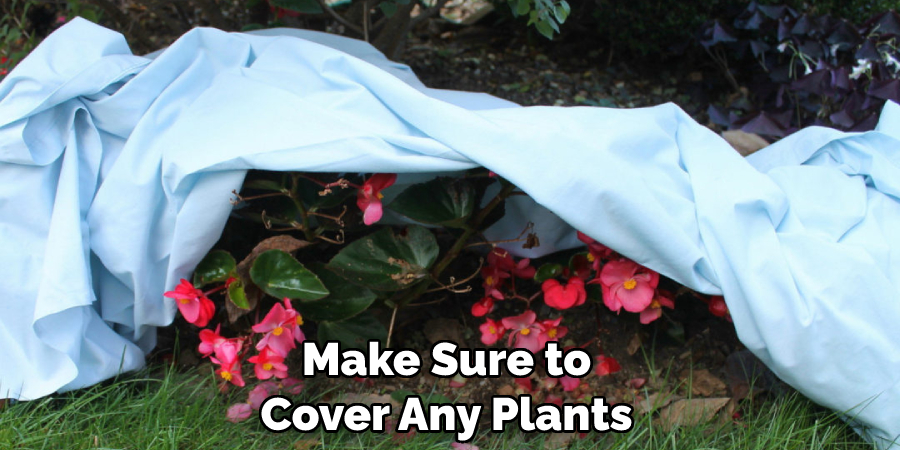
Remove all outdoor furniture, lightweight objects, and debris from the paver area to prevent any injuries during the process. Also, ensure that your plants and other susceptible materials are covered to protect them from any damage from direct pressure spray.
But don’t forget to cover your own face and eyes with safety glasses for protection. This is an important step to remember when learning how to pressure wash pavers.
Step 3: Inspect the Pavers
Check your pavers once you’ve cleaned the area, looking for any damage that may make them weak and more susceptible to damage during the washing process. If the pavers are cracked or damaged, they’re best left untouched, and you should consider repairing them instead.
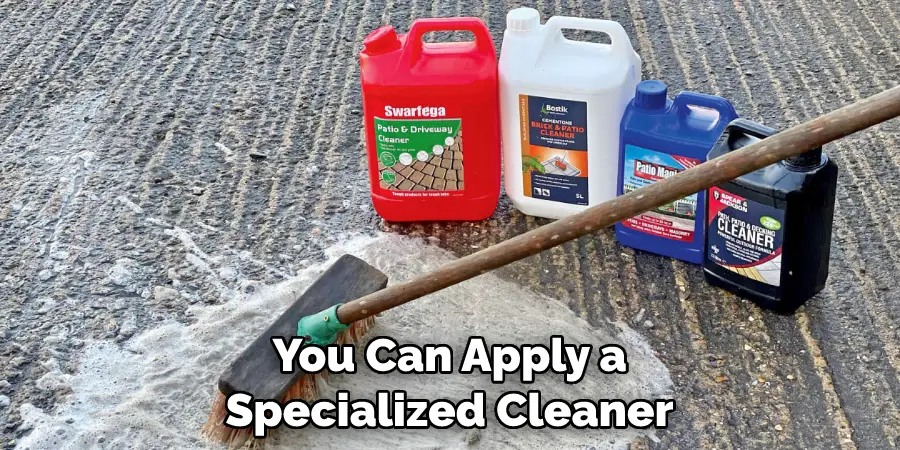
If you notice any moss or algae growth on the pavers, you can apply a specialized cleaner such as hydrochloric acid to remove it before pressure washing. But be sure to wear protective clothing when using chemicals.
Step 4: Pre-Wet the Pavers
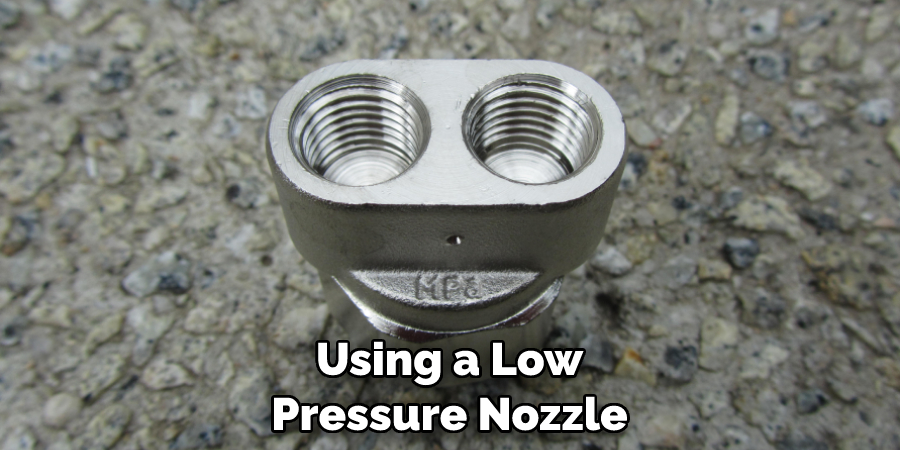
Before you begin cleaning the pavers, it’s best to pre-wet them with water using a low-pressure nozzle. This pre-wetting helps with loosening debris and dirt that has settled into the pores of the pavers, making it easier to remove during the washing process. It also prevents any overspray damage to the surrounding surfaces. If your pavers are particularly dirty, you can use a pressure cleaning detergent for extra dirt-fighting power.
Step 5: Use a Cleaning Solution
To remove any stubborn stains or dirt, use a cleaning solution made for pavers. Choose a cleaning solution that’s best suited for the type of paver you have. Apply the cleaning solution on the damp pavers after reading the instructions on the package correctly. You may have to scrub the pavers with a brush if necessary. This step is especially important when learning how to pressure wash pavers.
Step 6: Start with Low Pressure
Begin pressure washing the pavers always using a low-pressure nozzle. The pressure and the water flow rate must be set for low impact; you don’t want to damage the pavers. Ensure that the nozzle is held at a consistent distance from the pavers, and make sure you are moving in a slow and steady motion. But if you’re dealing with stubborn stains, you can switch to a higher pressure or a chemical-based cleaner.
Step 7: Increase Pressure as Needed
Once you’ve got the hang of it, increase the pressure gradually if you find that it’s taking longer than expected to remove the dirt or stains. Always take your time, so as not to damage the pavers.
But if after increasing the pressure, you still don’t see any visible progress, switch back to a lower setting. You may need to apply chemical-based solutions if the stains are hard to remove. It’s important to follow these steps when you’re learning how to pressure wash pavers.
Step 8: Use a Higher Pressure for Stubborn Stains
If you encounter any stubborn stains like oil or grease, go ahead and switch to a high-pressure nozzle. Also, move in a fast motion than the low-pressure nozzle in removing stubborn stains and cleaning the area in a fan pattern. However, be careful not to aim the nozzle directly at an area for too long–this can cause damage. When you’re done, switch back to a lower-pressure setting to rinse off any cleaning solution or dirt.
Step 9: Rinse Off the Surface
After cleaning the area get to the rinsing point. Rinsing off the pavers removes any remaining detergent and debris, so use a high-pressure nozzle to rinse off the surface effectively. If done correctly, the pavers will look like new when you’re finished. This is a critical step when learning how to pressure wash pavers.
Step 10: Perform an Additional Cleaning
Check the area for any areas that require additional cleaning to remove any signs of dirt, debris, or stains that might still be visible. Use the low-pressure nozzle to clean the pavers and ensure that the area is entirely cleaned. Although this step might take some additional time, it’s necessary to ensure that your pavers look spotless.
Step 11: Allow the Pavers to Dry
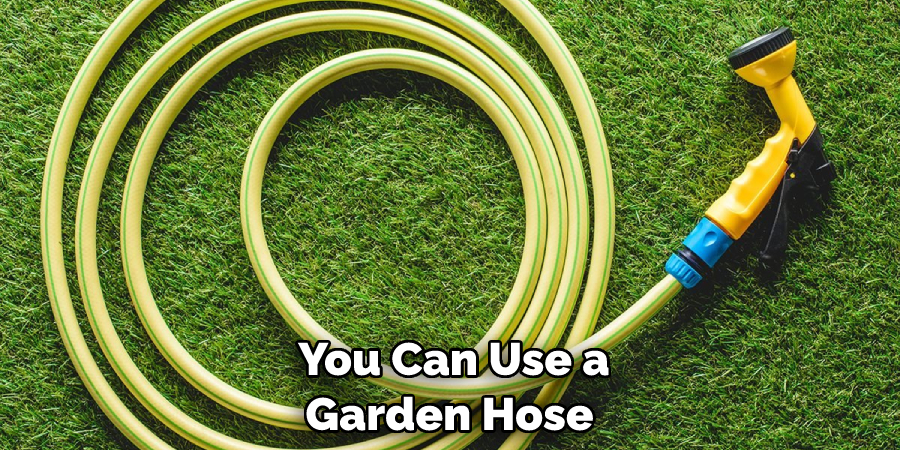
After cleaning the area, let it dry completely. You can use a garden hose to rinse off any cleaning solution residue or debris. Avoid stepping on or placing anything on the pavers until they have thoroughly dried. Always remember to use protective clothing, safety glasses, and gloves when learning how to pressure wash pavers.
Following these steps will ensure your pavers are cleaned effectively and efficiently. Remember to wear protective gear such as goggles, gloves, and long-sleeve clothing when pressure washing the pavers. This will help you protect yourself from any debris or flying dirt during the process.
Do You Need to Use Professionals?
While you can undertake the pressure washing of your pavers yourself, it’s best to hire a professional if the job is too big for you. Professional services use special equipment and techniques that guarantee the best results possible. They also ensure that nothing gets damaged during the process, so they are definitely worth considering if you don’t want to take any risks with your pavers.
We hope this blog post was helpful in guiding you to pressure wash your pavers safely and effectively! Keep in mind the tips and step-by-step guidelines we’ve provided here, and you can be sure that your pavers will last for a long time. Good luck!
If you are looking for more information on how to care for and maintain your pavers, you might want to check out our other blog posts. We have a wealth of resources and tips that can help you look after your property in the best way possible.
Frequently Asked Questions
Q: How Often Should I Pressure Wash My Pavers?
A: Pressure washing your pavers should be done at least once a year. This helps keep them clean and free from any unwanted substances like dirt, dust, or moss build-up. It’s best to pressure wash your pavers during the warmer months when there’s less chance of rain.
Q: How Much Pressure Is Too Much For Cleaning Pavers?
A: Using too much pressure can damage your pavers, so it’s important to use a pressure washer with a maximum output of 3000 PSI and a 3 GPM flow rate. Electric pressure washers are not powerful enough for this job, so make sure to get one that’s suitable for the task at hand.
Q: How Can I Protect My Plants From Pressure Washing?
A: Before pressure washing your pavers, make sure to cover any plants and other susceptible materials with a tarp or sheet. This will prevent them from getting damaged by the direct pressure spray.
We hope this blog post has been helpful in guiding you to safely and effectively pressure wash your pavers! Remember to follow the steps we’ve outlined here, and use an appropriate cleaning solution for your specific type of paver.
Q: What Are the Benefits of Pressure Washing Pavers?
A: Pressure washing your pavers can help keep them looking new and clean for longer. Additionally, it helps restore their original color, as dirt and dust build-up can make them look dull over time. It also prevents moss or weed growth between the pavers, which in turn will reduce any staining or discoloration. In short, pressure washing your pavers regularly can help keep them looking like new!
Conclusion
Pressure washing pavers is an important process to keep your outdoor space looking beautiful and fresh. Remember to choose the right pressure washer, clear the area, inspect the pavers, pre-wet them, use a cleaning solution, start with low pressure, increase pressure as needed, use high pressure for stubborn stains, rinse off the surface, perform an additional cleaning if necessary, and let the pavers dry.
By following these 11-step guidelines on how to pressure wash pavers, you’ll keep your pavers looking elegant and new for years to come.
About
Outdoor Fixes is a distinguished figure in the world of Diy design, with a decade of expertise creating innovative and sustainable Diy solutions.
His professional focus lies in merging traditional craftsmanship with modern manufacturing techniques,
fostering designs that are both practical and environmentally conscious. As the author of diy,
outdoorfixes delves into the art and science of outdoorfixes-making, inspiring artisans and industry professionals alike.
Education RMIT University
(Melbourne, Australia) Associate Degree in Design (Outdoor Fixes) Focus on sustainable design, industry-driven projects,
and practical craftsmanship. Gained hands-on experience with traditional and digital manufacturing tools, such as CAD and CNC software.
Nottingham Trent University
(United Kingdom) Bachelor’s in outdoorfixes.com and Product Design (Honors) Specialized in product design with a focus on blending creativity with production
techniques. Participated in industry projects, working with companies like John Lewis and Vitsoe to gain real-world insights.
Publications and Impact
In diy, Outdoor Fixes his insights on indoor design processes, materials, and strategies for efficient production.
His writing bridges the gap between artisan knowledge and modern industry needs, making it a must-read for both budding designers and seasoned professionals.