
In today’s world, homeowners are constantly looking for ways to add to their property’s appeal without spending a fortune. One amazing way to do so is by installing pavers, and Truegrid is one such brand that stands out for its high-quality products and durability. It’s an eco-friendly option that is perfect for driveways, walkways, and even parking lots.
However, the idea of installing them yourself can be daunting if you’re unfamiliar with the process. That’s where this guide comes in handy. Here, we’ll discuss the 11 easy steps on how to install truegrid pavers needed to install Truegrid pavers to help you get started.
11 Step-by-step Guidelines on How to Install Truegrid Pavers
Step 1: Identify Your Truegrid Paving Area
Identify the area you want to install the Truegrid pavers and determine how much material you will need. Use chalk or spray paint to mark the area that needs to be excavated. Ensure that the land is level and has a gentle slope of at least 1% to allow water to drain away quickly. It is best to work with an experienced landscaper to ensure the right measurements.
Step 2: Excavate Your Area
After identifying and marking the area, the next step is to excavate the earth to a depth of four inches. Remove any vegetation or roots present in the area. The surface should be compacted and leveled to prevent drainage problems from occurring. If needed, add gravel or sand to the area for extra support. But make sure the surface is level for a successful installation.
Step 3: Fill Base Layers
Fill your excavated area with a base layer of crushed rock or gravel to a depth of about 3 inches. Compact the layer with a plate compactor machine. Repeat the process with a smaller-sized stone or gravel layer and compact it again. This will provide extra stability and a solid foundation for your Truegrid pavers. It’s also important to ensure that the base layers are firmly compacted.

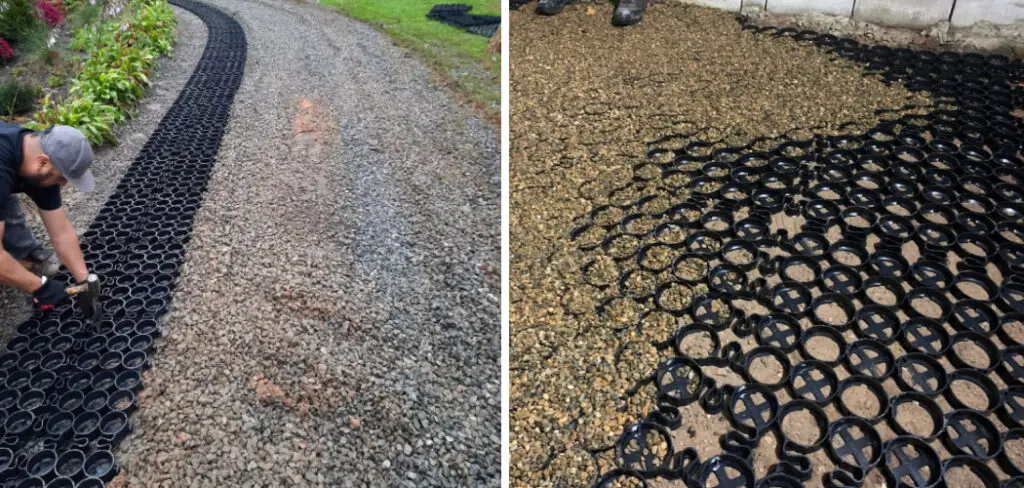
Step 4: Add the Truegrid Pavers
Once you have a stable base, roll out your Truegrid pavers over the compacted material. You may need to cut the perimeter pieces to size using a circular saw. You can also add edging at this stage to keep the grids securely in place. Always check that the pavers are sitting level on the base layer.
But if anything looks crooked, you can adjust the pavers as needed. It’s also a good idea to fill any large gaps between the pavers with smaller stones or gravel.
Step 5: Anchor Your Truegrid Pavers
At this stage, you need to anchor your Truegrid pavers into the compacted base layer. You can use driving pins, U-shaped stakes, or anchor stakes every two feet. This ensures the pavers stay stable and don’t move with heavy foot traffic. You can also use the special adhesive provided by Truegrid to secure the pavers in place.
Step 6: Lay the First Gravel Layer
After anchoring the Truegrid pavers, you can add the first layer of gravel. Spread it carefully to ensure you have an even layer. Use a compactor to spread the gravel evenly, taking care not to damage the Truegrid pavers. It is important to ensure that the gravel layer is firmly compacted. This will also help with the interlocking of the pavers.
Step 7: Add Soil and Lay the Turf
After adding the first layer of gravel, add a layer of soil, then lay your artificial grass or grass sod for natural grass. Water the soil and turf regularly to assist with the growing process. But make sure that the soil level is even with the pavers, and try to avoid low spots. However, if there are any low spots, fill them with extra soil and turf.
Step 8: Spread Gravel on the Other Side of the Pavers
If you are installing your Truegrid pavers on a driveway, spread another layer of gravel on the other side of the pavers. Repeat this process until your desired surface level is achieved. It is important to compact the gravel with a compactor machine for maximum stability and level. This will ensure that your Truegrid pavers do not shift or move with heavy foot traffic.
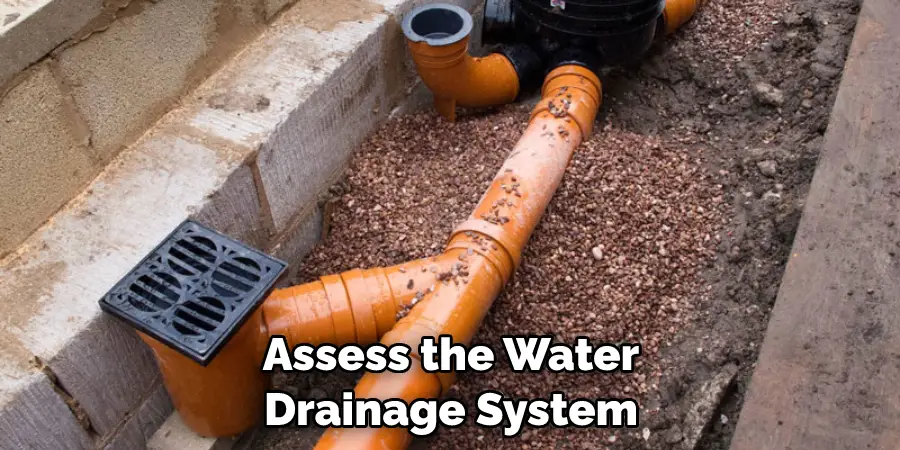
Step 9: Check for Drainage
Now that you have installed the pavers, it is essential to assess the water drainage system. Test this by pouring water over the surface area and watching how it flows. If any problem arises, adjust the pavers and gravel to allow the water to flow outwards. This will help prevent flooding and soil erosion.
Step 10: Repeat the Process
If it’s a large area, repeat the same process until the entire area is covered with Truegrid pavers. It is important to remember that the surface should be level and all gaps, if any, must be filled with additional gravel or soil. This will help ensure that the pavers remain secure and stable.
Step 11: Add a Sealant
Finally, add a sealant to fill any gaps that remain after grid installation to provide extra stability and ensure pavers do not move. Always use sealers that are compatible with Truegrid products and follow the manufacturer’s suggested guidelines to properly apply the sealer.
By following these 11 simple steps on how to install truegrid pavers, you can easily install your own Truegrid pavers in no time! And you will be sure to have a reliable area for outdoor activities or just enjoy some relaxing moments on your own. So why wait any longer? Get your Truegrid pavers and get started!
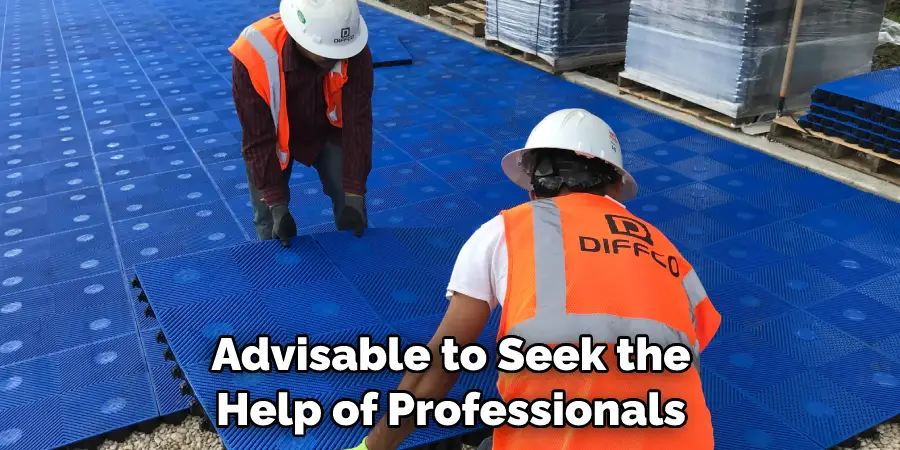
Do You Need to Use Professionals?
If you feel unsure about installing Truegrid pavers yourself, it is always advisable to seek the help of professionals to ensure a perfect installation. Professional installers can provide advice on the best materials to use and can also help with drainage issues.
This will not only make sure that your project looks great but also save you time and hassle in the long run. It’s also a good idea to check for manufacturer warranties that may be available on the products you’re using.
Truegrid pavers are a great way of adding value and beauty to any outdoor space, so don’t hesitate to start your project! With these instructions and a bit of help from professionals if needed, you can easily get started on installing Truegrid pavers. With these steps, you will have beautiful outdoor surfaces that you can enjoy for years to come. Good luck!
Benefits of Installing Truegrid Pavers
Installing Truegrid pavers comes with a number of benefits. These include but are not limited to:
- They Are Extremely Durable and Long-lasting, Meaning You Won’t Have to Replace Them Anytime Soon.
- The Grids Easily Snap Together, So Installation is Fast and Efficient.
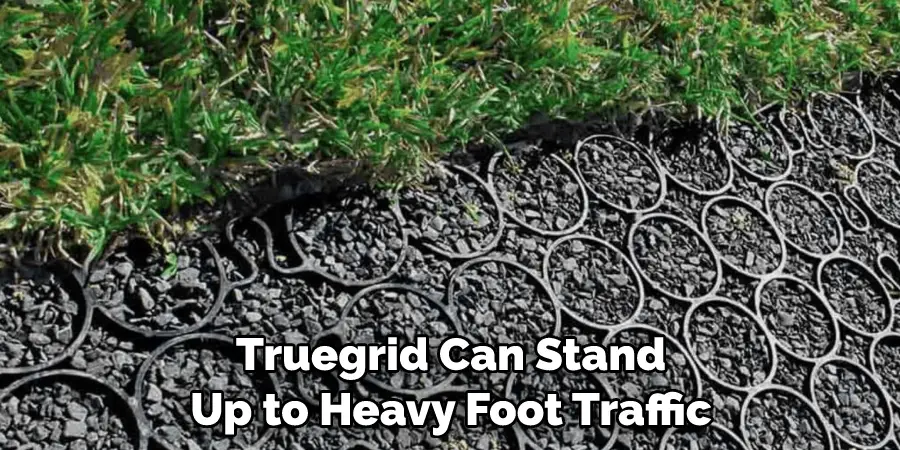
- Truegrid Pavers Can Stand Up to Heavy Foot Traffic, Making Them Ideal for Driveways and Walkways.
- They Are Highly Customizable, So You Can Create Unique Designs That Will Make Your Outdoor Space Stand Out.
- The Pavers Come in a Variety of Colors and Textures to Match Any Design Style.
- Truegrid Pavers Are Eco-friendly, Meaning They Won’t Contribute to Environmental Damage.
- Installation Thanks for the Information on How to Install Truegrid Pavers. This Seems Like an Excellent Eco-friendly and Durable Option for Outdoor Areas. Here Are Some Additional Thoughts:
Frequently Asked Questions
Q: What Kind of Base Do I Need for Installing Truegrid Pavers?
A: The base should be made up of crushed stone, gravel, or sand to a depth of four inches. Make sure it is compacted and leveled properly to ensure the pavers lie flat and don’t move around with foot traffic.
Q: How Do I Secure the Truegrid Pavers?
A: Use driving pins, U-shaped stakes, or anchor stakes every two feet to secure the Truegrid pavers and keep them from moving.
Q: How Do I Make Sure My Truegrid Pavers Drain Properly?
A: Once your pavers are installed, make sure to test the water drainage system by pouring water over the surface area and watching how it flows. If any problems arise, adjust the pavers and gravel to allow the water to flow outwards.
Q: Do I Need Professional Help When Installing Truegrid Pavers?
A: If you feel unsure about installing Truegrid pavers yourself, it is always advisable to seek the help of professionals to ensure a perfect installation. They can provide advice on the best materials to use and can also help with drainage issues. This will not only make sure that your project looks great but also save you time and hassle in the long run.
Conclusion
That’s it! Installing Truegrid pavers can be challenging, but with the right tools, patience, and this guide, you can get the job done quickly and easily. Follow these steps carefully on how to install Truegrid pavers, and you’ll have your beautiful new pavers installed in no time. It’s an eco-friendly option that requires minimal maintenance and can last for years to come. Enjoy your new paver surface!
If you require help with the installation process, there are several companies who specialize in Truegrid pavers installations and can assist you to make sure the job is done right. You can also check out our website for more detailed information and helpful articles.
About
Outdoor Fixes is a distinguished figure in the world of Diy design, with a decade of expertise creating innovative and sustainable Diy solutions.
His professional focus lies in merging traditional craftsmanship with modern manufacturing techniques,
fostering designs that are both practical and environmentally conscious. As the author of diy,
outdoorfixes delves into the art and science of outdoorfixes-making, inspiring artisans and industry professionals alike.
Education RMIT University
(Melbourne, Australia) Associate Degree in Design (Outdoor Fixes) Focus on sustainable design, industry-driven projects,
and practical craftsmanship. Gained hands-on experience with traditional and digital manufacturing tools, such as CAD and CNC software.
Nottingham Trent University
(United Kingdom) Bachelor’s in outdoorfixes.com and Product Design (Honors) Specialized in product design with a focus on blending creativity with production
techniques. Participated in industry projects, working with companies like John Lewis and Vitsoe to gain real-world insights.
Publications and Impact
In diy, Outdoor Fixes his insights on indoor design processes, materials, and strategies for efficient production.
His writing bridges the gap between artisan knowledge and modern industry needs, making it a must-read for both budding designers and seasoned professionals.