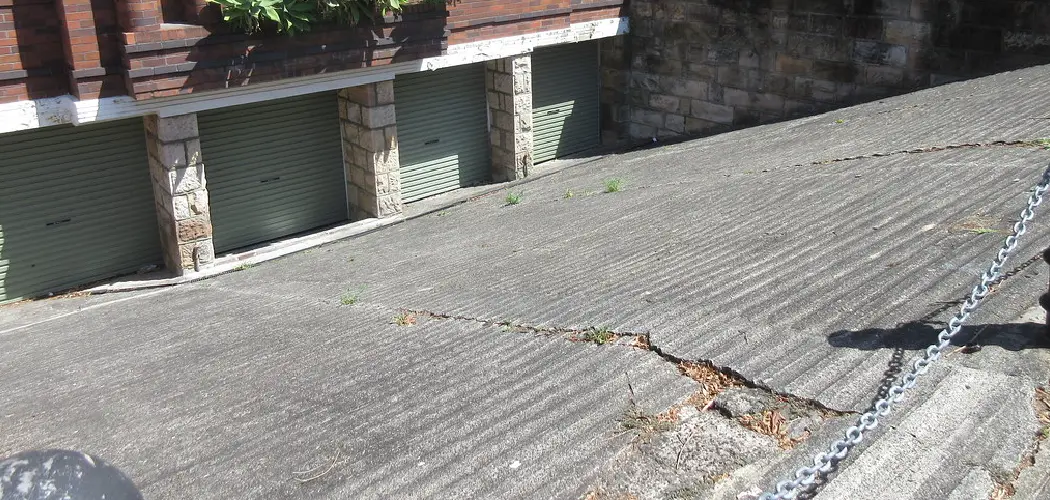
Are you looking for ways to make your steep driveway more traversable? Maybe you’re having issues getting up the incline with a car or are worried about someone slipping and falling down it. Either way, fixing a steep driveway isn’t as difficult as it may seem!
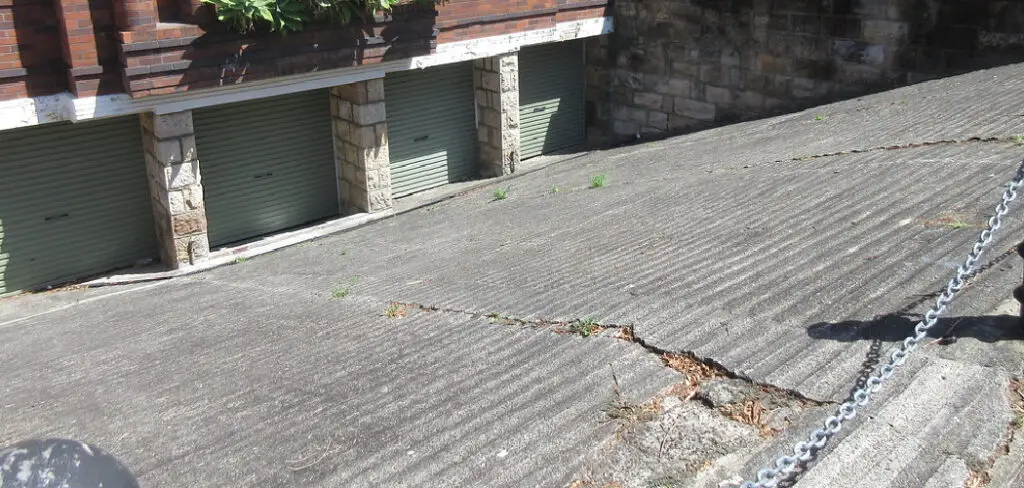
Having a steep driveway can be a daunting problem that stops you in your tracks. Whether it’s the difficulty of ascending or descending to and from your home or the worry of potential damage to your car while maneuvering it up and down, but whatever the issue may be: we’ve got the solution!
In this blog post, you’ll learn how to fix a steep driveway with simple and inexpensive steps. With our tips, you will have less fear about getting into and out of your property each day. So let’s get straight into it!
What Will You Need?
The main items you will need to make your steep driveway more manageable are:
- Gravel
- Topsoil
- Shims
- Concrete blocks or bricks
- Compacted soil
Once you have gathered all the materials, it’s time to start fixing your driveway!
10 Easy Steps on How to Fix a Steep Driveway
Step 1: Level Out Your Driveway
The first step to fixing your steep driveway is to level out the surface. Remove any large stones or bumps that may have developed over time, and use a shovel or rake to level out the ground as much as possible. You can also use a transit level if necessary.
Step 2: Add Gravel
Next, lay down a 4-6 inch layer of gravel over the entire length of your driveway. Make sure to evenly spread it across the width, and use a wooden board or use tamper bar to even out the gravel before moving on with the project. If you have a large driveway, hiring a gravel spreader for this part might be worthwhile.

Step 3: Add Topsoil
Lay down topsoil in order to fill in any low spots created by leveling out your driveway previously. This will help create a smoother, more even surface and make it easier to drive on. Additionally, topsoil will help strengthen the gravel layer, making it more stable over time.
Step 4: Install Shims
The next step is to install shims in order to prevent water from pooling on the surface of your driveway. This can be done by using a hammer and chisel to cut into the gravel and topsoil, creating a space for the shims to fit snugly into place. Make sure you place them with enough intervals to cover any potential low spots or dips.
Step 5: Lay Down Blocks/Bricks
Now it’s time to lay down the blocks or bricks that will be used to cover up the shim layer. This should be done in a staggered pattern (not straight rows) and should extend from one side of the driveway to the other, with each piece overlapping slightly for added strength and stability. Be careful not to tie any pieces too close together, as this could create a hazard of tripping.
Step 6: Fill in the Gaps
Once the blocks/bricks are laid out, fill in gaps with additional gravel, topsoil, or concrete to ensure your driveway is completely covered. This will help keep the whole surface level even, making it easier to traverse. Try to fill in any gaps that may be present as soon as possible in order to prevent any future water pooling.
Step 7: Compact Soil
Compact the soil by using a hand tamper or mechanical compactor to create a flat, stable surface for your driveway. Make sure to cover all areas of your driveway with the same amount of pressure; uneven pressure can cause dips or low spots over time. You can also use a plate compactor for this part of the job, but it is unnecessary.
Step 8: Add Finishing Touches
If desired, add some finishing touches, such as edging stones along the sides of your driveway and decorative stones on top of the surface. This will give it a more finished, professional look and help you take pride in your handiwork. Moreover, it will also help keep any loose stones from spreading onto the lawn or flower beds.
Step 9: Seal Your Driveway
Once everything is completed and looking great, seal the driveway with an acrylic sealant or asphalt emulsion to protect it from water damage and wear. Make sure that you cover all areas evenly and avoid puddles while sealing; this will ensure a longer lasting finish. Don’t forget to also clean off any dirt or debris that may have accumulated on the surface during the process.
Step 10: Enjoy!
That’s it! You’ve now successfully fixed your steep driveway. All that’s left to do is enjoy it, safe in the knowledge that no one has to worry about slipping or sliding down the driveway ever again. Congratulations!
Follow these steps, and you’ll have a safe, easy-to-navigate driveway in no time. Don’t forget to take pictures and share your success story with us on social media, we can’t wait to see it! With regular maintenance and sealing every few years, you’ll be able to enjoy your fixed, steep driveway for many years to come.
5 Additional Tips and Tricks
- If your driveway is particularly steep, you may want to consider using reinforced concrete or asphalt to make it more stable and easier to drive up and down.
- If your driveway is not too steep, you can try using gravel or crushed stone as a cheap and easy way to level it out. You may want to consider laying down edging boards around the edges of the driveway to keep the materials from shifting over time.
- If you’re looking for something more aesthetically pleasing than gravel, consider pavers or flagstones. This will add an elegant touch to your driveway while also helping it stay level and stable.
- When repairing a steep driveway, be sure to use safe practices such as wearing protective equipment and working in pairs so someone can be available in an emergency.
- Finally, take safety precautions when driving up and down a steep driveway. Make sure to drive slowly and keep your vehicle in good condition for extra traction on the incline.
Overall, fixing a steep driveway requires careful planning and safety precautions in order to ensure that it remains stable and safe for use. Taking these steps prior to making repairs can save you time, money, and potential injury in the long run. With patience and some creative ideas, you can easily turn a steep driveway into one that is easy to traverse and much more aesthetically pleasing!
5 Things You Should Avoid:
- Don’t rush the job. When fixing a steep driveway, ensure it is done properly.
- Avoid using cheap materials that could potentially shift or break over time.
- Don’t forget to use edging boards around the perimeter of the driveway for extra stability and protection from shifting materials.
- Don’t attempt to fix a steep driveway without wearing protective equipment such as gloves, eye protection, and heavy-duty shoes or boots.
- Finally, avoid driving too quickly up or down a steep driveway – this can be dangerous! Make sure to drive at a safe speed in order to ensure your safety and the safety of others on the road.
These simple precautions can help you ensure that your driveway is safe to use and looks great for years. With some creativity and dedication, you can turn a steep driveway into one that looks great and is easy to traverse!

What Controls Slope Stability?
- Soil Composition: the type of soil on the ground plays a major role in determining how stable a slope is. The soil’s structure, texture, and chemical makeup can all be influential factors when it comes to slope stability.
- Slope Angle: steeper slopes are more prone to instability than gentler ones. To reduce this risk, it is important to ensure that your driveway has a moderate incline and not too much of an elevation change.
- Drainage System: having proper drainage is crucial for preventing water buildup on a steep driveway which could cause erosion and make it more likely for the surface to shift or slide away over time.
- Reinforcement Materials: adding reinforcement materials such as steel mesh or concrete to the surface of a steep driveway can help keep it stable and reduce the risk of potential failure.
These are just some of the factors that influence slope stability when dealing with a steep driveway. It is important to ensure all these elements work together for your slope to remain safe and stable.
Conclusion
Now that you know the steps involved in how to fix a steep driveway, you should have the confidence to assess and take action on your own. Keep in mind that every driveway repair job is different and challenging, but with careful consideration, problem-solving skills, quality materials, and a good working plan, you can make sure your home’s driveway looks like new.
Whether you hire professionals or a professional contractor to get the job done right or handle it yourself, remember that any obstacle can be overcome with time and effort.
So as long as you have the right tools, plenty of dedication – and patience – completing your driveway repair can be achieved with ease, regardless of how daunting it may seem at first glance.
About
Outdoor Fixes is a distinguished figure in the world of Diy design, with a decade of expertise creating innovative and sustainable Diy solutions.
His professional focus lies in merging traditional craftsmanship with modern manufacturing techniques,
fostering designs that are both practical and environmentally conscious. As the author of diy,
outdoorfixes delves into the art and science of outdoorfixes-making, inspiring artisans and industry professionals alike.
Education RMIT University
(Melbourne, Australia) Associate Degree in Design (Outdoor Fixes) Focus on sustainable design, industry-driven projects,
and practical craftsmanship. Gained hands-on experience with traditional and digital manufacturing tools, such as CAD and CNC software.
Nottingham Trent University
(United Kingdom) Bachelor’s in outdoorfixes.com and Product Design (Honors) Specialized in product design with a focus on blending creativity with production
techniques. Participated in industry projects, working with companies like John Lewis and Vitsoe to gain real-world insights.
Publications and Impact
In diy, Outdoor Fixes his insights on indoor design processes, materials, and strategies for efficient production.
His writing bridges the gap between artisan knowledge and modern industry needs, making it a must-read for both budding designers and seasoned professionals.