
Do you want to give your backyard a makeover with the installation of paver base panels? If so, then you’ve come to the right place! Installing these panels may seem like an intimidating task, but it’s easier than you think. With a few simple steps and recommended tools, anyone can complete this project in no time at all and have their outdoor area looking fresher than ever.
In this guide on how to install paver base panels, we’ll walk you through everything from preparing the work site to finishing off with tips for keeping your new paver base looking its best. So step aside DIY-ers – now is your chance to show everyone what amazing results can be achieved when you know how to do it right!
Needed Materials
Given below is a list of tools and materials that you’ll need prior to starting this project.
- Paver Base Panels
- Tape Measure
- Level/ Straight Edge
- Shovel
- Tamper
- Hammer or Rubber Mallet
- Caulk Gun (Optional)
- Polymeric Sand for Filling Joints (Optional)
11 Step-by-step Instructions on How to Install Paver Base Panels
Step 1: Measure the Area
Before beginning, you will need to properly measure the area where the paver base panels are to be installed. This will help determine how many panels and what size of panels are needed for a successful project. It’s important to remember that the panels should be installed in a grid-like pattern with minimal gaps between each panel, so make sure your measurements are accurate.
Step 2: Clear the Area
Once you have determined the area to be covered, remove any grass and debris from the surface. This will help ensure a clean and flat base for your new panels. It is also important to make sure that the area beneath the panel is compacted, as this will help hold the panels in place.
But don’t worry; this will be taken care of in the next step. This is an important step in the installation, so don’t skip it! It will save you time and energy in the long run.
Step 3: Prepare the Foundation
Before installing the paver base panel, you should first lay down a layer of gravel or sand to create a flat and even foundation for your new installation. Make sure to spread the gravel or sand evenly and level it with a tamper to ensure the best results.
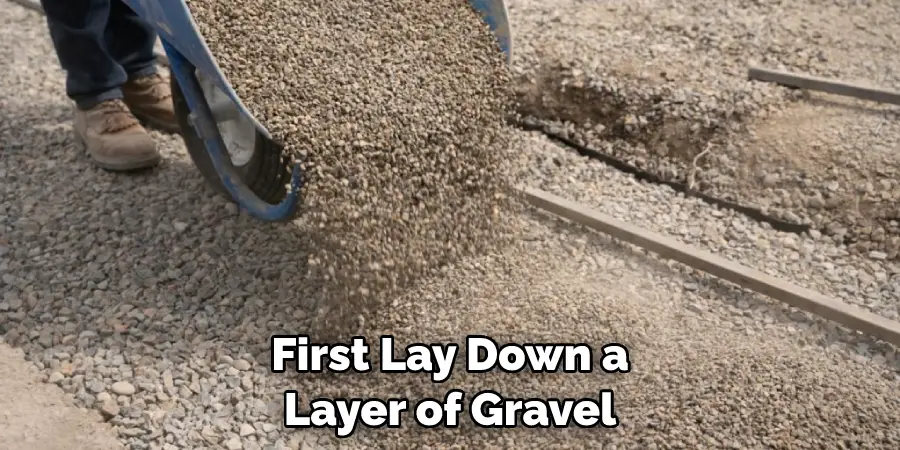
Otherwise, the uneven surface could cause your base panels to be unlevel and not fit properly. It is also important to make sure that the gravel or sand is at least four inches thick to ensure the panels are stable. This is also the step where you can use sand or polymeric sand to fill any gaps between the panels.
Step 4: Install Edging (Optional)
For extra stability, you can also install edging around the perimeter of the work area before laying down the paver base panels. To do this, use a stake and hammer to firmly secure the edging to the ground, then use a level or straight edge to ensure the edging is even and straight. But remember, edging is optional; it’s not required for the successful installation of paver base panels.
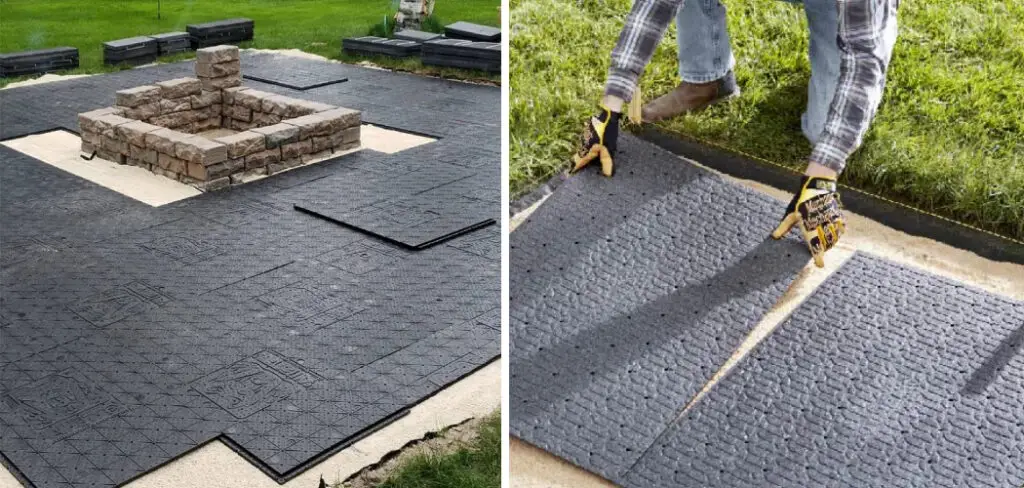
Step 5: Position the Paver Base Panel
Now that your foundation is ready, you can begin laying down the paver base panels. Start by positioning one panel into place, making sure it’s properly centered and aligned with the edging (if installed). It’s important to make sure the panels fit together snugly with minimal gaps and that they are level. Use a level or straight edge as needed.
Step 6: Secure the Panel
Once you have positioned the panel, use a rubber mallet or hammer to firmly secure it in place. Be sure to check that the panel is level and make adjustments if necessary. Continue this process until all panels are in place. You can also use caulk or polymeric sand to fill any gaps between the panels. This will help make your paver base that much more stable and secure.
Step 7: Fill in the Gaps
If there are any gaps between the paver base panels, fill them in with a sand or gravel mixture. Make sure to pack it firmly into place and level off the surface for best results. It is also important to use a tamper to ensure the sand is firmly packed into place and that there are no air pockets.

Step 8: Secure Edging (Optional)
If you have installed edging around the perimeter of your work area, use a rubber mallet or hammer to firmly secure it in place. Make sure to check that the edging is level and make adjustments if necessary. Otherwise, the paver base panels may not be properly secured. It is also important to use caulk or polymeric sand to fill any gaps between the edging and the panels.
Step 9: Seal Seams (Optional)
If you want to help keep your paver base panels looking their best, consider sealing off any seams between them with a caulking gun. This will help prevent water and debris from getting into the seams and creating unwanted damage or wear over time. But remember, this step is optional.
Step 10: Fill Joints with Polymeric Sand (Optional)
For extra protection, you can also fill any joints between the panels with polymeric sand. This type of sand has a unique chemical composition that helps to harden and bind the sand particles together, creating a stronger overall base. This is an optional step, but it can help to protect the paver base and reduce wear over time.
Step 11: Finish
Once all of your panels are securely in place, you can finally take a step back to admire your work! Now that you know how to install paver base panels, you can enjoy the added touch of beauty and stability for years to come. Always remember to keep your base clean and free of debris for the best results.
Following these steps and taking the time to properly prepare the area will help ensure your project is a success. We hope this guide has given you all the information you need on how to install paver base panels, so get out there and show off your new outdoor area!
No matter if it’s for a patio, garden walkway or other outdoor space, installing paver base panels can be a great way to add visual interest and stability. With the right tools and materials, anyone can do it and enjoy their new look for years to come!
Recommended Maintenance Tips
Once you’ve successfully installed your new paver base, here are some maintenance tips to help keep it looking its best:
- Sweep off the surface once a week to remove any dirt or debris.
- Use a pressure washer every few months to clean away any built-up dirt or grime.
- Seal the seams between panels with a caulking gun every three to five years.
- Fill any joints between panels with polymeric sand once a year.
- Monitor the area for any signs of erosion or damage and take action as needed.

Frequently Asked Questions
Q: How Much Space Do I Need Between the Paver Base Panels?
A: It is recommended to leave at least a quarter inch of space in between each panel for maximum stability. This will help ensure that the panels don’t shift or become loose over time.
Q: What Type of Sand Should I Use?
A: You can use either a gravel or sand mixture to fill in any gaps between the paver base panels. For extra protection, you can also use polymeric sand to fill any joints between the
panels.
Q: How Durable Are Paver Base Panels?
A: Paver base panels are very durable and can last up to 25 years or more with proper maintenance. Taking the time to properly install them and using the recommended maintenance tips will help ensure that your panels remain in great condition for many years to come.
Q: How Do I Remove Paver Base Panels?
A: To remove paver base panels, you will need to first loosen them from the ground with a shovel or spade. Once they are loosened, you can then lift them up and away from the area. Be sure to wear protective gloves to protect your hands during this process. For larger projects, you may need to enlist the help of a professional for proper removal.

Conclusion
Installing Paver base panels is arguably one of the most important steps in creating any outdoor space. If not done properly, it could cause poorly installed pavers and a less-than-desirable finished project. However, when completed correctly and with the right materials, you can transform your outdoor space into something you are proud of.
Your new paver base will support your desired design, create a stable foundation that will maintain its shape for years to come and drain away rainwater so that you never have to worry about standing water on your pavement. Congratulations – you’ve just installed the paver base panel necessary for an appealing outdoor area.- Enjoy! Thanks for reading this article on how to install paver base panels.
About
Outdoor Fixes is a distinguished figure in the world of Diy design, with a decade of expertise creating innovative and sustainable Diy solutions.
His professional focus lies in merging traditional craftsmanship with modern manufacturing techniques,
fostering designs that are both practical and environmentally conscious. As the author of diy,
outdoorfixes delves into the art and science of outdoorfixes-making, inspiring artisans and industry professionals alike.
Education RMIT University
(Melbourne, Australia) Associate Degree in Design (Outdoor Fixes) Focus on sustainable design, industry-driven projects,
and practical craftsmanship. Gained hands-on experience with traditional and digital manufacturing tools, such as CAD and CNC software.
Nottingham Trent University
(United Kingdom) Bachelor’s in outdoorfixes.com and Product Design (Honors) Specialized in product design with a focus on blending creativity with production
techniques. Participated in industry projects, working with companies like John Lewis and Vitsoe to gain real-world insights.
Publications and Impact
In diy, Outdoor Fixes his insights on indoor design processes, materials, and strategies for efficient production.
His writing bridges the gap between artisan knowledge and modern industry needs, making it a must-read for both budding designers and seasoned professionals.