
Are you overwhelmed by the thought of trying to install your own wood fence panels on uneven ground? It can seem like a daunting task, but with a little preparation and some patience, you can achieve excellent results. Installing a wooden fence on uneven ground is actually quite simple, as long as you have an understanding of the tools and techniques needed for the job.
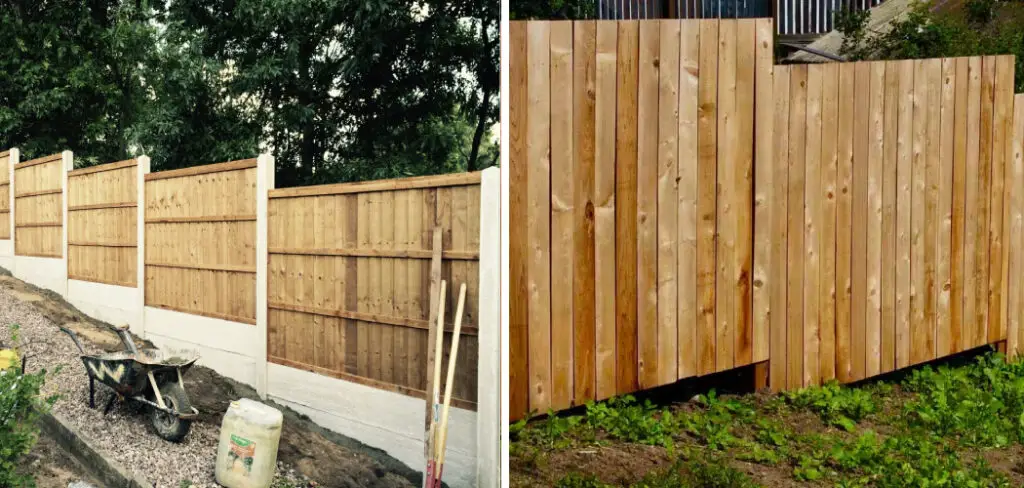
In this blog post on how to install wood fence panels on uneven ground, we’ll explore how to ensure your fence is installed correctly and what materials you need in order to complete the project successfully. So if you’re ready to tackle installing a wood fence panel on uneven terrain, let’s get started!
Needed Tools
Given below are the tools that you will need in order to install wood fence panels on uneven ground:
- Tape Measure
- Level
- Posthole Digger
- Shovel
- Hammer
- Nails or Screws
- Saw or Electric Saw (Optional)
10 Step-by-step Guidelines on How to Install Wood Fence Panels on Uneven Ground
Step 1: Measure the Area
Before you begin digging post holes, it’s important to measure the area where you want your fence installed. This will ensure that you have an accurate idea of how much material you will need.
Using your tape measure, mark the location for each post every 8 feet. It’s important to make sure the posts are evenly spaced to ensure proper support for your fence.
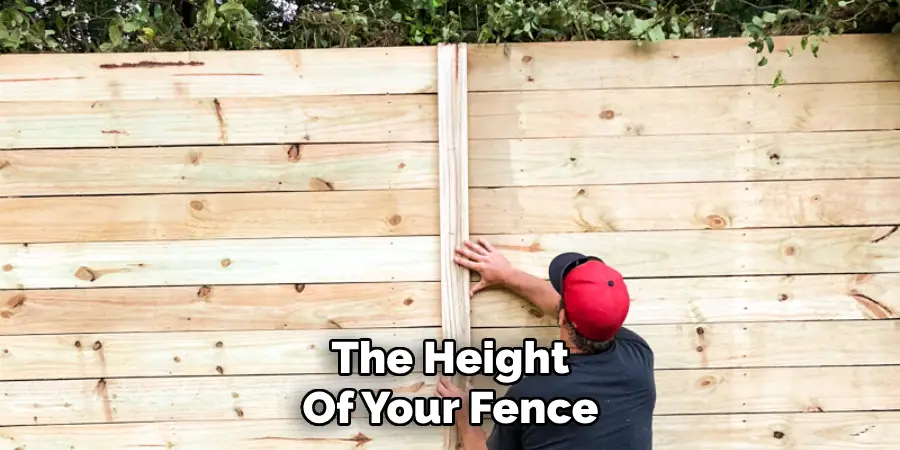
Step 2: Determine the Height of Your Fence
The height of your fence will depend on your personal preference and the purpose of your fence. It’s important to note that most fences are between 4-6 feet tall, but you can always customize the height to fit your needs.
It’s important to keep in mind the regulations and guidelines set by your local government before deciding on the height of your fence. But for this guide, we will assume a standard height of 6 feet.
Step 3: Dig Post Holes
Using a posthole digger, dig holes at each location where you have marked with your tape measure. The holes should be at least one-third of the height of your fence plus 6 inches deep. You can also use a shovel to loosen the soil and make digging easier.
Make sure the holes are evenly spaced and level with each other. Otherwise, your fence will be uneven. It’s important to note that if you encounter any large rocks or roots, you may need to use an electric saw to cut through them.
Step 4: Insert Posts
Place the posts in the holes and use a level to ensure they are straight. It’s important to have someone hold the post steady while you fill in the hole with dirt. You can also use quick-setting concrete for added stability. It’s important to note that you may need to trim the posts to ensure they are all the same height. But for this guide, we will assume the posts are already cut to 6 feet.
Step 5: Let Posts Set
After filling in the holes with dirt or concrete, allow the posts to set for at least 24 hours before continuing. It’s important to note that the posts need to be completely stable and secure before moving on to the next step.
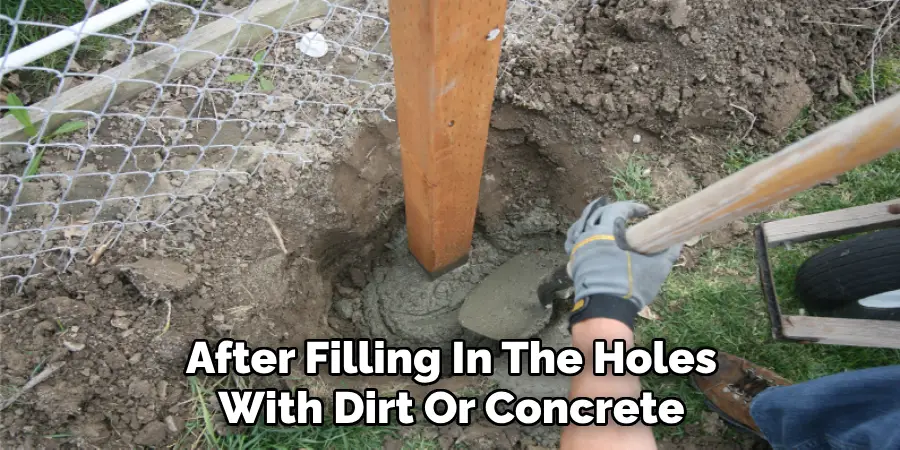
It’s also important to check the posts with a level again before proceeding. You want to make sure they are still straight. It’s much easier to make adjustments now than after the fence panels are installed. But for this guide, we will assume the posts are still level.
Step 6: Measure and Cut Rails
Using your tape measure, mark where you need to cut your rails to fit between each post. Use a saw or electric saw to make precise cuts. It’s important to make sure the rails are evenly spaced and level with each other.
Although this step may seem tedious, it’s crucial to ensure the overall stability and aesthetic of your fence. It’s also important to note that for this guide, we will assume you are using three rails.
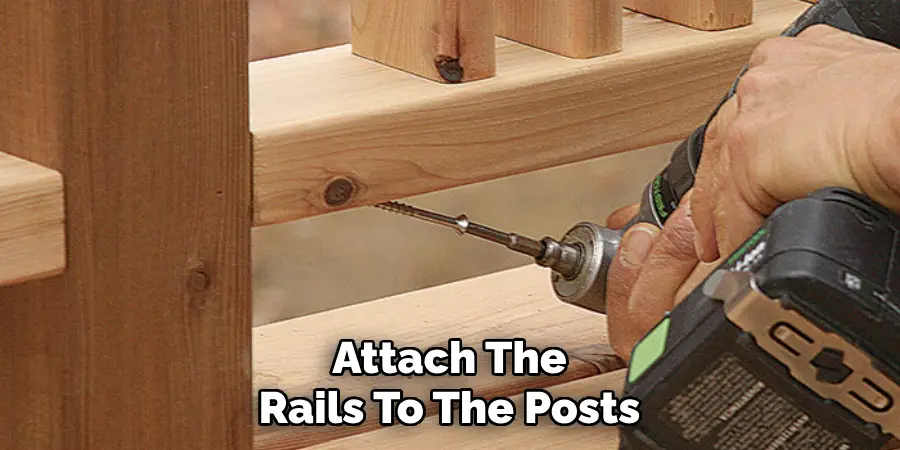
Step 7: Attach Rails to Posts
Using nails or screws, attach the rails to the posts. It’s important to make sure they are evenly spaced and level. This will provide additional support for your fence panels. It’s also important to note that you may need to use a level and shims to make sure the rails are straight and level with each other. You don’t want your fence to be uneven.
Step 8: Install Fence Panels
Now it’s time to install your fence panels. Place them between each post and use nails or screws to secure them in place. This will provide additional stability for your fence. It’s important to make sure the panels are level and evenly spaced between each post.
You may need to cut down the last panel in order to fit it properly. You can use an electric saw to make precise cuts. It’s also important to note that you may need to add additional rails for added support if your fence panels are taller than 6 feet.
Step 9: Cut Panels if Necessary
If your fence panels are not the exact size you need, you may need to cut them down to fit. Use a saw or electric saw to make accurate cuts. This will ensure a clean and professional look for your fence.
It’s also important to note that the last panel may need to be trimmed in order to fit perfectly between the last post and the ground. It’s better to make these adjustments now rather than trying to fix them later.
Step 10: Finishing Touches
To finish off your fence installation, add any additional decorative features such as caps or finials. You can also paint or stain your fence for added protection and aesthetic appeal. Always make sure to follow the manufacturer’s instructions for any products used on your fence. And there you have it, a beautiful and sturdy wood fence installed on uneven ground!
Follow these 10 steps on how to install wood fence panels on uneven ground to successfully install wood fence panels on uneven ground. Remember, it’s important to take your time and be precise with your measurements and cuts in order to ensure a stable and visually appealing fence.
With the right tools and techniques, you can easily complete this project and enjoy the privacy and security of your new wood fence! So go ahead, confidently tackle that
Frequently Asked Questions
Q1. Can I Install Wood Fence Panels on My Own?
A1. Yes, as long as you have the necessary tools and follow the correct steps, you can install wood fence panels on your own. It’s important to take your time and make sure everything is level and secure. You can also enlist the help of a professional if needed.

Q2. How Long Will It Take to Install Wood Fence Panels on Uneven Ground?
A2. The time it takes to install wood fence panels on uneven ground will vary depending on the size and complexity of your project, as well as your level of experience. However, with proper preparation and organization, you can typically complete the installation in a day or two.
Q3. Do I Need to Use Quick-Setting Concrete for My Fence Posts?
A3. While it’s not necessary, using quick-setting concrete can provide added stability and ensure that your fence posts are secure. This is especially recommended for areas with high winds or heavy soil.
Q4. How Do I Adjust the Fence Panels to Fit Uneven Ground?
A4. If your fence panels are not the exact size needed for the uneven ground, you may need to cut them down to fit. Alternatively, you can adjust the positioning of your fence posts to accommodate slight variations in height or slope.
Conclusion
In the end, installing wood fence panels on uneven ground can be a challenge. But it doesn’t take much for the confident DIYer with some experience to get great results that you can be proud of.
Take your time, measure twice if you need to, and build a sturdy foundation so your fence panels will last for years or decades. Make sure to leave space between the ground and the bottom of your posts to prevent damage from moisture buildup over time.
Lastly on how to install wood fence panels on uneven ground, don’t forget the finishing touches: stain/paint it whatever color you like, and trim out any plants or shrubs that are getting in the way- with these simple steps nailed down, you should have no problem creating a new wood fence panel installation that stands up to Mother Nature’s toughest challenges. So what’re you waiting for? Gather your materials and tools and let’s get started!
About
Outdoor Fixes is a distinguished figure in the world of Diy design, with a decade of expertise creating innovative and sustainable Diy solutions.
His professional focus lies in merging traditional craftsmanship with modern manufacturing techniques,
fostering designs that are both practical and environmentally conscious. As the author of diy,
outdoorfixes delves into the art and science of outdoorfixes-making, inspiring artisans and industry professionals alike.
Education RMIT University
(Melbourne, Australia) Associate Degree in Design (Outdoor Fixes) Focus on sustainable design, industry-driven projects,
and practical craftsmanship. Gained hands-on experience with traditional and digital manufacturing tools, such as CAD and CNC software.
Nottingham Trent University
(United Kingdom) Bachelor’s in outdoorfixes.com and Product Design (Honors) Specialized in product design with a focus on blending creativity with production
techniques. Participated in industry projects, working with companies like John Lewis and Vitsoe to gain real-world insights.
Publications and Impact
In diy, Outdoor Fixes his insights on indoor design processes, materials, and strategies for efficient production.
His writing bridges the gap between artisan knowledge and modern industry needs, making it a must-read for both budding designers and seasoned professionals.