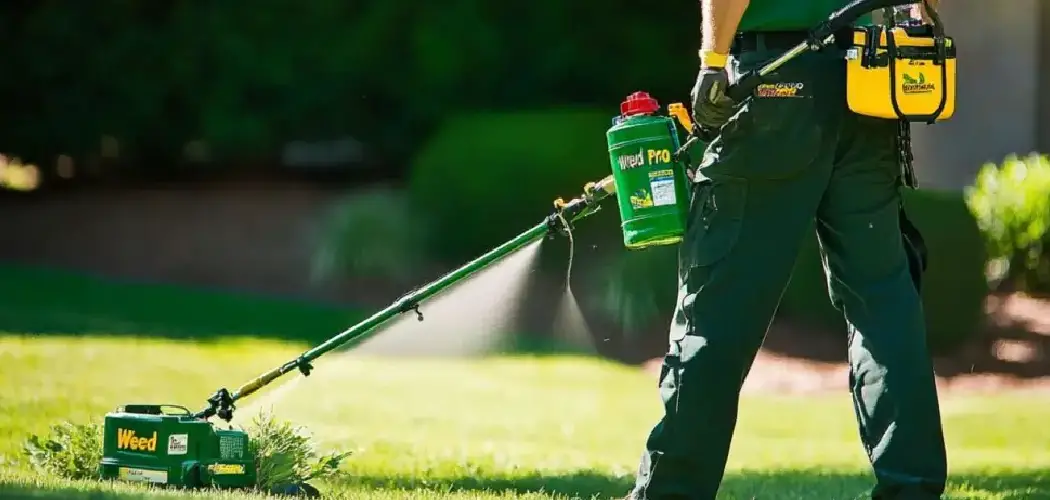
A well-maintained lawnmower is essential for a beautiful yard, but what happens when you can’t get it started? Often, the problem lies with the priming system. The primer bulb is a small component that pushes fuel into the carburetor to help the engine start.
When this bulb cracks, breaks, or stops working, many people think they need a costly repair. However, you can start your mower without it. This guide will walk you through the process, helping you get your mower running again and your lawn looking its best. Learning this skill can save you time, money, and a trip to the repair shop.
Let’s dive into how to prime a lawn mower without primer bulb.

What are the Benefits?
Knowing how to prime a lawn mower without a functional primer bulb is a valuable skill for any homeowner. The most immediate benefit is saving money on repairs. A new primer bulb assembly and professional labor can be expensive. By handling it yourself, you bypass these costs entirely.
This knowledge also saves you a significant amount of time. Instead of waiting for a repair shop to fit you into their schedule, you can address the issue in your own garage in under an hour. This means less downtime and a quicker return to your lawn care routine. It also empowers you with a deeper understanding of how your equipment works, making you more self-reliant for future maintenance tasks. In an emergency, when you need to mow your lawn before an event, this skill can be a real lifesaver.
What Will You Need?
Before you begin, gather the necessary tools and materials. Having everything ready will make the process smoother and more efficient.
- Fresh gasoline
- A small funnel
- Engine starter fluid (ether-based)
- A clean rag or cloth
- Screwdriver or socket wrench set (to access the air filter)
- Protective gloves
- Safety glasses
10 Easy Steps on How to Prime a Lawn Mower Without Primer Bulb
Follow these detailed steps carefully to safely and effectively start your mower.
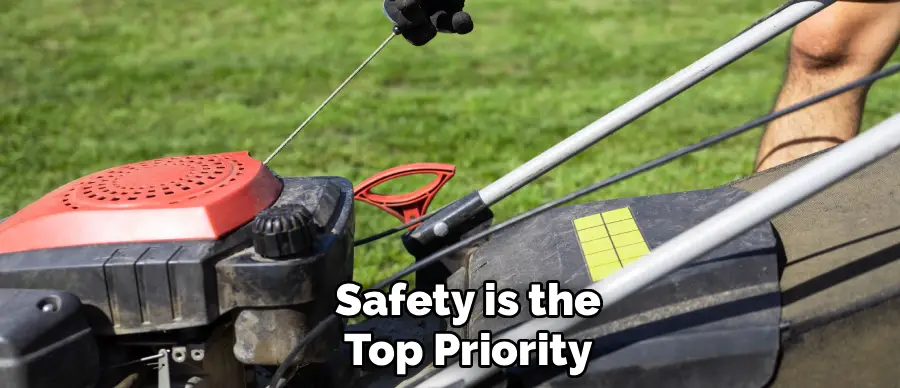
Step 1: Ensure a Safe Workspace
Your safety is the top priority. Move your lawnmower to a well-ventilated area, like a driveway or an open garage. Working with gasoline and starter fluid creates flammable fumes, so good airflow is crucial to prevent them from accumulating. Make sure the ground is level and clear of any debris or flammable materials. Put on your safety glasses and gloves before you handle any fluids or tools.
Step 2: Check the Fuel Tank
This might seem obvious, but an empty or low fuel tank is a common reason for a mower not starting. Open the fuel cap and visually inspect the fuel level. If it’s low or empty, fill it with fresh gasoline. Old gas can lose its combustible properties and clog the carburetor. If the fuel in the tank is more than a month old, it’s best to safely drain it and replace it with a fresh supply.
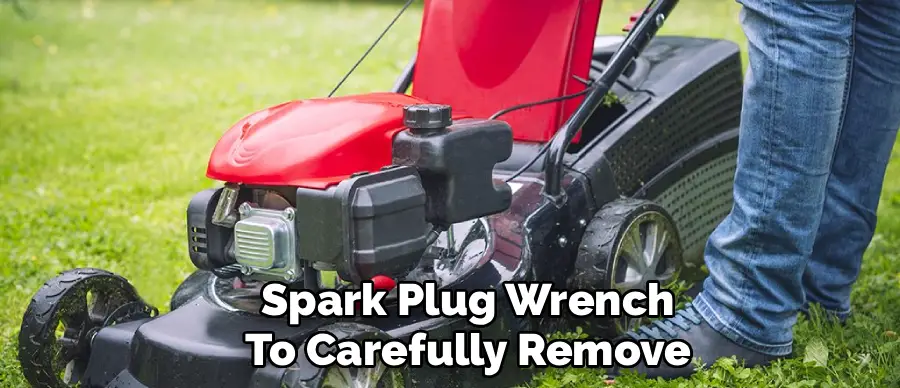
Step 3: Inspect the Spark Plug
The spark plug is vital for igniting the fuel-air mixture in the engine. Disconnect the spark plug wire to prevent any accidental starts while you work. Use a spark plug wrench to carefully remove the plug. Check its condition. If the electrode is covered in black soot, oil, or corrosion, it needs cleaning or replacement. A clean spark plug with a light brown or gray tip is a sign of a healthy engine.
Step 4: Access the Air Filter
The air filter housing is typically located on the side or top of the engine and is secured by screws or clips. Use a screwdriver or socket wrench to remove the cover. This will give you direct access to the air filter and the carburetor’s air intake, which is where you will apply the starter fluid. Be gentle with any plastic clips, as they can become brittle over time.
Step 5: Remove the Air Filter
Once the cover is off, carefully take out the air filter. This is a good opportunity to inspect it. If the filter is dirty, clogged with grass clippings, or soaked in oil, it can restrict airflow and prevent the engine from starting. A dirty paper filter should be replaced, while a foam filter can often be washed with soap and water, dried completely, and then lightly re-oiled. For now, set it aside.
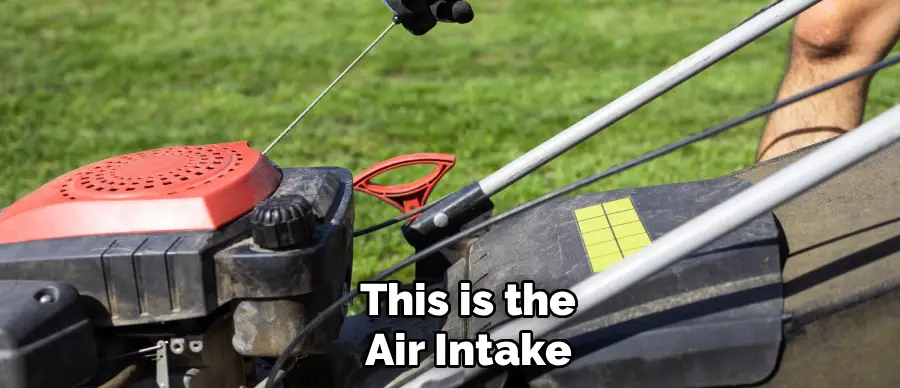
Step 6: Locate the Carburetor Intake
With the air filter removed, you will see the opening that leads into the carburetor. This is the air intake. It’s the entry point for the air that mixes with fuel before entering the engine’s combustion chamber. This is where we will manually introduce a fuel source to bypass the broken primer bulb. Make sure the area around the intake is clean.
Step 7: Apply Starter Fluid
Take your can of engine starter fluid. Following the instructions on the can, spray a very small amount—just a one to two-second burst—directly into the carburetor’s air intake. Starter fluid is extremely flammable and volatile, so use it sparingly. Too much can cause engine damage. The goal is simply to provide an initial combustible vapor to get the engine to fire up.
Step 8: Reassemble the Air Filter
Quickly but carefully, place the air filter back into its housing and secure the cover. The engine is designed to run with the air filter in place, and this step ensures no debris gets sucked into the carburetor once the engine starts. Make sure the cover is properly sealed to maintain the correct air-to-fuel ratio.
Step 9: Reconnect the Spark Plug
With everything else assembled, reconnect the spark plug wire. Ensure it clicks firmly into place on the tip of the spark plug. This connection is what delivers the electrical charge needed to create a spark and ignite the starter fluid you just sprayed into the carburetor. A loose connection will prevent the mower from starting.
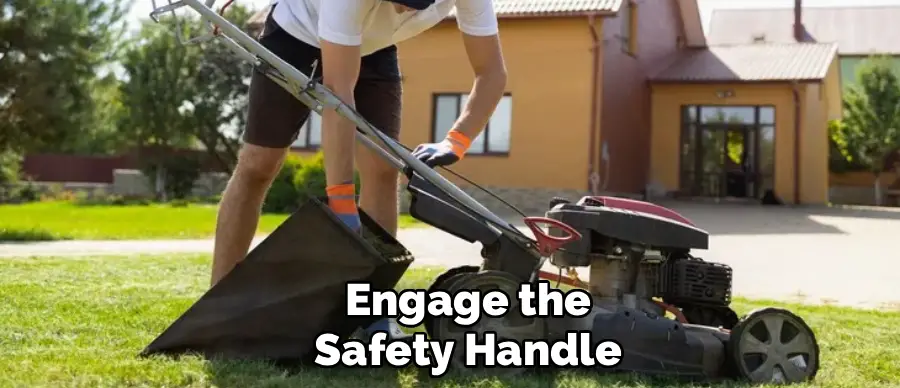
Step 10: Start the Engine
Move to the operator’s position, engage the safety handle, and pull the starter cord firmly. The engine should sputter and start, running on the starter fluid for a few seconds. This initial combustion should create enough suction to pull fresh gasoline from the tank through the fuel lines and into the carburetor, allowing the engine to continue running on its own. If it stalls, you may need to repeat the process, but avoid using too much starter fluid.
5 Things You Should Avoid
- Overusing Starter Fluid: Applying too much starter fluid can cause a condition known as hydro-locking, where the cylinder fills with too much liquid, potentially bending or breaking internal engine components. Use only a short, one-second spray.
- Pouring Gasoline Directly into the Carburetor: Never pour raw gasoline into the carburetor intake. It is far less volatile than starter fluid and can flood the engine, creating a serious fire hazard.
- Forgetting to Reconnect the Spark Plug: It’s a simple mistake, but if you pull the starter cord without the spark plug wire connected, the engine will never start. Always double-check this connection before attempting to start the mower.
- Running the Engine Without an Air Filter: Never run the engine for more than a few seconds without the air filter in place. Dirt, dust, and debris can be sucked directly into the engine, causing scoring on the cylinder walls and significant internal damage.
- Working in a Poorly Ventilated Area: Gasoline and starter fluid fumes are toxic and highly flammable. Always work outdoors or in a garage with the doors wide open to ensure proper ventilation and reduce the risk of fire or inhalation.
Frequently Asked Questions
- Can I Use This Method on Any Lawn Mower?
This method generally works for most gasoline-powered walk-behind mowers and some riding mowers that have a carburetor and are not fuel-injected. However, the exact location of the air filter and carburetor may vary by brand and model, so you might need to consult your owner’s manual to locate these components. - What if the Mower Starts but Then Immediately Stalls?
If the engine fires up on starter fluid but dies once it burns off, it’s a strong sign that the carburetor is clogged or the fuel line is blocked. The initial start proves the ignition system is working, but the engine isn’t getting a steady supply of fuel. The carburetor will likely need a thorough cleaning. - Is Using Starter Fluid Bad for My Engine?
When used sparingly and correctly, starter fluid is not harmful to a small engine. It’s a standard diagnostic tool used by mechanics. The danger comes from overuse. Excessive application can wash lubricating oil off the cylinder walls and cause detonation that is more powerful than the engine is designed to handle, leading to potential damage.
Conclusion
A broken primer bulb doesn’t have to mean the end of your mowing day. By following these steps, you can safely and effectively start your lawn mower and get back to work.
This process not only serves as a temporary fix but also helps you diagnose underlying fuel system issues. Learning this simple technique empowers you with the confidence to handle minor equipment problems, saving you time and money.
Hopefully, this guide on how to prime a lawn mower without primer bulb has provided you with the knowledge and tools to get your lawn mower back up and running.
About
Outdoor Fixes is a distinguished figure in the world of Diy design, with a decade of expertise creating innovative and sustainable Diy solutions.
His professional focus lies in merging traditional craftsmanship with modern manufacturing techniques,
fostering designs that are both practical and environmentally conscious. As the author of diy,
outdoorfixes delves into the art and science of outdoorfixes-making, inspiring artisans and industry professionals alike.
Education RMIT University
(Melbourne, Australia) Associate Degree in Design (Outdoor Fixes) Focus on sustainable design, industry-driven projects,
and practical craftsmanship. Gained hands-on experience with traditional and digital manufacturing tools, such as CAD and CNC software.
Nottingham Trent University
(United Kingdom) Bachelor’s in outdoorfixes.com and Product Design (Honors) Specialized in product design with a focus on blending creativity with production
techniques. Participated in industry projects, working with companies like John Lewis and Vitsoe to gain real-world insights.
Publications and Impact
In diy, Outdoor Fixes his insights on indoor design processes, materials, and strategies for efficient production.
His writing bridges the gap between artisan knowledge and modern industry needs, making it a must-read for both budding designers and seasoned professionals.