
As the swimming season comes to a close and the leaves begin to fall, every pool owner faces the crucial task of winterizing their backyard oasis. While custom safety covers are excellent, they can be prohibitively expensive, leading many homeowners to look for more budget-friendly alternatives. Using a heavy-duty tarp is a cost-effective and practical solution that, when done correctly, offers excellent protection against debris, sunlight, and harsh weather.
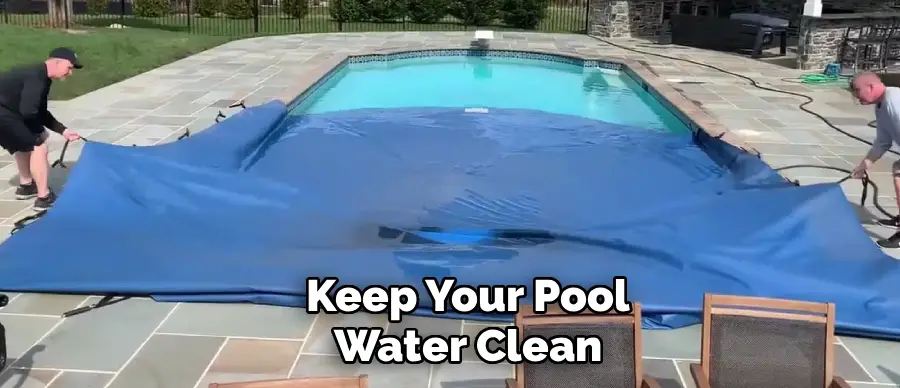
However, simply throwing a plastic sheet over the water is not enough to ensure a clean opening next spring. You need a strategic approach to secure the material against wind, rain, and snow loads. This comprehensive guide is designed to walk you through the entire process, ensuring you understand exactly how to cover inground pool with tarp materials safely and effectively. By following these detailed steps, you can prevent algae growth, keep your water crystal clear, and extend the lifespan of your pool without breaking the bank.
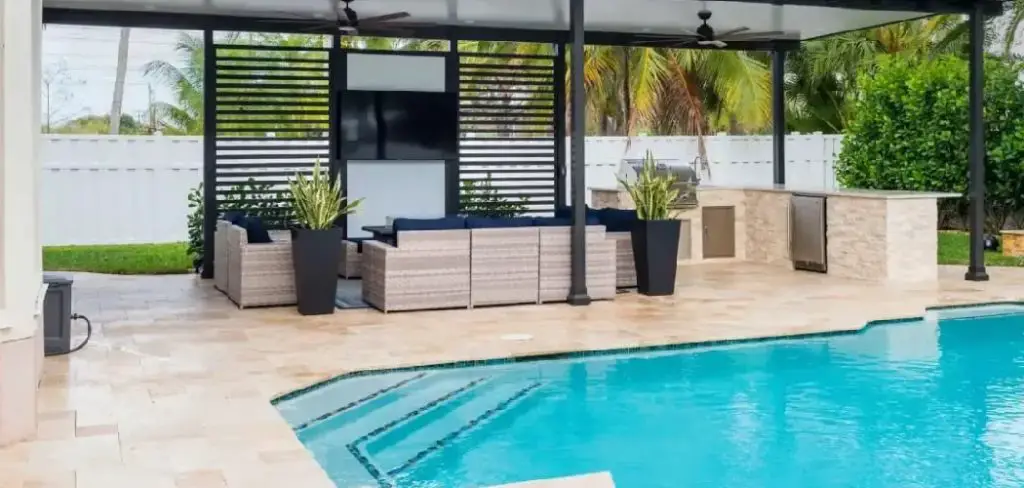
Maintaining your pool during the off-season is essential to preserving its condition and preparing for an easy reopening when warmer weather returns. Properly covering your pool not only keeps debris out but also protects it from harsh weather conditions, minimizes maintenance, and reduces long-term repair costs. By investing time and effort into correctly covering your pool, you can rest assured that it will remain in excellent shape and be ready for use when the next swim season arrives.
What is a Tarp?
A tarp is a large sheet of heavy-duty material, typically made from polyethylene or canvas, that can be used to cover and protect various objects or surfaces. It is commonly used as a temporary shelter for camping or outdoor events, but it can also be utilized in other intto such as covering an inground pool.
A tarp is an incredibly versatile tool, offering protection against the elements in various situations. Whether shielding belongings from rain, providing shade on a sunny day, or acting as a protective layer during construction projects, tarps are designed for durability and adaptability. Their lightweight yet strong structure makes them an essential item for both residential and commercial use.
Why Use a Tarp to Cover an Inground Pool?
Covering your inground pool with a tarp offers numerous benefits, including protecting your pool from debris and weather elements, saving money on water and chemicals, and extending the lifespan of your pool. By using a tarp specifically designed for pools, you can also prevent algae growth and keep your pool water clean.
One of the main reasons to use a tarp to cover an inground pool is to protect it from debris such as leaves, twigs, and insects. By covering your pool when it’s not in use, you can prevent these unwanted items from entering the water and clogging up your filters or damaging your pool equipment.
Step-by-Step Guide on How to Cover Inground Pool with Tarp
Step 1: Accurately Measure Your Pool
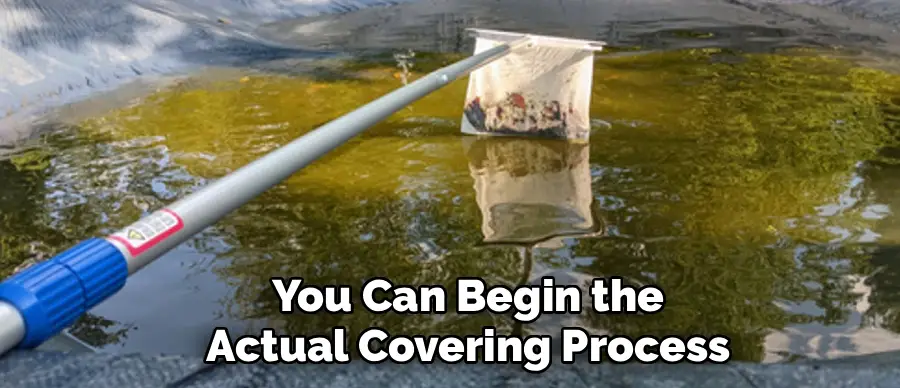
Before you can begin the actual covering process, you must determine the precise dimensions of your swimming area to purchase the correct size tarp. It is not enough to simply buy a tarp that matches the pool’s water surface dimensions because you need significant overlap to anchor it securely on the deck. Measure the maximum length and width of your pool, including any steps or swim-outs.
A general rule of thumb is to add at least four to five feet to both the length and width measurements. This extra material allows the tarp to drape down the pool walls to the water level and extend onto the pool deck for anchoring. In addition to the tarp, you will need water bags or heavy blocks specifically designed for pool covers to hold the edges down.
Step 2: Clean and Balance the Pool Water
The success of your winterization strategy depends heavily on the condition of the water before the cover goes on. If you cover a dirty pool, you are guaranteed to open a swampy mess in the spring. Spend a few days skimming out floating debris, vacuuming the bottom to remove sediment, and brushing the walls to dislodge any algae spores.
Once the pool is physically clean, test the water chemistry and adjust the pH, alkalinity, and calcium hardness to the ideal levels. It is also highly recommended to add a winterizing chemical kit, which typically includes an algaecide and a shock treatment designed to slowly release over the winter months. This chemical preparation creates a hostile environment for algae and bacteria, ensuring the water remains clear while hidden under the tarp.

Step 3: Lower the Water Level
One of the most common mistakes homeowners make is leaving the water level too high or draining it too low. The ideal water level for a tarp cover is roughly 18 inches below the coping or the top edge of the pool. This specific level serves two critical purposes. First, it allows the plumbing lines to be blown out and plugged, preventing freezing damage to your pipes. Second, it provides a supportive base for the tarp.
When heavy snow or rain accumulates on top of the cover, the tarp will stretch down and rest on the water’s surface. If the water is too low, the tension on the tarp can cause it to rip or pull the anchors into the pool. If the water is too high, debris on the cover can easily dip into the pool water if there is a tear.
Step 4: Winterize the Plumbing and Equipment
Protecting the mechanical components of your pool is just as important as covering the water itself. Turn off the power to the pool pump and heater at the breaker panel. Drain all water from the pump, filter, heater, and any other equipment to prevent freezing and cracking during the cold winter months. Use an air compressor or a shop vac to blow the remaining water out of the skimmer lines, return jets, and main drain line.
Once the lines are clear of water, install expansion plugs (also known as winterizing plugs) into the return jets and skimmer to seal the system. Add non-toxic pool antifreeze to the lines for an extra layer of protection against any residual water that might freeze. This step ensures that your expensive equipment survives the freezing temperatures intact.
Step 5: Install an Air Pillow or Floatation Device
An air pillow is a crucial component when using a tarp cover, especially in regions that experience freezing temperatures. Inflate a large, durable air pillow—often roughly 4 feet by 4 feet—and float it in the center of the pool. Tie it loosely to the sides of the pool using strong twine or rope so that it stays relatively centered. The purpose of this pillow is twofold.
First, it acts as an ice compensator; if the water freezes, the pillow absorbs the expansion pressure of the ice, protecting your pool walls from structural damage. Second, it creates a tenting effect under the tarp. This slight elevation in the center encourages rain and melting snow to drain toward the edges of the pool rather than pooling massively in the middle, which reduces stress on the cover material.
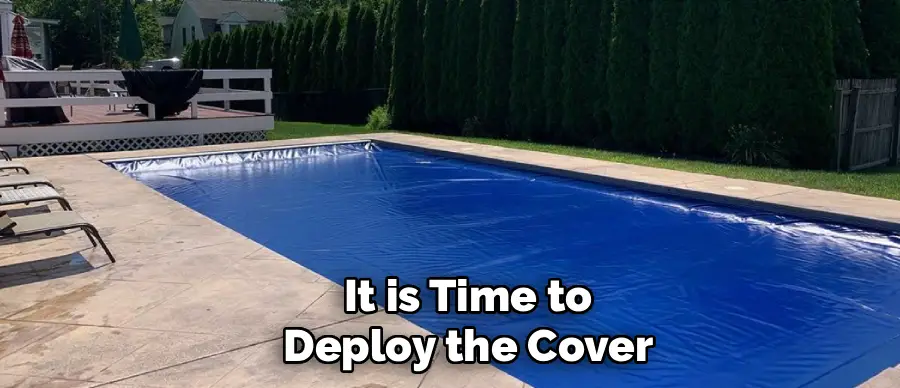
Step 6: Unfold and Position the Tarp Over the Pool
With the preparation complete, it is time to deploy the cover itself. This step is significantly easier with the help of at least one other person. carefully unfold the tarp at one end of the pool, ensuring it does not snag on any rough concrete or decking that could puncture the material. Coordinate with your helper to lift the tarp over the water, floating it across the surface until it covers the entire pool.
Avoid dragging the tarp across the abrasive pool deck, as this can create small holes that will leak dirty water into your clean pool later. Ensure the tarp is centered, with an even amount of overlap extending onto the deck on all sides. Ideally, the tarp should rest on the surface of the water (supported by the air pillow) and travel up the walls and onto the deck.
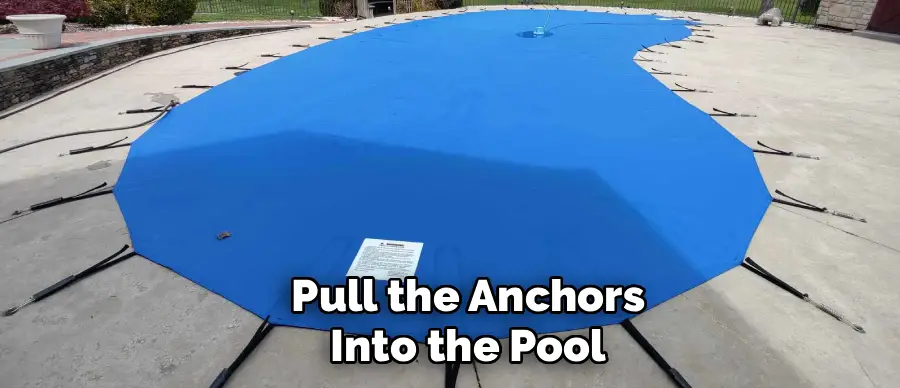
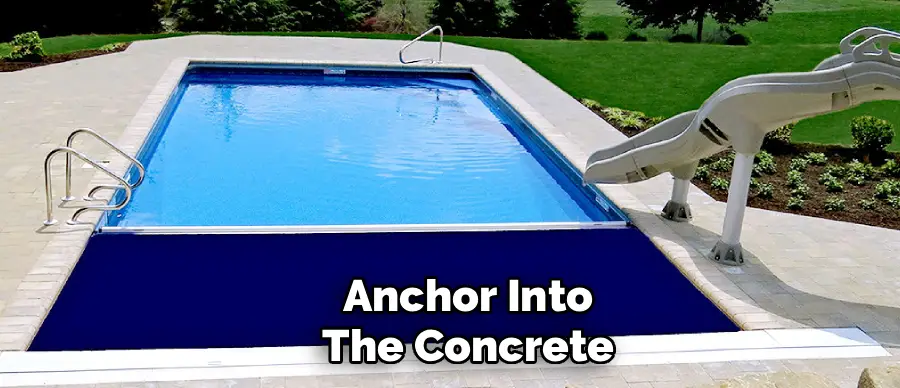
Step 7: Secure the Edges with Water Bags
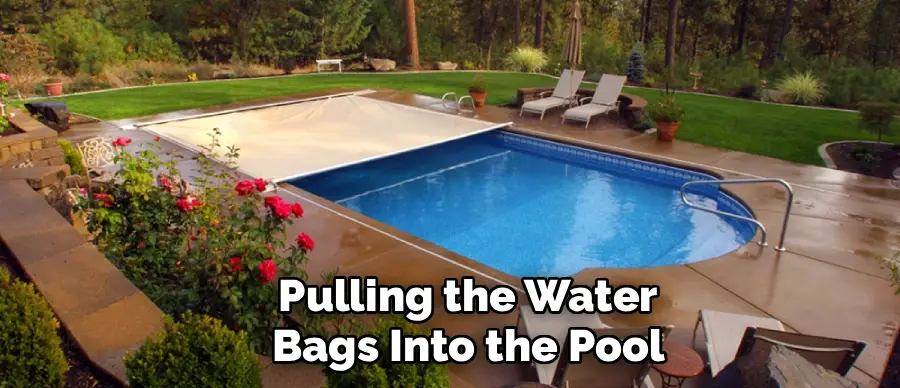
Unlike safety covers that anchor into the concrete, tarps rely on weight to stay in place. Water bags specifically designed for pools are the most effective solution. These are durable vinyl tubes that you fill with water and place around the perimeter of the pool on top of the tarp’s edge. Lay the empty bags end-to-end around the entire edge of the tarp to create a continuous seal.
Fill the bags only about half to three-quarters full with water. This is critical because if the water inside the bag freezes, it needs room to expand; a fully filled bag will burst when frozen. Place the filled bags securely on the overlap of the tarp to pin it firmly against the deck. This continuous barrier prevents wind from getting under the tarp and lifting it off the pool.
Step 8: Add Additional Weights
If you live in an area prone to high winds or severe storms, standard water bags might not be enough to keep the tarp secure. Wind can whip under loose sections of the tarp, causing it to flap violently and eventually tear or blow away completely. To counteract this, consider adding extra weight in the corners or using specialized cover clips if your pool has a raised edge or lip.
Some pool owners use wall bags, which are similar to water bags but designed to hang down slightly inside the pool wall to hold the cover taut. Never use abrasive items like bricks, concrete blocks, or stones to hold down the tarp. These items can easily damage the pool deck, tear the tarp material, or worse, fall into the pool and crack the liner or shell.
Step 9: Use a Cover Pump
Even with an air pillow, water from rain and melting snow will eventually accumulate on top of your tarp. If allowed to build up, this water becomes incredibly heavy, putting massive stress on the tarp and potentially pulling the water bags into the pool. To manage this, place a submersible pool cover pump in the center of the cover (or wherever water naturally pools).
Regularly pump off excess water throughout the winter and early spring. While a little bit of water can help weigh the cover down against wind, too much water is dangerous for the cover’s integrity. Keeping the cover relatively dry also prevents it from becoming a breeding ground for mosquitoes as the weather warms up in the spring. Be careful not to pump out the water from under the tarp, which can happen if there is a hole in the cover.
Step 10: Regularly Inspect
The job is not finished once the cover is installed. Winter weather is unpredictable, and neglecting the pool for months can lead to problems. Make it a habit to inspect your pool cover every few weeks. Check that the water bags are still intact and haven’t leaked or burst. Ensure the tarp hasn’t shifted significantly due to wind or snow load.
Look for any branches or debris that may have fallen on the cover and carefully remove them to prevent punctures. If the water level inside the pool drops due to a slow leak in the liner, the cover might become too tight; you may need to add water to the pool (using a hose under the cover) to support the tarp again. Regular maintenance ensures your setup remains secure until opening day.
Tarp Removal Process
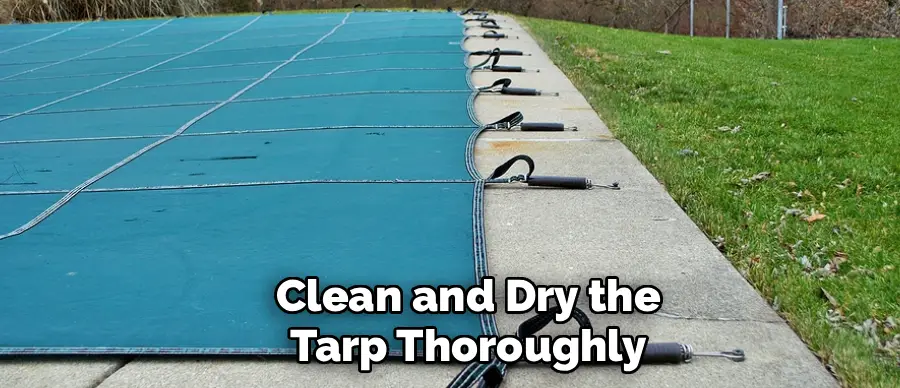
When the time comes to remove the tarp, it’s essential to follow a methodical process to prevent debris or dirty water from falling into the pool. Start by using a pool cover pump or a similar tool to remove any accumulated water from the tarp. Once the water has been drained, clear off any remaining leaves, twigs, or debris with a soft broom or blower. Next, ensure the pool’s water level is appropriate and ready for reopening, as this prevents complications when the tarp is lifted.
Carefully detach the tarp from its anchors or weights, and enlist additional help if needed to lift it evenly across all sides. Slowly pull the tarp away from the pool, ensuring no remaining debris falls into the water. Finally, clean and dry the tarp thoroughly before folding it for storage, keeping it in a cool, dry location to preserve its durability for future use.
Proper Storage of Your Pool Tarp
Proper storage of your pool tarp is essential for ensuring its longevity and maintaining its condition for future use. Once the tarp is clean and completely dry, consider rolling it rather than folding it to prevent deep creases that could weaken the material over time. Use a storage bag designed for pool covers, which offers protection from dust, pests, and environmental moisture.
For added convenience, store the bag in a designated area such as a garage, shed, or storage closet, away from direct sunlight and extreme temperatures. If space allows, you may also hang the tarp on sturdy hooks or racks to keep it off the ground and avoid unnecessary wear. Always ensure the storage area remains dry and well-ventilated to prevent mildew or damage.
Frequently Asked Questions
Can I Use a Regular Blue Tarp from a Hardware Store?
While you technically can use a standard hardware store tarp, it is not recommended for winterizing a pool. Standard utility tarps are generally thinner and less resistant to UV radiation and harsh chemicals than dedicated pool tarps. They often degrade quickly, leading to shredding and plastic bits falling into your pool water. A tarp specifically manufactured for pools is made of heavier-duty polyethylene with reinforced stitching and UV inhibitors, designed to withstand months of exposure to the elements without falling apart.
How Do I Prevent the Tarp from Falling Into the Pool?
The key to preventing the tarp from collapsing into the water is ensuring you have adequate overlap and sufficient weight on the deck. You need at least 4-5 feet of extra material on all sides so the tarp can dip down to the water surface and still reach the deck. The water inside the pool actually supports the weight of the snow and rain on top of the cover. If you pull the tarp tight like a drum without letting it touch the water, the weight of the snow will inevitably tear the anchors loose and pull the cover in.
Why Should I Not Use Bricks or Concrete Blocks to Hold the Tarp?
Using hard, abrasive objects like bricks, rocks, or concrete blocks is a major risk. First, rough edges can easily chafe and tear the tarp material, rendering it useless. Second, if a block gets pulled into the pool by a gust of wind or the weight of snow, it can crack a fiberglass shell, tear a vinyl liner, or chip concrete plaster, leading to extremely expensive repairs. Water bags or specifically designed soft weights are the only safe option for securing a pool tarp.
Do I Really Need an Air Pillow?
Yes, an air pillow is highly recommended, especially in climates where the temperature drops below freezing. The pillow acts as a stress absorber for the ice sheet that forms on the pool surface. Without it, the expanding ice pushes outward against the pool walls, which can cause structural damage or pop the liner out of its track. Additionally, the pillow creates a dome shape that encourages rain and snowmelt to run off toward the sides, making it easier to pump off excess water.
How Long Will a Tarp Pool Cover Last?
The lifespan of a tarp pool cover varies based on the quality of the material and the harshness of the winter weather. A high-quality, heavy-duty pool tarp typically lasts between one to three seasons. Factors that shorten its life include prolonged exposure to intense sunlight, heavy snow loads, and abrasion from wind or deck surfaces. Inspecting the cover for thinning areas or small holes at the end of each season will help you decide if it can be reused or needs replacement.
Conclusion
Covering your inground pool with a tarp is a practical, economical way to protect your swimming pool from the harsh realities of winter. While it requires a bit more effort and maintenance than an automatic or safety cover, the results are well worth the time investment.
By carefully measuring, cleaning the water, winterizing the plumbing, and securing the tarp with the proper weights, you create a robust barrier that keeps debris out and water quality high. Remember that the secret to success lies not just in the installation, but in the ongoing maintenance throughout the off-season. Regularly pumping off water and checking your anchors will ensure your hard
About
Outdoor Fixes is a distinguished figure in the world of Diy design, with a decade of expertise creating innovative and sustainable Diy solutions.
His professional focus lies in merging traditional craftsmanship with modern manufacturing techniques,
fostering designs that are both practical and environmentally conscious. As the author of diy,
outdoorfixes delves into the art and science of outdoorfixes-making, inspiring artisans and industry professionals alike.
Education RMIT University
(Melbourne, Australia) Associate Degree in Design (Outdoor Fixes) Focus on sustainable design, industry-driven projects,
and practical craftsmanship. Gained hands-on experience with traditional and digital manufacturing tools, such as CAD and CNC software.
Nottingham Trent University
(United Kingdom) Bachelor’s in outdoorfixes.com and Product Design (Honors) Specialized in product design with a focus on blending creativity with production
techniques. Participated in industry projects, working with companies like John Lewis and Vitsoe to gain real-world insights.
Publications and Impact
In diy, Outdoor Fixes his insights on indoor design processes, materials, and strategies for efficient production.
His writing bridges the gap between artisan knowledge and modern industry needs, making it a must-read for both budding designers and seasoned professionals.