
Owning a swimming pool comes with its fair share of maintenance challenges, and dealing with equipment failure is often at the top of the list. One specific component that can cause major headaches is the heater.
Whether it has developed a significant leak, the heat exchanger has corroded, or you simply need to remove it for repairs, a faulty heater can shut down your entire filtration system. When water cannot flow through the heater, it cannot return to the pool, leaving you with stagnant, untreated water.

Fortunately, there is a practical plumbing solution that allows you to keep your pump running while isolating the heating unit. Learning how to bypass a pool heater is an essential skill for any pool owner.
It involves creating a simple detour for the water, directing it away from the damaged equipment and straight back to the pool. This guide will walk you through the process, ensuring you can maintain crystal-clear water even when your heater is out of commission.
Bypassing a pool heater might sound complicated, but with the right tools and steps, it’s a manageable task for most pool owners. Whether your heater needs repairs or you simply want to shut it down temporarily, creating a bypass ensures your pool remains operational.
This method not only saves time and money on repairs but also helps prevent further damage to your equipment.
Tools and Materials
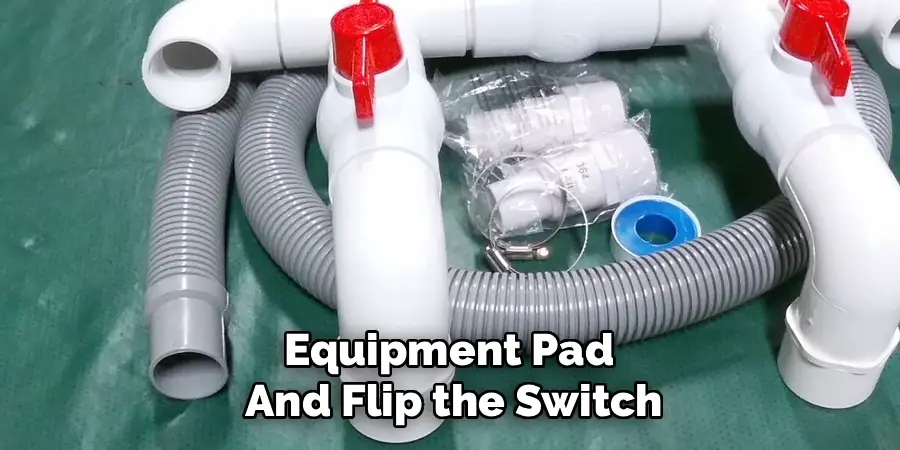
To successfully bypass a pool heater, you’ll need the following tools and materials:
- PVC Pipes – To redirect the water flow around the heater.
- PVC Elbows and Fittings – For connecting pipe sections and ensuring proper alignment.
- PVC Primer and Cement – To securely bond the pipes and fittings together.
- Pipe Cutter or Saw – For cutting the PVC pipes to the required lengths.
- Teflon Tape – To seal threaded connections and prevent leaks.
- Adjustable Wrench – For tightening connections.
- Clamps or Hose Connectors – Depending on your pool plumbing setup, these may be needed to secure hoses.
Make sure to have all tools and materials ready before beginning the process to ensure smooth and efficient work.
Step-by-Step Guide on How to Bypass a Pool Heater
Step 1: Turn Off the Pool Pump and Power
Safety is the absolute priority before you begin any plumbing work on your pool system. You must completely shut down the pool pump to stop the flow of water and release the pressure in the lines. Go to your pool equipment pad and flip the switch to turn off the pump.
For added safety, locate the main circuit breaker panel for your home or the sub-panel near the pool equipment and switch the breaker for the pool pump to the “OFF” position.
This prevents the system from accidentally turning on while you are cutting pipes or gluing fittings, which could result in injury or a massive water mess. Double-check that the pressure gauge on your filter reads zero before proceeding to the next step.
Step 2: Release System Pressure
Even with the pump turned off, there may still be residual pressure trapped inside the filter and plumbing lines. To work safely and avoid getting sprayed with water when you cut the pipes, you need to release this pressure.
Locate the air relief valve on top of your pool filter tank. Turn it counter-clockwise to open it. You should hear a hissing sound as air enters the tank and water pressure equalizes.
Wait until the hissing stops completely. Additionally, if your equipment is installed below the water level of the pool, you must close the valves on the suction and return lines to prevent gravity from forcing pool water out through the pipes you are about to cut.
Step 3: Identify the Inlet and Outlet Pipes
Take a moment to study your pool’s plumbing layout to understand the flow of water. You need to identify exactly where the water enters the heater and where it exits. Typically, a pipe comes from the filter and connects to the “Inlet” side of the heater.
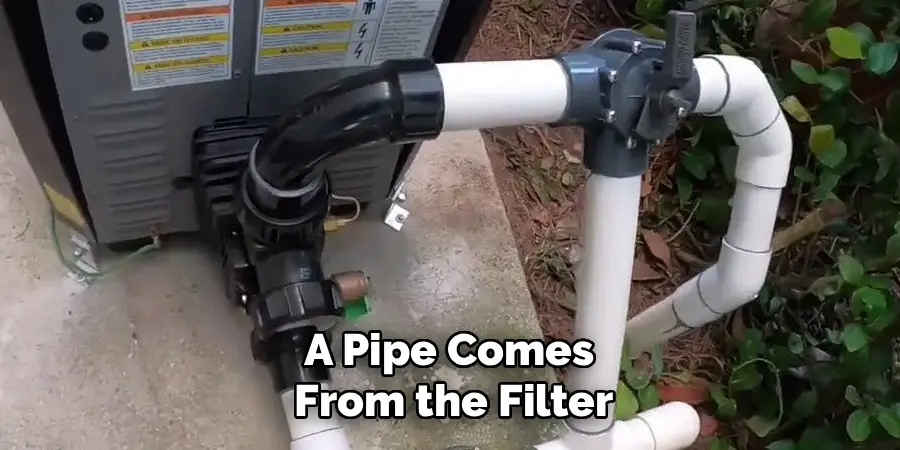
Another pipe leaves the “Outlet” side of the heater and goes towards the chlorinator or salt cell, and eventually back to the pool returns. Mark these pipes clearly with a piece of tape or a marker.
You will be cutting into these two specific lines to install your bypass loop. Understanding the direction of flow is critical because installing a check valve or diverter valve backward will block water flow and damage your pump.
Step 4: Plan Your Bypass Loop Configuration
Before you make any cuts, you need to visualize and dry-fit your bypass design. The most common and effective method for how to bypass a pool heater involves installing a 3-way diverter valve or a series of ball valves. A 3-way valve is often preferred because it simplifies operation.
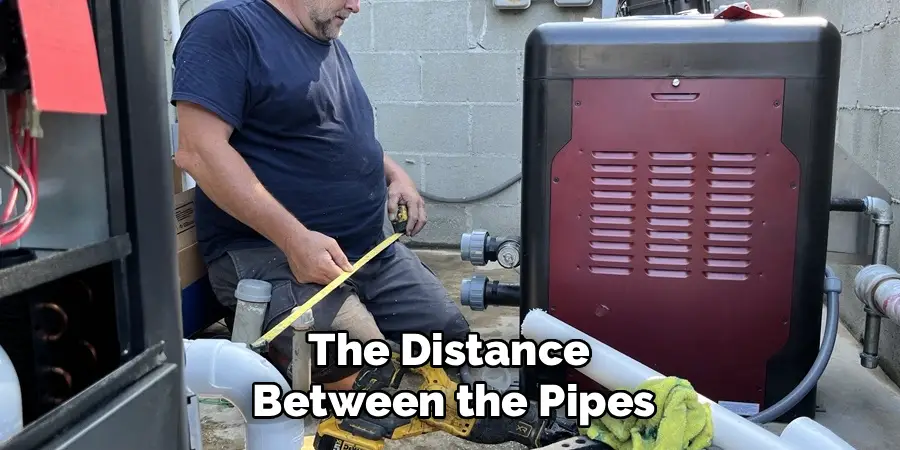
You will essentially be cutting the pipe before the heater inlet and the pipe after the heater outlet, then connecting them with a new section of pipe.
This creates a “bridge” that allows water to skip the heater entirely. Measure the distance between the pipes and determine exactly what fittings—elbows, tees, and straight pipe lengths—you will need to purchase from the hardware store to create this loop.
Step 5: Cut the Existing Plumbing Lines
Once you have your plan and materials ready, it is time to cut the pipes. Using a hacksaw, a reciprocating saw, or a PVC pipe cutter, make a clean, straight cut on the pipe leading into the heater inlet. Next, make a similar cut on the pipe exiting the heater outlet.
Try to leave enough existing pipe sticking out of the ground or coming from the filter to easily attach your new fittings. If the plumbing is tight, you might need to use a coupling to extend the pipe. Be sure to place a bucket underneath your cut site to catch any water draining from the heater or the filter. Sand the cut edges with sandpaper to remove rough burrs and debris.
Step 6: Clean and Prime the Pipe Ends
A secure, leak-free plumbing connection relies entirely on proper surface preparation. You must clean the outside of the existing pipe ends and the inside of your new fittings. Use a dedicated PVC primer, which is usually purple, to soften the plastic and remove dirt and grease. Apply the primer generously to both the pipe and the fitting socket.
The primer chemically prepares the PVC for the cement, ensuring a permanent bond. Do not skip this step, even if the pipes look clean. The purple stain is a good indicator that you have covered the entire surface area. Allow the primer to dry for a few seconds until it loses its wet shine but is still tacky to the touch.
Step 7: Dry Fit the New Assembly
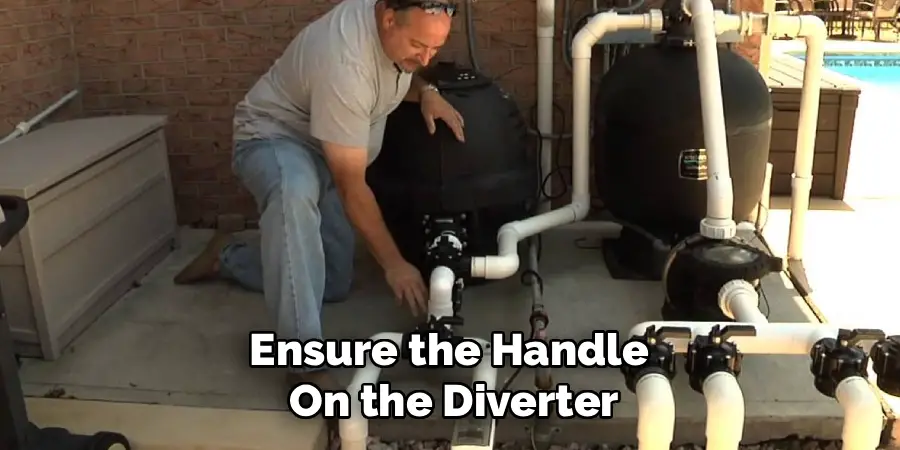
Before you apply any glue, assemble your new bypass loop without cement to ensure everything fits perfectly. Connect your 3-way valve or ball valves, elbows, and straight pipe sections into the configuration you planned. Place the assembly into position between the cut pipes.
Check that the angles are correct and that there is no stress on the pipes. If a pipe is too long, trim it down. If it is too short, cut a new piece. This “dry fit” stage is your last chance to make adjustments.
Once PVC cement is applied, it sets within seconds, and mistakes become permanent and difficult to fix. Ensure the handle on the diverter valve can turn freely without hitting a wall or another pipe.
Frequently Asked Questions
Why Is Bypassing a Pool Heater Necessary?
A bypass is crucial for maintenance and chemical safety. It allows you to keep filtering your pool water even if the heater is broken, leaking, or removed for service. Furthermore, a bypass is essential when you are shock dosing the pool or adding harsh chemicals. Super-chlorinated water or acidic water can corrode the copper heat exchanger inside the heater. By diverting water around the heater during chemical treatments, you significantly extend the lifespan of the unit.
Can I Use Flexible Hose Instead of PVC Pipe?
While flexible PVC pipe (flex pipe) or heavy-duty rubber hoses might seem easier to install, rigid Schedule 40 PVC pipe is the industry standard and highly recommended for permanent repairs. Flexible hoses can degrade in the sun, kink, or burst under pressure. Rigid PVC provides better flow characteristics, is more durable against UV rays, and creates a professional, leak-proof seal that will last for years.
What Is the Difference Between a Manual and Automatic Bypass?
A manual bypass involves valves that you must turn by hand to divert water. This is the most common DIY setup. An automatic bypass uses a motorized valve actuator connected to your pool automation system. The system can automatically rotate the valve to send water to the heater only when the thermostat calls for heat, and bypass it when heating is not needed. Automatic systems are more expensive and complex to install.
Will Bypassing the Heater Affect Water Pressure?
Actually, bypassing the heater often improves water flow and slightly increases pressure at the return jets. Heaters naturally create resistance (head loss) as water is pushed through the complex heat exchanger coils. When water flows through the simple, straight pipe of a bypass loop, there is less resistance, allowing the pump to work more efficiently. You might notice your pool cleaner moving faster or the waterfall flowing stronger.
Do I Need a Check Valve in My Bypass Loop?
Yes, installing a check valve is highly recommended, especially if you have a chlorinator or salt cell installed after the heater. A check valve placed between the heater outlet and the chlorinator prevents concentrated chlorine or salt water from flowing backward into the heater when the pump turns off. This backflow of corrosive chemicals is a leading cause of heater failure.
Conclusion
Taking control of your pool’s plumbing by installing a heater bypass is one of the smartest upgrades a homeowner can make. It transforms a potential emergency—like a leaking heater in the middle of summer—into a manageable inconvenience that doesn’t turn your pool green. By isolating the heater, you protect the expensive heat exchanger from chemical damage and ensure your filtration system remains operational regardless of the heater’s status. The process requires careful planning, precise measuring, and proper installation to ensure reliable and efficient operation.
About
Outdoor Fixes is a distinguished figure in the world of Diy design, with a decade of expertise creating innovative and sustainable Diy solutions.
His professional focus lies in merging traditional craftsmanship with modern manufacturing techniques,
fostering designs that are both practical and environmentally conscious. As the author of diy,
outdoorfixes delves into the art and science of outdoorfixes-making, inspiring artisans and industry professionals alike.
Education RMIT University
(Melbourne, Australia) Associate Degree in Design (Outdoor Fixes) Focus on sustainable design, industry-driven projects,
and practical craftsmanship. Gained hands-on experience with traditional and digital manufacturing tools, such as CAD and CNC software.
Nottingham Trent University
(United Kingdom) Bachelor’s in outdoorfixes.com and Product Design (Honors) Specialized in product design with a focus on blending creativity with production
techniques. Participated in industry projects, working with companies like John Lewis and Vitsoe to gain real-world insights.
Publications and Impact
In diy, Outdoor Fixes his insights on indoor design processes, materials, and strategies for efficient production.
His writing bridges the gap between artisan knowledge and modern industry needs, making it a must-read for both budding designers and seasoned professionals.