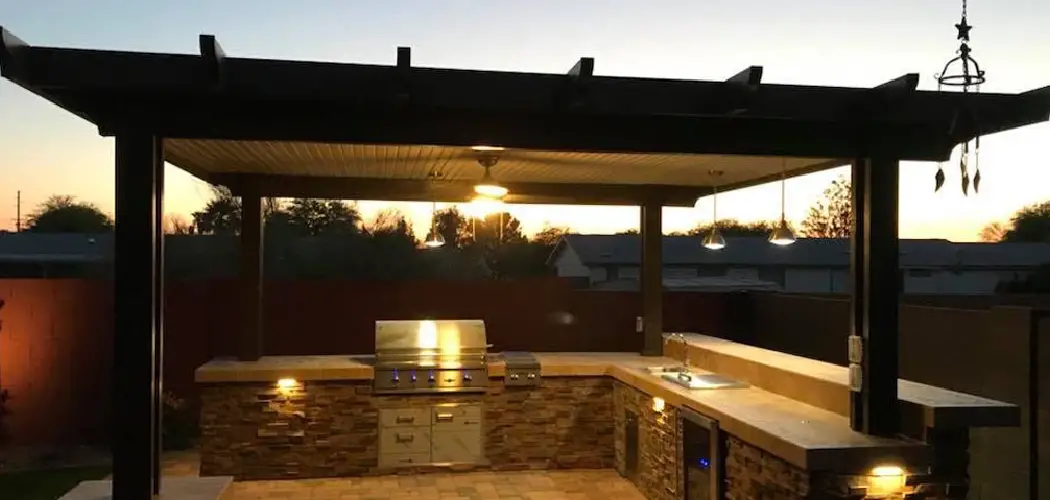
The outdoor barbecue island represents the ultimate upgrade for the modern backyard enthusiast. It transforms a simple patio into a luxurious, functional outdoor kitchen, turning the solitary act of grilling into a communal culinary experience. Instead of running back and forth to the indoor kitchen for prep work or cold drinks, an island allows you to cook, entertain, and socialize in one central hub.
While the finished product often looks like the work of a high-end contractor, constructing one is an achievable goal for a dedicated DIYer with moderate skills. This comprehensive guide will detail how to build outdoor barbecue island structures from the ground up, covering everything from the initial design phase to the final installation of your gleaming new grill.
Planning Your Dream BBQ Island: Design and Layout
A successful build begins long before you pick up a drill; it starts with a solid, well-considered plan. The design phase is where you determine how your island will fit into your lifestyle and your landscape. You must first decide on the layout that best suits your space. A simple linear island is perfect for smaller patios or for placing against a wall, offering a streamlined look that doesn’t intrude on the flow of traffic.
For those who want to create a true social hub, an L-shaped or U-shaped design is often superior. These layouts provide ample counter space for food preparation and often allow for bar seating on the outer edge, keeping guests close to the cook without being in the danger zone of the hot grill.
Selecting Your Built-in Components
One of the most common mistakes in building a BBQ island is framing the structure before selecting the appliances. Your design must revolve entirely around the specific components you choose. You need to purchase—or at least have the precise “cutout specifications” for—your grill head, side burners, access doors, and outdoor refrigerator before you cut a single piece of track. Unlike indoor cabinetry, which has standard sizes, outdoor appliances vary significantly by manufacturer. Having the physical units on site is the safest way to ensure a perfect fit, as you can measure the actual unit against your frame as you build.
Mapping Utilities and Location
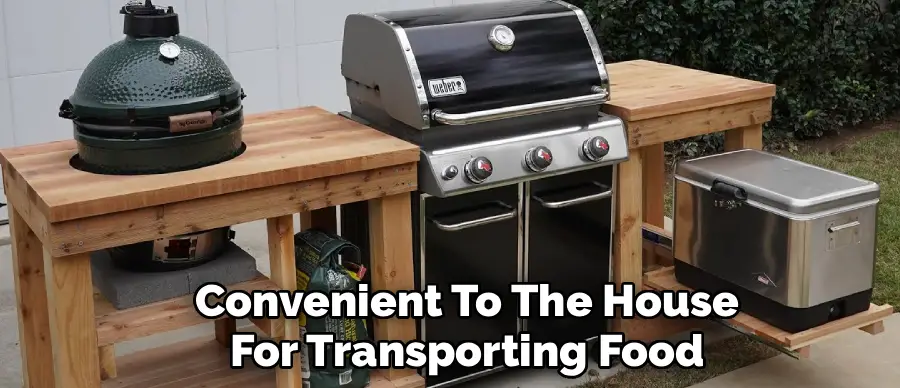
Location is about more than just aesthetics; it is about safety and utility access. You should choose a spot that is convenient to the house for transporting food, yet far enough away to prevent smoke from wafting indoors. Critically, you must plan the route for your utilities. If you are installing a sink, you need a water supply and a drain line.
If you are using a natural gas grill, you will need a gas line trench. Even for a propane grill, you likely need electricity for rotisserie motors, lights, and the refrigerator. Marking these utility lines on the ground with spray paint helps you visualize the project and is essential for the trenching phase.
Choosing a Construction Method: Steel Studs vs. Masonry
When it comes to the structural skeleton of your island, there are two primary schools of thought: steel stud framing and concrete block (CMU) masonry. Each has distinct advantages, but for the average DIYer, one often stands out as the more accessible option.
Steel Stud Framing
Steel stud framing has become the industry standard for custom outdoor kitchens, and for good reason. It creates a frame that is incredibly strong yet lightweight, non-combustible, and dimensionally stable—meaning it won’t warp, rot, or twist like wood. It is built much like an interior wall but uses heavier-gauge galvanized steel to withstand the elements.
This method is generally faster than masonry and allows for more precision when framing the intricate cutouts required for doors and grills. Because it is lighter, it often does not require the massive poured footings that heavy masonry demands, usually sitting comfortably on a standard reinforced patio slab.
Concrete Block (CMU) Construction
The traditional method involves stacking concrete blocks and mortaring them together. This creates a structure that is virtually indestructible and impervious to water damage. However, masonry is heavy, labor-intensive, and requires a specific skill set to keep walls plumb and level. It also requires a substantial concrete footing to support the immense weight. While excellent for simple, straight runs, creating complex shapes or precise openings for stainless steel appliances can be more challenging with block than with steel framing.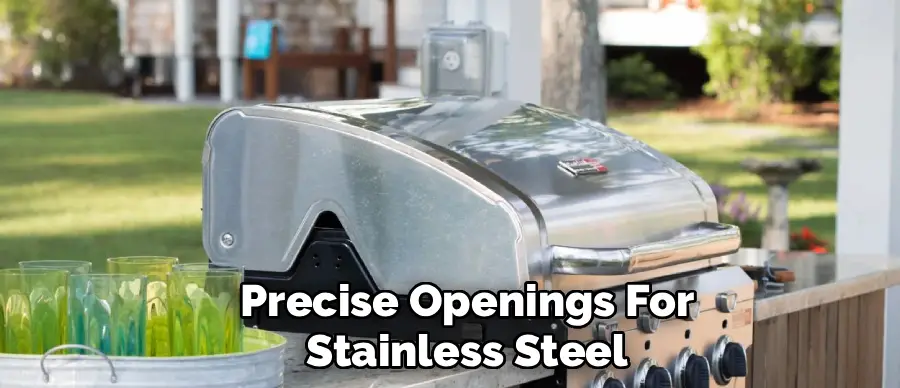
Permits, Codes, and Safety Considerations
Before you break ground, you must address the legal and safety aspects of the project. An outdoor kitchen is considered a permanent structure, and adding utility lines like gas and electricity almost always triggers the need for a building permit.
Checking Local Building Codes
Your first stop should be your local building department. Codes vary wildly by region. Some areas may require a specific depth for gas line trenches, while others might have strict regulations about the distance between the grill and combustible materials like wooden fences or siding. You may also encounter “setback” rules that dictate how close you can build to your property line. Ignoring these codes can result in fines or complications when you eventually sell your home.
Gas and Electrical Safety
While you can do the framing and finishing work yourself, connecting gas lines and high-voltage electrical wiring is not a place for guesswork. It is highly recommended—and often legally required—to hire licensed professionals to make the final connections. An improperly installed gas line is a severe fire hazard, and outdoor wiring must be protected by GFCI circuits to prevent shock in wet conditions. Treat these elements with the respect they deserve to ensure your island is safe for your family to use.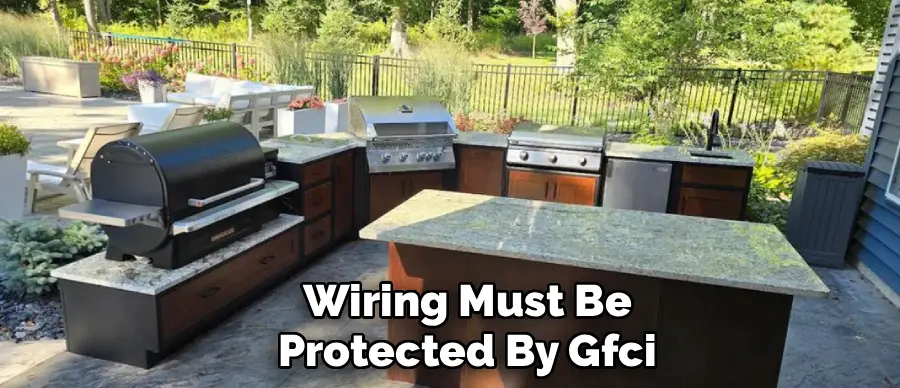
Step-by-Step Guide: How to Build Outdoor Barbecue Island with Steel Studs
For this guide, we will focus on the steel stud framing method, as it offers the best balance of durability and ease of construction for the home improver. This process allows you to build a professional-grade structure that will last for decades.
Step 1: Prepare the Foundation
A stable island requires a stable base. Ideally, you should build on top of an existing concrete patio that is level and in good condition. If you are building on pavers, you may need to pour a concrete footer around the perimeter of the island to support the weight and provide a solid anchor point. Once your base is ready, use chalk or a marker to draw the exact footprint of your island directly onto the concrete. Mark the locations of all your appliances on the floor as well to ensure your layout works in the real world.
Step 2: Build the Base Frame
Your frame will consist of metal tracks (the top and bottom horizontal pieces) and studs (the vertical pieces). Start by cutting the bottom tracks to length using aviation snips or a chop saw with a metal-cutting blade. Lay these tracks over your chalk lines. Do not anchor them yet. Cut the matching top tracks as well. To join the corners and create a rigid structure, you will eventually screw the studs into these tracks.
Step 3: Frame the Walls and Appliance Cutouts
Begin installing your vertical studs. For outdoor kitchens, studs are typically placed every 12 to 16 inches on center to provide ample support for heavy stone veneers and countertops. Insert the studs into the bottom track and secure them with self-tapping framing screws. Then, attach the top track. This is the stage where precision is paramount: you must frame the “rough openings” for your grill and doors. Consult your appliance manuals for the exact dimensions required. The opening is usually slightly larger than the appliance itself. You may need to install extra studs or horizontal headers to support the weight of the grill, which can easily exceed 100 pounds.
Step 4: Run Utility Lines
Before you close up the walls, you need to install the internal rough plumbing and electrical work. If you are hiring pros, this is when they should come in to run the gas piping and electrical conduit through the pre-punched holes in the steel studs. Ensure that the stub-outs (where the gas or electric comes out of the wall) are positioned exactly where your appliances will need them. It is much easier to move a pipe now than to try to reroute it after the cement board is on.
Step 5: Attach Cement Board
With the skeleton complete and utilities roughed in, it is time to skin the frame. You will use a cement backer board, typically 1/2-inch thick, which creates a rigid, waterproof, and fireproof substrate for your finish materials. Measure and cut the cement board to fit your frame. You can cut it by scoring it with a carbide knife and snapping it, or by using a grinder with a masonry wheel. Attach the board to the steel studs using specialized cement board screws, spacing them about every 6 to 8 inches to ensure a tight bond that won’t flex.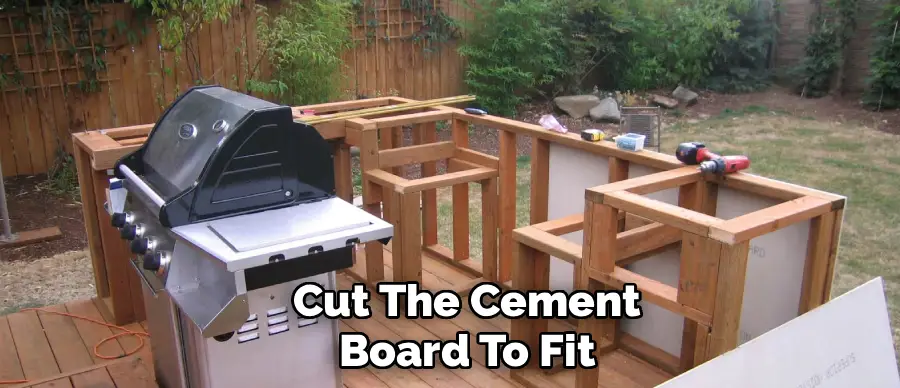
Step 6: Cut Openings in the Cement Board
Once the island is fully sheathed in cement board, you need to open up the spaces for your appliances. Using your framed openings as a guide, cut out the cement board covering the grill, door, and vent areas. An angle grinder or a jigsaw with a masonry blade works well for this. Be sure to wear a dust mask and safety glasses, as cutting cement board creates a significant amount of silica dust.
Installing the Countertop
The countertop is both the functional workhorse and the visual centerpiece of your island. It needs to be durable enough to withstand hot pans, grease, and weather, while also looking beautiful.
Choosing a Countertop Material
Granite is a top choice for outdoor kitchens because of its hardness and resistance to heat and scratching. However, it is heavy and usually requires professional fabrication. Concrete countertops are a popular DIY option; you can pour them in place or cast them in molds and lift them onto the island. They offer a rugged, customizable look, but must be sealed regularly to prevent staining. Large-format porcelain tile is another excellent option, offering heat resistance and durability at a lower price point than slab stone, though you will have grout lines to maintain.
Setting the Countertop
If you are installing a slab material like granite or pre-cast concrete, you will need help lifting it, as these pieces are incredibly heavy. Apply a generous bead of high-strength construction adhesive to the top track of your steel frame and any supports. Carefully lower the countertop into place, checking immediately to ensure it is level. If you are tiling, you will apply a bed of thin-set mortar directly to the cement board top of your island (often requiring two layers of board for stability) and lay your tiles just as you would on a floor.
Applying the Finish: Stone Veneer or Stucco
The vertical sides of your island define its style. You want a finish that complements your home’s exterior and ties the outdoor kitchen into the landscape.
Applying Stacked Stone Veneer
Stacked stone veneer creates a classic, high-end look and is surprisingly easy to install. Start by applying a “scratch coat” of mortar to the cement board sides of the island and letting it cure. This gives the stone something to grip. Then, apply a layer of mortar to the back of each stone (a process called “buttering”) and press it firmly against the scratch coat. Start at the corners and work your way in, trimming stones as needed with a grinder. The interlocking nature of the stone hides imperfections and creates a seamless, solid appearance.
Troweling a Stucco Finish
For a sleek, modern, or Mediterranean look, stucco is a fantastic and cost-effective choice. It involves applying a series of coats—a scratch coat, a brown coat, and a colored finish coat—over a wire lath attached to the cement board. You can texture the final coat to match your home’s exterior walls. Stucco can also be painted if you decide to change your color scheme later, offering great versatility.
Installing Appliances and Final Connections
This is the moment where your project transforms from a structure into a kitchen. The hard work is done, and it is time to fit the gleaming stainless steel components into place.
Sliding in the Grill and Components
Carefully slide your grill head into the cutout. It should fit snugly but not be so tight that it scrapes the sides. Most built-in grills are supported by the countertop flanges on the sides and back. Next, install the access doors and drawer units. These typically slide into their openings and are secured to the frame with screws through the inside flanges. Ensure they are level and that they open and close smoothly without binding against the stone veneer.
Final Utility Hookup
With the appliances in place, your licensed plumber and electrician can return to make the final connections. They will connect the flex line from the grill to the hard pipe gas supply, test for leaks, and wire up the outlets and grill lights. Once they give the all-clear, you are ready to fire up the grill for the first time.
Conclusion
Building an outdoor barbecue island is a significant undertaking that demands patience, planning, and a bit of sweat equity. However, the result is a transformative addition to your home that offers returns far beyond the financial value it adds to your property. By meticulously planning your layout, utilizing the durability of steel stud framing, and paying attention to the details of safety and finishing, you can create a professional-quality kitchen in your own backyard.
Knowing how to build outdoor barbecue island structures allows you to customize every inch of your space, ensuring it meets your specific entertaining needs. As you stand by your new grill, surrounded by friends and family, you will find that the effort was well worth the reward of creating a lasting centerpiece for outdoor living.
About
Outdoor Fixes is a distinguished figure in the world of Diy design, with a decade of expertise creating innovative and sustainable Diy solutions.
His professional focus lies in merging traditional craftsmanship with modern manufacturing techniques,
fostering designs that are both practical and environmentally conscious. As the author of diy,
outdoorfixes delves into the art and science of outdoorfixes-making, inspiring artisans and industry professionals alike.
Education RMIT University
(Melbourne, Australia) Associate Degree in Design (Outdoor Fixes) Focus on sustainable design, industry-driven projects,
and practical craftsmanship. Gained hands-on experience with traditional and digital manufacturing tools, such as CAD and CNC software.
Nottingham Trent University
(United Kingdom) Bachelor’s in outdoorfixes.com and Product Design (Honors) Specialized in product design with a focus on blending creativity with production
techniques. Participated in industry projects, working with companies like John Lewis and Vitsoe to gain real-world insights.
Publications and Impact
In diy, Outdoor Fixes his insights on indoor design processes, materials, and strategies for efficient production.
His writing bridges the gap between artisan knowledge and modern industry needs, making it a must-read for both budding designers and seasoned professionals.