There is nothing quite like the refreshing sparkle of a backyard pool on a hot summer day. However, after years of sun exposure, chemical treatments, and enthusiastic splashing, that once-vibrant blue liner can become faded, brittle, or even start to leak.
While hiring a professional is always an option, many homeowners are surprised to discover that swapping out an old liner is a manageable weekend project. With a few friends, some basic tools, and a little patience, you can revitalize your swimming oasis for a fraction of the cost. This guide is designed to walk you through the entire process, explaining exactly how to replace pool liner above ground safely and effectively so you can get back to enjoying the water.
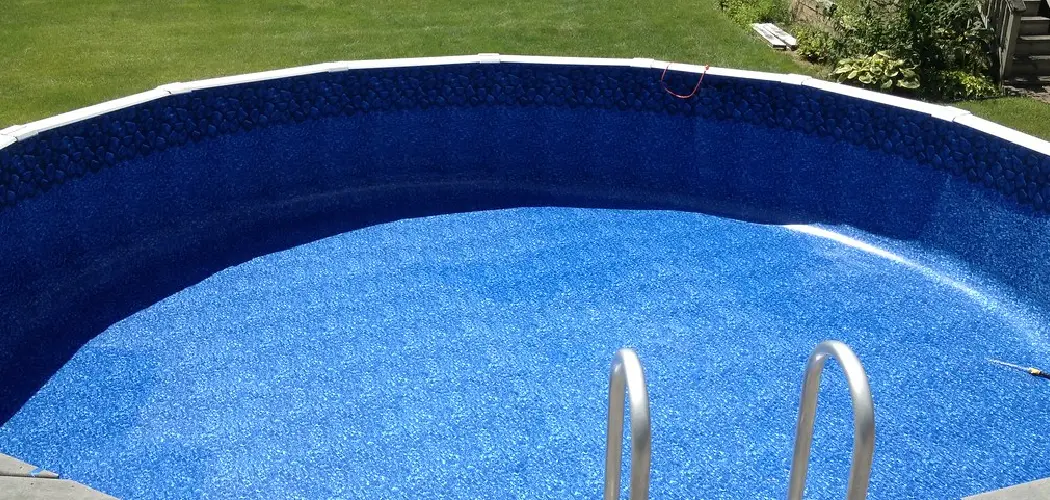
How to Replace an Above ground pool liner may seem like a daunting task at first, but with some preparation and the right approach, it becomes much more manageable. A worn or damaged liner can affect not only the aesthetic of your pool but also its overall functionality.
By learning the proper steps ahead of time, you can ensure a smoother process and achieve a professional-looking result. Whether you’re tackling this project for the first time or refreshing your skills, taking the time to understand the basics can save you both time and money in the long run.
Why Replace Your Above-Ground Pool Liner?
Over time, pool liners naturally wear out due to exposure to sunlight, chemicals, and regular use. Cracks, tears, and fading not only detract from the pool’s appearance but can also lead to water loss and increased maintenance costs. Replacing your liner restores the pool’s aesthetics, prevents potential leaks, and helps maintain proper water chemistry. Additionally, updating an old liner gives you the opportunity to select a more modern design or pattern, allowing you to refresh the overall look of your pool and backyard space.
There are several types of pool liners available, each with its own unique features and benefits. Vinyl liners are the most popular choice due to their affordability, durability, and easy installation. They come in a variety of thicknesses and patterns, allowing you to customize your pool’s look while providing a smooth surface for swimmers.
Fiberglass pool liners offer a more long-term solution as they have a longer lifespan than vinyl liners. They also provide a stronger barrier against water penetration and require less maintenance. However, fiberglass liners can be more expensive and are typically only available in limited sizes and shapes.
Tools Needed for Installation
When it comes to installing a new pool liner, having the right tools on hand is essential to ensure a smooth and efficient process. Some of the tools you’ll need include a measuring tape to confirm precise dimensions of your pool, a liner lock or bead wedge to secure the liner in place, and a pool vacuum to assist with fitting the liner tightly by removing air pockets.
You’ll also need a utility knife for trimming excess material and duct tape to cover any rough edges or screws on the pool walls that could damage the liner. Additionally, having a soft-bristle broom or pool brush can help smooth out wrinkles and ensure a flawless finish. With these tools adequately prepared beforehand, the installation process becomes significantly easier and more manageable.
Step-by-Step Guide on How to Replace Pool Liner Above Ground
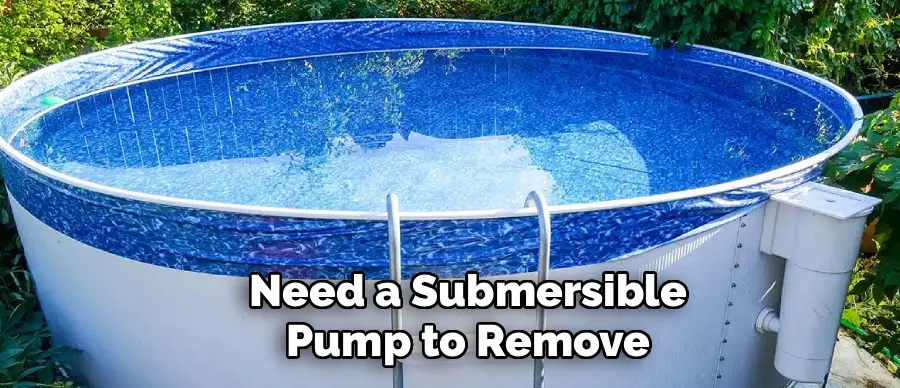
Step 1: Drain the Pool
The first phase of this renovation project involves completely emptying the pool. You will need a submersible pump to remove the thousands of gallons of water efficiently, as relying on a garden hose siphon will take far too long. While the water is draining, which can take several hours or even a full day, begin removing all the accessories attached to the pool wall.
This includes the skimmer faceplate, the return jet fittings, and any ladders or steps. Keep all screws and faceplates in a labeled bag so you do not lose them. Once the water is entirely gone, you can carefully cut the old liner into manageable strips using a sharp utility knife and remove it from the pool area.
Step 2: Prep the Sand Base
Once the old vinyl is removed, the sand base underneath is exposed. This is your only chance to correct any imperfections that have developed over the years. Inspect the sand thoroughly for any rocks, roots, or debris that could puncture the new liner. You must smooth out the sand to ensure a flat, comfortable bottom for your pool.
Using a wide push broom or a rake, redistribute the sand to fill in any divots or footprints. You should also rebuild the pool cove, which is the banked slope of sand around the inner perimeter where the wall meets the floor. A solid, even cove is crucial for preventing the liner from stretching too much under the weight of the water.
Step 3: Check the Pool Walls and Frame for Damage
With the liner gone, the metal walls and frame of your pool are fully visible. Take this opportunity to inspect them for rust, corrosion, or structural damage. If you find small patches of rust, sand them down and apply a rust-inhibiting paint to prevent further deterioration.
Check that the track (or coping) along the top of the wall is secure and in good condition. If the wall has shifted, ensure it is still seated correctly in the bottom track. Addressing these structural issues now is vital because covering them up with a new liner will only lead to bigger problems down the road. A healthy frame ensures your new liner has a safe and sturdy skeleton to support it.

Step 4: Install the New Liner into the Pool
Now comes the main event. Carefully take the new liner out of the box. Ideally, you should do this on a warm, sunny day, as the heat makes the vinyl more pliable and easier to stretch. Place the folded liner in the center of the pool and unfold it outward toward the walls. Do not drag the liner across the sand, as this can create uneven spots or tears.
If you are learning how to replace pool liner above ground with a bead receiver, simply snap the edge of the liner into the track. For an overlap liner, drape the excess vinyl over the wall and secure it temporarily with coping strips or clamps. Ensure the seams on the floor are straight and centered before proceeding.
Step 5: Smooth Out Wrinkles and Set the Liner
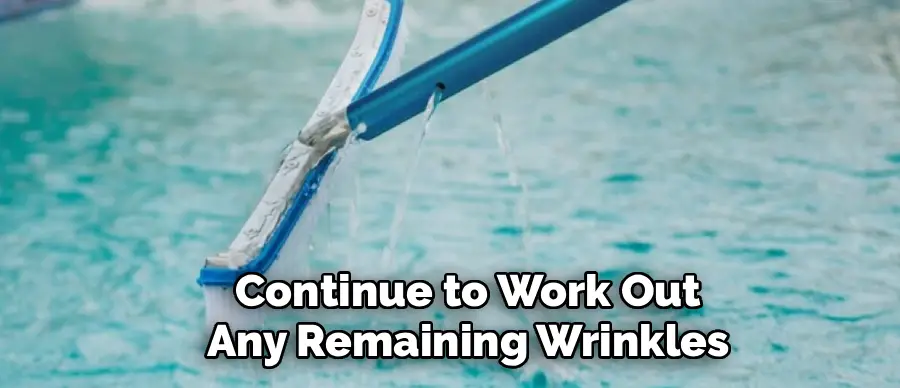
This step requires patience and usually a helper or two. Before adding water, you need to remove as many wrinkles as possible from the floor. Working from the center of the pool outward, gently push and pull the vinyl to smooth out folds.
Some homeowners use a shop vac to suck the air out from behind the liner, which vacuums the vinyl tight against the wall and floor—a professional trick that works wonders. Once the floor looks smooth and the liner is properly seated, you can begin filling the pool with water. Start slowly. As the water level rises, continue to work out any remaining wrinkles on the floor with your feet or a soft broom.
Step 6: Reinstall the Top Rails and Verticals
As the pool fills and the water weight holds the liner in place, you can begin reassembling the pool’s structure. If you have an overlap liner, you will need to adjust the hang-over so the wall pattern is even, then permanently secure it with the coping strips.
Once the liner is secure, reinstall the top rails, vertical supports, and any decorative caps you removed earlier. Do not cut any holes for the skimmer or return jet yet. The liner needs to stretch and settle under the full weight of the water before you cut into it. Wait until the water level is just a few inches below the opening of the skimmer or return jet before moving to the next step.
Step 7: Cut Openings for Skimmer and Return Jet
This is the final and most nerve-wracking step. Once the water level is high enough to stretch the liner fully into position against the wall, locate the outline of your skimmer and return jet through the vinyl. Place the faceplate for the skimmer over the liner, aligning the screw holes with the holes in the pool wall.
Screw the faceplate on tightly before cutting any vinyl. Once the faceplate is secure and creating a watertight seal, use a sharp razor blade to cut out the vinyl inside the square opening. Repeat this process for the return jet. Connect your hoses and filtration system, top off the water level, and your project is complete.
Maintenance Tips for Longevity
Proper maintenance is key to extending the life of your pool and keeping it in optimal condition. Here are some essential tips to follow:
- Regular Cleaning – Skim the surface of your pool regularly to remove leaves, insects, and debris. Vacuum the pool floor weekly to prevent dirt buildup.
- Monitor Water Chemistry – Test the pool water frequently and maintain proper pH, chlorine, and alkalinity levels. Imbalanced water can damage the liner and filtration system.
- Inspect Equipment – Periodically check your skimmer, return jets, pump, and filter for signs of wear or damage. Replace or repair parts as necessary.
- Protect the Liner – Avoid sharp objects in the pool, and immediately address small tears or leaks in the liner to prevent further damage.
- Winterization – If you live in a region with cold winters, properly winterize the pool by lowering the water level, adding winterizing chemicals, and covering it securely.
By following these maintenance practices, you can enhance the durability of your pool and enjoy it for many years to come.

Frequently Asked Questions
When Is the Best Time to Replace a Pool Liner?
The ideal time to install a new vinyl liner is during the spring or early summer when the temperature is consistently between 70°F and 85°F. The warmth of the sun is essential because it makes the vinyl flexible and stretchy, allowing you to manipulate it easily and remove wrinkles. If you try to install a liner in cold weather (below 60°F), the vinyl becomes stiff, brittle, and extremely difficult to install without causing damage.
How Long Does an Above Ground Pool Liner Last?
On average, a vinyl pool liner lasts between 6 and 10 years. However, this lifespan can vary significantly based on factors like sun exposure, chemical balance, and winterizing habits. Liners that are constantly exposed to harsh UV rays or improper pH levels will degrade faster. If you notice the vinyl becoming brittle, cracking, or losing its elasticity, it is likely time for a replacement regardless of its age.
Do I Need to Put Sand Under the New Liner?
You usually do not need to add new sand unless the old base has washed away or become contaminated. However, you absolutely must re-smooth and regrade the existing sand base. When you remove the old liner, the sand will be disturbed and likely have footprints and divots. You must rake it smooth and rebuild the cove (the slope at the edges) to ensure the new liner sits correctly and is protected from the metal frame.
Can I Put a New Liner Over an Old One?
No, you should never install a new liner directly over an old one. This practice can cause significant problems. The old liner can harbor mold, algae, and fungus that will damage the new vinyl. Furthermore, leaving the old liner prevents you from inspecting the pool wall for rust and smoothing out the sand base. For a sanitary, long-lasting installation, always remove and discard the old liner completely.
What Is the Difference Between Overlap and Beaded Liners?
- Overlap Liners: These drape over the pool wall and are secured with coping strips. They are forgiving and adjustable but can be tricky to get even.
- Beaded Liners: These have a thick edge (the bead) that snaps into a track receiver on the pool wall. They are easier to install and offer a cleaner look but require precise sizing since they cannot be adjusted.
- Unibead/J-Hook: These can function as either a beaded liner or hook over the wall like an overlap liner without the excess overhang.
Conclusion
Replacing an above-ground pool liner is a significant task, but it is one of the most rewarding DIY projects a homeowner can undertake. It instantly transforms a tired, aging pool into a sparkling centerpiece for summer fun. By following a methodical process—draining, prepping the base, carefully installing the vinyl, and refilling slowly—you ensure a professional-quality result that will last for years. While it requires physical effort and attention to detail, the savings on labor
An above-ground pool is a fantastic addition to any backyard, offering a convenient way to cool off and enjoy quality time with family and friends. Over time, however, the pool liner may show signs of wear and tear, such as fading, cracking, or leaks. Replacing the liner might seem daunting at first, but with the right tools and guidance, it can become a manageable and satisfying project. By taking on this task, you not only extend the life of your pool but also enhance its appearance and functionality.
About
Outdoor Fixes is a distinguished figure in the world of Diy design, with a decade of expertise creating innovative and sustainable Diy solutions.
His professional focus lies in merging traditional craftsmanship with modern manufacturing techniques,
fostering designs that are both practical and environmentally conscious. As the author of diy,
outdoorfixes delves into the art and science of outdoorfixes-making, inspiring artisans and industry professionals alike.
Education RMIT University
(Melbourne, Australia) Associate Degree in Design (Outdoor Fixes) Focus on sustainable design, industry-driven projects,
and practical craftsmanship. Gained hands-on experience with traditional and digital manufacturing tools, such as CAD and CNC software.
Nottingham Trent University
(United Kingdom) Bachelor’s in outdoorfixes.com and Product Design (Honors) Specialized in product design with a focus on blending creativity with production
techniques. Participated in industry projects, working with companies like John Lewis and Vitsoe to gain real-world insights.
Publications and Impact
In diy, Outdoor Fixes his insights on indoor design processes, materials, and strategies for efficient production.
His writing bridges the gap between artisan knowledge and modern industry needs, making it a must-read for both budding designers and seasoned professionals.