
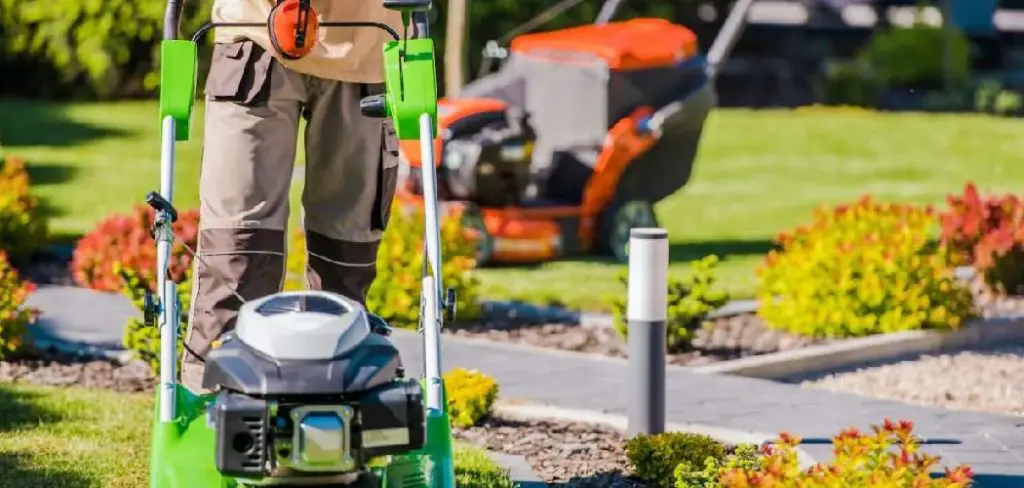
A self-propelled lawn mower can transform lawn care from a strenuous chore into a simple walk in the park. But what happens when your mower’s pace doesn’t match yours?
Walking too fast to keep up or too slow for your liking can be frustrating and inefficient. Adjusting the speed of your self-propelled mower is the key to unlocking a truly customized and comfortable mowing experience. Proper speed control not only enhances your comfort but also improves the quality of your cut, ensuring a healthier and more beautiful lawn.
This guide on how to adjust speed on self propelled lawn mower will walk you through everything you need to know to fine-tune your mower’s pace perfectly.
What are the Benefits?
Taking the time to adjust your mower’s speed offers several significant advantages. The most immediate benefit is improved control and maneuverability. When the mower moves at a pace that feels natural to you, you can navigate around obstacles like trees, garden beds, and pathways with greater precision. This leads to a cleaner, more professional-looking cut.
Furthermore, a properly adjusted speed reduces physical strain. You no longer have to push a slow mower or jog to keep up with a fast one. This makes the task less tiring, which is especially beneficial for those with large yards or physical limitations. Finally, matching the mower’s speed to the lawn conditions—slowing down for thick, tall grass and speeding up on lighter patches—ensures the blade cuts every blade of grass evenly, promoting better lawn health.
What Will You Need?
Before you begin, it’s wise to gather all the necessary tools and materials. This preparation will make the process smoother and safer. Here is a list of items you will likely need:
- Owner’s Manual: This is your most important tool. It provides model-specific instructions and diagrams.
- Safety Gloves: Protect your hands from dirt, grease, and sharp components.
- Screwdriver Set (Phillips and Flathead): For removing covers and making adjustments.
- Wrench Set or Socket Set: To loosen and tighten nuts and bolts securing the drive cable.
- Pliers (Needle-nose recommended): Useful for manipulating small parts like clips or springs.
- Cleaning Rag: To wipe away grass clippings and debris from the adjustment area.
- Work Mat or Tarp: To provide a clean surface to work on and catch any small parts.
10 Easy Steps on How to Adjust Speed on Self Propelled Lawn Mower
Adjusting the speed on your self-propelled mower usually involves modifying the tension of the drive cable. This cable connects the drive control handle (or bail arm) on the handlebar to the transmission. By increasing or decreasing its tension, you change how much the drive system engages, which in turn alters the speed. Follow these detailed steps to get it right.
Step 1: Prepare Your Mower and Workspace
Safety is the priority. Start by moving your lawnmower to a flat, level surface like a garage floor or driveway. This ensures it won’t roll away while you’re working. Disconnect the spark plug wire from the spark plug. This is a critical safety measure that prevents the engine from accidentally starting while you are handling the blade or drive mechanism. Put on your safety gloves to protect your hands. If your mower has been running, allow the engine to cool down completely before you start any work to avoid burns.

Step 2: Consult Your Owner’s Manual
Every lawnmower is different. Before you touch a single screw, open your owner’s manual and find the section on adjusting the self-propel speed or drive system. The manual will show you exactly where the drive cable, adjustment points, and transmission are located on your specific model. It will provide diagrams that are invaluable for identifying the correct components. Some mowers have a simple adjustment knob, while others require you to adjust the cable itself. The manual is your roadmap for this entire process.
Step 3: Locate the Drive Cable and Adjustment Point
With your manual as a guide, locate the drive cable. It typically runs from the handlebar, down the mower’s frame, to the transmission, which is usually located near the rear axle for rear-wheel drive models or the front axle for front-wheel drive models. Trace this cable to find the adjustment point. Common adjustment points include a turnbuckle, a threaded bolt with lock nuts, or a bracket with multiple holes where the cable can be repositioned. It might be exposed or hidden under a plastic cover that you’ll need to remove.

Step 4: Identify the Type of Adjuster
There are a few common types of adjusters. Some mowers feature a simple wing nut or adjustment knob located on the handlebars or along the cable’s path. Turning this knob clockwise usually increases speed (tightens the cable), and counter-clockwise decreases it. Another common type is a threaded adjuster with one or two nuts. Loosening the nuts allows you to move the cable housing forward or backward to change the tension. A third type involves a “Z” bend on the end of the cable that fits into one of several holes on a linkage plate. Moving the “Z” bend to a different hole changes the tension.
Step 5: Clean the Adjustment Area
The area around the drive cable and transmission can become caked with grass, dirt, and oil. Before making any adjustments, use your cleaning rag or a brush to thoroughly clean this area. A clean workspace makes it easier to see what you’re doing, prevents debris from falling into the transmission, and ensures that the adjustment mechanism can move freely. Pay close attention to the threads on any adjustment bolts and the linkage points.
Step 6: Make an Initial Small Adjustment
Now it’s time to make your first adjustment. The key here is to make small, incremental changes. If you want to increase the speed, you generally need to tighten the cable. This removes slack. For a threaded adjuster, you would loosen the locking nut and then turn the adjustment nut or bolt to shorten the effective length of the cable housing. For a linkage plate, you would move the cable to a hole that pulls it tighter. To decrease the speed, you do the opposite—loosen the cable to create more slack. Make a small adjustment first, such as one full turn of a nut or moving the cable by one position.

Step 7: Temporarily Secure the Adjustment
After making a small change, lightly tighten any nuts or bolts you loosened. Don’t fully tighten them just yet, as you may need to make further adjustments. The goal is to secure the cable just enough so it doesn’t slip during testing. This step ensures that your adjustment holds while you check the new speed. If you have an adjustment knob, it will click into place, so no temporary securing is needed.
Step 8: Test the New Speed Setting
This is where you see the result of your work. Reconnect the spark plug wire. Start the mower on your flat surface. Engage the self-propel drive and walk with the mower. Does the pace feel more comfortable? Is it too fast or still too slow? Walk a short distance to get a real feel for the new speed. Pay attention to how smoothly the drive engages. You don’t want it to be jerky or hesitant.
Step 9: Fine-Tune as Needed
Based on your test, you will likely need to fine-tune the setting. If the speed is still not right, turn off the mower, wait for all moving parts to stop, and disconnect the spark plug wire again. Now, return to the adjuster and make another small change in the desired direction. Repeat the process of adjusting, temporarily securing, reconnecting the spark plug, and testing. It may take two or three attempts to find the perfect speed that matches your walking pace and mowing style. Patience is key.
Step 10: Finalize and Secure Everything
Once you are satisfied with the speed, it’s time to lock in your adjustments. Shut down the mower one last time and disconnect the spark plug wire for safety. Go back to the adjustment point and fully tighten all nuts and bolts to secure the cable firmly in its new position. Be careful not to overtighten, as this could strip the threads or damage the components. Reinstall any protective covers you may have removed. Finally, reconnect the spark plug wire, and your mower is ready for action.

5 Things You Should Avoid
- Skipping the Owner’s Manual: Every model is unique. Assuming you know where the adjuster is can lead to you modifying the wrong cable (like the brake cable) or damaging parts.
- Over-tightening the Drive Cable: An overly tight cable can cause the drive to be partially engaged at all times. This leads to premature wear on the belt, pulley, and transmission.
- Forgetting to Disconnect the Spark Plug: This is a critical safety mistake. An accidental engine start while your hands are near the blade or drive system can cause serious injury.
- Making Large Adjustments at Once: Making a huge adjustment can cause the mower to become dangerously fast or render the self-propel system useless. Small, incremental changes are safer and more effective.
- Adjusting with the Engine Running: Never attempt to make adjustments while the mower is on. It’s unsafe and makes it impossible to accurately set the tension.
Conclusion
How to adjust speed on self propelled lawn mower is a straightforward task that can dramatically improve your mowing experience.
By setting a pace that is comfortable for you, you gain better control, achieve a more precise cut, and reduce physical fatigue. By following the steps outlined above—from preparing your workspace safely to making small, incremental adjustments—you can easily fine-tune your mower’s performance.
Take a little time to get your mower’s speed just right; your body and your lawn will thank you for it.
About
Outdoor Fixes is a distinguished figure in the world of Diy design, with a decade of expertise creating innovative and sustainable Diy solutions.
His professional focus lies in merging traditional craftsmanship with modern manufacturing techniques,
fostering designs that are both practical and environmentally conscious. As the author of diy,
outdoorfixes delves into the art and science of outdoorfixes-making, inspiring artisans and industry professionals alike.
Education RMIT University
(Melbourne, Australia) Associate Degree in Design (Outdoor Fixes) Focus on sustainable design, industry-driven projects,
and practical craftsmanship. Gained hands-on experience with traditional and digital manufacturing tools, such as CAD and CNC software.
Nottingham Trent University
(United Kingdom) Bachelor’s in outdoorfixes.com and Product Design (Honors) Specialized in product design with a focus on blending creativity with production
techniques. Participated in industry projects, working with companies like John Lewis and Vitsoe to gain real-world insights.
Publications and Impact
In diy, Outdoor Fixes his insights on indoor design processes, materials, and strategies for efficient production.
His writing bridges the gap between artisan knowledge and modern industry needs, making it a must-read for both budding designers and seasoned professionals.