
Maintaining a crystal-clear swimming pool involves more than just balancing chlorine and pH levels. One often-overlooked aspect of pool care is managing phosphate levels. Phosphates are essentially food for algae, and high concentrations can lead to persistent algae blooms, cloudy water, and an increased demand for sanitizers, making your pool maintenance efforts feel like an uphill battle.
Understanding how to properly manage these nutrients is key to preventing frustrating water quality issues. By learning how to use a phosphate remover, you can effectively starve algae of its primary food source. This simple but powerful treatment can save you time, reduce chemical usage, and ensure your pool remains a sparkling oasis for everyone to enjoy, especially during the peak swimming season. In this guide on how to add phosphate remover to pool, we’ll walk you through the steps and answer some commonly asked questions.
Tools and Materials You May Need
- Phosphate test kit
- High-quality liquid phosphate remover
- Safety goggles
- Chemical-resistant gloves
- Measuring cup specifically for pool chemicals
- Pool brush
- Clean bucket
- Pool filter cleaning supplies (e.g., backwash hose, filter cleaner)
- Clarifier (optional, but recommended)
8 Simple Step-By-Step Guidelines on How to Add Phosphate Remover to Pool
Step 1: Test Your Pool’s Phosphate Level
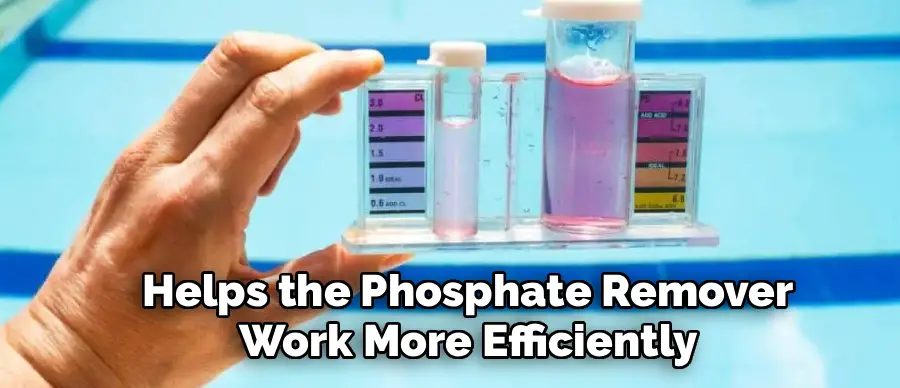
Before you begin adding any chemicals, the first and most crucial step is to determine the existing phosphate concentration in your pool water. Phosphates are invisible to the naked eye, so you cannot guess their presence or quantity. Using a reliable phosphate test kit is essential for an accurate reading. These kits are readily available at pool supply stores and come with clear instructions. The process typically involves taking a water sample and adding specific reagents that will react and change color, indicating the parts per billion (ppb) of phosphates present.
It is important to follow the test kit’s directions precisely to ensure you get an accurate result. An incorrect reading could lead you to add too much or too little phosphate remover, both of which can create problems. Adding an insufficient amount will not solve the algae issue, while adding an excessive amount can cause severe cloudiness and strain your filter system. Document your initial reading, as this number will be the basis for calculating the correct dosage of phosphate remover needed for your specific pool volume and contamination level.
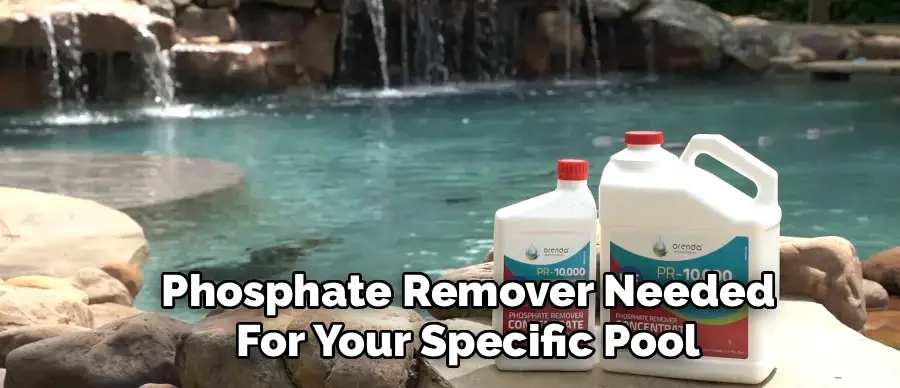
Step 2: Calculate the Required Amount of Phosphate Remover
Once you have an accurate phosphate reading, your next task is to calculate the precise amount of phosphate remover your pool requires. This calculation is vital for the treatment’s effectiveness and to avoid overdosing on the water. Refer to the dosage chart on the label of your chosen phosphate remover product. The instructions will specify how many ounces of the chemical are needed to treat a certain number of gallons of water and reduce phosphates by a specific ppb measurement. For example, a label might state that 8 ounces of remover will lower phosphate levels by 300 ppb in a 10,000-gallon pool.
To perform the calculation accurately, you must know your pool’s volume in gallons. If you are unsure, you can use online calculators that estimate volume based on your pool’s shape and dimensions (length, width, and average depth). Using your initial phosphate reading and the product’s guidelines, determine the exact dosage. It is always better to be precise. Guessing the amount can lead to ineffective results or create a cloudy mess that requires significant effort to clear up, so take the time to do the math correctly before proceeding.
Step 3: Prepare Your Pool and Equipment
Proper preparation of your pool and its circulation system is essential for the phosphate remover to work effectively. Start by ensuring your pool’s filter is clean and operating efficiently. If you have a sand or D.E. filter, perform a thorough backwash to clear out any trapped debris. For cartridge filters, remove the cartridges and give them a deep cleaning with a hose and, if necessary, a specialized filter cleaning solution. A clean filter is critical because it will be responsible for trapping and removing the precipitated phosphates from the water after the treatment.
Next, make sure your pool’s water is balanced according to ideal chemical ranges for pH, alkalinity, and chlorine. A pH level between 7.2 and 7.6 is particularly important, as it helps the phosphate remover work more efficiently. Adjust any chemicals as needed and allow the water to circulate for a few hours before adding the remover. Finally, turn on your pool pump and ensure it is set to run continuously for at least 24 to 48 hours. Continuous circulation is non-negotiable, as it will distribute the remover evenly throughout the pool and help the filter capture the resulting particulate matter.
Step 4: Dilute the Phosphate Remover
Most liquid phosphate removers are highly concentrated and should be diluted before being added to the pool. This step helps prevent localized, intense chemical reactions that can cause staining on pool surfaces or immediate, severe cloudiness in one area. Diluting the product ensures a more even and gentle distribution throughout the entire body of water. To do this, find a clean, five-gallon bucket and fill it about three-quarters full with pool water. Be sure to use a bucket that has not been used for other household chemicals to avoid introducing unwanted contaminants into your pool.
Carefully measure the calculated amount of phosphate remover using a dedicated measuring cup. Pour the measured chemical slowly into the bucket of pool water. Avoid splashing the concentrated liquid on your skin or clothing. Gently stir the mixture with a clean stirring stick to ensure it is thoroughly combined. This pre-dilution process is a simple but important safety and efficacy measure. It makes the chemical easier to disperse and reduces the risk of overwhelming your pool’s water chemistry in one spot, leading to a much smoother and more effective treatment process.
Step 5: Add the Diluted Solution to the Pool
With your pump running and the phosphate remover properly diluted, you are ready to introduce the solution into your pool. The best way to do this is to walk slowly around the perimeter of the pool, pouring the diluted mixture from the bucket directly into the water. Aim for a steady, even pour as you move along the edge. This method aids in the uniform distribution of the chemical, allowing it to mix quickly and efficiently with the entire volume of pool water. Avoid dumping the entire contents of the bucket in one spot, such as near the skimmer or in the deep end.
An alternative and highly effective method for adding the solution is to pour it slowly into the pool’s skimmer. This approach sends the chemical directly into the filtration system, where it can be rapidly dispersed through the return jets. If you choose this method, pour the diluted solution into the skimmer very slowly to prevent an overwhelming concentration from hitting the filter at once. Regardless of the method you choose, continuous circulation is key. The goal is to ensure the remover contacts phosphates throughout the pool to begin the binding and precipitation process.
Step 6: Let the Pool Pump Run Continuously
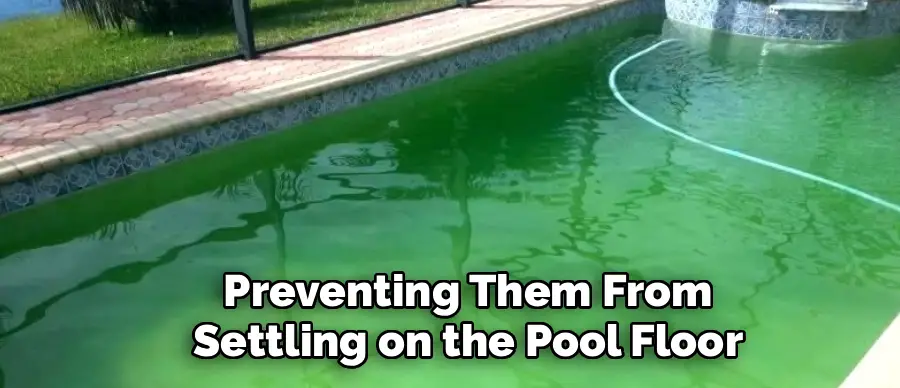
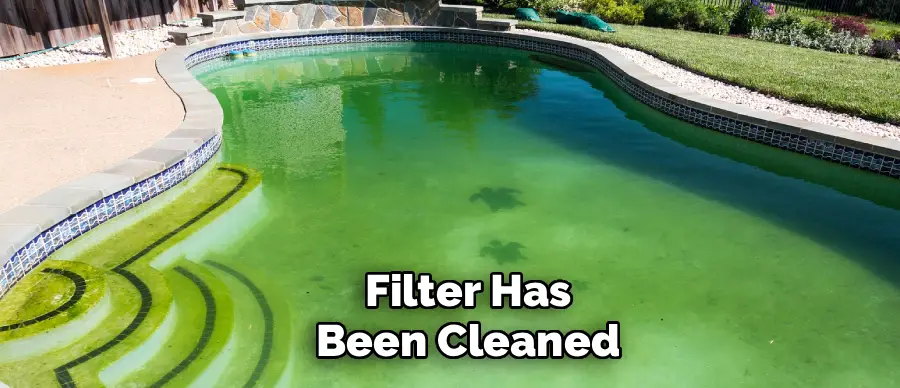
After adding the phosphate remover, the most critical action you can take is to let your pool pump run continuously. You should plan for the pump to operate for a minimum of 24 hours, though 48 hours is often better, especially for high phosphate levels. The chemical works by binding with the dissolved phosphates in the water, a process that transforms them into tiny, insoluble particles. These newly formed particles are suspended in the water, which will cause the pool to become cloudy. This cloudiness is a normal and expected sign that the treatment is working correctly.
The continuous circulation serves two main purposes. First, it ensures that all of the water in your pool passes through the filter multiple times, giving the system the opportunity to capture the precipitated phosphates. Second, it keeps the particles suspended in the water column, preventing them from settling on the pool floor and walls, where they can be difficult to remove. Do not be alarmed by the cloudy or milky appearance of the water. This is a temporary phase. Resisting the urge to turn off the pump is essential for a successful outcome.
Step 7: Address the Cloudy Water
Within a few hours of adding the phosphate remover, you will notice your pool water becoming cloudy, sometimes significantly so. This is the expected result of the chemical reaction, as phosphates precipitate out of the solution. Your filter will now begin the hard work of removing these fine particles from the water. To assist this process, you can add a pool clarifier after about 24 hours of circulation. A clarifier works by grouping the tiny phosphate particles together into larger clumps, making them much easier for your filter to trap and remove.
Follow the instructions on the clarifier bottle for the correct dosage based on your pool’s volume. Add the clarifier as directed, usually by pouring it around the edges of the pool or into the skimmer. Continue to run the pump. The combination of the phosphate remover, the clarifier, and your filtration system will work together to gradually restore the water’s clarity. This process can take a day or two, so patience is key. The cloudiness is a sign of progress, indicating that phosphates are being actively removed from your water.
Step 8: Clean the Filter and Re-Test
After 48 hours of continuous filtration, your pool water should be significantly clearer. Now is the time to clean your filter, which will be filled with the phosphates it has worked so hard to remove. For sand or D.E. filters, perform another thorough backwash until the water runs clear. For cartridge filters, remove the cartridges and give them a very deep cleaning with a high-pressure nozzle on your hose. A clogged filter cannot work effectively, so cleaning it post-treatment is a non-negotiable step to complete the process and prepare your system for normal operation.
Once the filter is clean and the pump is running again, it is time to re-test your pool’s phosphate level using your test kit. The reading should be significantly lower, ideally below 125 ppb or as close to zero as possible. You should also test and rebalance your other chemical levels, such as pH, alkalinity, and sanitizer, as the treatment process can sometimes alter them. With phosphates removed and your water balanced, you can resume your regular maintenance schedule. Remember to also brush and vacuum any settled debris from the pool floor to ensure it is completely clean.
Following these steps on how to add phosphate remover to pool water can help protect your pool from the negative effects of high phosphate levels. However, it is also important to take preventive measures to keep phosphates from entering your pool in the first place.
Post-Treatment Procedures
After the phosphate remover has worked and your filter has been cleaned, it is important to monitor your pool closely for the next few days. Brush the pool walls and floor to dislodge any remaining settled precipitates and vacuum the pool, preferably on the “waste” setting if you have a multiport valve and notice significant debris.
Re-test all your chemical levels—including pH, alkalinity, and chlorine—and make any necessary adjustments to bring them back into their ideal ranges. Finally, resume your regular pump and filtration schedule.
Safety Precautions and Considerations
Always handle pool chemicals with care. When using phosphate remover, wear safety goggles and chemical-resistant gloves to protect your eyes and skin from splashes. Read and follow all manufacturer instructions and warnings on the product label before you begin. Never mix phosphate remover directly with other pool chemicals, especially chlorine, as this can create hazardous fumes or dangerous reactions.
Store the chemical in a cool, dry, and well-ventilated area away from the reach of children and pets. If you are dealing with extremely high phosphate levels (over 1000 ppb), consider performing the treatment in stages to avoid overwhelming your filter system.
Frequently Asked Questions
Q1: Why Did My Pool Get Cloudy After Adding Phosphate Remover?
A1: A cloudy or milky pool is a completely normal and expected outcome after adding phosphate remover. This cloudiness is a positive sign that the product is working as intended. The chemical binds with dissolved phosphates, converting them into tiny, solid particles that are suspended in the water. Your filter’s job is to trap and remove these particles, but it takes time. Running your pump continuously for 24 to 48 hours is essential to filter out these precipitates and restore water clarity.
Q2: How Often Should I Test for and Treat Phosphates?
A2: The frequency of testing depends on your pool’s environment. It is a good practice to test for phosphates at the beginning and end of the swim season. You should also test after specific events that can introduce phosphates, such as heavy rainfall, a significant leaf or debris load, or an algae bloom. If your pool is prone to recurring algae despite balanced sanitizer levels, you may want to test monthly as part of your routine maintenance to keep phosphate levels in check proactively.
Q3: Can I Swim in the Pool After Adding Phosphate Remover?
A3: It is generally recommended to wait until the treatment process is complete and the water has cleared before swimming. While most phosphate removers are non-toxic, the extreme cloudiness can pose a safety risk as it obstructs visibility, making it impossible to see the bottom of the pool or a swimmer in distress. Always follow the specific instructions on the product label, but a safe rule of thumb is to wait at least 24 hours and until the water is no longer cloudy.
Q4: What Is an Ideal Phosphate Level for a Swimming Pool?
A4: For a residential swimming pool, the ideal phosphate level is as close to zero as possible. However, a practical and manageable target is to keep the level below 125 parts per billion (ppb). Once phosphate levels start to climb above 300 ppb, they can become a significant food source for algae and contribute to water quality problems. Maintaining a low level through regular testing and treatment helps prevent algae growth and reduces your overall chlorine consumption.
Conclusion
Effectively managing phosphate levels is a cornerstone of a proactive pool care strategy. By following these detailed steps, you can confidently use a phosphate remover to eliminate this key algae nutrient from your water. This process not only helps in clearing up existing algae issues but also serves as a powerful preventative measure, ensuring your pool water remains clear, safe, and inviting.
Remember that consistency is crucial in pool maintenance. Integrating regular phosphate testing into your routine and addressing high levels promptly will save you from future headaches and additional chemical costs. With a clean filter, balanced water, and low phosphate levels, you are well-equipped to enjoy a pristine swimming experience all season long. Thanks for reading this guide on how to add phosphate remover to pool.
About
Outdoor Fixes is a distinguished figure in the world of Diy design, with a decade of expertise creating innovative and sustainable Diy solutions.
His professional focus lies in merging traditional craftsmanship with modern manufacturing techniques,
fostering designs that are both practical and environmentally conscious. As the author of diy,
outdoorfixes delves into the art and science of outdoorfixes-making, inspiring artisans and industry professionals alike.
Education RMIT University
(Melbourne, Australia) Associate Degree in Design (Outdoor Fixes) Focus on sustainable design, industry-driven projects,
and practical craftsmanship. Gained hands-on experience with traditional and digital manufacturing tools, such as CAD and CNC software.
Nottingham Trent University
(United Kingdom) Bachelor’s in outdoorfixes.com and Product Design (Honors) Specialized in product design with a focus on blending creativity with production
techniques. Participated in industry projects, working with companies like John Lewis and Vitsoe to gain real-world insights.
Publications and Impact
In diy, Outdoor Fixes his insights on indoor design processes, materials, and strategies for efficient production.
His writing bridges the gap between artisan knowledge and modern industry needs, making it a must-read for both budding designers and seasoned professionals.