
If you’re looking to add a touch of elegance and functionality to your outdoor space, then setting pavers in the sand is an excellent option. Not only does it create a striking visual effect, but done correctly, using sand will also keep your pavers even and securely set for years to come.
Installing pavers with sand isn’t difficult, but there are some important steps that must be taken to ensure the job is done right. Here’s how you can achieve professional results on your own! In this blog post on how to set pavers in sand you will learn everything you need to know.
What is Pavers?
Pavers are a type of flat stone that is specially designed for use in landscaping or outdoor spaces. They can be used to create walkways, patios, driveways, pool decks and more. Pavers come in a variety of shapes, sizes, colors and materials that allow you toIn t customize your outdoor landscape with ease.
Needed Materials
Given below are the materials you need to set pavers in the sand:
- Pavers
- Sand
- String or Chalk Line
- Plate Compactor or Tamper
- Shovel
- Level
- Polymeric Sand
12 Step-by-step Guidelines on How to Set Pavers in Sand
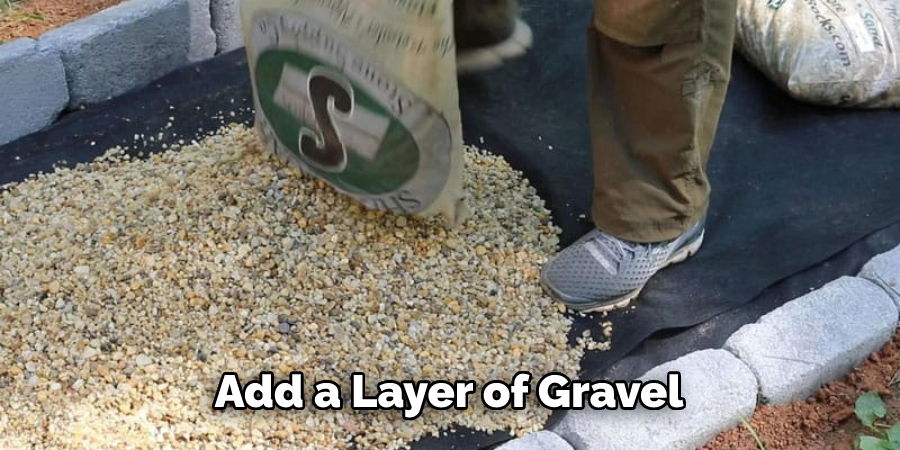
Step 1: Prepare the Area
Clear out any debris, level the ground and add a layer of gravel to create a base. It’s important to make sure the area is level and compact before continuing. If the area is not level, you may need to add or remove soil in order to achieve a level surface. It’s also important to ensure that the area is slightly higher than each side of the paver so that when sand is added, it won’t run off.
Step 2: Establish Guidelines
Before you begin to lay your pavers, establish a guideline with either string or chalk. This will help keep your paving uniform and in line, as you set them in the sand. Make sure to use a long spirit level or a laser level to check that your guidelines are even and straight.
Otherwise, your pavers may have an uneven finish. If the area is small, then you can skip this step. This will only be necessary if you’re setting up a large area.
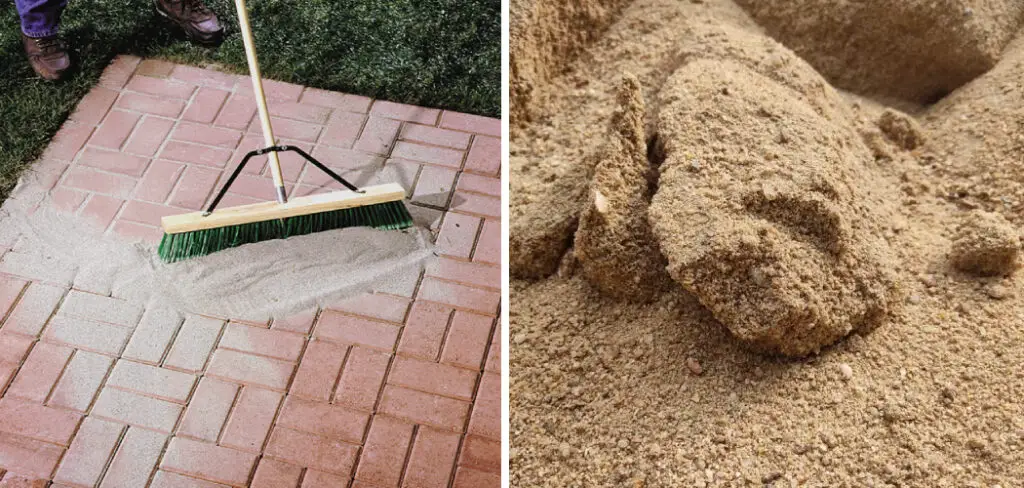
Step 3: Spread Out Sand
Spread out the sand and rake it until it’s an even depth over the entire area you’re paving. The depth of the sand should be roughly one-fourth of the height of the pavers. Although the exact depth may vary depending on the type of pavers you’re using and how much weight they will need to carry.
It’s important to make sure that the sand is even before you continue. This will ensure that your pavers are laid properly and won’t shift or sink over time. But be careful not to compact the sand too much.
Step 4: Lay the Pavers
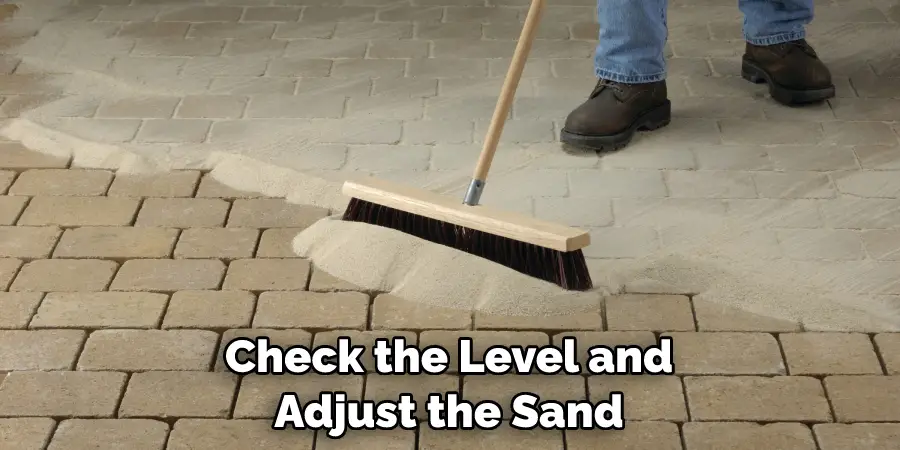
Lay your pavers in the sand as per the guidelines you have established. Take care to keep them even and in line using a level or spirit level if necessary. Avoid having gaps between the pavers, but do not overcrowd them either. But if you have to adjust a paver, be sure to do it while the sand is still loose.
This will make it easier to move and readjust the pavers as needed. Although, make sure to check the level and adjust the sand if needed. It’s important to ensure that the sand is enough to support the pavers and that each paver has a uniform coverage of sand.
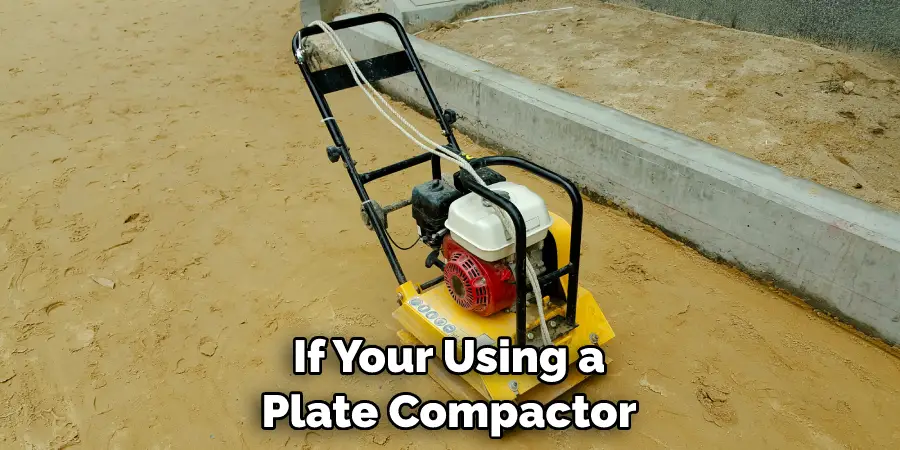
Step 5: Compress the Pavers
Compact the pavers using a plate compactor or tamper to ensure they fit snugly together. This will help prevent movement down the line and make sure your paving lasts longer. You don’t want to go overboard and compact too aggressively as you can damage the pavers.
Instead, use moderate pressure to ensure each paver is secure and that there are no gaps between them. It’s also important to check the level after compressing the pavers to make sure they are all even.
Step 6: Add Sand In-Between
Using a shovel, add more sand in between the pavers until it is level with the tops of each paver. This will help keep your pavers in place and stop them from moving around or sinking over time. But make sure to not overfill the gaps with sand, as this could cause the pavers to shift. If needed, use your tamper or compactor to level out the sand.
Step 7: Compact Again
Compact the area for a second time, making sure to use even pressure over the whole area. This will ensure that all of the sand is completely set into the area. However, be careful not to compact the sand too much as it can cause damage.
If you’re using a plate compactor, go over the area twice to ensure that all of the sand is evenly distributed. It’s also important to check the level after compressing for a second time.
Step 8: Sweep In Polymeric Sand
Sweep polymeric sand into the joints between each paver, making sure to fill them in completely. This will help lock your pavers together and stop weeds from sprouting up later on.
It’s important to make sure you use the right type of sand for your pavers, as some types of polymeric sand can be too abrasive and cause damage. It’s also important to make sure that the sand is level with the pavers. This will ensure that it can do its job properly and keep your pavers secure.
Step 9: Compact Again
Compact the area for a third and final time, again making sure to use even pressure over the whole area. This will lock in the polymeric sand and set your pavers into place for good. You want to make sure that the pavers are firmly set in place before moving on.
It’s also important to check the level after compressing again. This will make sure that your pavers are even and won’t move around when in use.
Step 10: Sweep Away Excess Sand/Polymeric Sand
Using a broom or brush, sweep away any excess sand or polymeric sand on top of the pavers. You want the tops of the pavers to be completely level and free of any excess material.

It’s important to make sure that all of the polymeric sand has been swept away properly, as any remaining sand could cause the pavers to shift. It’s also important to check the level to make sure that all of the pavers are even.
Step 11: Clean Up
Clean up any remaining debris or materials from the area and then hose down your pavers to remove any leftover sand/polymeric sand. This will make your pavers look clean and polished! This is the final step in setting pavers in sand, and once you’re done, you can sit back and admire your work.
But don’t forget to take your time and make sure that each step outlined above is done carefully, as this will help ensure your pavers last for years to come.
Step 12: Enjoy Your New Pavers!
Your pavers are now ready to be enjoyed. All that’s left to do is sit back, relax and enjoy your new outdoor space! Always remember to clean and sweep your pavers regularly, as this will help keep them in top condition. With care and maintenance, your pavers can last for many years to come. So enjoy your new outdoor space and all of the memories that it brings! Happy paving!
Following these steps will help you how to set pavers in sand quickly and easily. If you have any questions, it’s always best to consult a professional for advice. Pavers can be a difficult job and the right advice can make all the difference. Good luck with your project!
Tips & Warnings
- Make Sure You Use the Correct Amount of Sand When Setting Pavers. Too Much or Too Little Can Cause Problems Later on.
- If You’re Setting Pavers Around a Pool or Any Body of Water, Make Sure to Use Non-porous Pavers That Won’t Absorb Moisture and Become Slippery.
- Always Wear Protective Eyewear When Using Power Tools Such as Plate Compactors or Tampers.
- In Areas With High Rainfall, It’s Important to Make Sure Your Pavers Are Securely Set in Place as Loose Paving Can Be Displaced by Heavy Downpours.
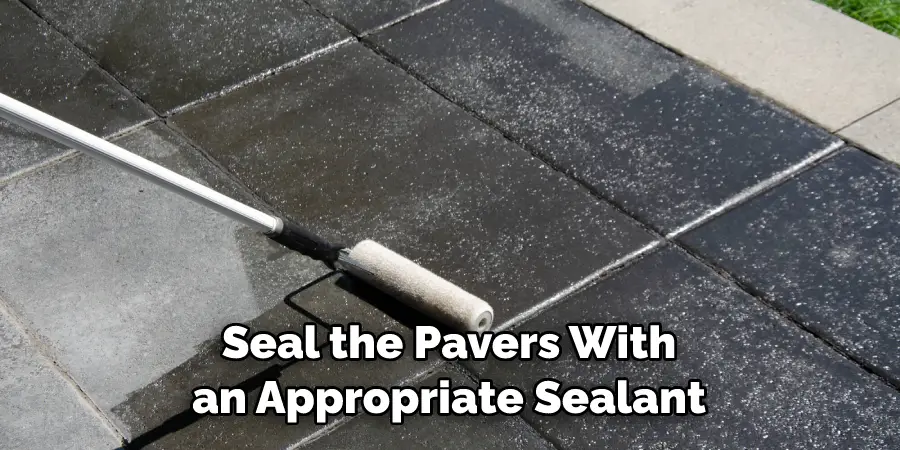
- For a Professional Finish, You May Wish to Seal the Pavers With an Appropriate Sealant. This Will Help Protect Them From Weathering or Staining and Keep Them Looking Good for Longer.
Do You Need to Use Professionals?
Follow these steps and you’ll soon have a stunning paved area that will last for years to come! With the right materials, tools and patience, setting pavers in sand is an easy DIY project that can add value and beauty to your outdoor space. It’s always best practice to hire professionals when tackling larger-scale projects, but for smaller jobs like this one, you can do it yourself in no time!
Good luck and happy paving!
How Much Will It Cost?
The cost of setting pavers in sand largely depends on the size of the area you’re paving and the type of materials you choose. The average price for a small patio or walkway is between $1,000 to $2,000 USD. This cost covers all the materials and supplies needed for the project as well as labor if needed. You can also save money by doing the job yourself, as long as you have the right tools and knowledge.
Overall, setting pavers in the sand is a relatively inexpensive way to upgrade your outdoor space that will last for years to come!
Frequently Asked Questions
Q: How Do I Know if the Area is Level?
A: Before laying pavers, it’s important to make sure the area is level. You can use a spirit level or laser level to determine this. Make sure that the area is slightly higher than each side of the paver so that when sand is added, it won’t run off.
Q: Can I Install Pavers on a Slope?
A: Yes, you can install pavers on a slope. However, it’s important to use a compactor or tamper to ensure the pavers are firmly set in place. You should also add more sand between them than usual and use polymeric sand to help keep them secure.
Q: What Should I Do if Weeds Start Growing Between Pavers?
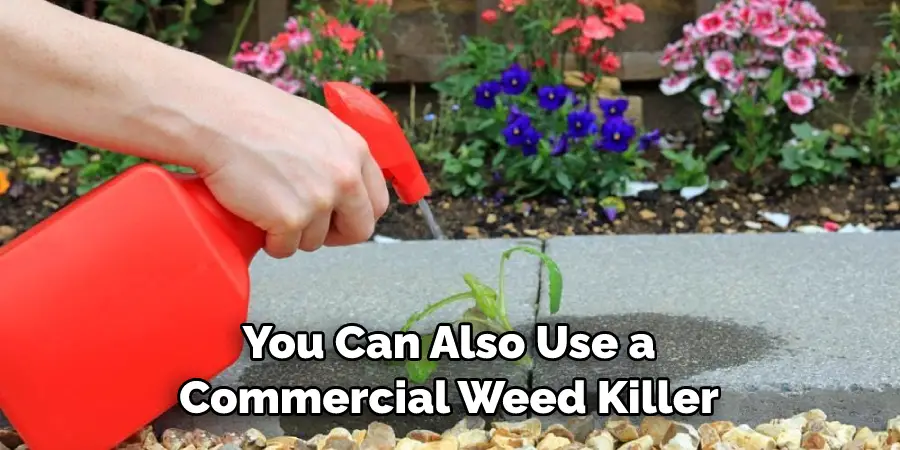
A: If weeds start to appear between your pavers, you can remove them by hand. You can also use a commercial weed killer but be careful to not get any on the pavers themselves. Additionally, adding more polymeric sand between your pavers will help prevent weeds from growing in the future.
Q: How Often Should I Reseal My Pavers?
A: The frequency of resealing your pavers depends on the type of sealant you use, as well as the level of weathering or staining they receive. Generally, it is a good idea to reseal them every two to three years in order to keep them looking their best and protect them from the elements.
Conclusion
Installing paving stones in the sand is a fairly straightforward process, but it requires great care and attention to detail. Patience and attention to the details of laying the pavers will help ensure that the end result is beautiful, sturdy, and reliable.
Whether you are installing pavement for a walkway or a driveway, it is important to remember that the area should be properly graded, the sand should be installed in consistent layers, and the pavers should be compacted in multiple directions.
With this method of installation, you can rest easy knowing that your paved surface will last for years. Furthermore, on how to set pavers in sand, you’ll have plenty of time to admire all of that hard work once it’s done! So go ahead—get out there with your slate or brick pavers and start laying them right away!
About
Outdoor Fixes is a distinguished figure in the world of Diy design, with a decade of expertise creating innovative and sustainable Diy solutions.
His professional focus lies in merging traditional craftsmanship with modern manufacturing techniques,
fostering designs that are both practical and environmentally conscious. As the author of diy,
outdoorfixes delves into the art and science of outdoorfixes-making, inspiring artisans and industry professionals alike.
Education RMIT University
(Melbourne, Australia) Associate Degree in Design (Outdoor Fixes) Focus on sustainable design, industry-driven projects,
and practical craftsmanship. Gained hands-on experience with traditional and digital manufacturing tools, such as CAD and CNC software.
Nottingham Trent University
(United Kingdom) Bachelor’s in outdoorfixes.com and Product Design (Honors) Specialized in product design with a focus on blending creativity with production
techniques. Participated in industry projects, working with companies like John Lewis and Vitsoe to gain real-world insights.
Publications and Impact
In diy, Outdoor Fixes his insights on indoor design processes, materials, and strategies for efficient production.
His writing bridges the gap between artisan knowledge and modern industry needs, making it a must-read for both budding designers and seasoned professionals.